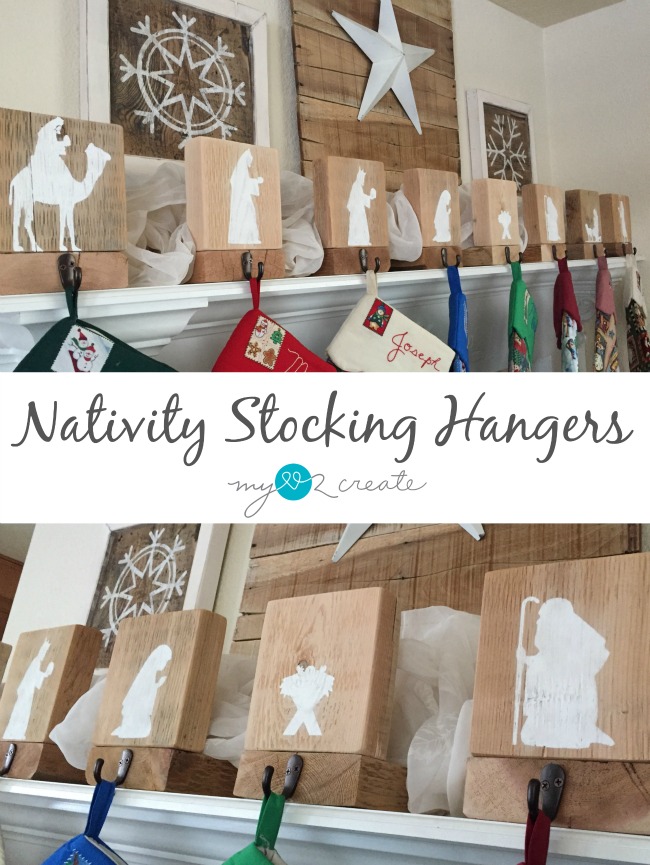
Nativity Stocking Hangers
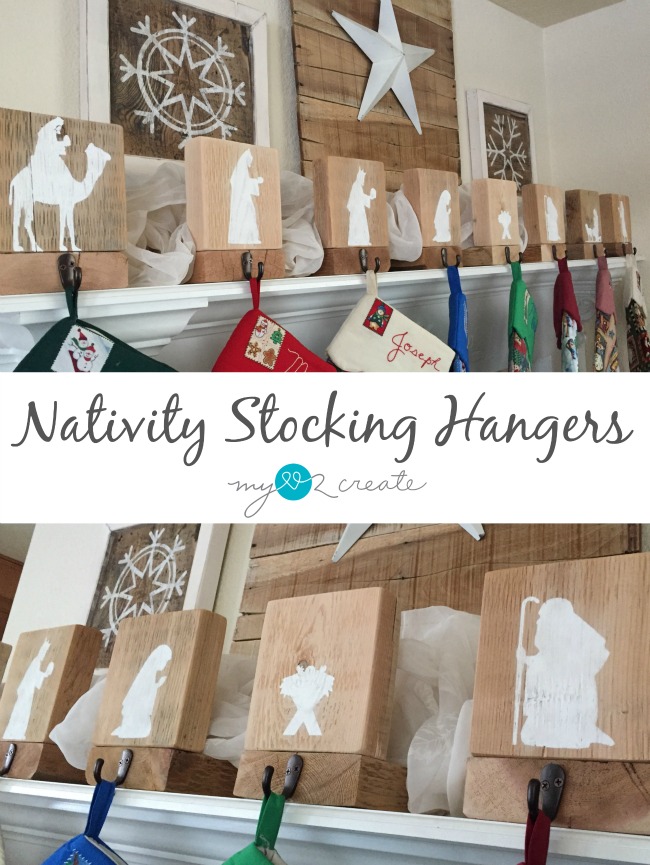
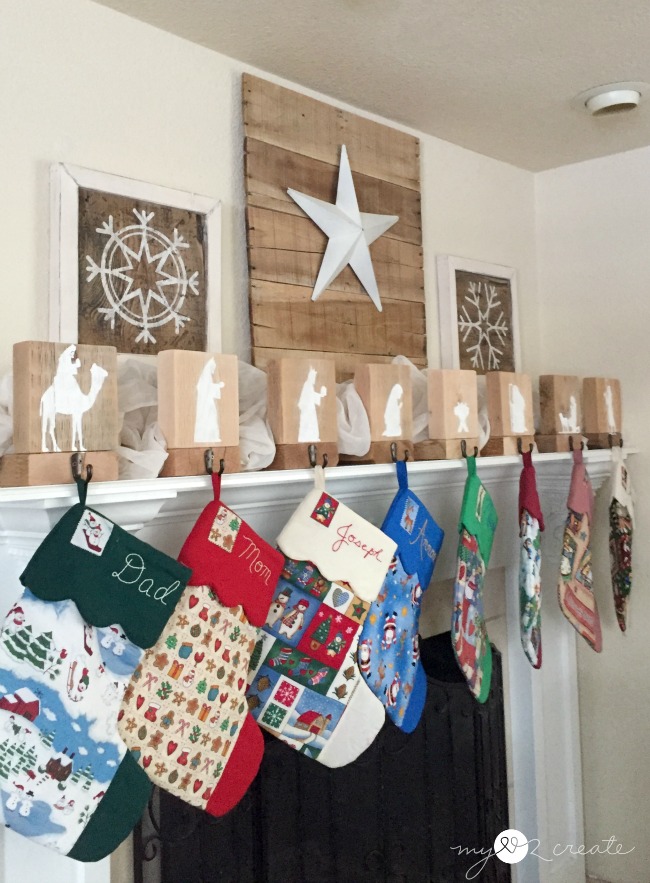
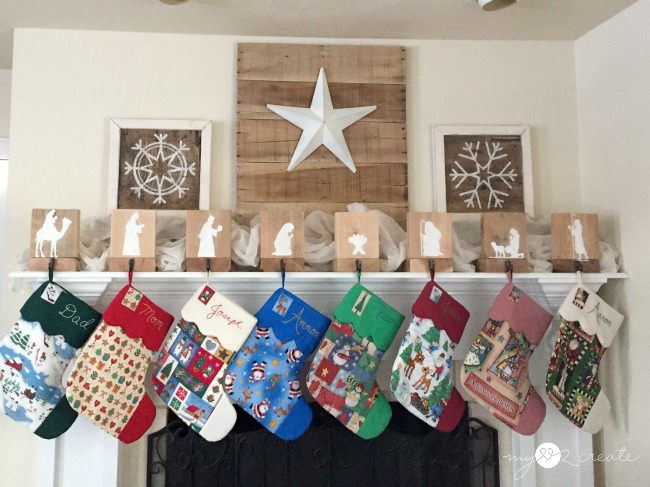
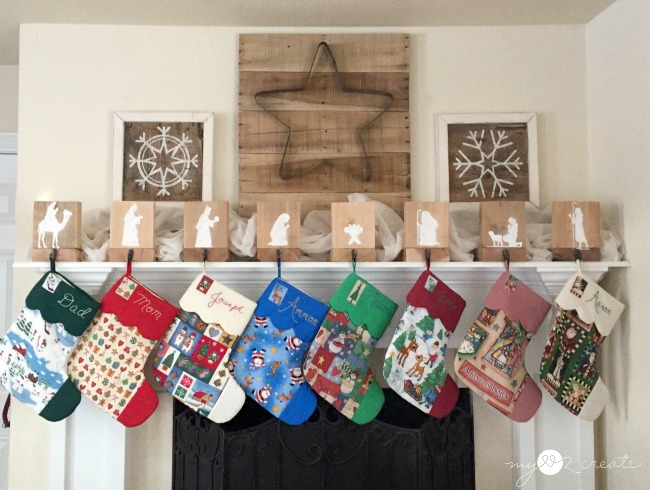
This year I decided to replace our plastic command strip stocking hangers…because the kids kept pulling them off…go figure. 🙂
So, of course I decided to do it DIY style and guess what?! My husband was a big inspiration behind these fun Nativity Stocking Hangers! Yay!
I was inspired by Shanty2Chic’s Photo Stocking hangers, which are super adorable. I planned to do them a little different, and this is where my husband comes in. I asked him what I should put on the front of each holder and he suggested doing a nativity scene. I loved his idea, so I ran with it, and I am super happy with how they turned out!
Not only will I share with you this simple DIY tutorial, but I am also participating in a fun deck the halls diy-style blog hop, hosted by the wonderful Jen Woodhouse!
- 12/1 – Just A Girl and Her Blog
- 12/2 – Addicted 2 DIY
- 12/3 – The House of Wood
- 12/4 – Sawdust 2 Stitches
- 12/7 – The Ugly Duckling House
- 12/8 – Sawdust and Embryos
- 12/9 – Pretty Handy Girl
- 12/10 – Not Just a Housewife
- 12/11 – Place Of My Taste
- 12/14 – Bower Power Blog
- 12/15 – That’s My Letter
- 12/16 – The Kim Six Fix
- 12/17 – Her Toolbelt
- 12/18 – My Love 2 Create– You are Here!
- 12/21 – Craftberry Bush
- 12/22 – The DIY Village
- 12/23 – Shades Of Blue Interiors
- 12/24 – Ana White
Be sure to check out everyone’s beautiful and festive projects! So much awesome inspiration!
Now, onto the tutorial: How to make Nativity Stocking Hangers
You will need:
- 1- 2x6x8 board (depending on how many stocking hangers you are going to make, you may need more than one)
- Hooks (one for each stocking hanger)
- wood glue
- miter saw
- drill/driver
- 2 1/2” screws (two or three for each hanger)
- nativity stencils
- paint and brush
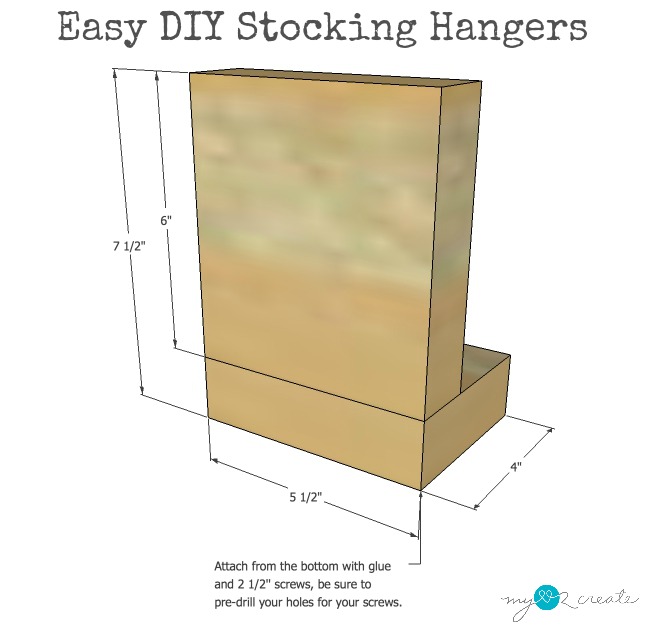
Cut List for ONE stocking hanger (adjust for how many hangers you need):
- 1- 2×6 at 4”
- 1- 2×6 at 6″
With your boards cut and sanded all you have to do is glue and screw them together from the bottom, make sure pre-drill holes with a countersink bit.
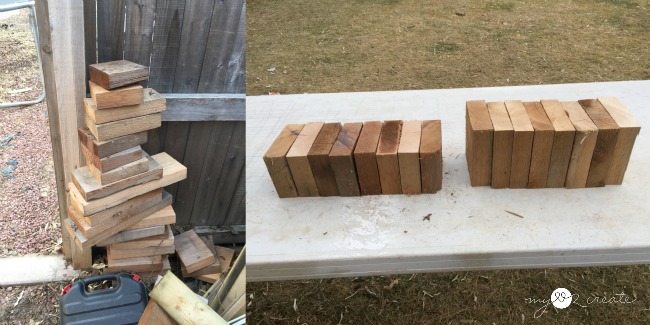
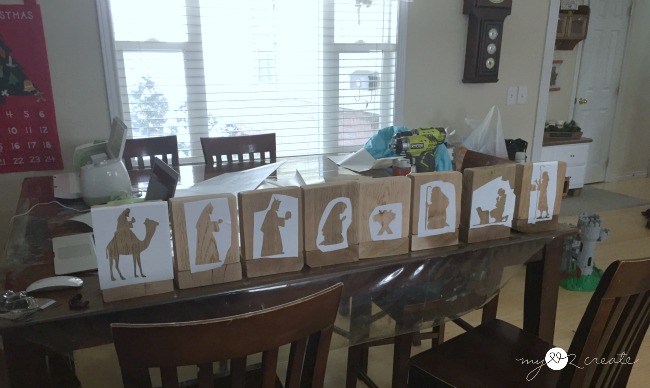
Not all 2×6 boards will be the same width some will be 5 1/2 and some will be 5 1/4, either width is fine. I used some reclaimed cedar wood, and cut out enough for 8 stocking hangers, cause we have six kids, and I NEED a stocking, that is where I get my chocolate! 🙂
I love the color variation in this wood, I just used it on my Reclaimed Wood Media Console, and it is so pretty. 🙂
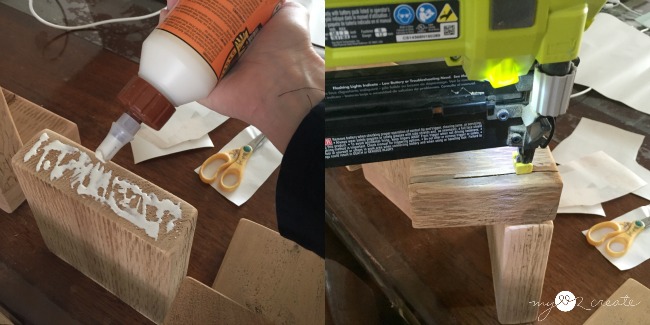
I decided to glue and nail my boards together first and then attach them with screws, it made it really easy to screw them in after they were already secured with nails.
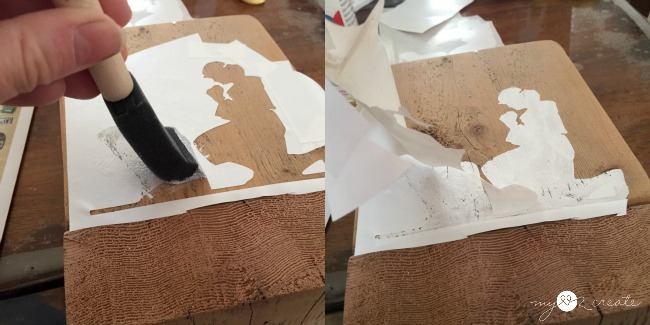
I used my Cricut to cut some nativity scene pictures on contact paper. If you don’t have a cutting machine you can buy stencils at a craft store. I always use contact paper for my stencils, it is sooo much cheaper than vinyl. First I place the negative of the stencil on the wood…
Then, load and unload my brush with paint (the less paint the better) then brush the paint on towards center. Last I peel off the stencil as soon as I finish painting before the paint dries.
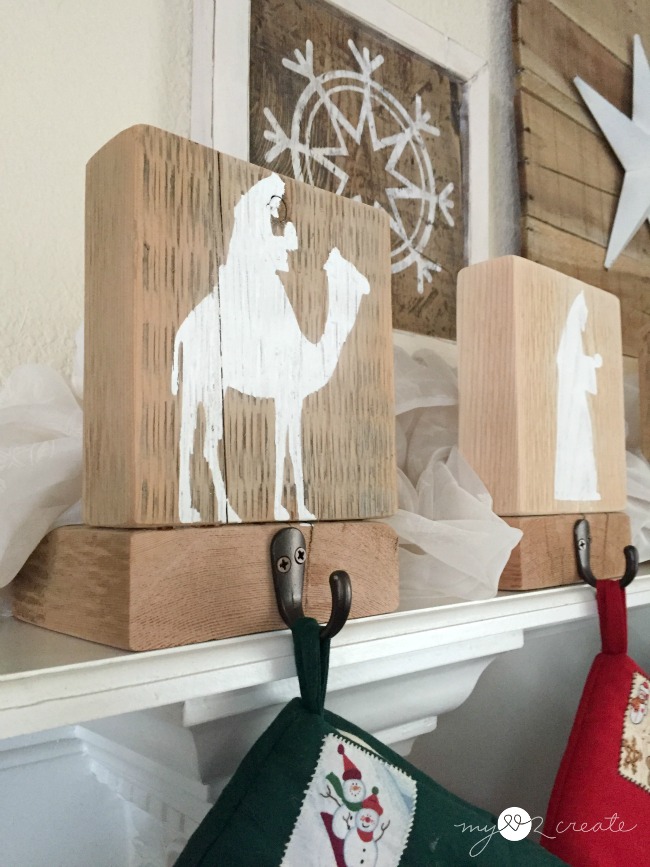
I attached the hooks and was done, super fast and easy! These could be customized any way you want! If you don’t have 8 people you could do multiple nativity figures on each board, or do one huge board with hooks…so many possibilities!
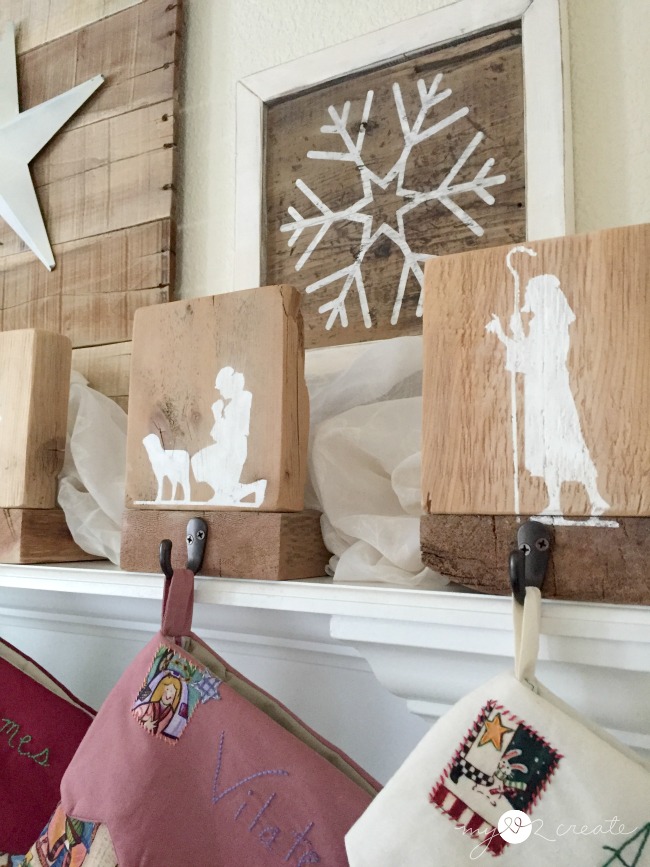
I love the natural rustic goodness of these stocking hangers. In fact I think when I do my mantle’s I tend to go the neutral route because our stockings are so colorful.
Simple yet powerful. A perfect reminder of the real meaning of Christmas.
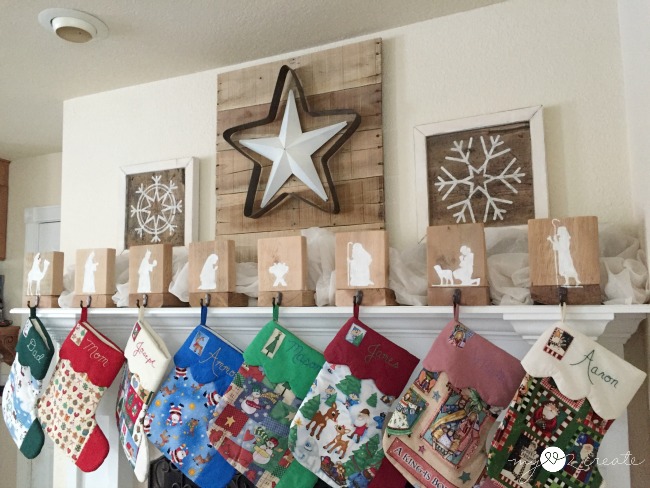
For the rest of the mantleI grabbed some old boards and a fabric curtain to cover them. I set the planked wood and snowflake frames on top of the boards and I was done! The pallet planked wood is from two years ago when I had my White and Natural Christmas Mantle, and made my Foam Core and Poster Board Marquee Angel.
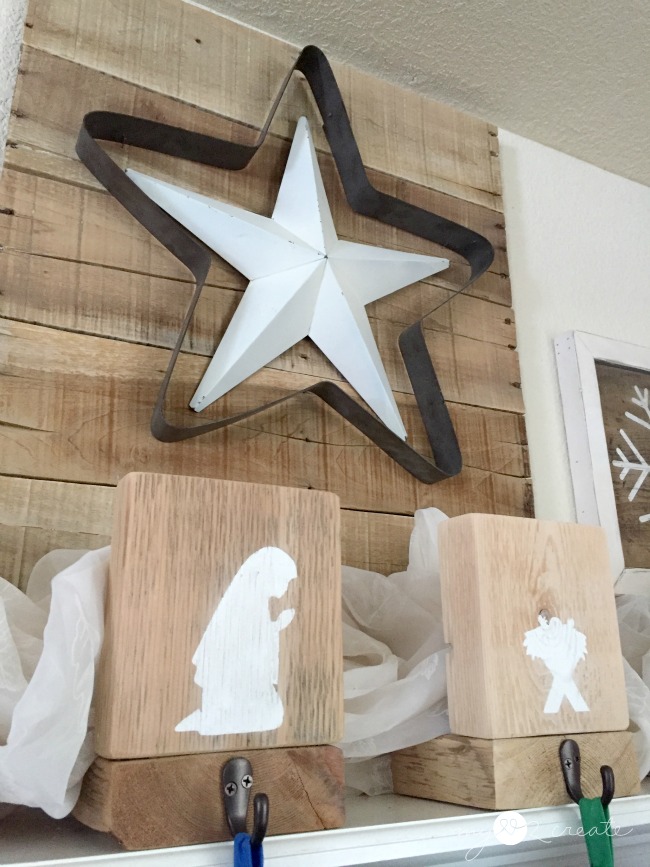
I used a white metal star to hang on my planked wood, and then I remembered this cool metal star I had picked up at the thrift store for $2! I threw it over the white star to see how it looked.
I kind of liked it, but wasn’t totally convinced…
So I tried it alone. Meh. What do you think? I know the snowflakes may not totally fit on this mantle, but I love them, and they do match the color scheme so I used them…I will be sharing a tutorial on them soon, and they have a special power too, ok maybe not a power but a super cool feature that makes me happy. 🙂
Thank you so much for pinning! And don’t forget to check out all the other bloggers too!
Hugs!
Mindi
I will be linking to these parties and Savvy Southern Style



Lovely hangers and I like the star within a star! Hope YOUR stocking is filled with fun things.
Oh my goodness, Mindi – this is so beautiful and powerful. I love your nativity stocking holders! Thank you for joining it on our blog hop – wishing you and your family a Merry Christmas! xoxo
Pinned.
Your mantel is perfect Mindi! Love those nativity stocking holders and your pallet star snowflakes.
Thank you so much for linking up to the Mad Skills Link Party. I will be featuring this tutorial in this month's newsletter!
Such a great idea!
Your fireplace looks beautiful! Great job!
These are sooooo adorable, Mindi! Absolutely love how gorgeous your mantle turned out. Hope you had a wonderful Christmas 🙂
beautiful job Mindi on the nativity stocking hangers! They are gorgeous, and the mantel looks fabulous… those stars? who would have thought they would fit so perfectly!
gail
I can't believe I didn't see this before! Absolutely love it!! Thank you for sharing! Inspiration for next year 🙂
These are so pretty! I'm featuring them this week at You're Gonna Love it! Since I love it! <3
Very nice ! I love these ideas
beautiful job Mindi on the nativity stocking hangers! They are gorgeous, and the mantel looks fabulous…