Old Fence Wood Bench
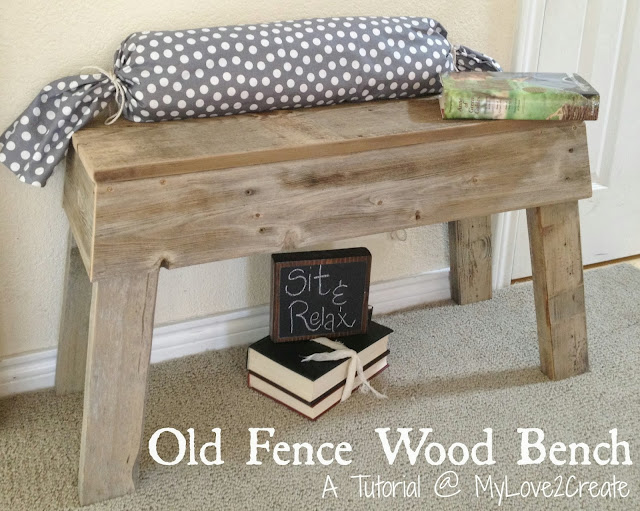
It is obvious I love reclaimed wood, and crates, but maybe you didn’t know I also have a thing for benches too.
True story.
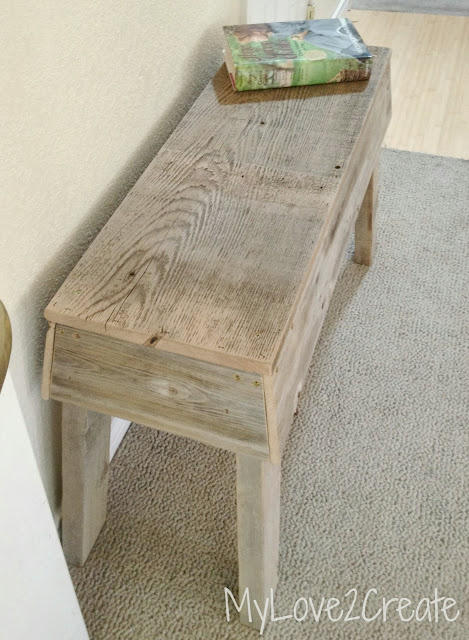
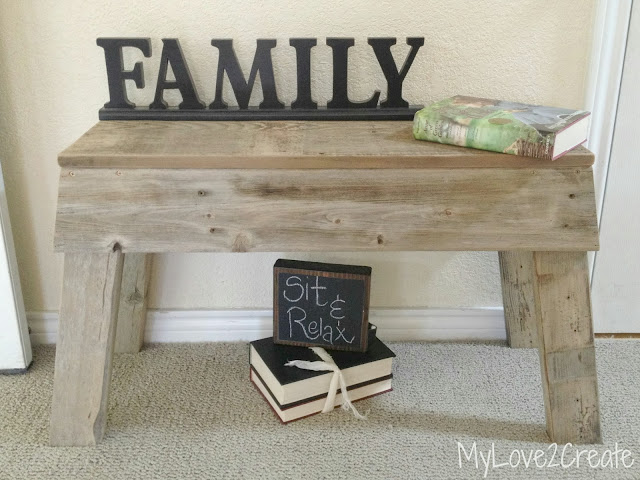
So…I built a bench out of old fence wood!
Sometimes I wonder if the people that threw this wood away would ever imagine that it could be this cute?! Probably not. It’s all good, I have no problem with getting their trash and turning it into a treasure, for FREE!
There is just something about the natural rustic goodness that gets me giddy! Don’t you agree? Oh, and do you remember my “Sign and Chalkboard in One”? My kids have loved writing messages on it all summer.
So, do you want to make one? Well then, let’s get started!
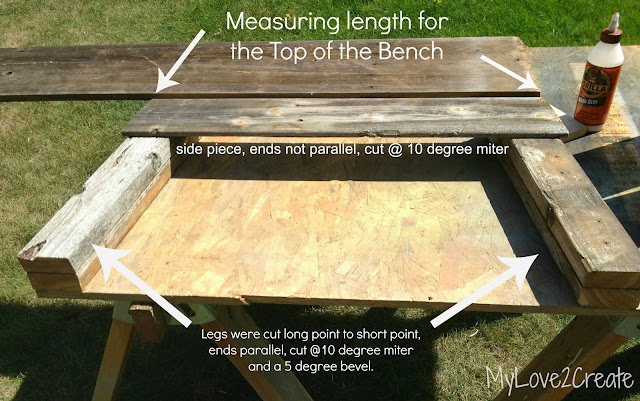
The top board is from some fence boards I got at our city clean up last year, they are huge, 1×12’s! So in love. I have big plans for the others stashed behind my shed. Anyway, I wanted the legs slightly tapered so I went with a 10 degree miter and a 5 degree bevel.
First, I determined the bench length I wanted, and cut the side piece to that length (mine was approx. 32 inches short point to short point, that is the top part), with the 10 degree miter on the ends. I also determined my height (approx 19 inches), and cut my legs (which were the support boards to a fence) from the 2×4’s.
As you can see I laid the legs out and placed the top end of the side piece flush with the outside end of the leg. I then placed the board for the top of my bench and marked the length for the cut.
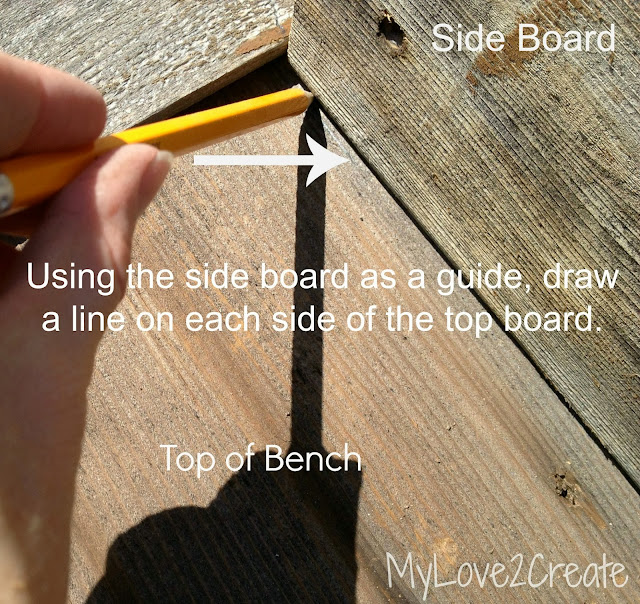
Next, I needed to get the width for my end pieces. I put down the top of the bench that I had cut, and stood the side board on its end and drew a line, I did that on both sides.
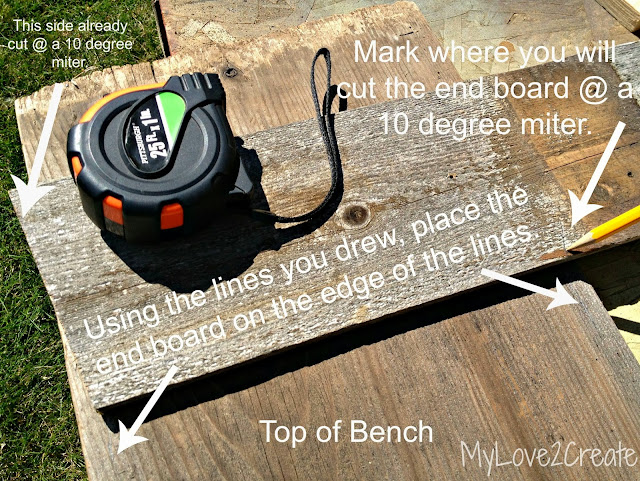
Using the lines as a guide I placed an end board down with one side already mitered. And marked where I needed to cut the other side. That gave me the measurements for the two end pieces.
I hope this is making since, it is my way of building without a plan and figuring the cuts and measurements as I go, I guess I could try to write up a plan, but life seems a little too crazy for me to add that to my plate!
Once all the pieces are cut it is time for the fun part, the build! Except if your air compressor breaks….then you wait, or just build without it, which you totally could do, skipping the nails and just using screws.
I decided that if I used the nail gun to attach all the pieces, then it would be faster to put together, so I waited until last week and then got to work. I was so glad I did! The glue and nails were perfect to build the bench quickly, and then I went back and added screws, which made it very sturdy.
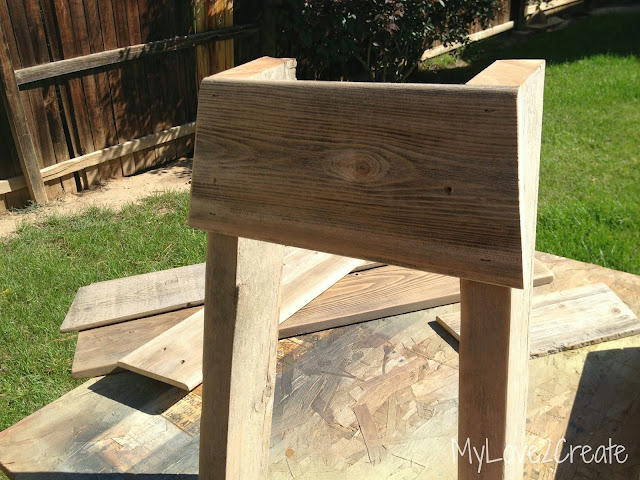
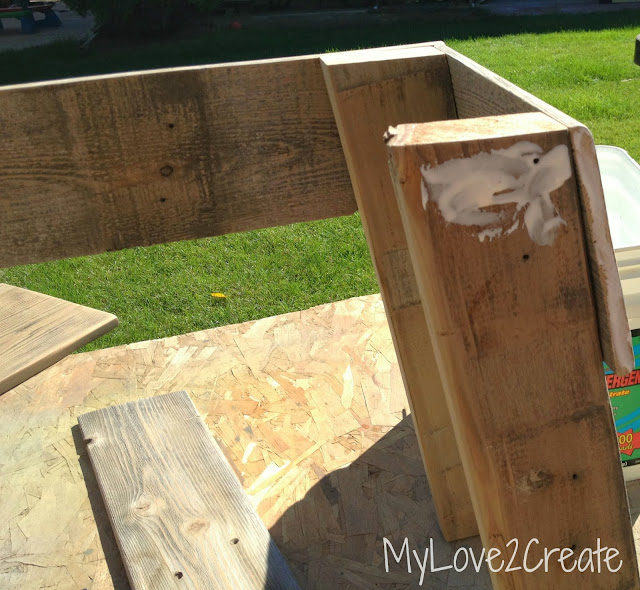
I started by gluing and nailing one side piece to the legs. Make sure your legs are going the right direction and lean into the center, it can get confusing! When I finished cutting the legs I stood them all up together and marked the very center points so I didn’t have to figure it out later, you can see an example in my “I turned an end table into a desk” post, just scroll down to where I make the stool.
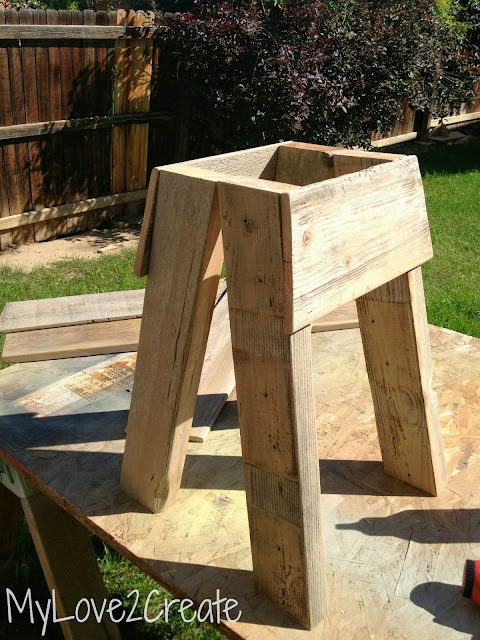
Then I did the other side. These legs would make a cute little stool wouldn’t they? Just add another piece to each side….oh, sorry, sometimes I can’t help it….back to the build.
The long side piece was next.
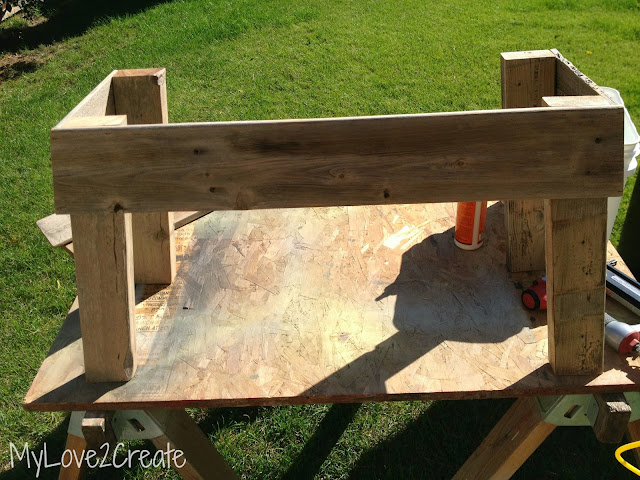
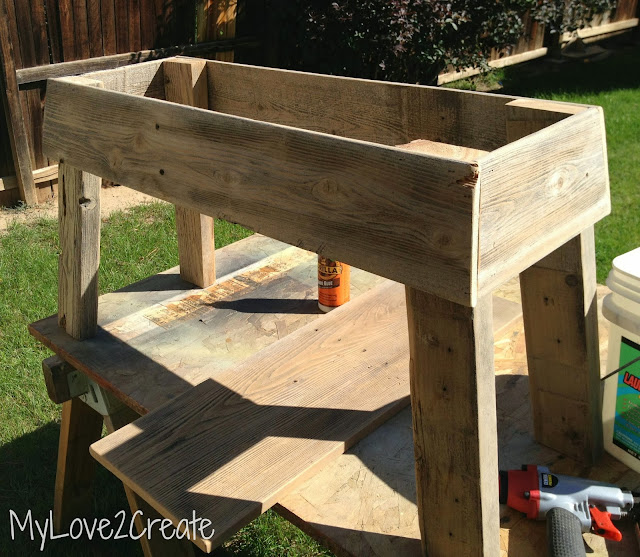
And the last side piece, don’t forget the glue!
Ready for the top! See it sitting under the bench ready to be put on? I glued and nailed it down on all four sides.
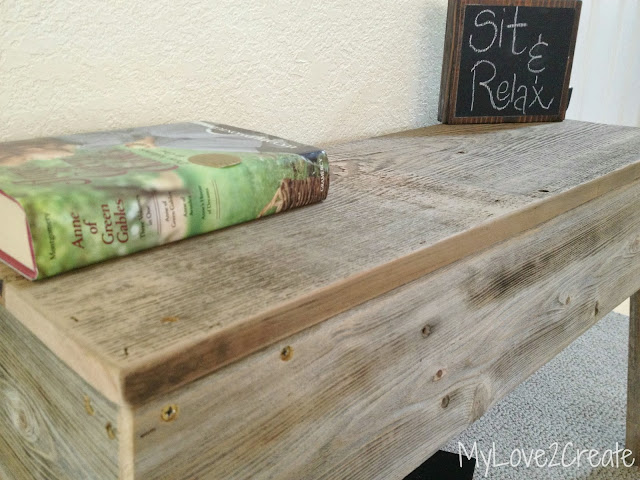
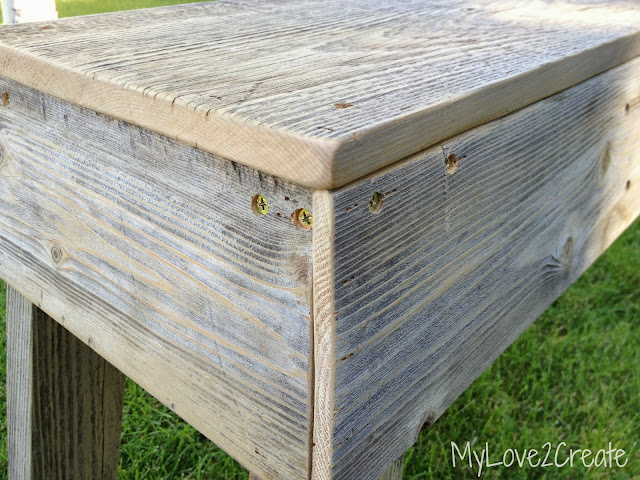
This shot shows you where I placed the screws, I pre-drilled the holes and screwed them in, making sure to go right into the legs. I also screwed the top into the legs. It is nice and sturdy.
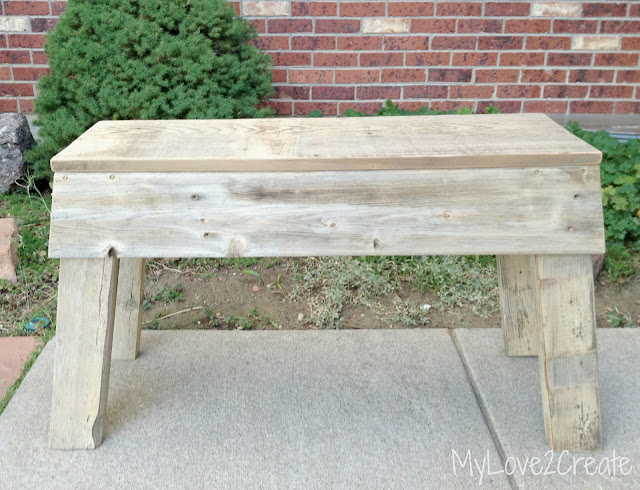
And that is it!
This little guy is going to be put to use! It’s purpose will be for more than just holding a book…
I was just having fun taking pictures! My hope is to convert this small area, and that closet you see on the right into some type of mudroom area. I have put a lot of thought into it. I already have another project in the works, but this bench was the first installment of “My quest for a mudroom!” Without the space for one, I am trying to get creative, it is hard work! Lol!
Hugs!
Mindi
I will be linking to these parties.


I love the natural, weathered finish! Pinning!
I love this – the wood looks beautiful.
Do share at this week's Empty Your Archive – one of our fun themes is chair makeovers, Alice @ Mums Make Lists x
yup, their loss your gain 🙂 looks really cute. Love the shape and the cuts
Mindi, how is it that you seem to find free wood everywhere? lol I love this bench and the weathered look. It looks like you are well on your way to your new mudroom area! 😀
How cute it this! Thanks for sharing! Hopping over from Shabby Creek!
Nice bench! I love the old rustic style of furniture made from old fence slates. Thanks for sharing!
Linda @ Mixed Kreations
I love that bench!! And I see that you have Anne of Green Gables on it. We are kindred spirits! LOVE that story! XO
awesome. You make it look easy!
Love this rustic bench. So many options for decorating, too. Nice job.
I think this is too cute! Love it! Thanks for linking up to #LOBS!
what a great job on this. Love the patina of the weathered wood!!
WOW Amazing! I love this! Found you on LOBS and will be back! Nice to meet you!
Jodi http://thenoiseofboys.com
Love it!! I wish I had a spot in my entryway for a bench because this would be the one! Thanks for sharing with us at #LOBS!
Mindi,
What a charming thrifty bench and thanks for sharing it at my party. It will be featured on Monday at this weeks party.
Blessings,
Linda
Love this! You're one of my picks for features at Give Me The Goods!
Amber @
Dimples & Pig Tales
Love this! You're one of my picks for features at Give Me The Goods!
Amber @
Dimples & Pig Tales
What a great job Mindi! I just love how it turned out. You will be featured this week on Tell Me Tuesday! Thanks for linking up! Have a great week!
Hi Mindi, What I love about this bench is it looks almost Amish or farm house. Love the design! Thanks for sharing at the party @DearCreatives Theresa Hope to see you soon & that your having a great week so far!
Awesome! Building a bench is in my near future plans, I hope it looks half as good as the one you just built. I think I might skip the angles this time 😉
Very nice. I love that you made this bench from scratch. Cool. Thanks for sharing how you made this. I really want to work with wood now. 🙂 Linda
LOVE this!! Great job. Thanks for linking it up at Think Tank Thursday. I've featured it today at Saving4Six.com
Fantastic job! I love the bench!
Of course I LOVE whatever you make!!! Featured again on The Patriotic Pam this weekend. Goes live tonight!!! Come see! Love it!!!
Pam 🙂
I love what you have done. You should come show off your creativity at our link party.
http://obsessiveandcreative.blogspot.com/2013/10/craft-frenzy-friday-7.html
The party will not be the same without you!
Love your bench Mindi! but that's nothing new, I love everything you do!
catching you!
gail
Great job! So simple and natural!
The bench turned out great! Thanks for sharing at Throwback Thursday.
xoxo
Denyse
Just wanted to stop by and let you know that your fence wood bench is my feature from last's week Throwback Thursday. Thanks for sharing your awesome bench and feel free to stop by and grab a feature button.
I love to read this stuff dear. Office Furniture UK & Conference Table
Thanks for sharing this- nice stuff! Keep up the Excellent work, we look forward to reading more from you in the future! Wooden benches .