Baby Supplies-Gift Box
Happy Halloween Everyone!!
I hope you are all looking forward to a fun night of trick or treating! My kids are super excited!
My life has been totally insane the past week and I have barely had a minute to myself. Oh, how I just want to curl up with a blanket, some hot chocolate and a good book! Maybe tomorrow? Next week? Someday…in the near future?!!
I do, however, have a fun quick project I made amid the chaos yesterday! I have some friends having babies, and that means I had to come up with some gifts….
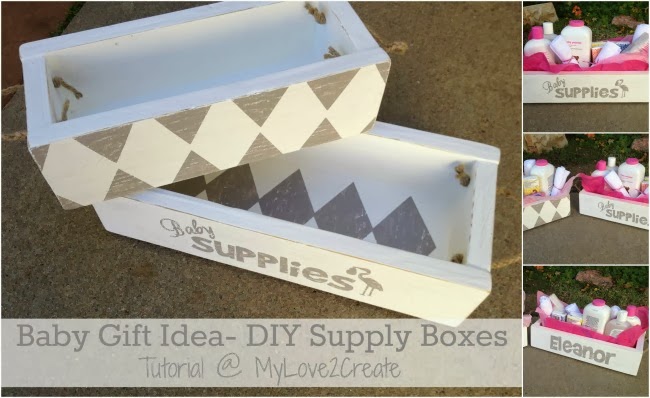
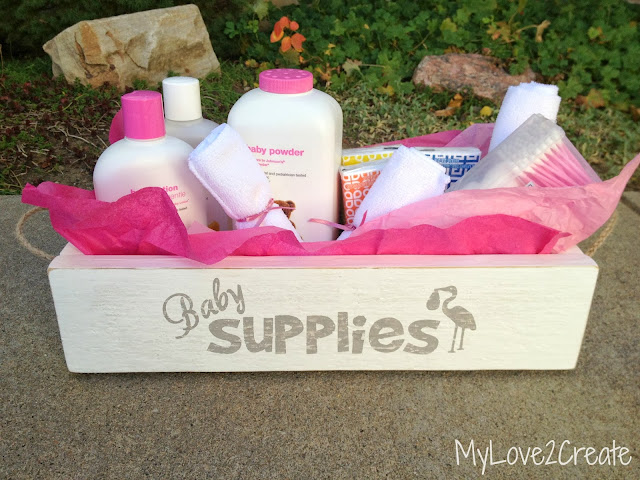
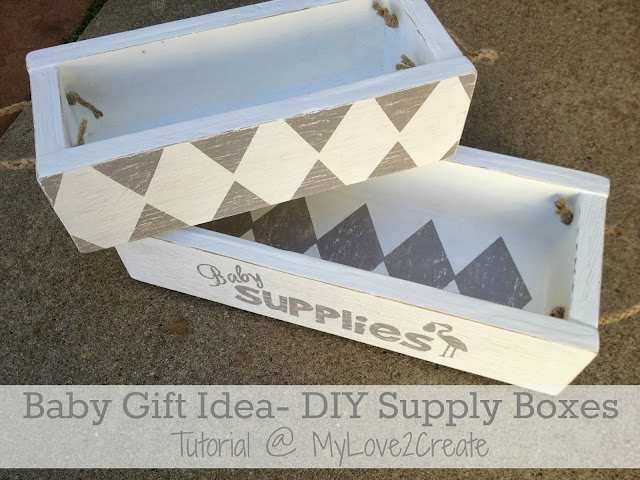
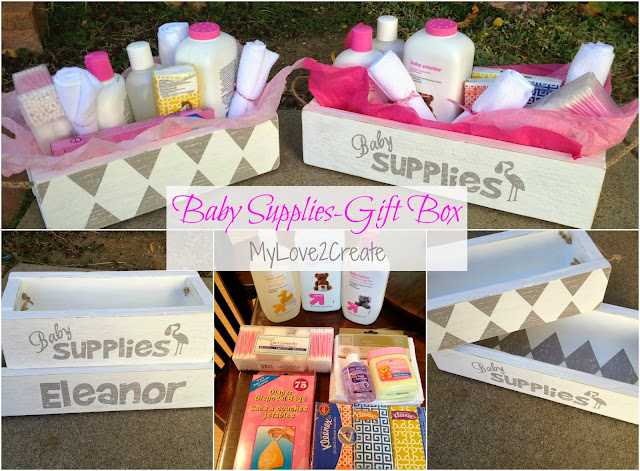
Yep, you guessed it a box! Go figure. Aren’t these the cutest boxes EVER?! I keep thinking why didn’t I have a cute box to hold all my baby supplies? Oh well, too late now!
Not only cute, but useful too. You can never have too many baby supplies, and they are easy to find all in one place!
So do you want to learn how to make your own?
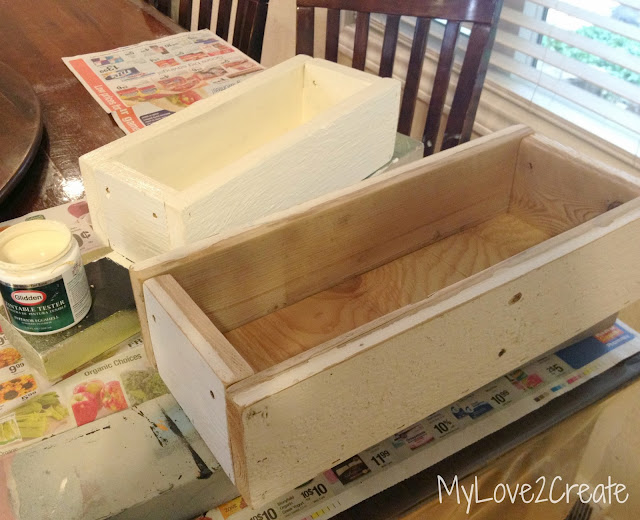
I thought so, it is super easy! I started by making two boxes. My small box is 13 x 5 1/2 inches, and my large one is 16 x 6 1/2 inches. I used the same wood as my Chippy Decor Box for the sides (1×4 boards) and scrap plywood for the bottoms. I made these boxes just like I made my Chalk Box. Check out the tutorial, the only difference is the size of my wood and I used glue and a nail gun for the baby supply boxes. You could also use screws too.
I started painting them using a cream and then decided to finish off with a white.
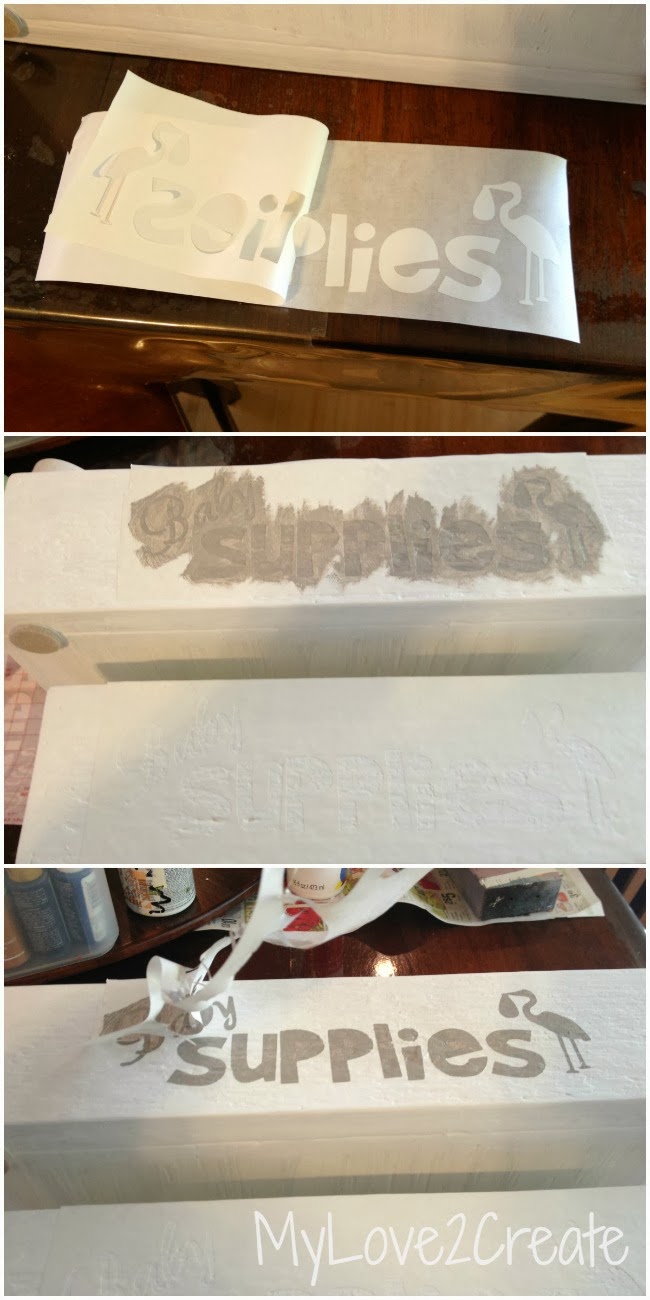
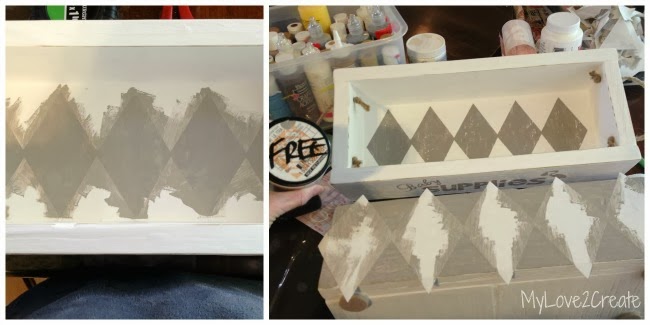
Using my cutting machine I designed a fun label, and cut them on contact paper. I pulled off the outside of the stencils and placed them on the side of the boxes. Using a free sample of gray paint, I did one quick coat, then started peeling off the contact paper, my favorite part!
Because one of my friends had her baby name picked out, I stenciled it on the back of her supply box. My other friend hasn’t picked her baby’s name yet, so I created a quick diamond pattern and cut a stencil, to place on the other side of her box (see bottom right photo above). With the reverse of the stencil I decided to put it in the bottom of the other box (photos above, left and top right).
Waste not, want not!! I keep the negative of every stencil, and vinyl, I hate to throw them away when I can use them again, just like this post. And, see the cuteness that happens!
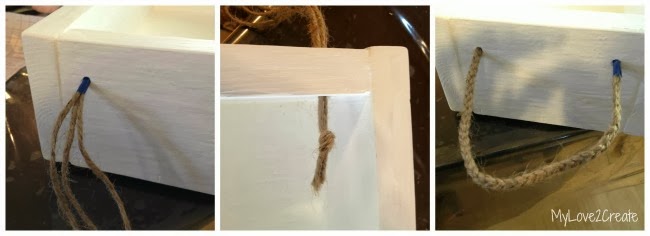
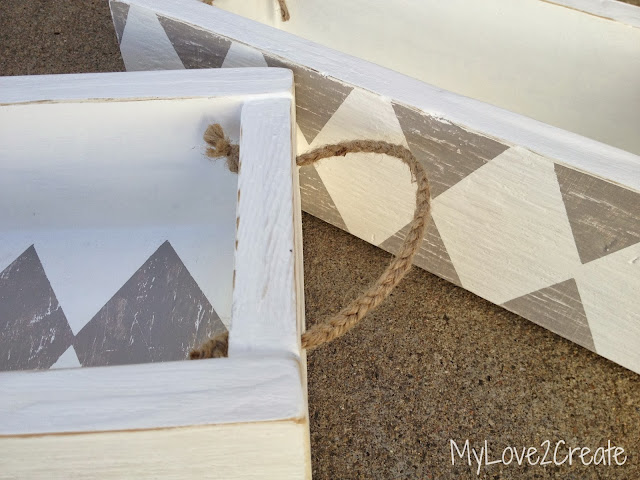
I would have loved to put fun handles on them, but I was at my budget, so I used the twine I had on hand. It was a little small so I made a braided rope handle. Using painters tape I taped three pieces of twine together and stuck it in one of the holes I drilled. I removed the tape and tided a knot on the inside. Then I braided the pieces and added tape at the end so I could easily stick it through the other hole. I removed the tape and tied another knot, all done!
I love the way they turned out!
For the supplies, I got most of them at the dollar store, I bought the baby powder, body wash and lotion at Target. The boxes were free, because I made them with materials I had on hand, and the supplies to in the boxes were less than $12 each, not bad!
I am planning on making a box for me with a stencil on the inside, it is making me happy! Oh, and I did lightly distress the boxes, just cause I like it, and I know it is going to happen anyway….
I can’t wait to give them to my friends!!
Thanks for stopping by!
Mindi
I will be linking to these parties.

That is such an awesome idea. What a beautiful and personal way to give a gift!
Oh so adorable friend! They are not only super cute they can be reused for so many things!!! What a great idea!!! I need to get one of those cutting machines because that label that you made is fantastic! Your friends are lucky ladies!!! I hope the your crew had a great night trick or treating!!! Have a great weekend!!! Nicole
So cute!
So cute! What a perfect gift, and I also love that when they're done with pampers they can be re-purposed any way you want!
That's such a cute idea for gifting lotion/shampoo bottles and misc. baby items. It's a great way for the mother to keep them all gathered in one place, too. I love the colors you used so it could be placed in a bathroom or bedroom of any color scheme and look great. Would you be willing to share this post and any of your other great ones at our Making Monday link party? We would love it and think our readers will, too. Thanks. Have a fantastic week. http://www.abrightandbeautifullife.com/making-monday-12/
Lori @ A Bright and Beautiful Life
http://www.abrightandbeautifullife.com
What a great gift–and so cute!
These are so cute!
I just might have to break down & work with wood. Love these! Just found out my oldest is due in May! Her due date 1 day from Sammie's bday bets are on, lol! Theresa @dearcreatives
Those are beautiful!
I absolutely LOVE these boxes. They are the perfect "gift wrap" and make such a nice, cute storage box after the gift. Thanks for linking them up to Think Tank Thursday. I featured them today. http://saving4six.com/2013/11/welcome-to-think-tank-thursday-55.html
What fun, personalized baby gifts, and I love that the wooden boxes can be reused in the nursery later! Thanks for sharing such a great tutorial!
Oh My Word! I love it! I have pinned it! Now I just need someone to get pregnant!
Nice creativity. Really appreciable. Please post how to make it at home step by step.
Baby Gift Box
This is great! I want to go make one now. It would be great to even make for any gift basket for Christmas too. Fun! I'm pinning and sharing on FB!!! 🙂
Pam
So special for the recipients!