Storage Shelves, a tutorial
It feels so good to be back! You may have noticed I have been MIA for a little bit. First, I started a huge project, I wasn’t planning on, which is what I am sharing today. And second, I was gone for almost a week to my Grandpa’s funeral and my nieces wedding. It was so good to be with family and wish my sweet Grandpa goodbye, he would have been 98 in November! Life has been crazy, but it is so nice to be home!
Before I went on my trip I hit a breaking point, we have been tripping over a roll of carpet in my basement for months, and I was done.
I am all about free, as you know. So back in the spring when my friend asked if I wanted a remnant roll of brand new carpet for free, I took it gratefully. With family vacations in June and a broken hand in July/August I never got to it…until a few weeks ago.
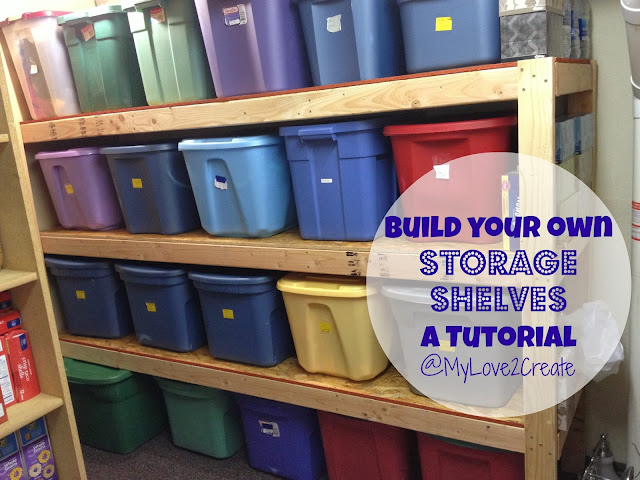
It was totally spur of the moment and I really didn’t have time to do it, but I couldn’t stand seeing it on the floor in my basement ONE MORE MINUTE! And….because I changed the carpet in my storage room, it led to me building these…
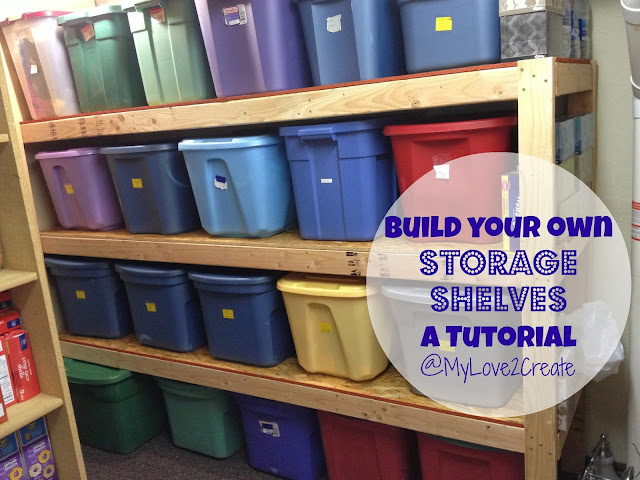
Ahhh, I am in LOVE! They aren’t pretty but they make me so so so happy!
You know how one thing leads to another? I really thought I was just replacing the carpet.
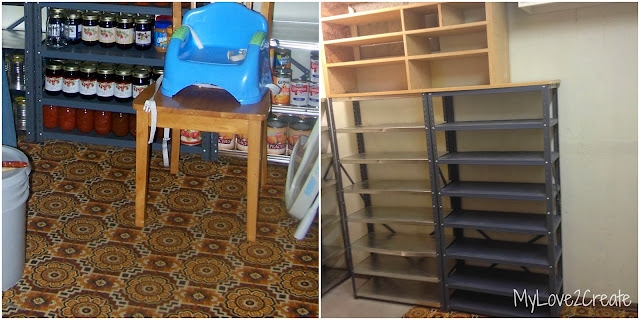
This is the carpet before. I am guessing the same age as me, and yes I was born in the late seventies :).
On the right is after I cleared all the stuff off the shelves, it took FOREVER, and I kept thinking why was I compelled to do this?!
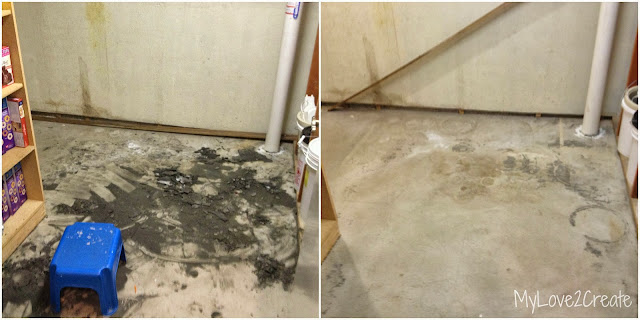
But I kept going. My Husband came home to me scraping this off the floor, and a basement living room full of bins and other junk. He thinks I am crazy…and, he is right. I had two lovely blisters from scraping too, really questioning myself at this point. I finished for the day with a clean concrete floor.
The next day I put in the new carpet. I wasn’t planning on blogging this and then I thought I should at least take a few photos, so you didn’t get a real before, which is good because you would be shocked and appalled at the state of this room. Hmmm, if you picture someone swimming through piles of bins and junk, then you might have a small idea, floor space was a rare treat!
Anyway, here is the carpet all laid, I cut some out of the room and pulled it in to cut the rest. On the back wall I replaced the brown trim that was already there, and cut and nailed up some white baseboard scraps on the two small walls you see above. I added them to help hold the carpet down, and cover a few jagged cuts in the carpet. Yes, I did this all by myself, and no it wasn’t easy. I have no idea what I am doing! But, I got it done with a utility knife and measuring tape, and I am just fine with the imperfections. I laid it on the bare floor, no glue, no carpet tacks, no pad, this is a storage room, and I was just wanting a clean new and less ugly carpet. It looks so much better!
I was now ready to move stuff back in, but I couldn’t do it. I knew that I would be swimming through junk again, and the metal shelves were only good for food, not my bins. So I waited for the next day to decide.
After some research I pulled up “How to store your stuff” from DIY Design Fanatic, and used that as my guide. Check it out for some good building photos I did not provide. I modified it a little but it is the same awesome idea, Thanks Pam!
I didn’t have 2×4’s that were long enough so I bit the bullet and bought new wood. Shocked? Me too! But with only a few hours to do this and a trip coming up I had limited time and using my reclaimed wood would have meant taking more time to cut and make things work.
So with three little ones in tow we headed to Home Depot and bought the wood. I got 10 8ft long 2×4’s and two sheets of OSB at just under 1/2 inch thickness. The OSB sheets are 8 ft x 4 ft, so I just had the guys at HD rip them in half lengthwise and it gave me four pieces at 8 ft by 2 ft. I also bought a box of 3 inch wood screws, and it totaled $56 dollars. The only thing I didn’t buy were the 2×4’s for the middle and end supports, so if you have to by those this project would be just about $60! Not bad.
How to Build Storage Shelves
- 13- 2” x 4” x 8′ boards (2×4’s at 8 feet long)
- 2- full sheets of OSB approximately 1/2” thick or a little less.
- 3” self tapping screws
- 1 1/2” screws (for attaching OSB to shelf support frames)
- Drill and Impact Driver
- Circular Saw
or Miter Saw
- Square
- 6- 2×4’s @ 96” (8 feet) Long shelf supports
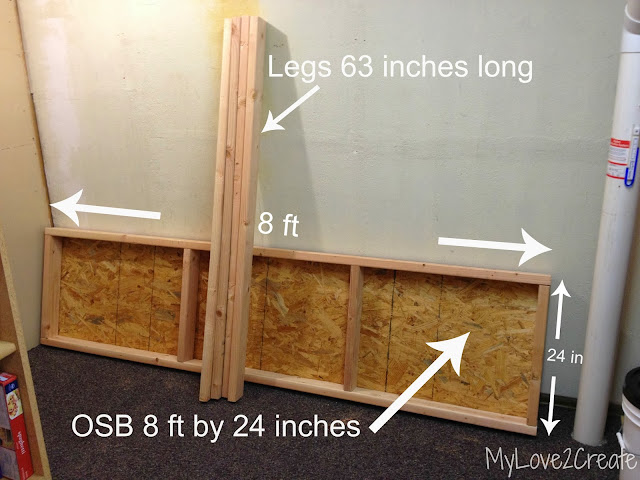
- 4- 2×4’s @ 63” Legs
- 12- 2×4’s @ 21” small shelf supports
- 3 sheets of OSB cut to 24” x 96″ (I had my 2 sheets ripped in half lengthwise at HomeDepot, which gave me 4 sheets at 24” x 96”)
Step 1: Build 3 shelf support frames
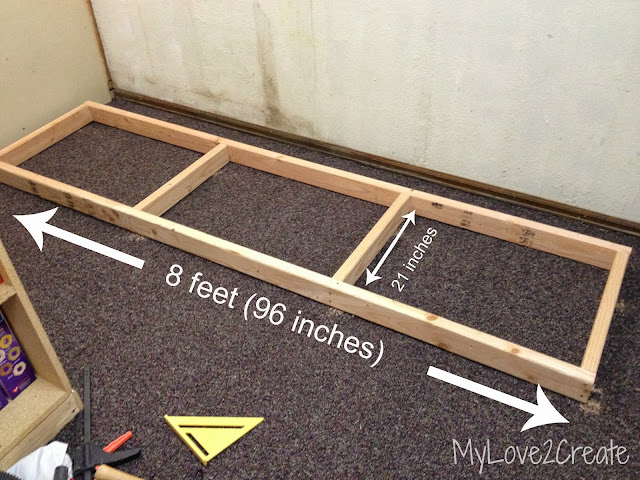
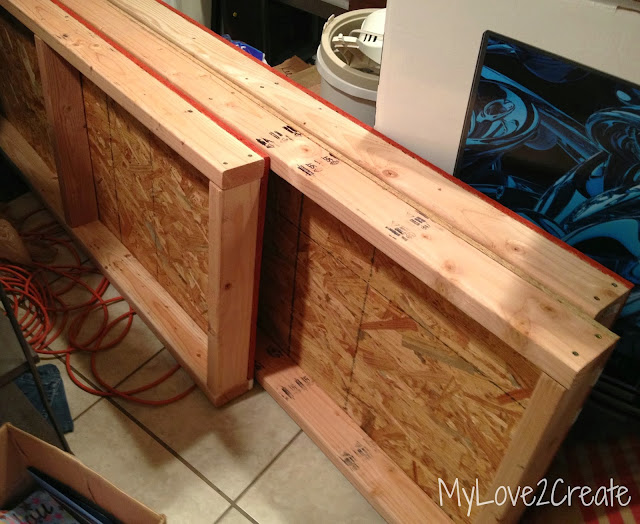
I made my shelf support with two 2×4’s at 8 ft. And 4 2×4’s cut to 21 inches. I pre-drilled holes and screwed them together, or you can use self tapping screws to skip the pre-drilling. I didn’t add glue so I can take them apart if needed. I used that triangle thing to make sure my box was square.
Step 2: Attach OSB panels to the top of the shelf support frames
I took my 8 ft x 2 ft sheets of OSB and screwed them onto the tops of my three shelf support frames.
See some of the junk? This is a little mini kitchen area off my storage room, I use it to house my craft supplies. This room and the living room got most of the junk I tossed out of the storage room while I worked. Why is it that when you organize things it always takes for ever and makes a HUGE mess? Ahhh, but it is worth it in the end!
Step 3: Build your shelves by attaching them to the legs
Here I am ready to build! To put the shelves together I had to build them it in my storage room. I also had very limited space, so I built them the only way I could…standing up. You could build them laying down as well, but I am showing how I did it, since that was my only choice. As you can see in the photo the legs were cut to 63 inches long. I measured the height of my bins and added a few inches, plus the height of the three shelves, and that is how I came up with 63 inches. You can make it to any height you want, that is the beauty of DIY!
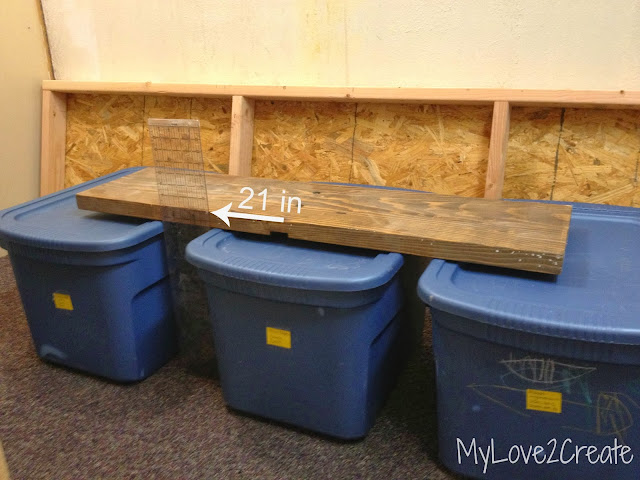
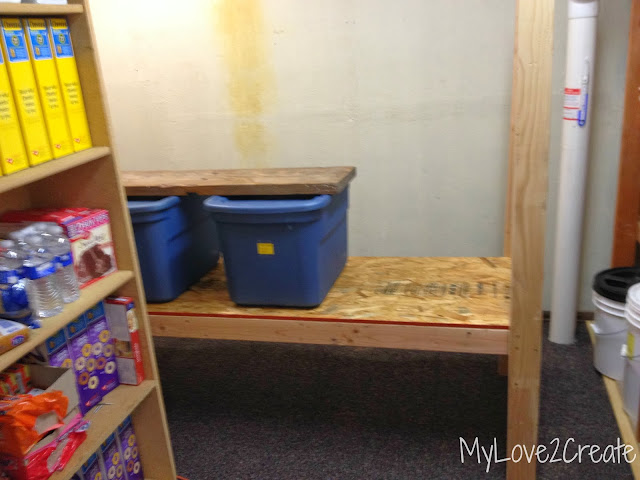
Since I was doing it myself, I needed a place to rest the shelf while I attached the legs. The storage bins were an obvious choice, plus a board to make it the height I wanted, 21 inches.
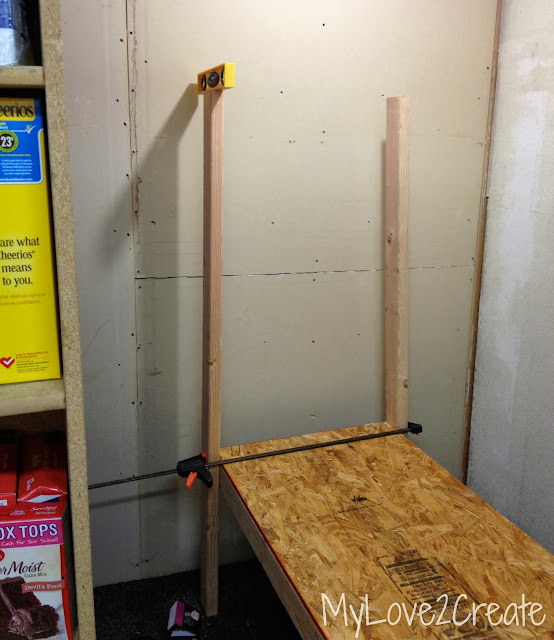
I used clamps and a level to position it where I wanted and also made sure the shelf was at the correct height (I learned that from experience, good thing I didn’t use glue). The first shelf was the hardest, because I had to secure the legs and make them straight. I pre-drilled the holes and then screwed in 4 to 5 screws into each leg attaching it to the 2×4 of the shelf.
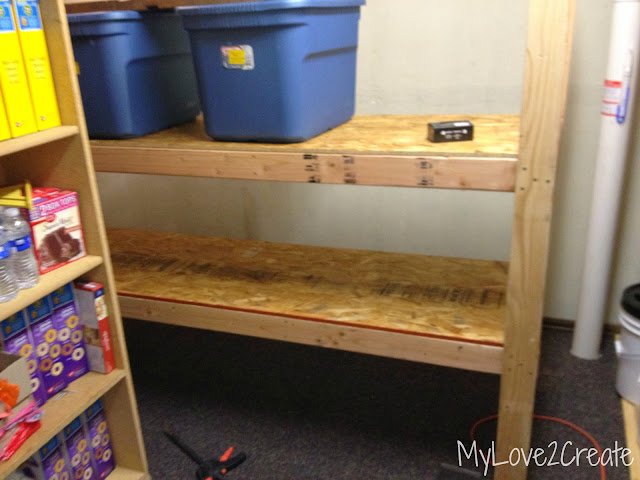
Here I am getting ready to add shelf #2. Sorry the next few pictures are blurry, I was in a hurry to finish and just snapped a quick shot without checking to see if it was good.
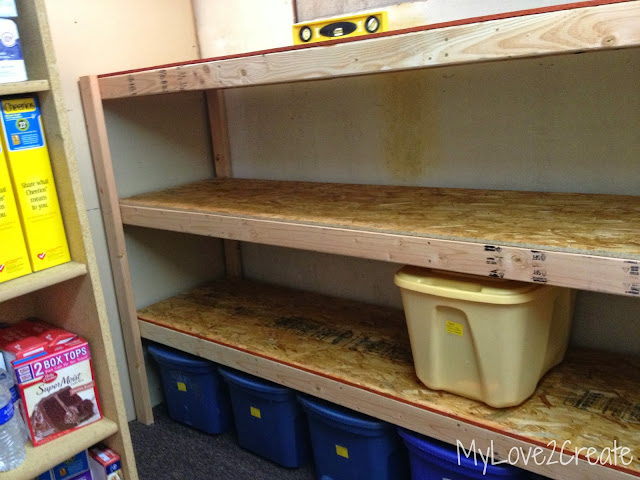
For shelf #3 I cut off the top of the shot, oops! It is hard to take time for pictures when you are building, at least it is for me =)! I used the same process for each shelf.
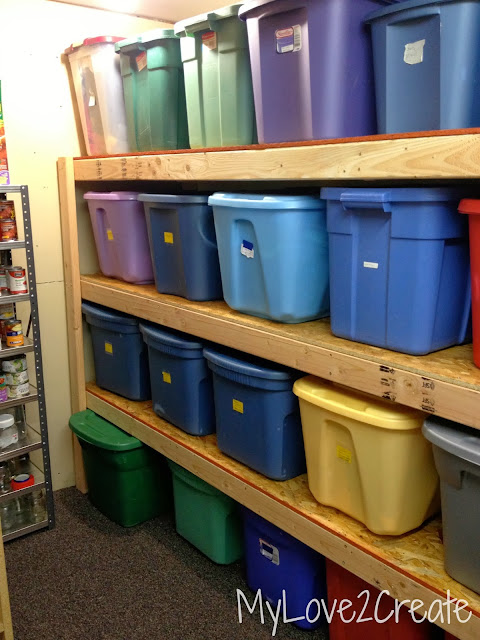
All done!! I was so excited, and all the shelves were level…I checked! As I was putting the bins in place I was doing a jig, and believe me I can jig, scottish, Irish, you name it! (I was a folk dancer, back in the day) I am not sure why this made me so giddy…
Maybe because it holds 20 bins? Or the fact that I won’t have to unstack 4 bins to get to the 5th one on the bottom, and then re-stack them when I am done finding something?
Perhaps it’s because I won’t have to go to the garage for bins in freezing winter, because all my bins are now in the house? Or maybe I am just so happy I attempted a big project that I have needed forever and did it all by myself, that feels pretty good too!
Regardless, I swear I couldn’t walk downstairs for the first few days with out taking a trip to admire my new storage shelves!
I have already reaped the benefits of this wonderful creation, and I could sing a song every time I effortlessly reach reach for the bin I need and then just as quickly place it back! Yippee!!
So what do you think? Would you like to make some? You totally can! It was super easy and quick, I made mine in an afternoon all by myself! Go ahead and made some, I promise you won’t regret it!
Thanks so much for stopping by!
Hugs,
Mindi
I will be linking to these parties.



You go girl! You did an amazing job! It feels so good to be that organized, I built some similar shelves in my garage, long long time ago (pre-blogging days), they are as strong as the first day they were built and they hold tons of stuff!
You crack me up. You REALLY do! It looks great and doing something all by yourself really is satisfying. Especially when you get to use "that triangle thing" and it actually comes out SQUARE! Great job!
Way to go Mindi! Mom told me about this project today. I am tired after reading about it, I can't believe you did it all yourself! in a couple of days. You have really become quite the expert carpenter. Very cool. I'll miss the 70s carpet though… 🙂
First off I am so sorry to hear about your grandpa…I know how hard it is to say goodbye and I am glad you were surrounded by family. Your shelves are amazing! WOW! The carpet looks beautiful and your storage is now so organized! Oh how I wish you could come here and help me with something like this for my garage…you would not believe it if I showed you a picture! You crack me up! My husband thinks I'm crazy too! Ha! Hey you make such beautiful things…I guess the crazy is paying off!!! Great job friend!! Nicole xoxo
I cannot believe you did that by yourself! That is amazing! I love how you did it. I had my husband make something similar in our basement, except it is attached to the walls. Like you said, the best part is not having to unstack 4 bins to get to the bottom one! Or spending hundreds of dollars on shelves that most likely won't fit the bins in the first place!
Great job!
This is an awesome project! I have pinned it and shared it on my FB page.
Diane @ The Olde Barn
I am so amazed that you did this yourself!
I've pinned it.
This looks freakin awesome Mindi! I need to make smth like this too!
YOU ROCK!!!! that's all!
I'm admiring your food storage! and your bins are awesome too!!
Wow go you!! This is excellent and I only wish I had the tools (and skills) to give it a go! well done 🙂
Amazing. Your talents always amaze me. I would have screamed for help as soon as I pulled the carpet up, not to mention trying to level the shelves. I love to woodwork, but with my hubby assisting, not all by myself. YOU GO GIRL! Thanks for linking up The Patriotic Pam this weekend. Pinning now!
Pam
Great Idea, love thinking out the box ideas. From Lawrie
http://fireflyfarmadventures.blogspot.com/
wow really cool great job thanks for sharing need to organize my space better have a great day
This looks awesome!!!!!!
I'll have to try my hand at making a few of these(6 -8 anyway).
I have a workshop(about 35ft x 45 ft) and have need for lots of shelving….
Thank you for the inspiration & for sharing this wonderful project!!
Our garage could use a facelift & storage. Not to mention decluttering. Thanks for sharing at the party. I have a freebie on the site this week. Stop by to get it. Valued at $40. & great for making photo collages, digital scrapbooks, & more. xo Theresa @DearCreatives
nicely done, terrific tutorial!
Well done you! I am ever so slightly obsessed with functional storage and as long as it's out of sight functional beats pretty any day 🙂
Do come over and this project at Empty Your Archive – we are linking up shelving projects this week, Alice @ Mums Make Lists
I think they are pretty and with this fabulous tutorial I am featuring you and PINNING also. Thanks so much. Linda
I think they are pretty and with this fabulous tutorial I am featuring you and PINNING also. Thanks so much. Linda
Featured and pinned. Beautiful tutorial. Linda
great tutorial Mindi! stacking on top of each other gets OLD! this is so much better.
pinning!
Great webpage buddy, I am going to notify this to all my friends and contacts as well.
is bubblegum casting legitimate
How do you handle the lateral load? I didn't see any cross bracing.
Hi Kevin, it is actually very sturdy and I did not find it necessary, but you could add it easily if you wanted by putting 2×4's on the back. I have been using it for over 2 year now with no problems. 🙂 You could also secure the back legs to the wall by drilling screws through the legs into the studs, for extra stability if you are concerned. Hope that helps!
Hi Mindy,
I don't understand how the legs can be 63" long and the gap between shelves can be 21". This doesn't allow room for the height of the shelves themselves.
Seems to me the legs should be ~75"… 3 gaps of 21" + 3 shelves of ~4" height = 3×21 + 3×4 = 63 + 12 = 75"
What am I misunderstanding?
Hi Rob,
Great question, I can see why you are confused your math is correct. On my shelves the actual gap between the shelves is 17 inches not 21. If I measure from the floor to the top of the first shelf it equals 21 inches, or from the top of one shelf to the top of another shelf is 21 inches. That is why my legs are 63 inches long. I hope that makes since. So instead it is 3 gaps of 17" (51") plus the 3 shelves at 4" (12") which equals 63" total. Sorry to confuse you! I hope that helped!
Ok, I understand you now!
I was confused by the picture with the 3 bins and the board on top with the arrow pointing to 21". I thought maybe you were putting the shelf on top of that board before screwing it into the legs, which would put the BOTTOM of the shelf at 21".
I guess you're using that board to show where the top of the shelf should be!
Thanks very much for clearing that up.
Rob.
MyLove2Create, Storage Shelves. Ahhh … bstoragecabinets.blogspot.com
This is fabulous. I need a set of shelves like this for my Christmas bins! Maybe someday, as at the moment I have nowhere to put the shelves. You did an awesome job!
This is the best post for making shelves for the garage/basement. Thanks for using OSB, such an underrated material, that is cheap and practical. My workbench, miter saw cart, and shelving is made of 3/4 OSB. You did a great job explaining step by step; these are sturdy well built units. Thanks a million!
Wow – I can only say you have given me the boost of energy to build my storage area in the basement plus an 8' x 4' shed I want under the balcony. At almost 70 I keep forgeting I'm not as bendable as I used to be. You go girl – that is a wonderful job. I like you idea of not sticking the carpet down. Keep up the great ideas. Gale from Surrey, B.C.
If these are 2×4's wouldn't you need longer than 2" screws?
Oops! You are right I meant to put 3" screws! I will have to change that, thanks for catching it!
No problem. I made these shelves today and I love them! Thanks so much for the tutorial. What a difference they make in my basement. I am going to make 2 more sets next week. Can't wait to have my whole basement organized.
That is so awesome!!! You go!! I would love to see pictures when you finish if you don't mind sharing. I love to share reader projects on my social media! If you want you can email them to me at Mindi@mylove2create.com Either way, I am so excited you are getting organized!
THANK YOU SO MUCH for your tutorial! I searched the internet and all of the other sites had huge gaps of how to do the actual logistics! I too cannot build them lying down either and am by myself trying to figure out how it will hold together while I work. So thank you for your precision! I like your tip with using the bins with a piece of wood on top to hold the shelf while you secure it. I am on the way to the supply store now! Fingers crossed:)!
Yay Misty!!! You have totally got this!! Best of luck!!
First of all…this look great! Second…can you come over and do this at our homes? LOL Love all of the new storage and how all of the bins are stacked out of the way!
Oh my goodness, I need this in my life, our garage is so Unorganized right now 🙁
Great job. Two years? I usually find something I could have done to make things better or more useful , or a way to save work or material, after finishing a project. Is there anything you would change? And your readers need to be aware that all storage tubs, even with same capacity , are not going to have the same outside dimensions. And if the tubs have a good amount of weight a middle support may be in order
Thank you for this tutorial! I have been after my husband to do a project like this for me as the shelving in our house is to deep and I have having to almost climb into the shelving to get what I need. Now I will just do it myself!
Fantastic! Don't know how I ever missed seeing your blog, but I just came across it & am loving what I'm seeing. I am old enough to be your mama, born in the 50's, but you are a girl after my own heart. I asked for a compound miter saw for Mother's Day when I was in my early 30's, and have built a bunch of furniture & rehabbed 3 houses, with my husband. My dad was a builder with 3 daughters & 1 son. The son: he taught the business to; the daughters: had no business holding a hammer or a drill. Erg. I could have learned so much from him! Anyway, one thing I did learn, is "that triangle thing" (love it 😁) is called a speed square.
First of all looks good, pretty easy to do
Comment on 2×4’s, you need 13
The 12 @ 21” long
You get 4 out of a 2×4 ( 96” ) x 3– 2×4’s
Totaling 13 — 2×4’s
You would be short on material,
How did you make that shelving?
Nice simple shelf design
Got it updated, 13 2×4's is correct, thanks!
I am so glad you posted this, because I was trying to figure out what to do for shelves in my garage. I took your plans and modified them slightly to make two 4' shelves instead of one 8' shelf because of my space, but this was so easy to follow and I'm really excited to finally get my garage under control and BE ABLE TO ACCESS THE BOTTOM BINS!! 😁
Oh my goodness!! This is amazing!! I am so happy for you, there is nothing better than being organized and making it happen yourself, you ROCK!
Might uldate supply list to 13 2x4x8’s
Thanks for catching that, I updated it! 🙂