Master Closet Makeover Plans
It is so good to be back!! I have really enjoyed my holiday break with my family! I hope you all enjoyed your Holidays as well!
I have set some personal goals for the new year, and one them is to do some “BIG” projects around my house. I have never really done a huge project, so this is a big deal for me…I am super excited!!
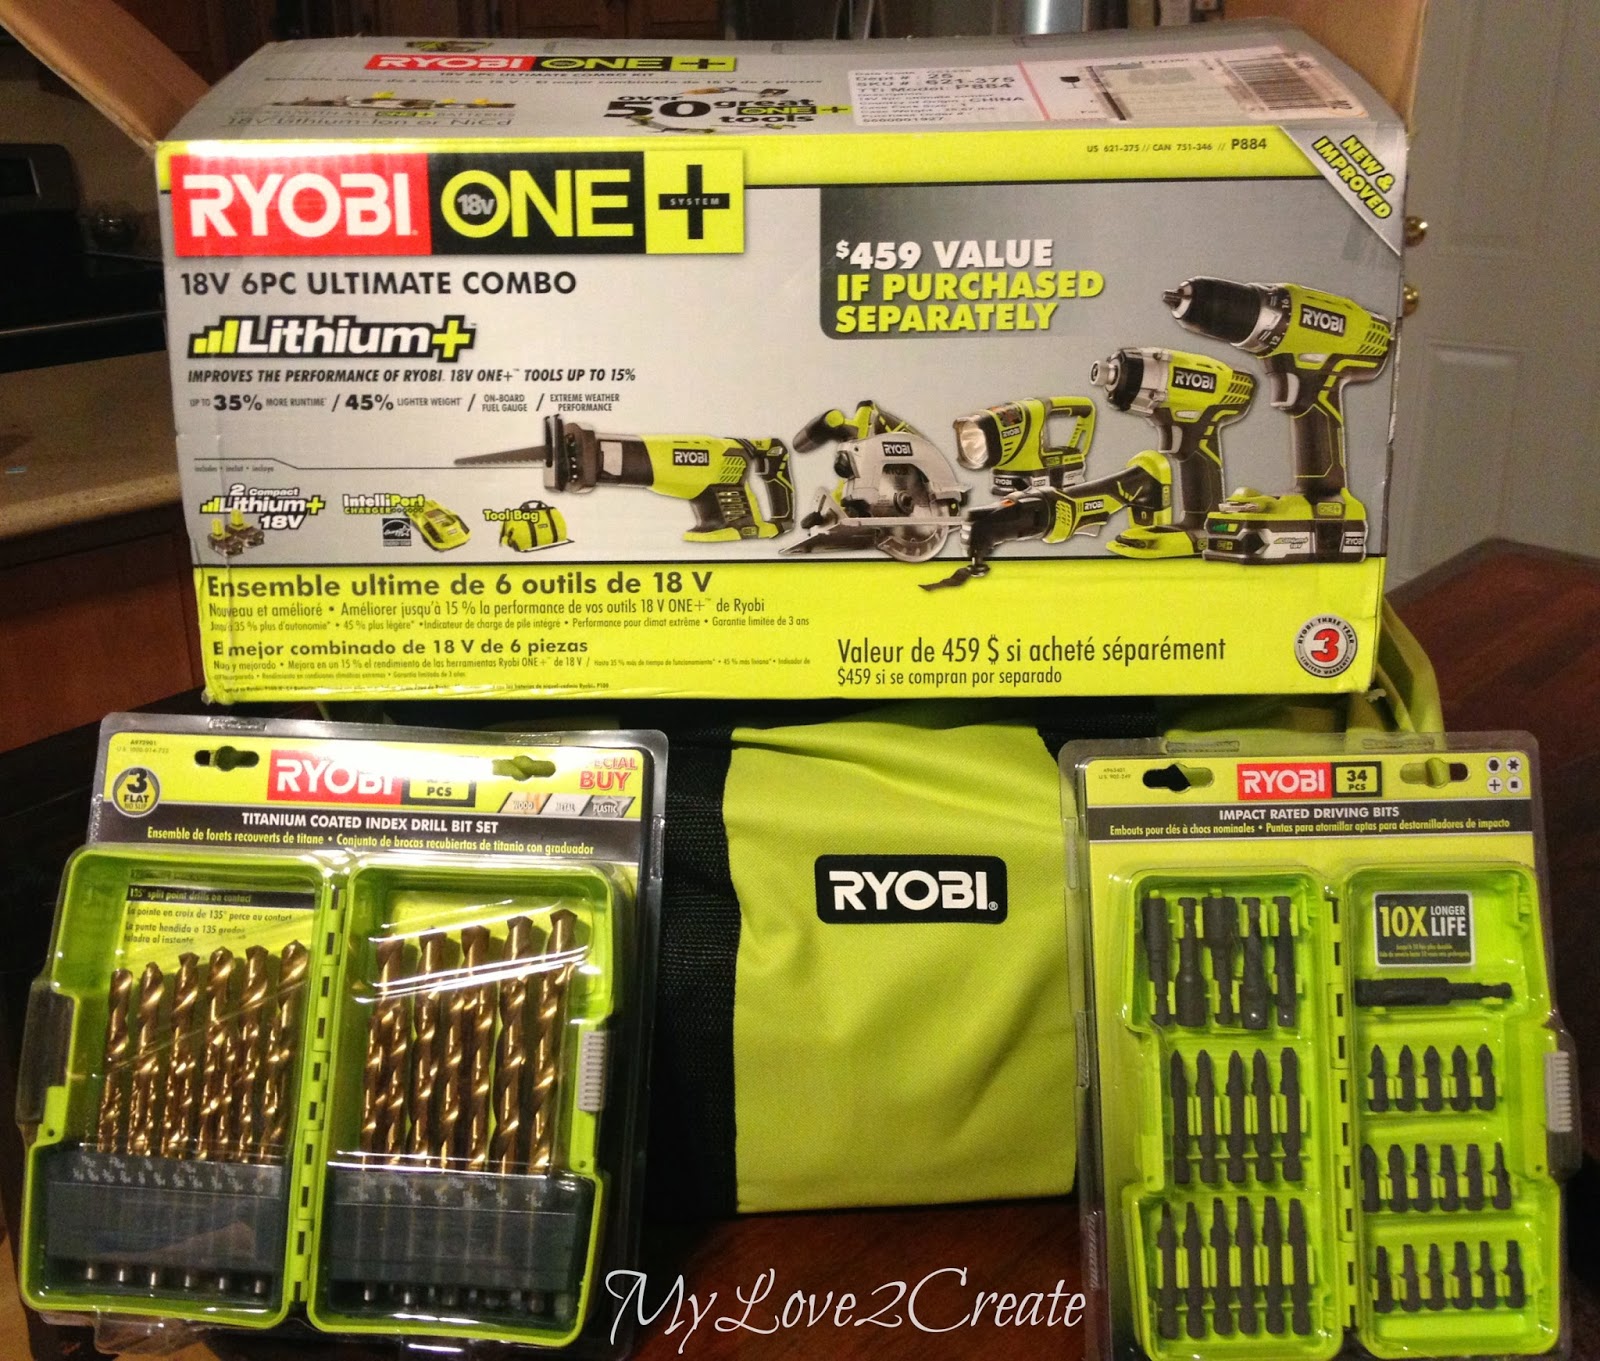
My amazing husband gave me a much needed and super appreciated Christmas present:
Can you believe it? Look at all those awesome tools! I have been using a plug in drill guys, seriously, It. was. time. Eeeek!
Along with all the tools I was given permission and a budget for redoing our master bedroom closet! (and hopefully the bedroom too… 🙂 Double Awesome!!
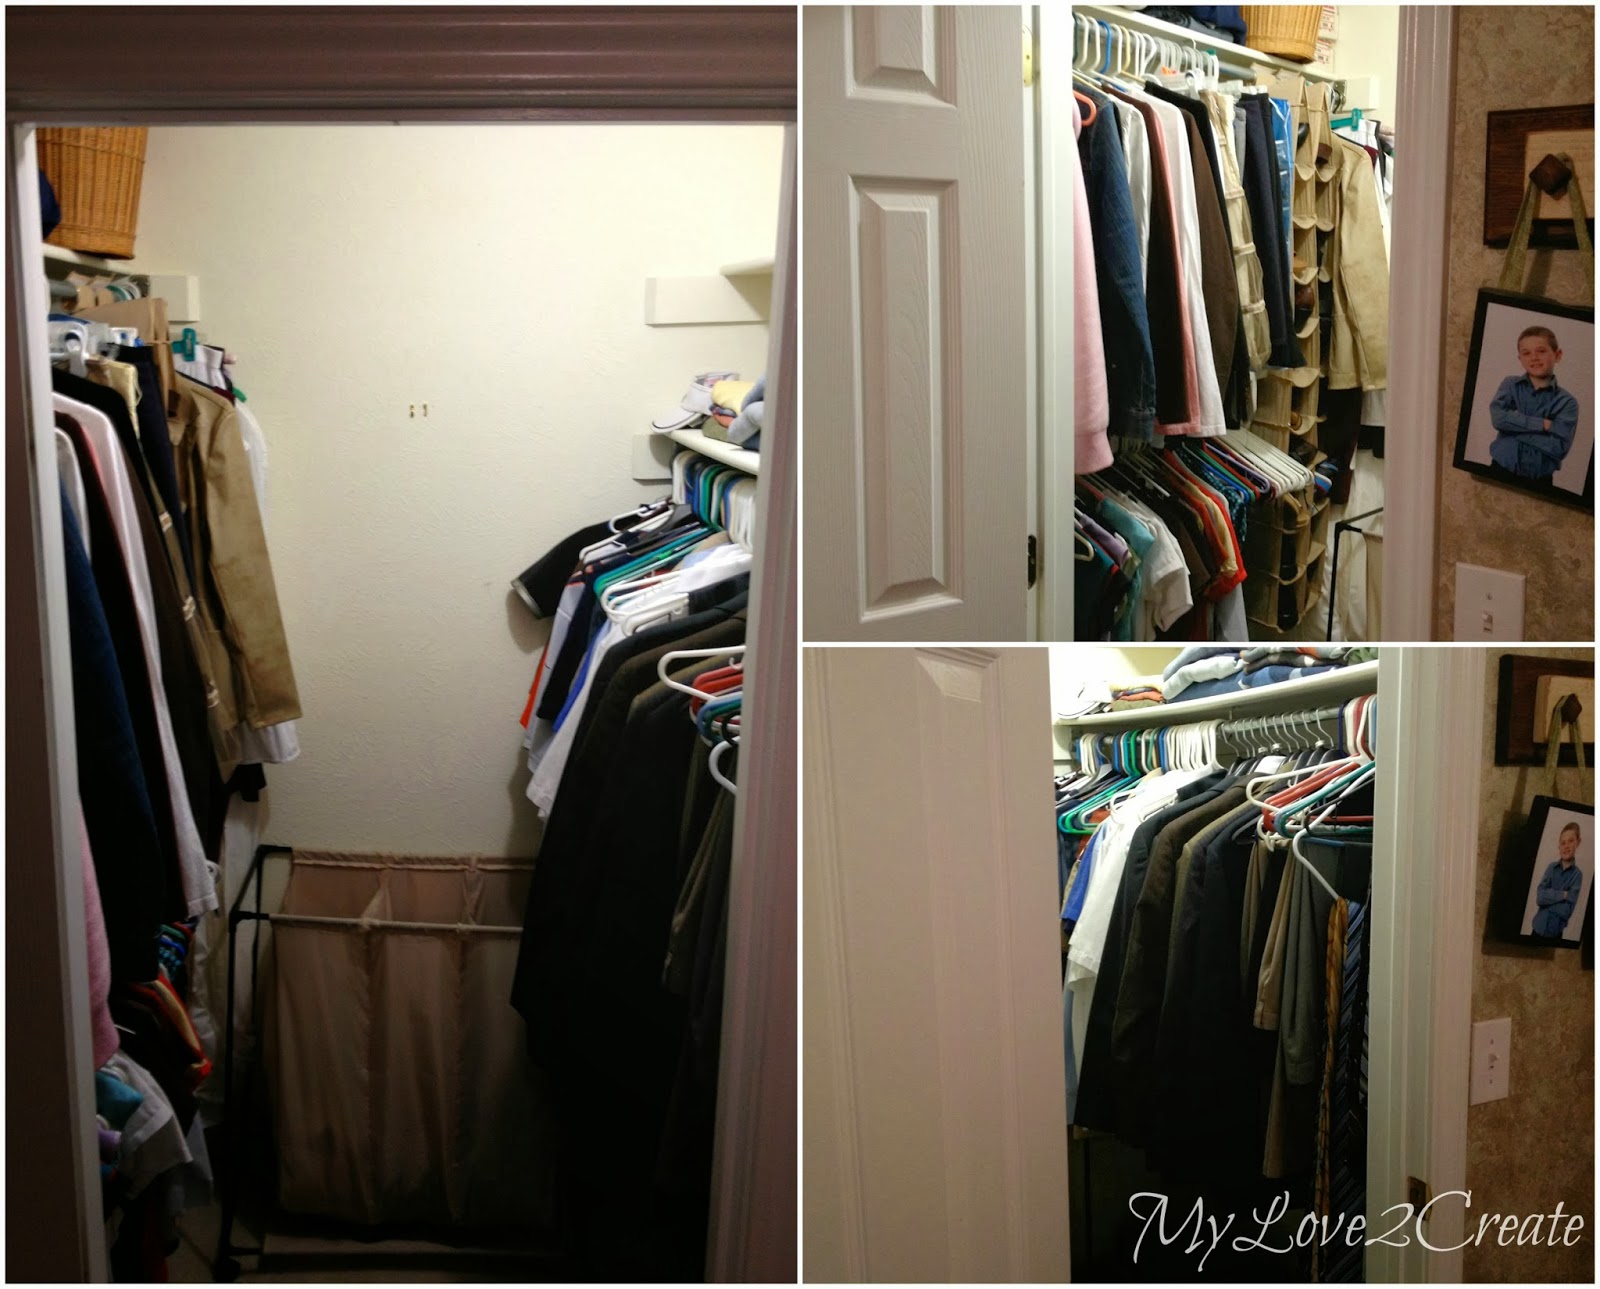
Today I will share the plans I came up with and the progress I have made. Lets start with a before photo shall we…
Exciting right? Ha ha ha. Not. Exciting.
Now, this closet is not big. It is going to be pretty tight, but more effective. So I am crossing my fingers that it will all work out. I spent a lot of time over break reading up on closets and plans, getting a ton of ideas AND wishing my closet was bigger!
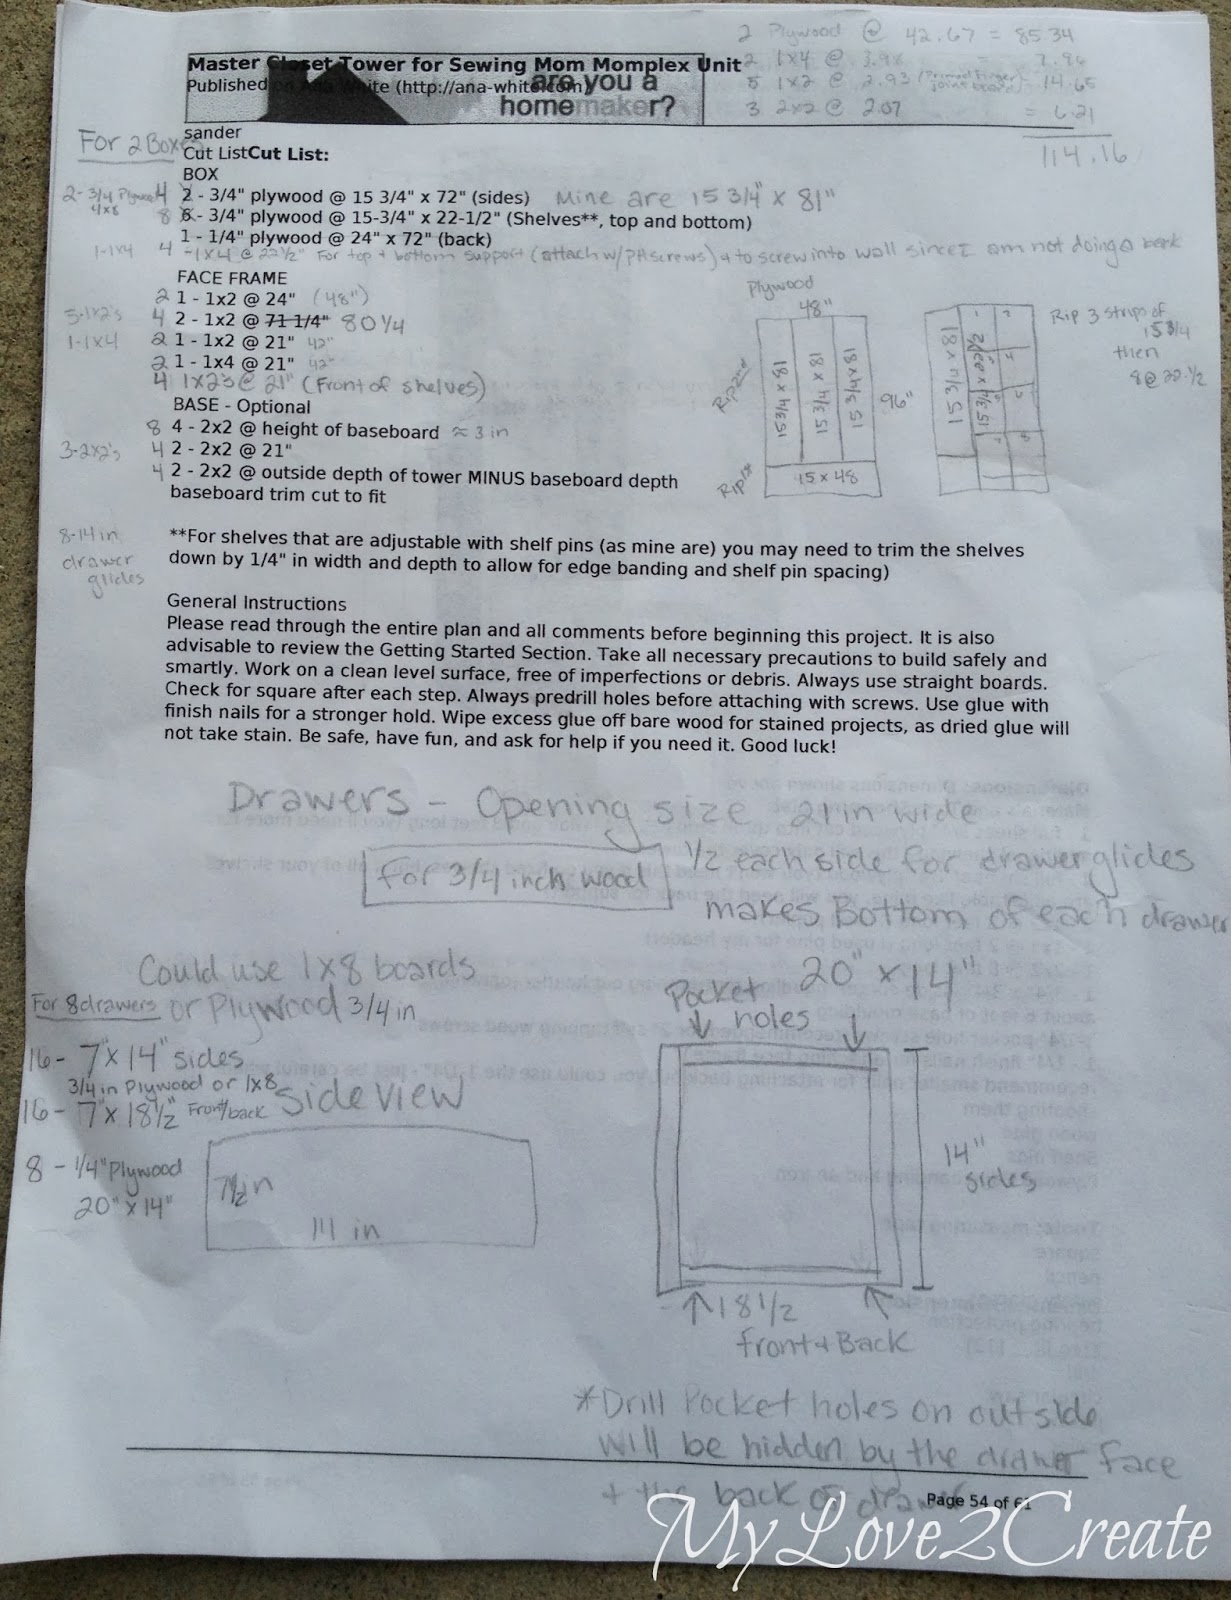
I ended up choosing a plan from Ana White that I will use to build “the two towers” (as I have lovingly named them…we are Lord of The Rings fans) Here is a part of Ana’s plan with my modifications penciled in:
I am making it a little taller and adding several drawers. I wrote on the bottom some tips that Ana provided in her drawer post. You can also see I was calculating out an estimated cost for wood in the top right corner, I don’t have a huge budget. I am hoping to keep it around $200. I have a huge scrap pile of wood I have gathered to pull from, and I will reuse the shelving from the existing closet if necessary.
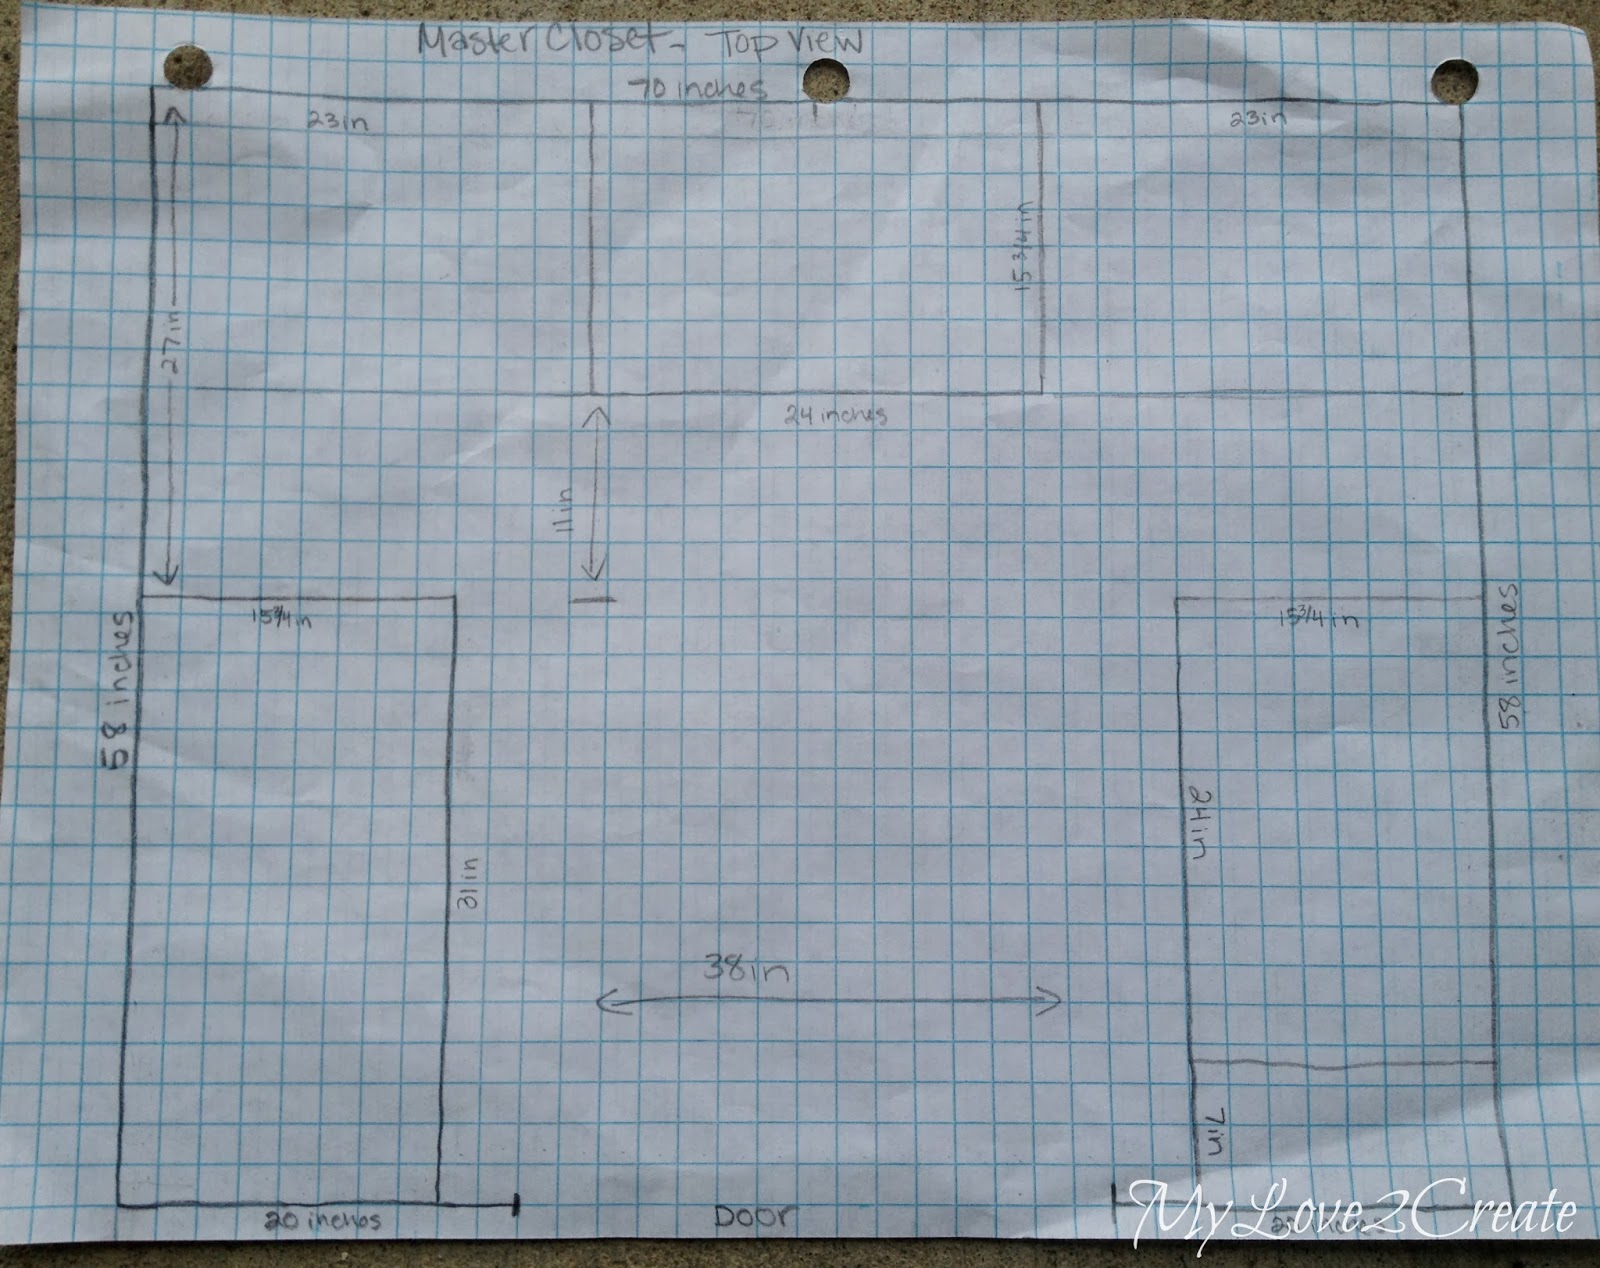
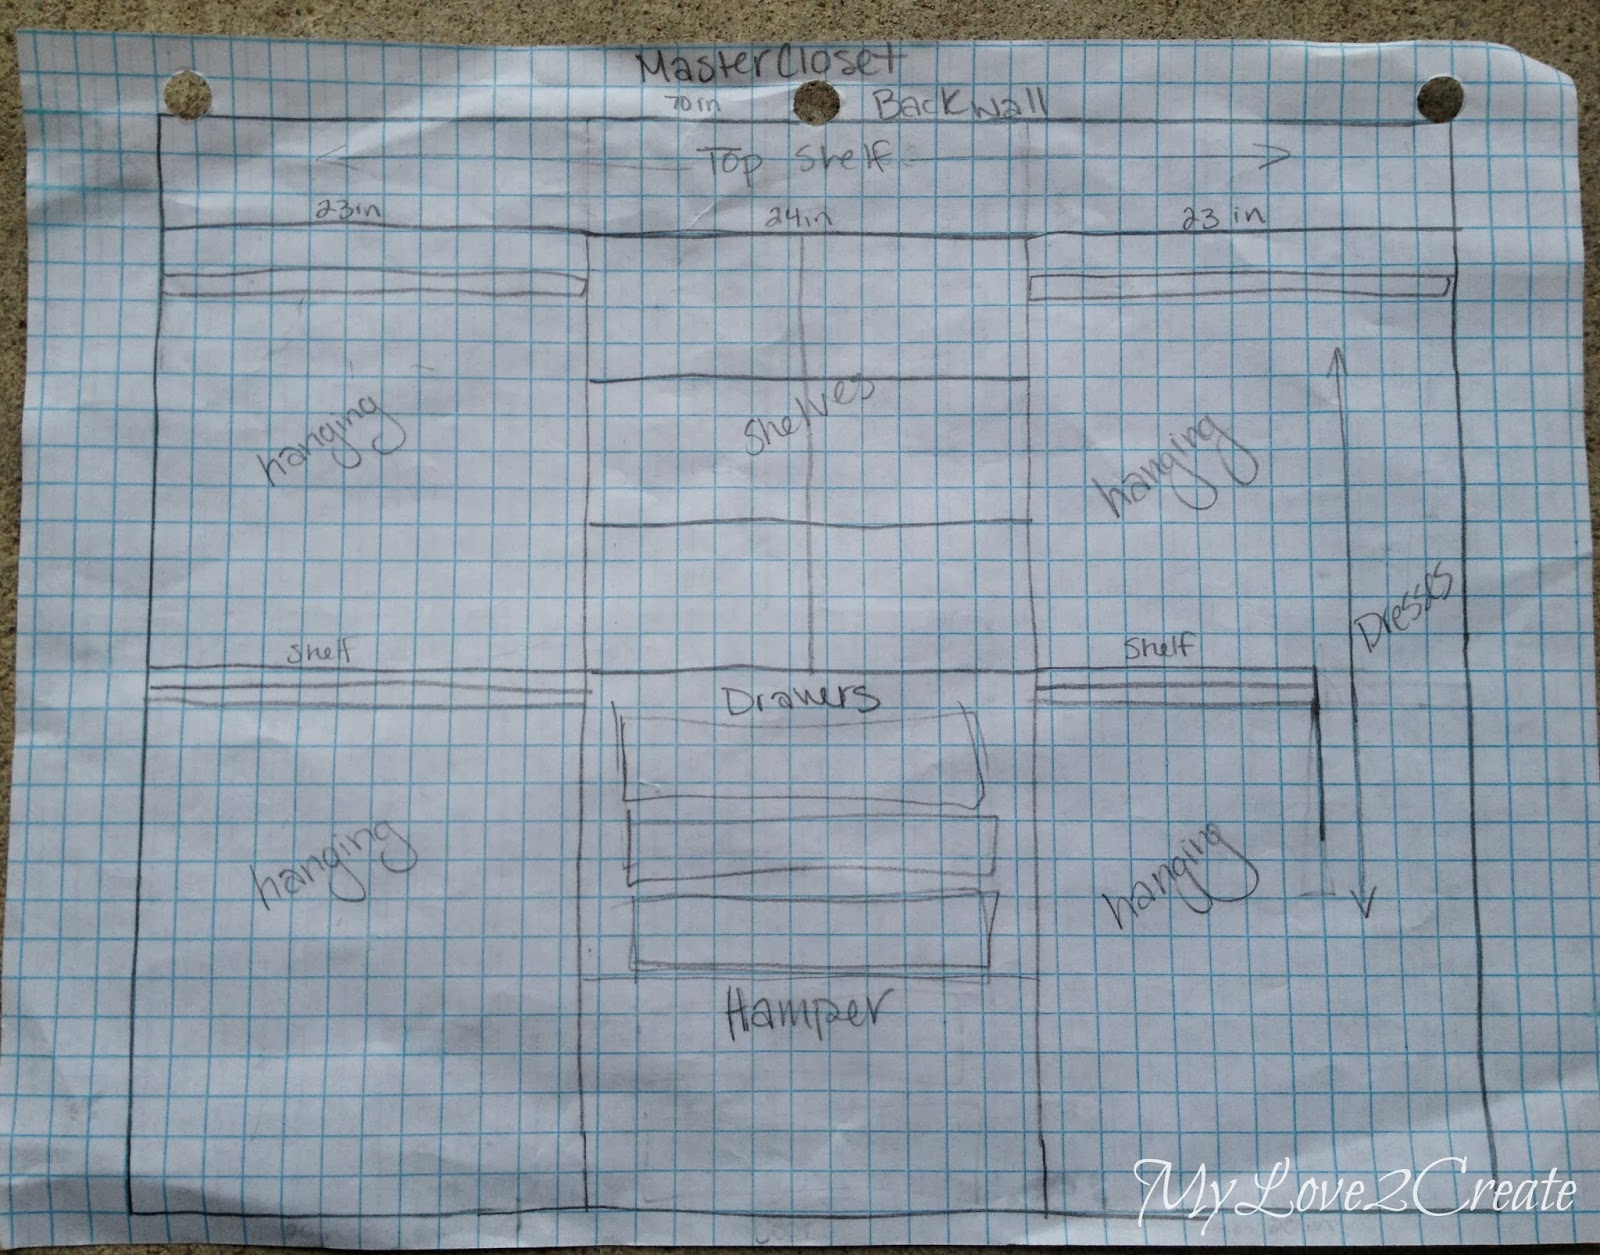
Here is a top view of my layout, the graph paper was helpful, on my diagram each square equals 2 inches. I also used the Easy Closets design tool to get a feel of how to best use my space. I totally recommend this if you are going to re-do a closet. Plus, you can see the estimated cost and see all the money you are going to save by doing it DIY style!
This is a rough sketch of the back wall, the middle section is one of the towers. After cleaning out all clothes we never wear, I measured what was left and we should have the perfect amount of hanging space.
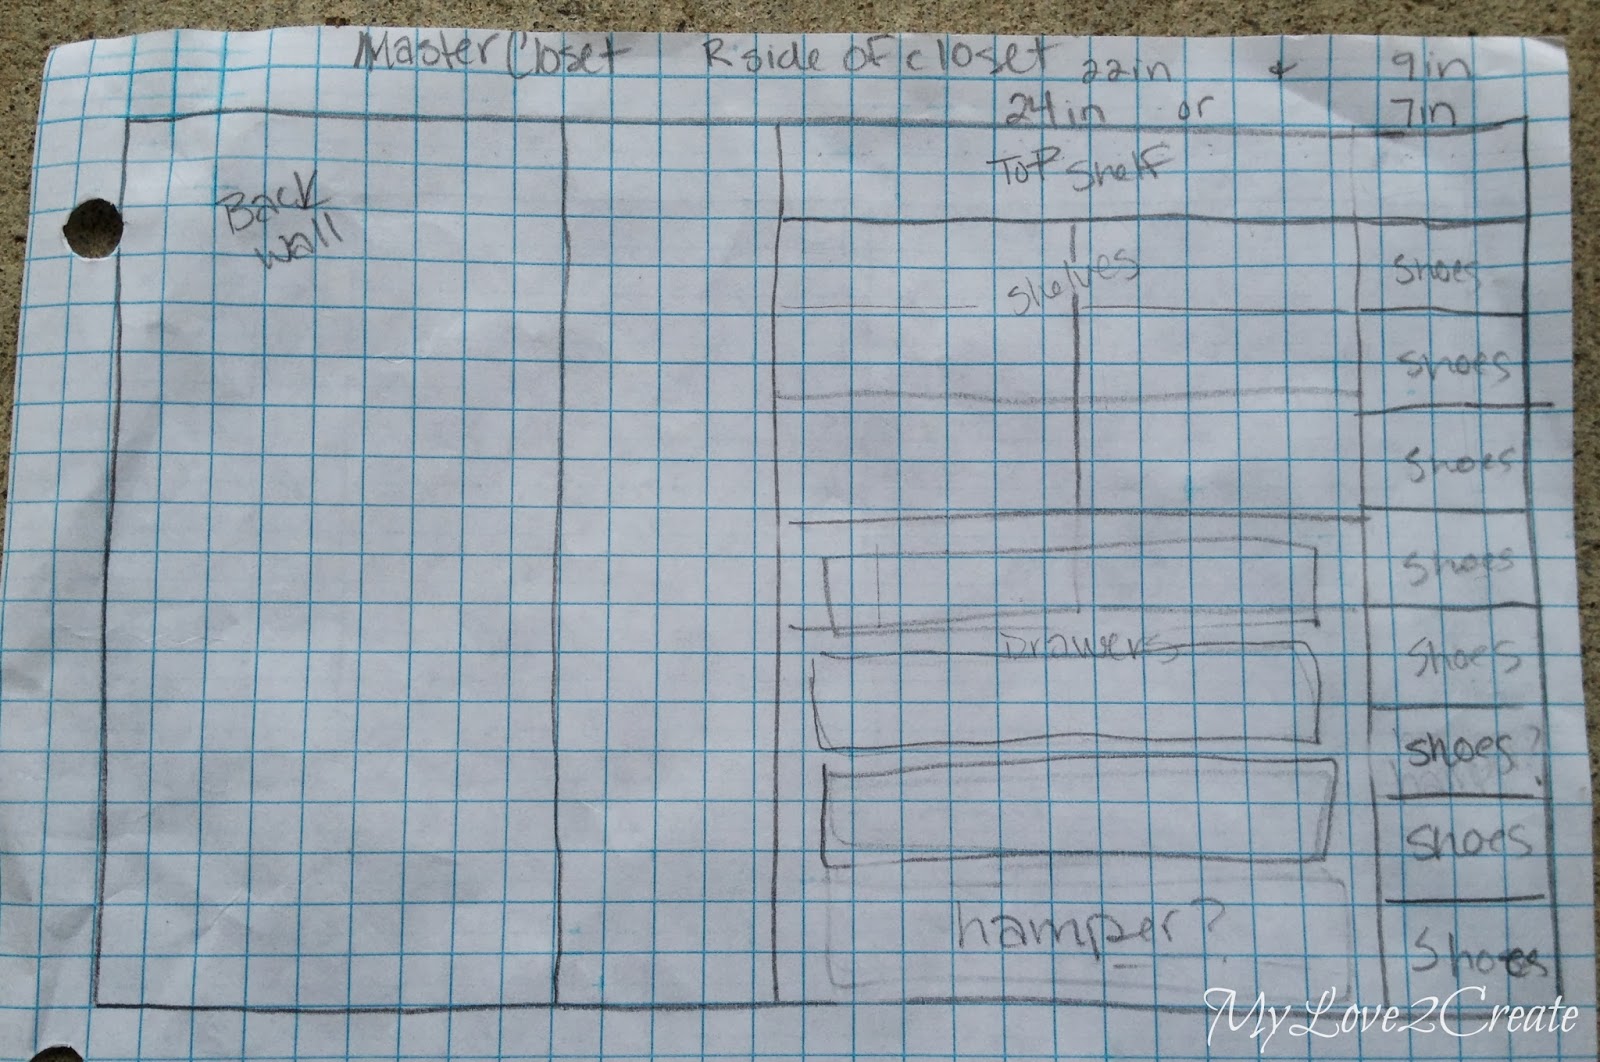
The above is the plan for the right wall. It will have the second tower, and a built-in for shoes. I think I might switch them up and put the shoes on the other side of the tower though.
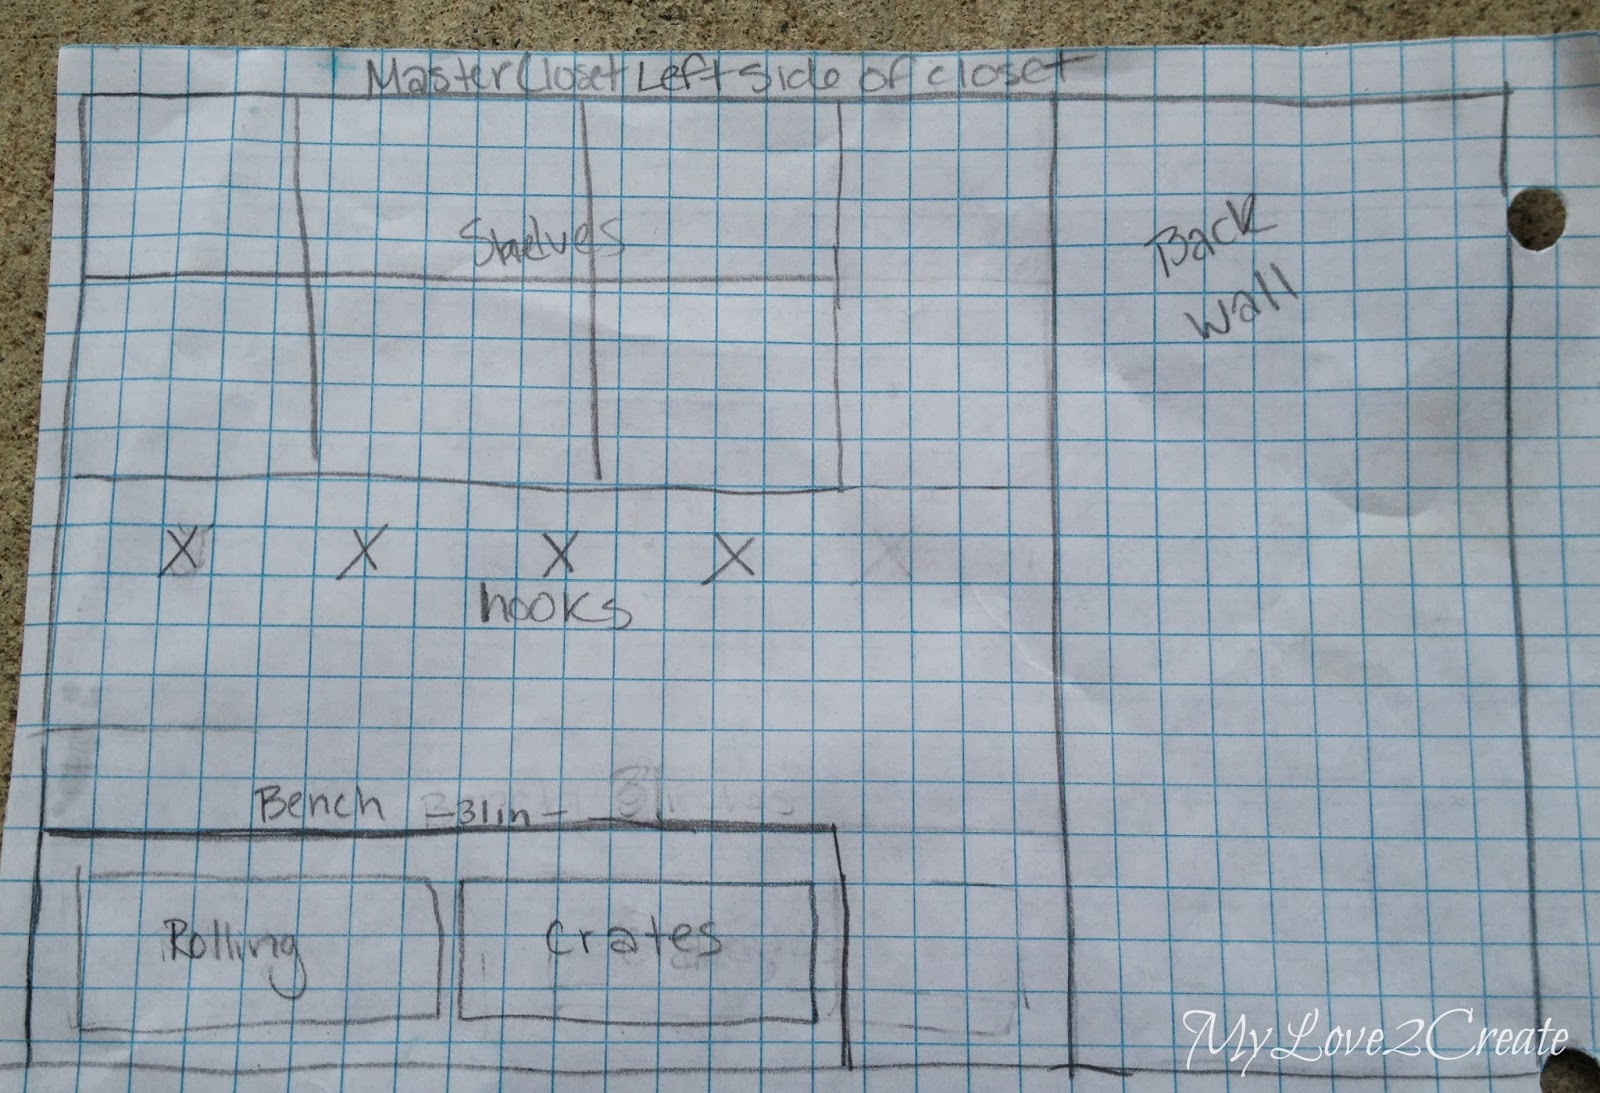
On the left wall I want a small bench with hooks and shelves above, and some roll out crates under the bench. Kind of like a mud room area. It looks so big in the plan, but in reality is will be less than 31 inches. I plan on building this area last, so I can get a feel of how best to do it.
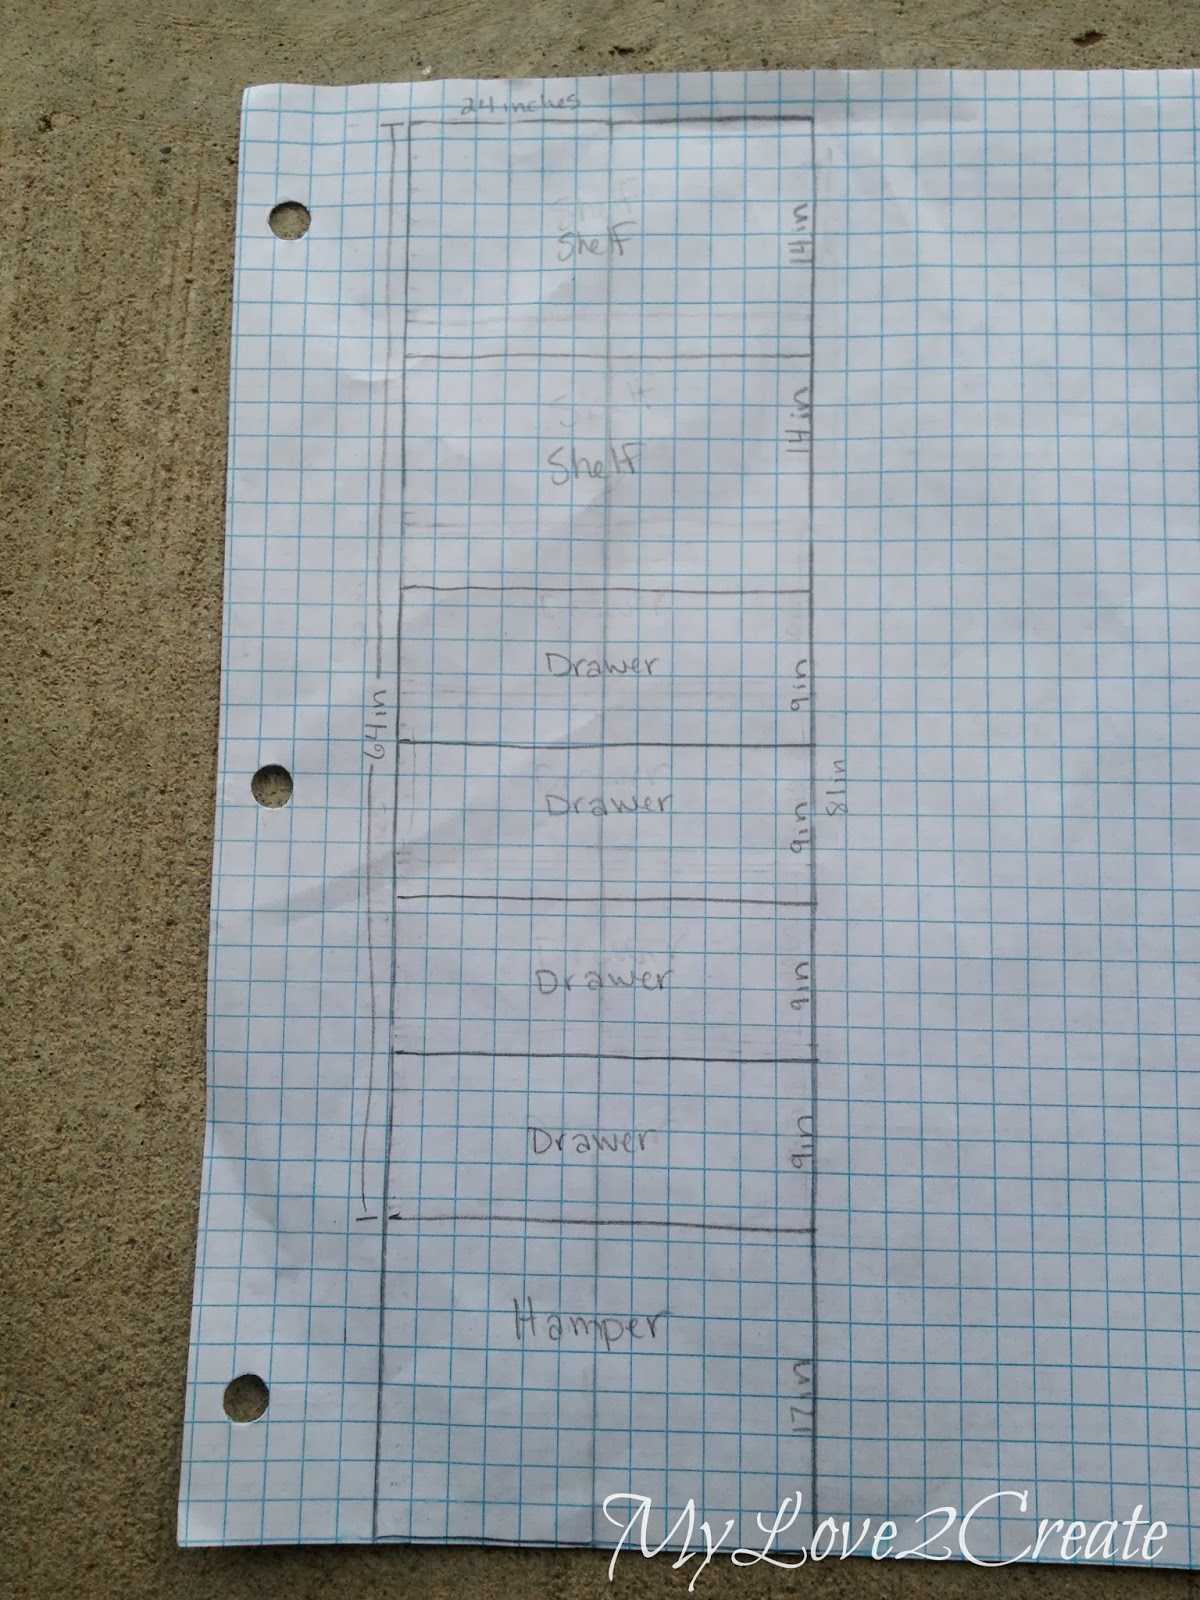
The last sketch is of my tower design. I may change it up, but this is where I am heading right now. I plan on a good amount of drawer space so I can hopefully downsize on dresser space in the bedroom.
Sick of the plans yet? Here are a few shots of my progress, it is not much, my littlest has been sick, and my kids barely went back to school today, you know, life still goes on!
I bought two sheets of plywood, had it cut for my two towers, and drilled some pocket holes.
I decided to do one coat of primer and one coat of paint before I build it. Then I can finish off with a coat when I am done. This took FOREVER! Ok, not really, but I totally had blisters on my hand. I am sure I will be grateful later.
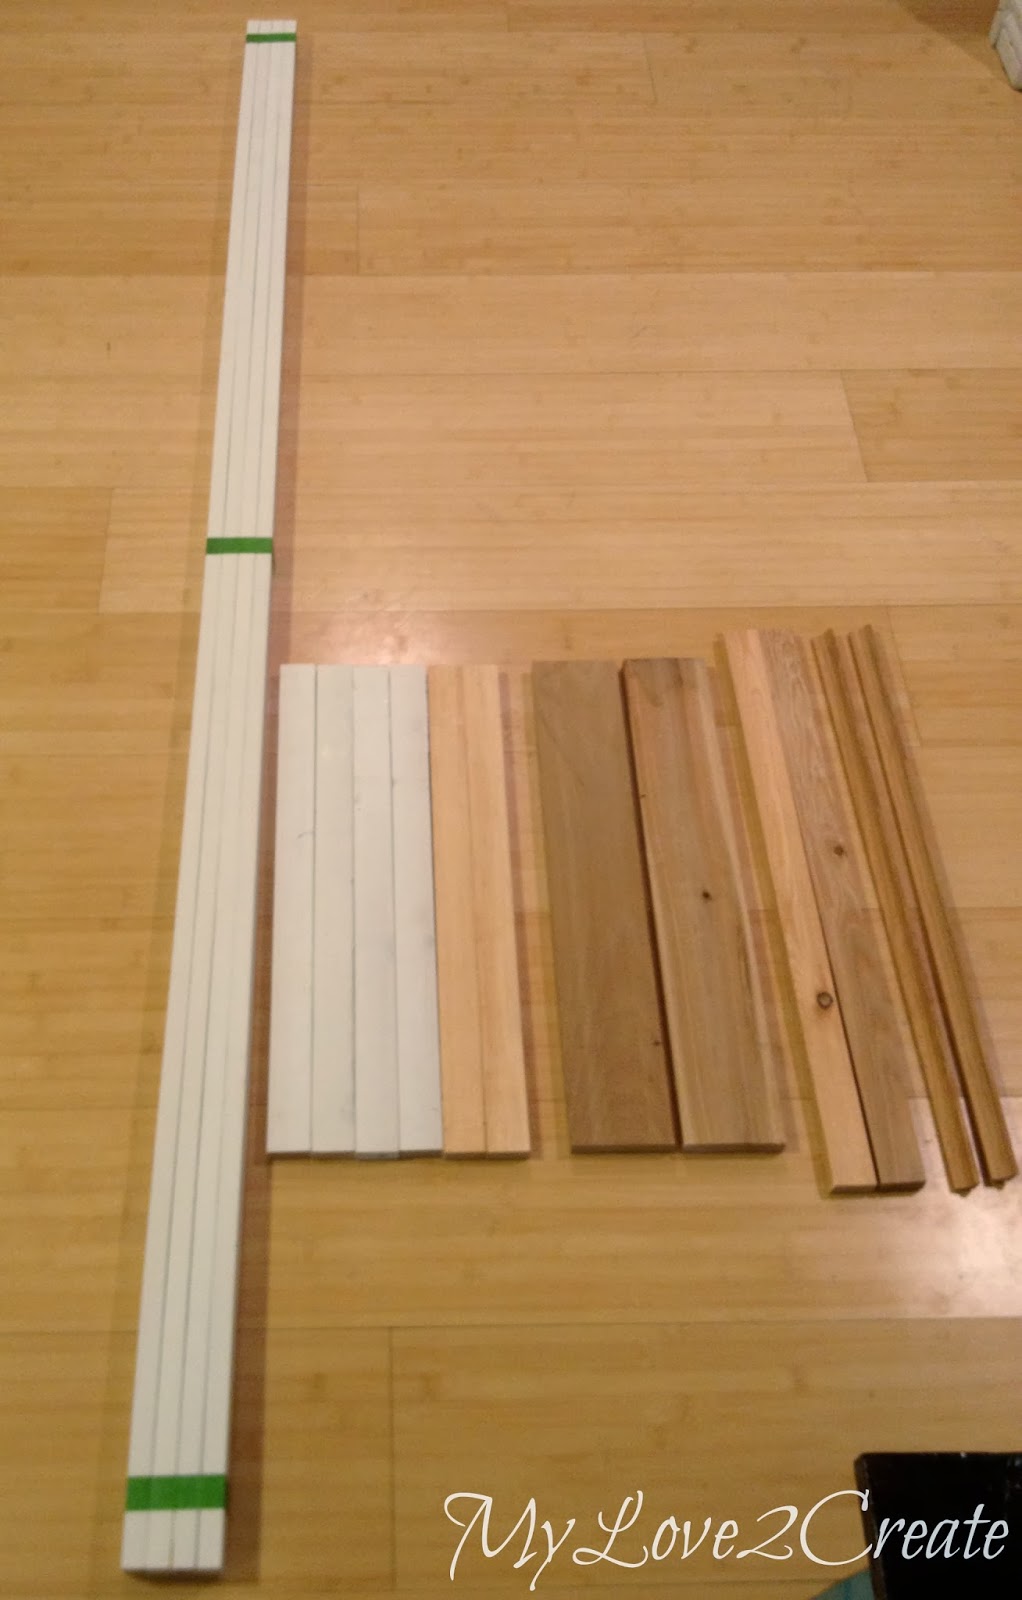
This is the wood for the face frames. The primed board are the ones I bought. The rest are scraps from my pile. (If you saw how much wood I hoard have you would be shocked and appalled, but I am ok with it because almost all of it was FREE: craigs list, free cycle, side of the road type stuff…) Oh, and you see my long boards I used painters tape and cut them all at once, love it! Such a time saver and you get exact cuts.
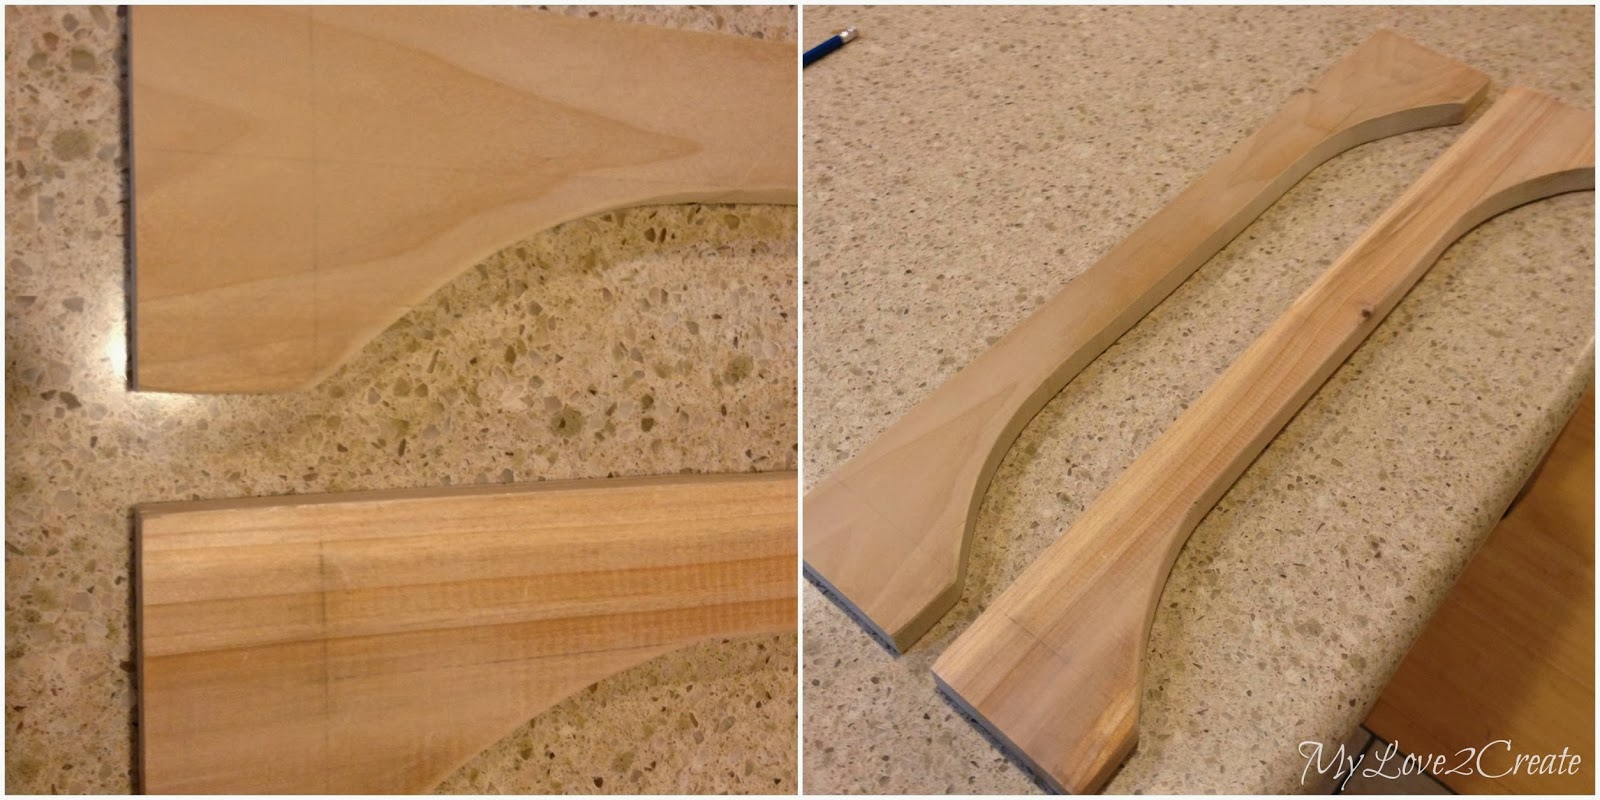
The top board of my face frame needed a decorative look so I took a 1×2 and traced line across the top using the width of the board as my guide. Then I traced the width of the 1×2 on both sides. Last I grabbed a large bowl and used the edge of it to trace a small semi circle connecting the two straight lines.
I cut it out with a jigsaw, you can see how the bowl gives it that curved shape, it made it easy to make all the sides exactly the same.




I read the whole thing! 🙂 I'm impressed with your sketches. I never draw out anything. … well I have, when built my media center, but not like you did.
The top is going to make it look really nice by taking the extra step with the bowl Mindi. you really did a great job cutting and sanding those pieces.
I look forward to following along as this all comes together.
gail
All I can say is wow!!!! You amaze me every single time and truly make me believe that we can do anything if you put your mind to it!! You are the kind of girl I want my little ones to be like. Able to do it on their own and use power tools! You rock friend!!! This is going to be spectacular!!!! Nicole xoxo
It is so amazing that you are tackling this Mindi. My closet needs a serious overhaul and I was just eyeing up the IKEA PAX wardrobe sale but I know I could save a bundle if I had the skills to build it myself!! Can't wait to see how it turns out!
Mindi, I am blown away and amazed by this project – and that is one serious tool set!!! Seriously impressed, my friend, and so excited to watch how this progresses. I know you will do a fantastic job! 🙂
wow awesome! Me next!!! I am available anytime!!!
I can't wait to see the final closet! Love your Christmas present from your husband. I have a feeling you are going to get a lot of use from it. I'm very impressed with your abilities! Whenever I have redone a closet, I used shelving kits from Lowe's :).
Hi Mindi, stopping by from My Re-purposed Life link party. That closet organizers site is awesome! thanks for sharing it. I'm right in the middle of doing my closets too but mine isn't a walk-in (sad face, it's a really long reach in). Your plans look great and I can't wait to see the finished project. Thanks for sharing. 🙂
my goodness. So exciting. I love your creative mind!
This is so exciting! Of course its going to look great because you did it! A building budget is the best gift ever! Looks great so far!
Oh wow. I can't wait to see the finished closet. I hope you'll share it with us on twirl and Take a Bow. Then you can come to my house next! ~Tammy
Beautiful Christmas gift! Can't wait to see your finished makeover!
Val @ artsybuildinglady.blogspot.ca
Wow! You have been busy! Thanks for linking up this week at Sewlicious Home Decor!🙂
Marti
Looks like it's going to be great! Aren't new tools the bestest? Hubs and I just got our first nail gun and it is FANTASTIC. I can't wait to see your finished product. Thanks for linking up to Gingerly Made!
can't wait to see your big reveal mindi, i'm in the middle of master closet organizing myself right now but unlike you, i stick to my ever beautiful wire shelvings girl♥
hey thanks for sharing over at The DIY'ers! huggies♥
rea
You are putting those tools to good use! Can't wait to see it done Mindi! Thanks for sharing at the party. Theresa @DearCreatives
Oh wow, Mindi I love your plans, how neat! I read everything, I'm also contemplating re-doing my closet so it's going to be fun following your work. Hey, I'm a bit jealous of your tools, I'm still using the plug in ones :/
Have a great weekend!
My hubby just bought one of those huge tool sets and used the drill once and now it will sit in the closet forever…I have a really big unfinished walkin master closet that really needs a make over…I think I'm going to read this a couple more times for.motivation and check out that closet planner link you recommend, charge all those batteries and make a week of it…he nevergoes into MY closet either so it will be quite a surprise lol…thanks so much for your inspiration!!!
Can't wait to see the rest of it. Thanks for linking up last week on Friday's Five Features. You've been featured this week! http://diy-vintage-chic.blogspot.com/2014/01/fridays-five-features-no-24.html
Drool! I want to hug your Christmas gift. 😉
I'd have to say this works beautifully! My bedroom is always seeming to run out of space for my things, maybe we'll have to start a project like this one!