Hello! Are you excited for the 4th of July tomorrow? I sure am!
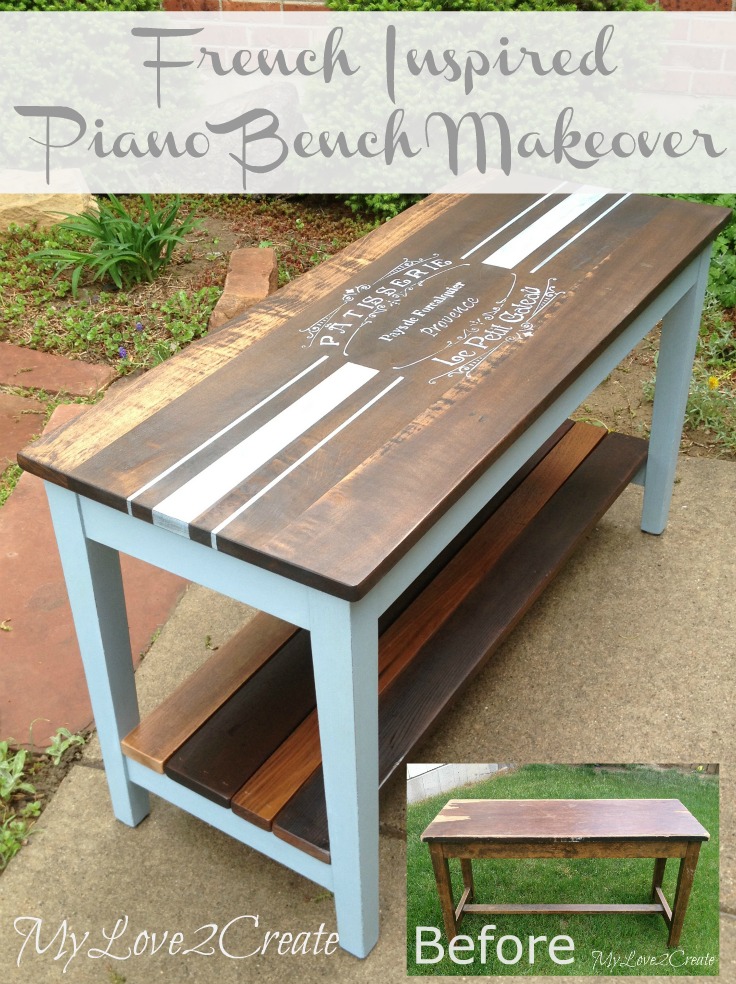
I have been spending time with family this week so I am pulling out a project that was first seen on My Repurposed Life. It is a fun French inspired piano bench makeover.
Benches are one of my favorite things, besides crates, I LOVE crates too. This bench was sitting out with someone’s garbage in the rain, until I spotted it driving by….
My family is finally getting past the shame and embarrassment phase of me grabbing things from the trash. In fact this bench was picked up by my oldest son, I didn’t even have to get out of the car! Yep, I am training them right!
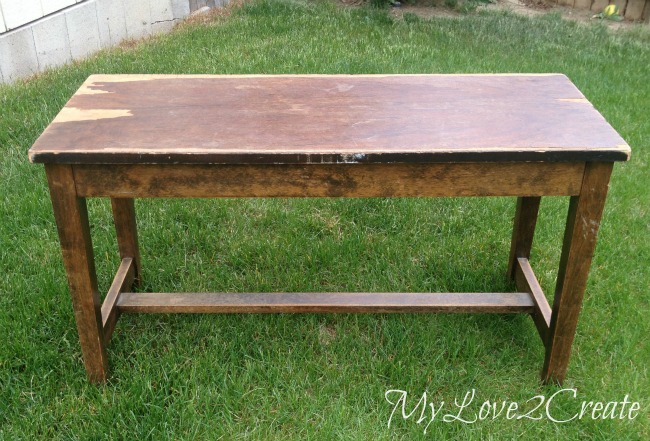
Of course that was months ago, and the sad lonely discarded piano bench has since been residing in my basement. Let’s get a better look at the before.
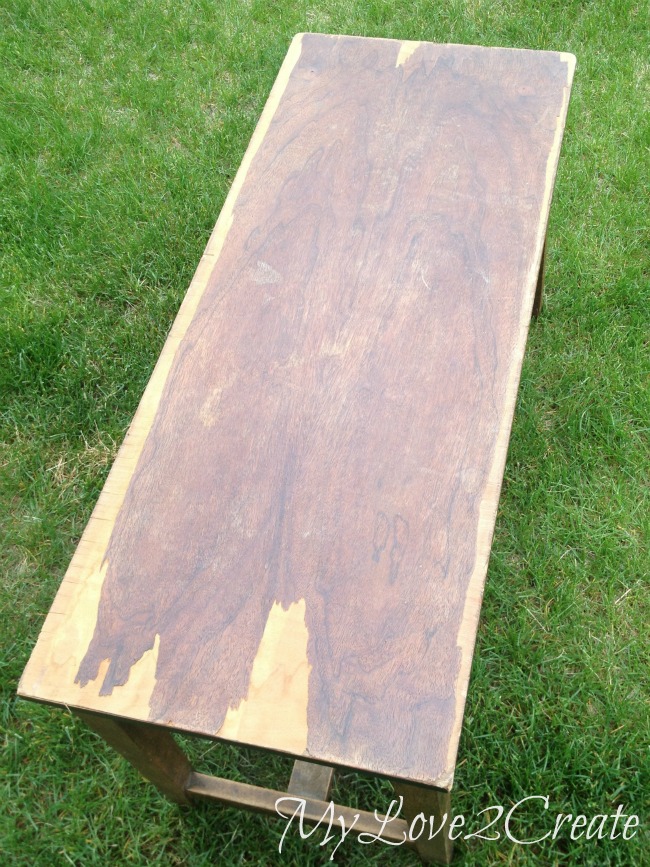
It was structurally sound and the lid worked great, just had some top veneer issues.
Yea, not patching that mess up! I have read that good wood mostly resides under veneer, so I commenced in finding out.
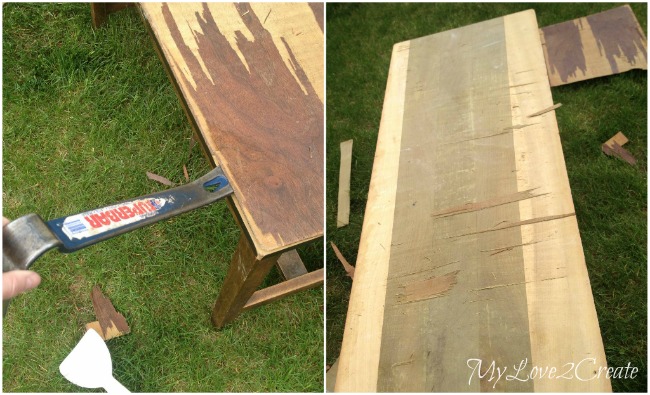
I grabbed some tools, a spackle scraper, a mallet, and a crowbar. I set to work. The veneer was peeling pretty good on all the edges so I easily worked the plastic scraper under and then pounded with the mallet. I kept the scraper level with the bench and It really helped to pull up the veneer in big chunks.
I also used a crow bar to help lift it up too, and then I was left with some stubborn spots that weren’t budging.
With a little google search I found that heat and water help, so I grabbed an iron and a damp cloth. I sprayed water on all the left over spots of veneer and let it sit while the iron warmed up. Then I placed the damp cloth over the spots and ironed away. This also brought the glue up too, which was sticky. It did help to loosen the veneer, but I still had to so some prying and scraping to get the rest, but it wasn’t too bad.
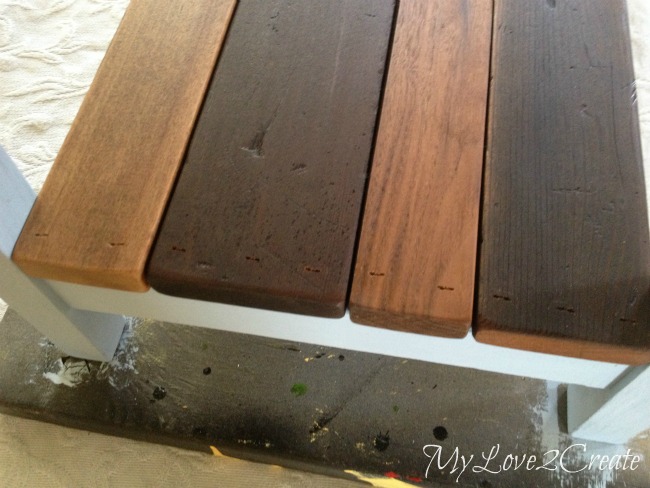
Next, I sanded the top down with 60 grit, and then followed with 150 grit sandpaper until it was nice and smooth. I also decided to make a shelf for the bottom and so I grabbed some of my free scrap boards and found 4 that fit. I cut them to size and sanded smooth.
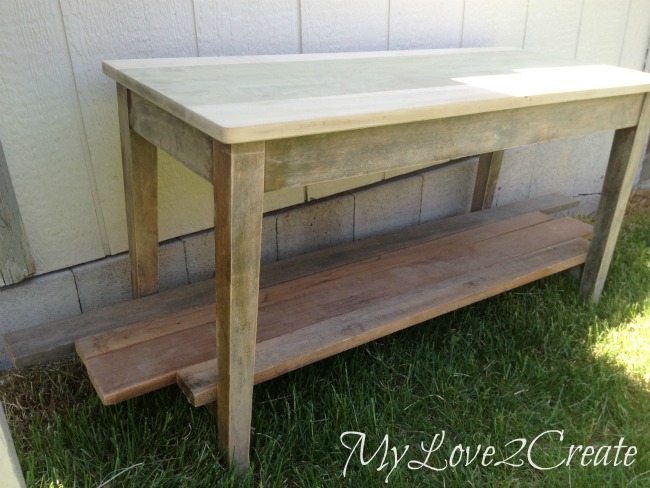
Since all the wood was different, I thought it would be cool to keep the contrast and stain them all with natural stain. Here they are pre wood conditioned and stained natural. The top was super cool! I loved it and was planning on keeping it as is. But of course I had to mess with it, because it really didn’t match with the bottom shelf boards. Ugh! So I stained it with Rusteoluem’s Kona and I was NOT happy….oh well to late now! I also took the largest bottom shelf board and used the same dark stain on it. I hate it when I mess with things too much…anyway it has a happy ending, thank goodness!
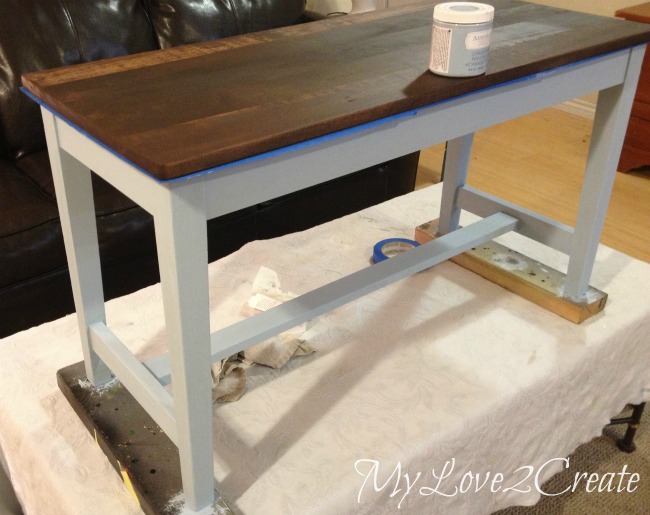
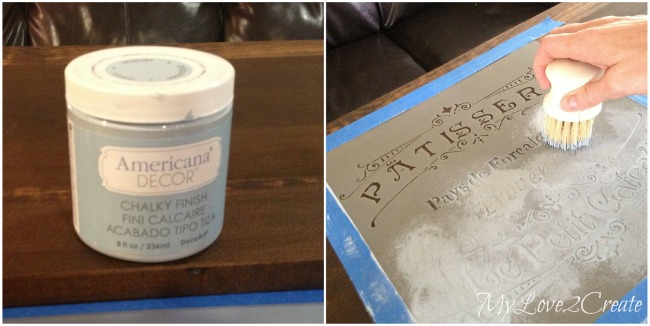
I had a chance to attend SNAP, a blogging conference, a few weeks ago and received some awesome stuff to try out. The first being chalk paint. This was my first time using it. I did two coats of Americana Decor Serene Chalky Finish. It was super thick, but went on well.
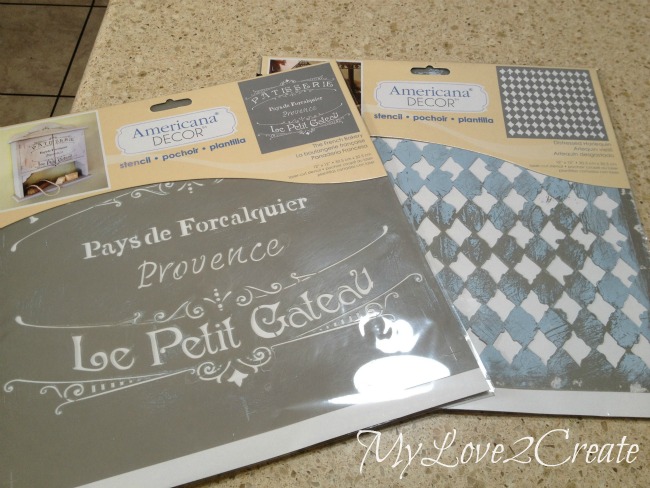
I also wanted to try out these stencils I had gotten and I was so excited to have a french theme! You can buy these products at Home depot.
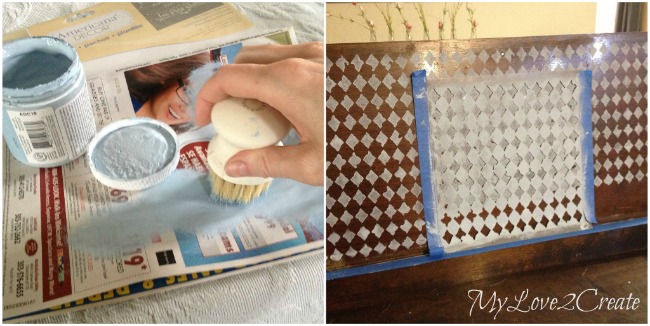
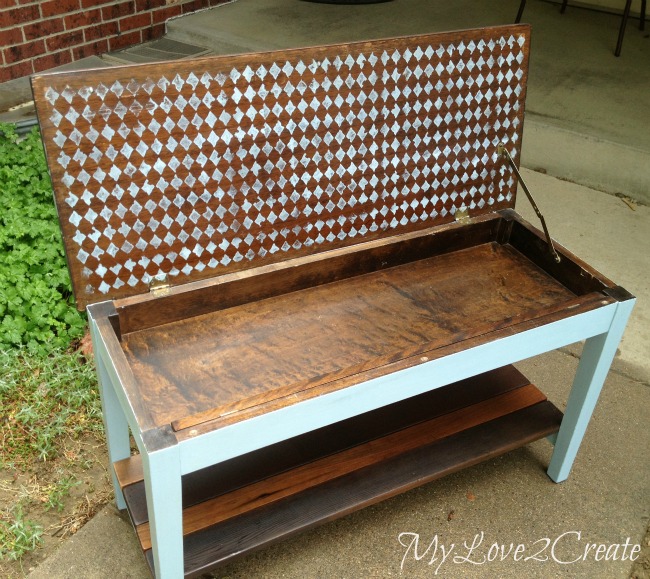
I thought it would be fun to have a pattern on the inside of the lid so I used this fun stencil to create it. I was impressed with the stencil quality (I am not sponsored I just am saying it like it is, in my own opinion) I used this brush and put a small amount of paint on it, rubbed most of it off in a circular motion on some newspaper, then used the same circular motion directly on the stencil with what was left on the brush. I had zero bleeding, which made me very happy!
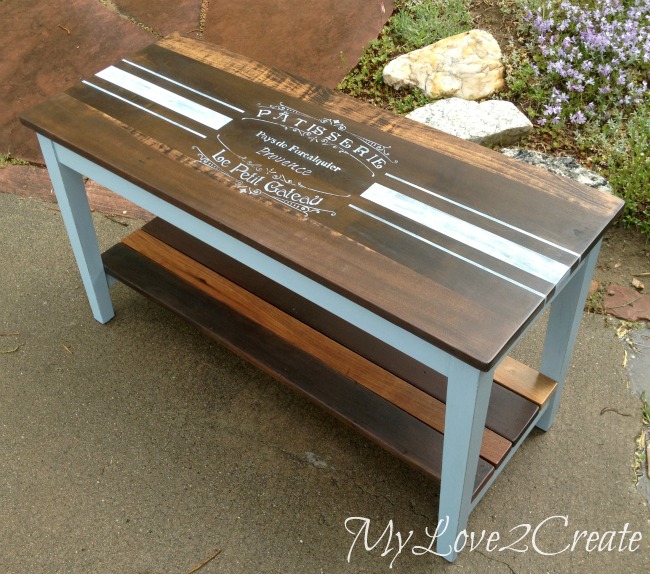
For the next stencil I centered and taped it onto the top of the bench and used the same method to stencil the french design. Again no bleeding, which I was worried about on stained wood, phew! I think the most important thing to remember is to load and unload your brush, so you have very little paint left to stencil with. This 8 oz. jar of paint went really far, I only used half of it.
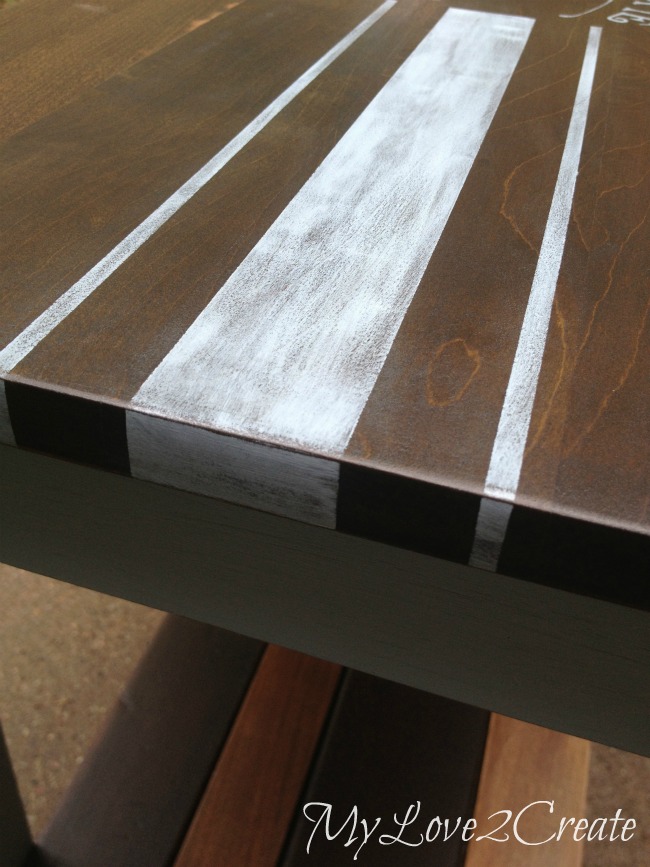
In keeping with the french theme, I couldn’t resist grain sack stripes, I LOVE THEM! After I measured and taped my lines, I firmly ran the tape roll over all the tape to seal it really well, this helps to get those crisp clean lines (a trick I learned from
Mandi at Vintage Revivals). It really works guys, you can see another example in my
How to Paint a Subfloor post.
I glued and nailed the bottom shelf boards on, then distressed the painted areas, stenciled parts included. I was going to use wax to seal it, but ended up using polyarylic.
And I was all done!! I am very happy with the final result, even if I did mess up with the top stain.
I really liked the chalk paint, I will have to use it more often.
Too bad they hide such fun wood under veneer, it has such character!
The inside it a little busy, but hey it was fun for me to try out that stencil, I kinda like it.
I had a few minutes when the sun came out, and I could snap some pictures before it started raining again.
Right now this bench is hanging out in my entryway, I am sure I will find a good home for it! Where would you put it?
Hugs,
Mindi
I will be linking to these parties.








What a coincidence, I have the exact same stencil! Haha. I LOVE how the bench turned out! Are you planning on selling it or keeping it in your house?
Beautiful bench makeover! I love how the stain turned out and the stencil for the top is amazing! Stopping by from Project Pin It.
Glenna @ My Paper Craze
this is outstanding! MUST find piano bench NOW!!
What a find pal! And you gave me a chuckle when you mentioned that your family is now ok with you grabbing things when you see em!!! They know their mama has serious talent! Just look at this bench lady!!!! It is gorgeous! Totally French inspired! My goodness…I could find a million places to put this beauty! Your work is amazing! Have a wonderful 4th with your family friend! Nicole xoxo
Wow – my heart skipped a beat when you said you are thinking about staining the cabinets. I was a bit sad when you said you wanted to paint them, but figured it's your house and was happy to play along with the color game. I hope staining works out – they are gorgeous.
table-set-for-luxury
Loving this <3 I'd love it if you shared this on Worthwhile Wednesdays http://thecraftiestallie.blogspot.com/2014/07/worthwhile-wednesdays-24.html
~Allie
Wonderful idea and great tutorial. Thanks for sharing it. I came over from City Girl. I will look for your follow options!
What a fabulous makeover! I love it 🙂
Wow Mindi, you did a fabulous job with this piano bench. Love the French graphic and grainsack stripes!
Marie@The Interior Frugalista
Hi Mindi, What a great find and wonderful makeover. It turned out gorgeous!
Julia
GORGEOUS… Love the different stains of wood with the Parisian style! Totally in love. Thanks for linking up #merrymonday visiting from http://www.everafterinthewoods.com
Great bench makeover Mindi. Love the graphic. My husband is a garbage picker too and I've learned to just look the other way. 😉
Kristi
So pretty!! Love it 🙂
STUNNING! Love the inside. I did redid my piano bench – the top looked much like yours with all the peeling veneer giving us all slivers in our rear ends! 🙂 Pinning to the Trash 2 Treasure Highlights board – thanks for sharing.
my piano bench in case you're curious: http://www.kammyskorner.com/2013/03/my-painted-piano-with-subway-art-bench.html
So cute! I love that it is elegant and simple at the same time.
Sarah @ Backwoods Babies
Love this!
Lucky! I have been looking for a bench like this. No luck at thrift stores or on CL. Mindi, the makeover done here is wonderful and gorgeous! This is a beautiful piece. 😀
Featuring tomorrow!
Hi Mindi, This is stunning! I am pinning it Thanks for sharing at the party! Theresa @DearCreatives
PS. Hope your having a great summer so far!
Just pinned and will be sharing on Facebook as one of the lovely features at Freedom Fridays this week!!
Hugs and thanks so much for sharing
Looks great! Thank you for sharing this post at City of Creative Dream's City of Links on Friday! I appreciate you taking the time to party with me. Hope to see you again this week 🙂
Wow that looks so pretty and easy to make ( I love the storage space). I would love it if you would share a post on my Meet Up Monday Blog Party!
http://jennymaire.blogspot.com/
featuring this tonight. told you I loved it… 😉
Amazing job with this bench, Mindi! I love the stencil and the addition of the bottom shelf. It really is gorgeous!! ~Amy
Wow! I have a piano bench hanging out in my garage just waiting for this inspiring post. Thank you!
You are so creative with benches. I love the stencils and the stained wood, and I personally love the surprise of the stencil inside the lid. Thank you for sharing this and your adorable drawer planters at What We Accomplished Wednesdays. Have a great week!
Blessings,
Deborah
I picked up a piano bench at an auction today for $5.00 and you know I'm gonna add a shelf to the bottom like you did!
I'm totally in love with this bench! I love that you added the bench with boards you had on hand. I like the variety of wood colors it has. Nicely done!
So great when I am ready to paint something and click a photo for a grain sack stripe tutorial, and it takes me to you!