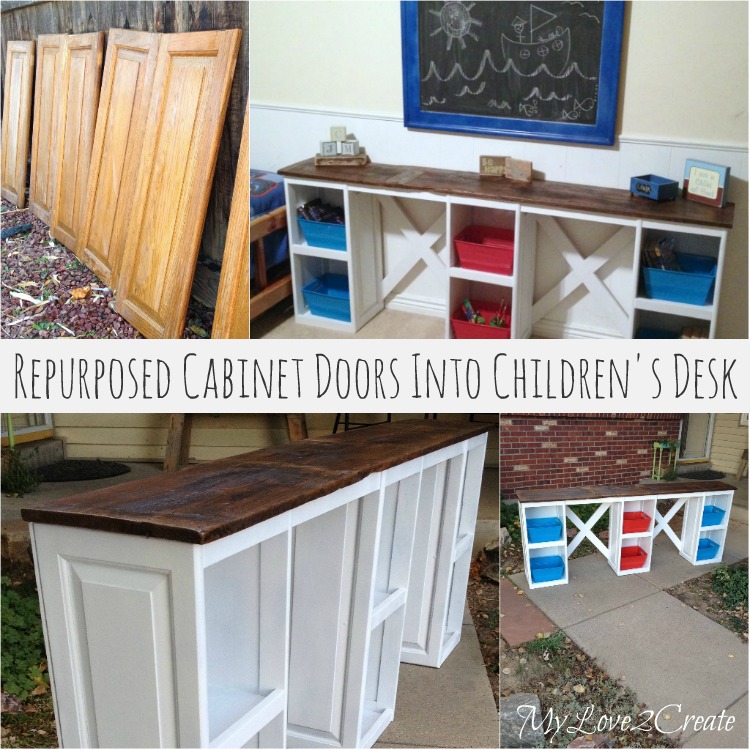
Cabinet Doors into Children’s Desk
Happy President’s day! It was so warm last week, 60 degree weather warm. My kids have been out riding bikes, jumping on the trampoline, playing basketball, rollerblading…it has been wonderful! But alas, it couldn’t last forever and the snow is back, brrr!
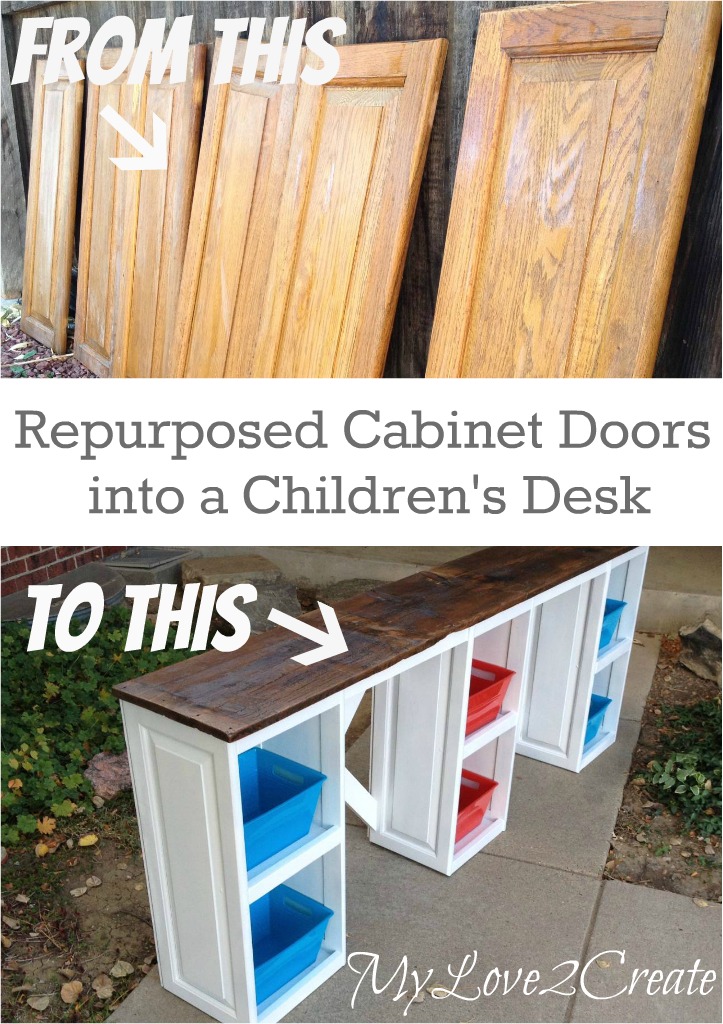
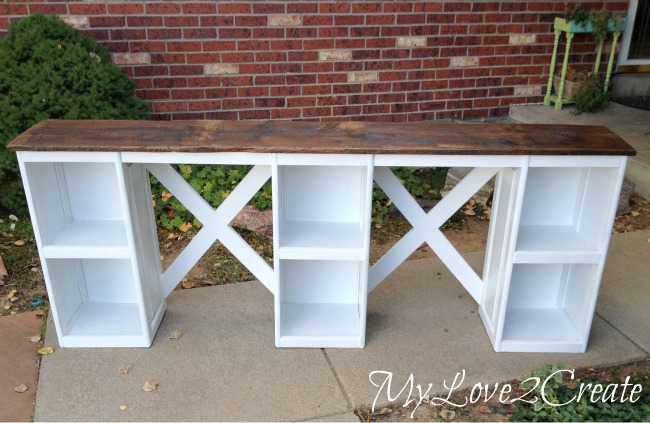
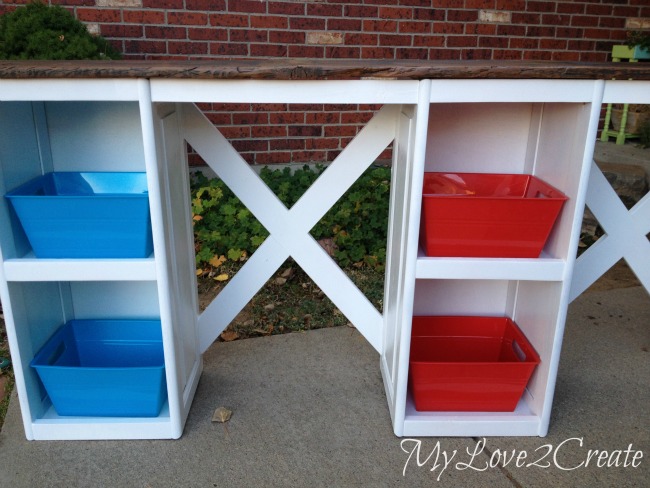
When I pulled up my Cabinet Doors into Children’s desk to share with you I was enjoying the “green” in the back ground, ahh spring….
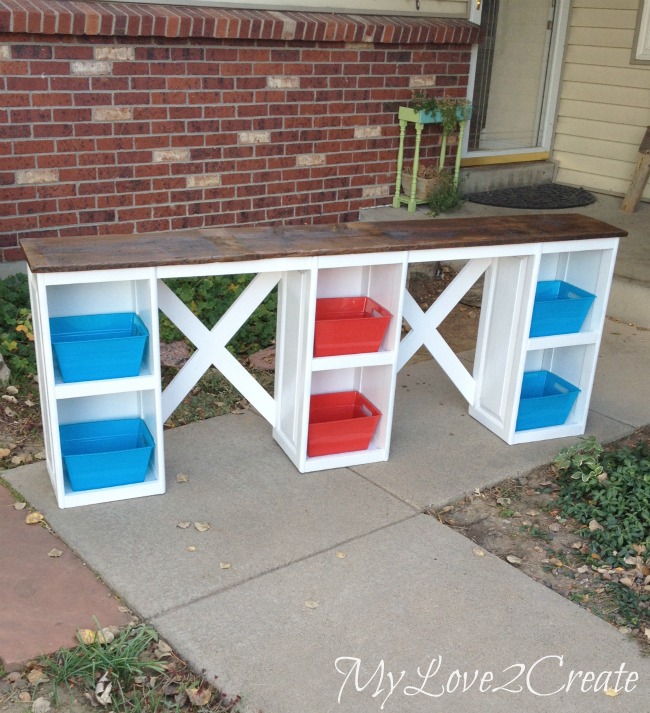
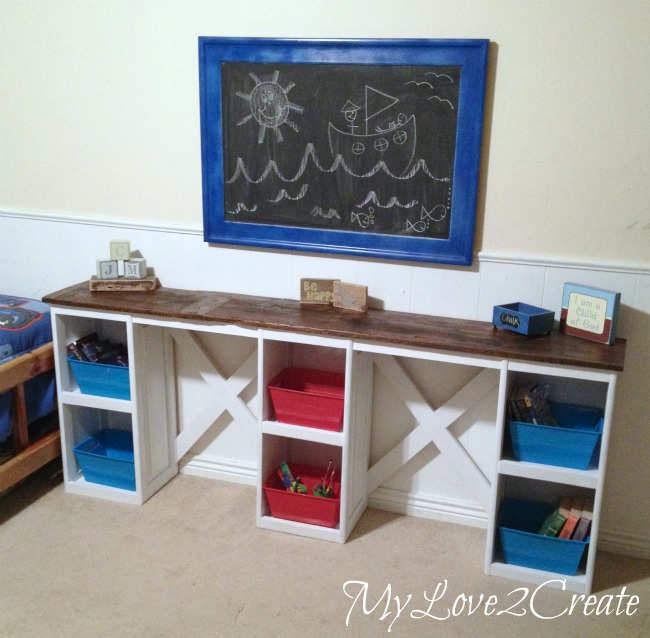
This project was so fun for me, and my kids are still enjoying it. I shared it on My Repurposed Life several months ago, so I am excited to finally share it with you today!
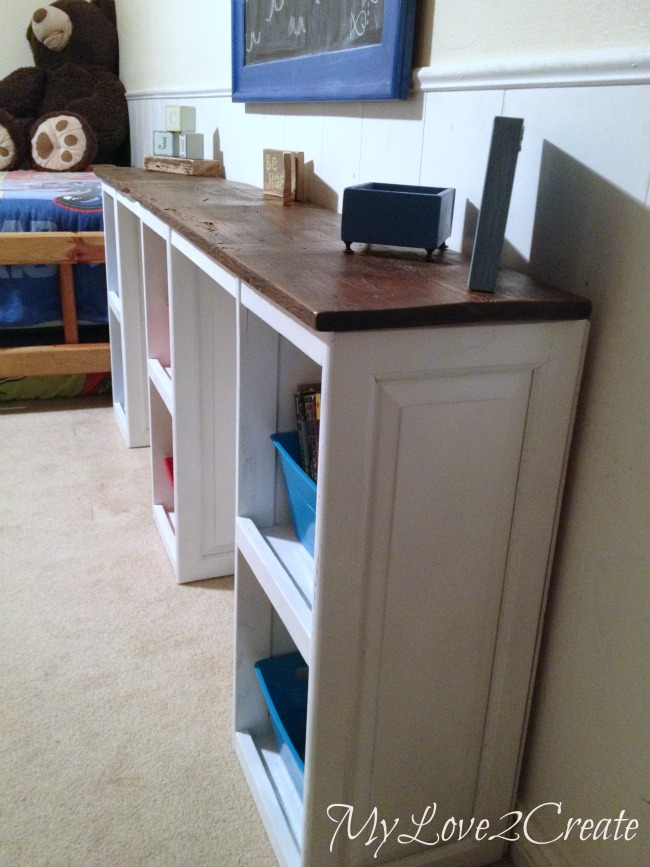
When I finished this desk and put in my boys room it is was a toss up for who was more giddy, me or my boys. Kids totally get a thrill out of furniture…when it is theirs! 🙂
I have had these cabinet doors for a while. They caught my eye on a rainy day, well pouring actually, and I did a… slam on the breaks, make a quick U turn, open the trunk and save them from the trash move. They were pretty grimey, but they came home non the less, and I gave them a good cleaning with TSP.
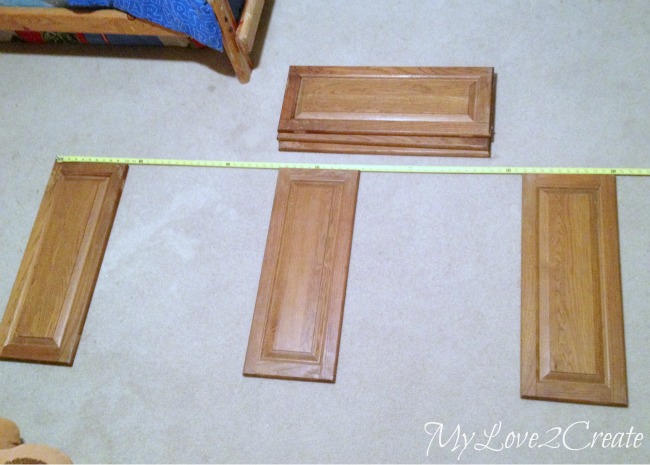
I had thought of tons of ways to repurpose them over the months, but this desk idea won out in the end. I stared by measuring the wall I was going to use and started trying different options on the floor with the cabinet doors.
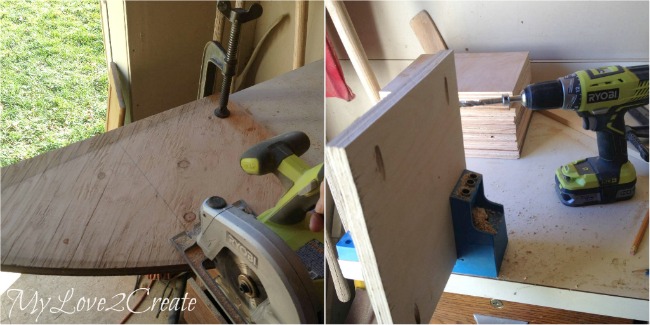
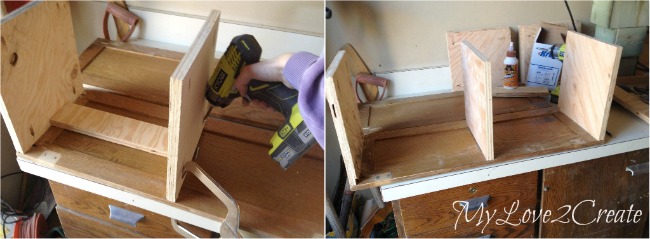
Once the size was determined I set to work cutting shelf boards. I used the same plywood scraps that I used in my Drawers and Drawer Slides, Master Closet Makeover post. On the left I am cutting them with my Ryobi Circular Saw and on the right, drilling pocket holes on two sides of each board. I cut 9 shelf boards.
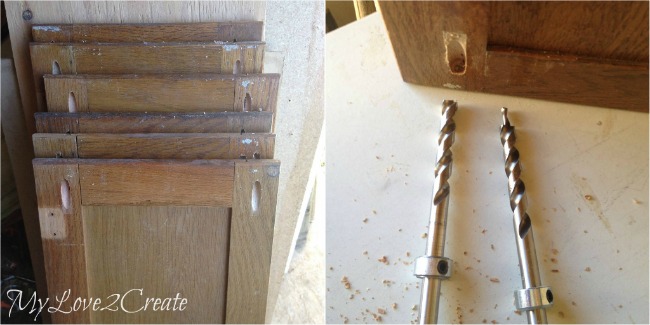
For attaching the desk top later on I drilled pocket holes in the top of each cabinet door. While drilling one of my pocket holes my bit broke inside the cabinet! What? I guess it is two years old and I use it all the time…luckily I had a spare, because had a feeling it was on it’s way out…phew!
Next I was ready to attach the shelves to the cabinet door. I attached the top and bottom shelves flush with the ends. For the middle shelf I measured where I wanted it and used a spacer board to keep all three sections the same without having to re-measure. I used my Kreg Right Angle Clamp to hold my boards in place while I drove in the first screw, this is the best clamp EVER. I also made sure to use my Gorilla Wood Glue for a strong hold.
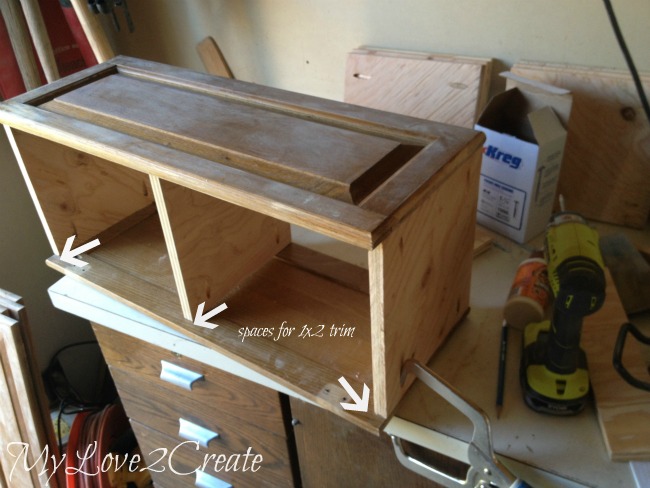
When I measured for my shelf size I left room for my 1×2 trim that I was planning to add. You can see here I am attaching the other cabinet door.
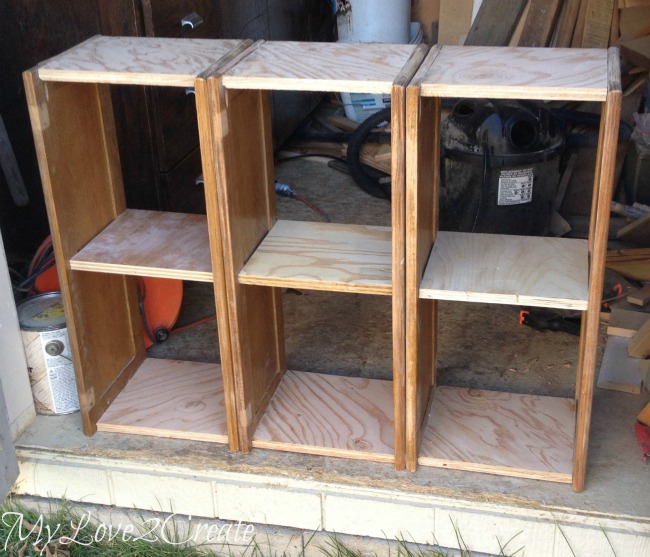
Here are all three sections built.
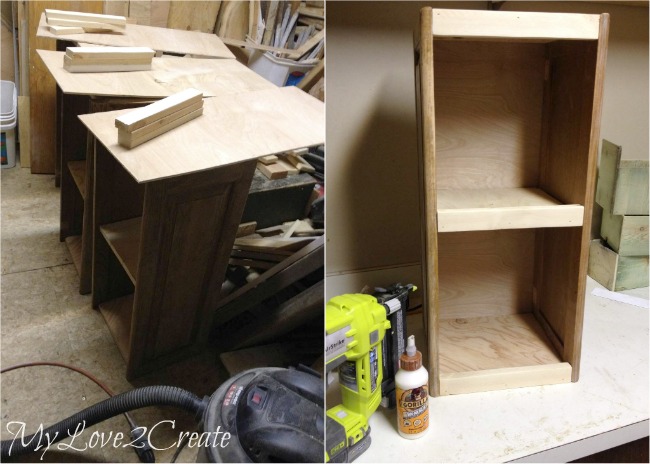
Next was adding the back and the 1×2 trim. My Father-in-law totally hooked me up with some awesome wood when his neighbor was moving and throwing it away. That is where I got the nice 1/4 plywood backing, I had the 1×2 in my stash. I measured and cut them to size and glued and nailed them on.
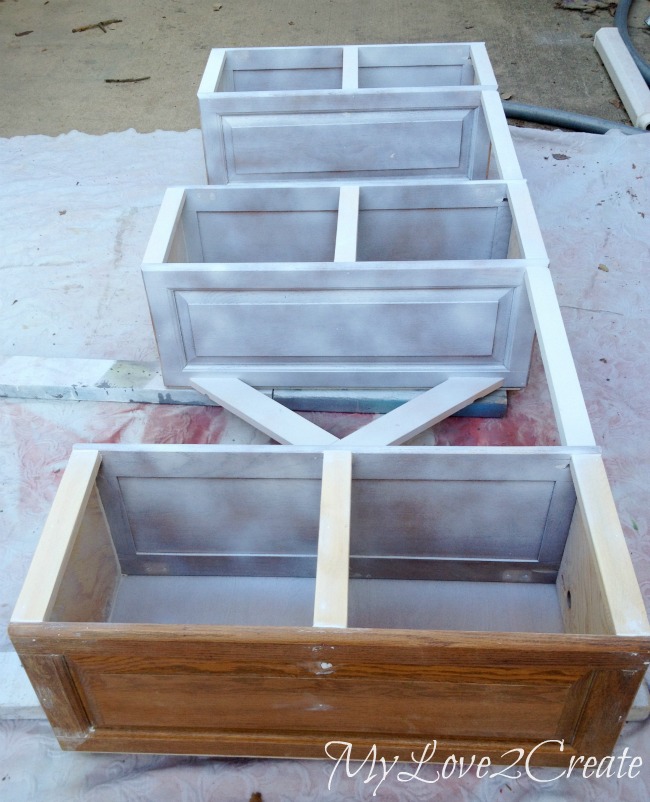
With the sections built I had to come up with a way to connect them. I ended up trying and X, mainly because I have never done it before, and I wanted to try, and because I think it is super cute. 🙂
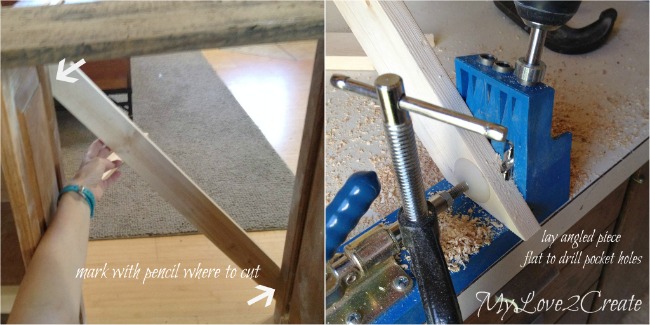
So, just know I was winging it, and this may not be the best way to do it. Mmmkay? My sister-in-law gave me some old bed slats and they were perfect for this job. I placed the 1×3 where I wanted it, and marked with a pencil where to cut. Then I drilled pocket holes in each angled end.
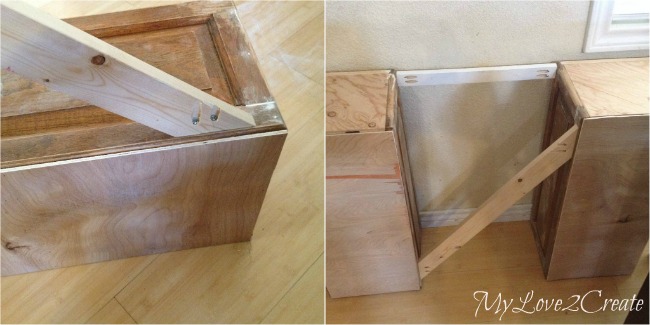
I attached the first side with the cabinet laying down. Then to help me out, I used the wall to keep my shelves from moving while I attached the second side. I also cut and attached another 1×2 trim piece in the front (top right photo).
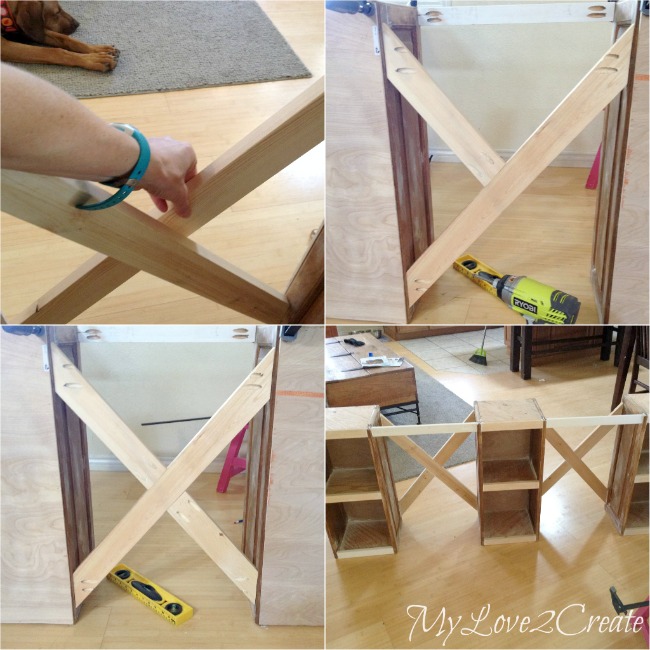
To complete the X pattern I used the same method, except I cut two pieces, and attached them one at a time. And that was it! Not too bad, they are not perfect, but I am good with that, especially for my first time.
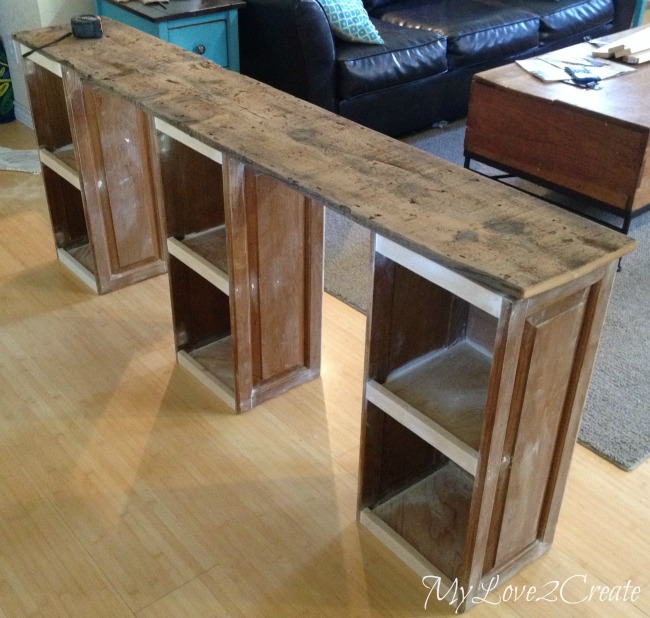
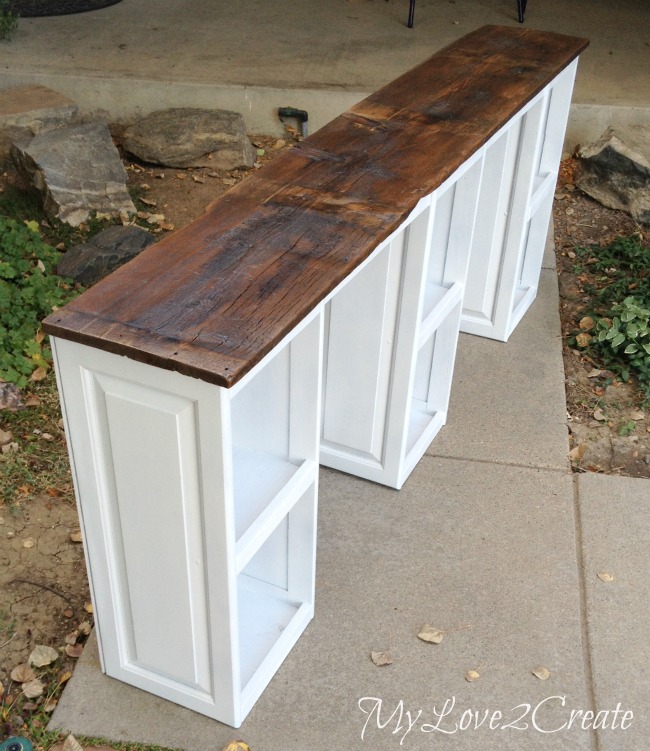
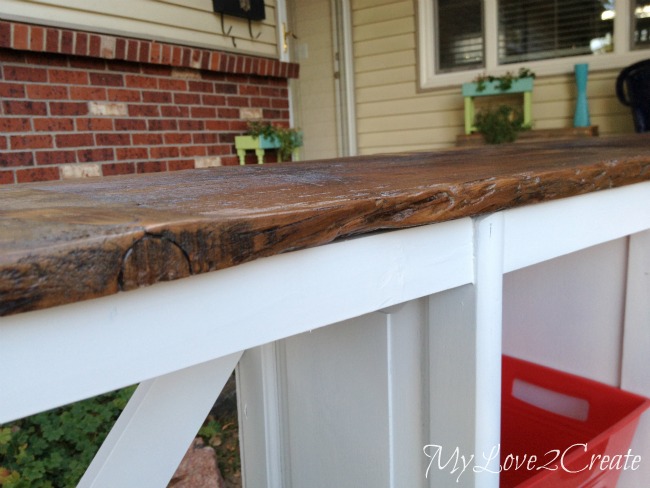
You may recall my Cubby Shelf Makeover that I shared last month. I really loved the reclaimed wood top I put on it, so I went to see if I had a piece of that 70 year old barn wood to fit the desk top. I had one left in the right size, sa-weet!
I will be linking to these parties!


Wow this turned out fabulous! Thanks for the post! Can't wait to see the chairs you made. Pinned it.
Huh? I love how your mind works! I just see doors and you see a desk. lol I really like the reclaimed desk top with the white. The contrast is so pretty! The X supports add an additional rustic vibe. 🙂
Chairs are coming?! What did you make those out of? 😉
I love this project! We're all about re-purposing things in our home, and this one definitely takes the cake. Great job!
Looks great! You did a wonderful job on it. I would like this in my craft room, that is if I had the room (-; can't wait to see the chairs!
This is so amazingly wonderful!! I also enjoy re-making things from stuff we have around the house. But you did such a good job using those doors and making them into something unexpected and useful! Thank you for sharing!
Awesome project. Great repurposing idea. And it's beautiful to boot.
How perfect for your kids room! I love the X back and the price! Thank you for sharing it at What We Accomplished Wednesdays. Blessings, Deborah
Beautiful job buddy! This is just wonderful! And you made chairs too!?!?!? Of course you did because you are crazy talented!!! This is awesome Mindi!!! And for some reason I did not get your post in my sidebar feed??? You rocked it lady! Nicole xoxo
Not only did you do a wonderful job making the desk out of repurposed cabinets but you tutorial on the project is wonderful. Very creative! Thank you for sharing with the Clever Chicks Blog Hop! I hope you’ll join us again next week!
Cheers,
Kathy Shea Mormino
The Chicken Chick
http://www.The-Chicken-Chick.com
Your creativity amazes me! I want to be like you (and have your wood stash) when I grow up!
I absolutely love this! We have three kids and have been debating on what to build for their desks, I think I am going on a mission to find some cabinet doors!! Well done, it is amazing. We are in the process of renovating and adding onto our 1950's home, and I am a big fan of using old stuff. We created our dream kitchen using $100 cabinets from the side of the road.
-Jenn ( http://www.onethriftychick.blogspot.com )
Wow! Great job Mindi. The old barn wood top is the perfect finishing touch. Thanks for sharing at Vintage Inspiration Party.
This looks incredible! I love it. Pinned and tweeted. Thank you for taking the time to party with us. We hope to see you tonight at 7 pm. It wouldn't be a party without you! Lou Lou Girls
I love this and it would be perfect for my boys! Thanks so much for sharing with us at Talented Tuesdays. I hope you join us again tomorrow!
Such a clever idea. Love how it turned out! Thanks for sharing it with SYC.
hugs,
Jann
Congrats! You will be featured on tomorrow's Friday’s Five Features over on DIY Vintage Chic. Stop by and grab yourself a button!
What an awesome tutorial! Thanks for linking up on my Friday Flash Blog party. Your post was featured this week — be sure to grab the swag button saying you were featured 🙂
Jennifer @ The Jenny Evolution
http://www.thejennyevolution.com/grab-button/
You probably noticed already, but this post is going to be featured over at Diana Rambles and has been pinned in the Featured at Diana Rambles board at Pinterest, Tweeted, and Recommended on G+. Please grab a featured button off my button page or via the post guidelines graphic. Thanks for sharing this awesome idea!
Ah! This is too cool also! Building a giant crafting desk is on my to-do list, and this might be the perfect idea for me! Any ideas on how to do the desk top for cheap? It's going to be BIG… like 12 feet or something and it needs to be pretty smooth and easy to clean.
that looks great…I was looking for similar project…now get those projects done… 🙂
Good job. Will be made one by myself as your instruction 🙂
Very useful project easy and cheap to make. But I have a question….are you a teacher in your life? You have a very good didactic way to explain projects Mindi
It's very good idea Mindi. You are so dextrous to do that lovely Cabinet Doors. It looks simple and cute. It will be my next project. Thanks for sharing your idea with us.
This really is a great idea. it's very beautiful and colorful. my daughter will love them. I think I will do it soon. thank you very much.
It's very good idea, I will make it for my house. Thank you for sharing!
Very nice cabinet design. I will try to make one for my son. Thank for this great post
really awesome post
It’s very nice table! I will make it for my house. Thanks for share!
Wow, wonderful blog layout! How long have you been blogging for? you make blogging look easy. The overall look of your web site is fantastic, let alone the content!
Thank you for sharing a great information and useful. it really necessary and timely for me at this time.
I wanted to share this information with my friends on the social network facebook.!
Great. This article is excellent. I have read many articles with this topic, but I have not liked. I think I have the same opinion with you.
So great Mindi! I'm not as handy as you but I will try my best. I love my son, I think he will be very happy if I can do a desk for him.
that’s amazing! Helpful information to detect, correct, and maintain the in my home. Thanks!
Great idea !
I have many free doors at home. I will try to make this children desk.
Thank for share this tutorial !
that’s amazing!
What a nice makeover! Also thanks for a detailed instructions. The images are a great help. I will do that to our old cabinet doors.
Great work Mindi! It is really a great idea to make a Children's Desk from Cabinet Doors.
I think the kids will love and so I am.
A cupboard so, how price
I like the widgets are painted white
SUPER!!!!!!!
Not sure how I missed this. Oh wait. I was having a baby. Ha! Umm. I LOVE THIS!!! I love the white contrasting with the dark stain on top. 👌🏼
Great idea to refinish things. Thanks for great content.
ChangeHotmailCalendarEvent
techmoab
Use this article to increase your knowledge. cara menggugurkan kandungan
Awesome I love it. Thanks for sharing