Getting organized seems to be my theme for the month, if you saw my 3 Drawer Storage Shelf, then you know that these types of projects have been on my mind.
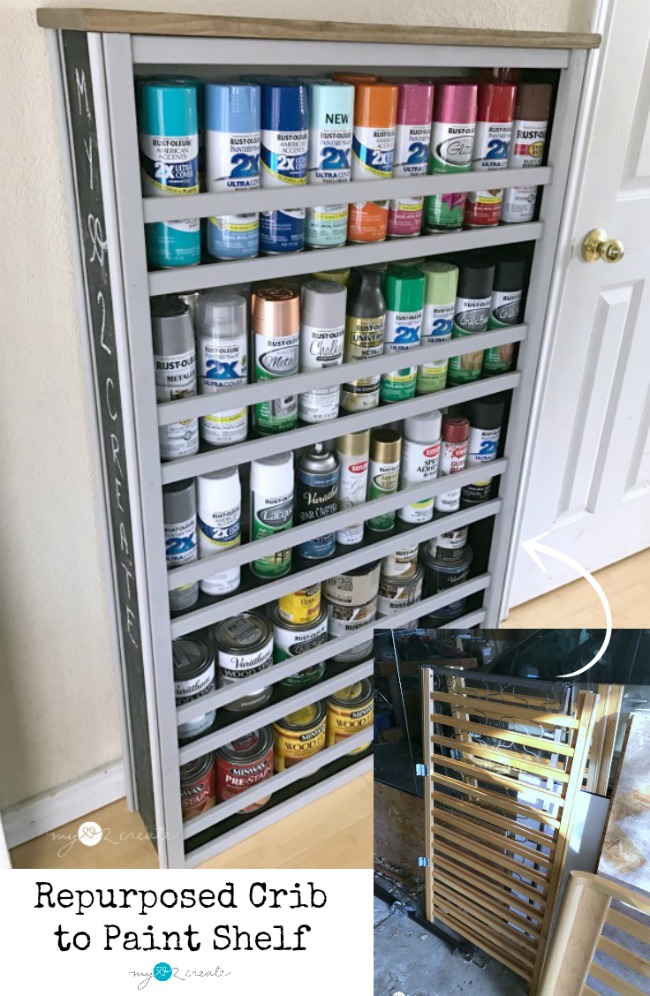
My shed and craft room are getting some lovin’ too, so I can work and actually find stuff in them! (which is no small feat, I might add) Today I am sharing a Repurposed Crib Paint Shelf!
I am seriously loving it! Especially because it was free, I had all the supplies on hand or had them given to me, which always makes a project even better!
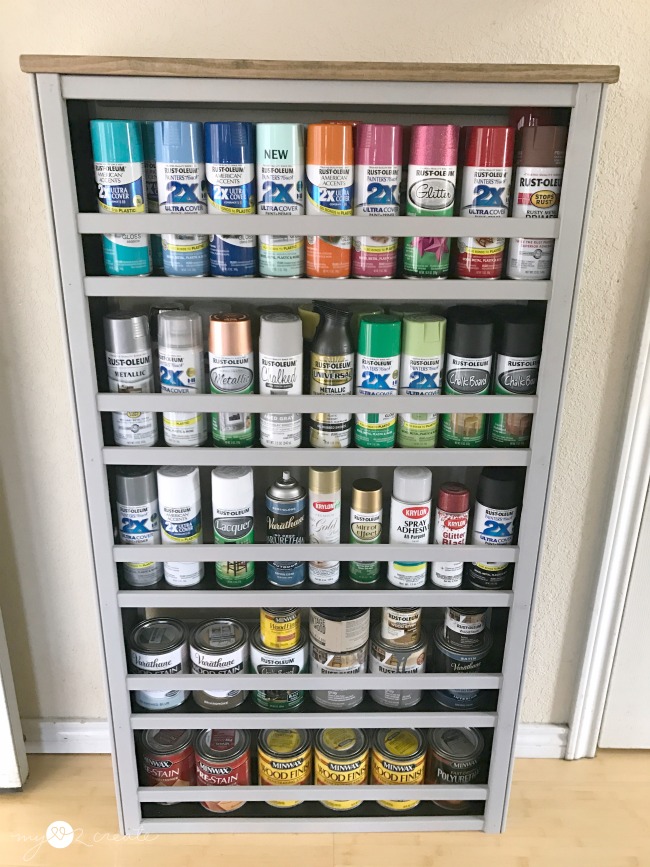
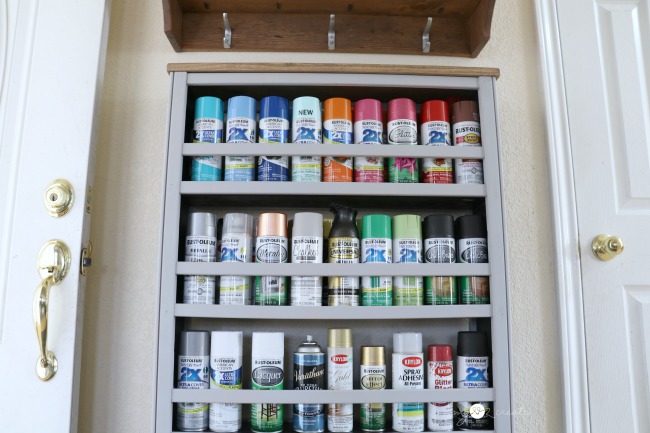
Look at how much paint/stain it can store!
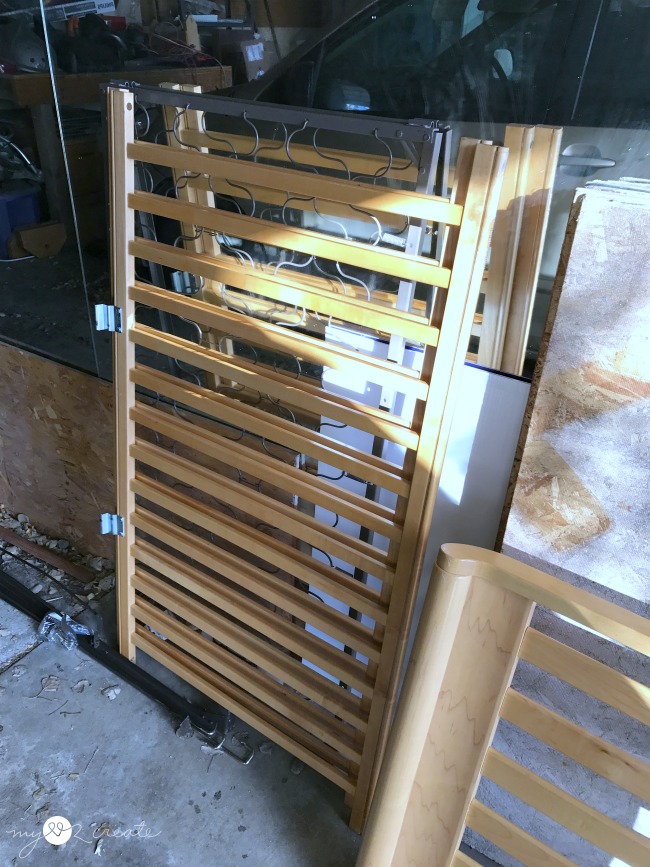
It all started when my friend called and asked if I wanted this drop down crib. I almost turned her down, and then decided that could repurpose it, but I wasn’t expecting to do it so soon.
This post contains affiliate links that help me at no charge to you!
Read more.
The next day I got some wood for free off of the Craig’s List free section and when I saw these fence boards I had a spark of inspiration. I could use them and the crib sides and make a paint shelf.
I set to work with my
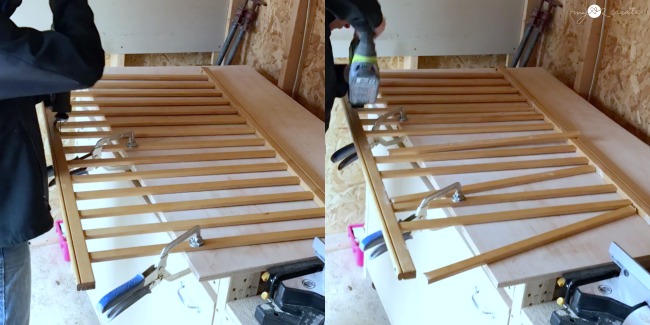
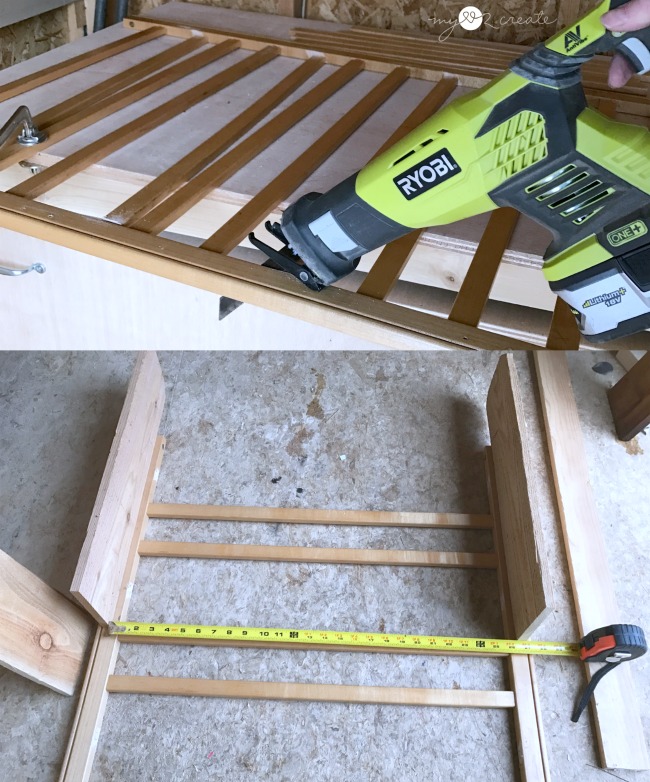
Ryobi Reciprocating Saw and started cutting off every third crib slat. I cut one side then flipped it over, re-clamped it and cut the other side.
When cutting off the slats I tried to get as close as possible to the end. Then, using two shorter scrap pieces of the fence wood I placed them on the crib sides and measured for how long to cut my shelf boards. Then I cut 5 of them.
This fence wood is similar to a 1×6 board but instead of it being 3/4” thick it is 1/2” thick by 5 1/2” wide. If you wanted to do this project I would purchase 1×6 boards, they would be perfect, unless you have some fence boards laying around!
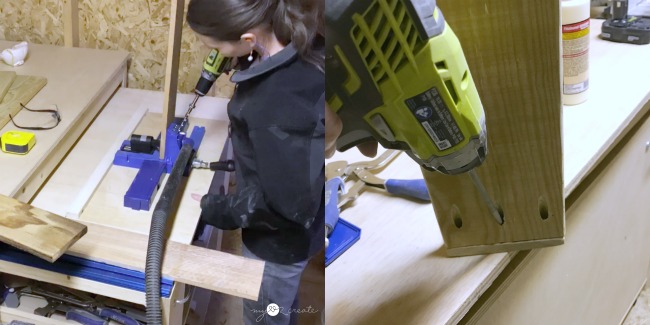
I drilled pocket holes into the ends of all 5 shelf boards. Then I attached the bottom shelf board to the two sides first. I did have to look for a few extra 1×6 boards in my scrap pile and some of them were almost an 1” thick and one was 3/4” thick. I had to remember to adjust my
Kreg K5 Pocket-Hole Jig
for the different boards thickness of the boards, that is very important in using pocket holes. I forgot in one board end and had to re-drill the correct size holes next to the messed up ones!
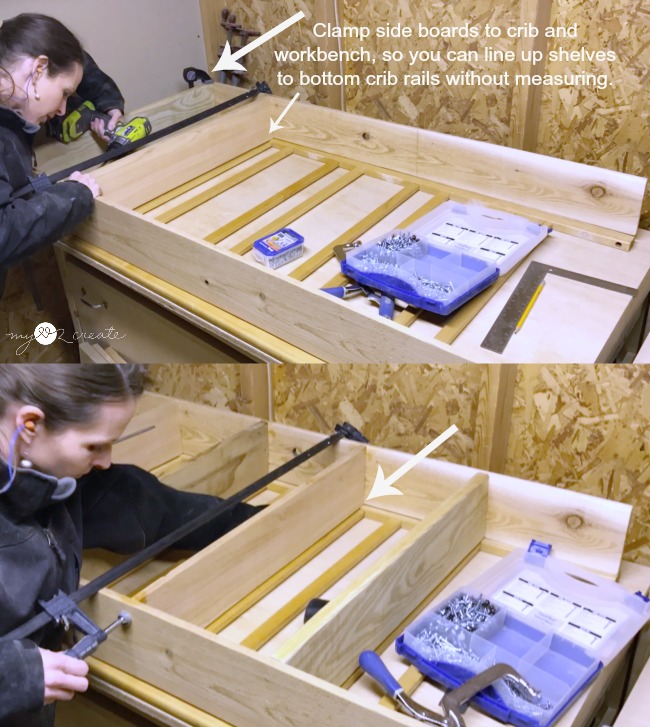
I started by attaching the bottom shelf to the sides, making sure to add wood glue before drilling in my pocket hole screws.
You will see in the picture below that I clamped this to the crib sides…
Call me lazy, but I would rather not measure if it isn’t necessary! 🙂 By clamping these together (I did clamp both ends, even though you can’t see one side in the picture) I could easily attach my other shelf boards so they were level with the bottom of the crib slats I was lining them up to. It made the job quick, easy, and accurate! I attached them with my pocket hole screws and wood glue.
Here is a shot of the crib slats, and the shelf. Once I had the shelf built, I put the crib slats up against it to do a dry fit, and it was perfect!!
After seeing the dry fit I realized that I wanted to add slats back onto the top and the bottom of each crib side to make it look finished on the ends. I used wood glue on the ends of 4 of the cut off slats and clamped them in place. Then I used my
Ryobi Nail Gun 
to nail them in at an angle. You could also attach them with pocket hole screws on the back, but it was late at night and I didn’t want to brave the cold.
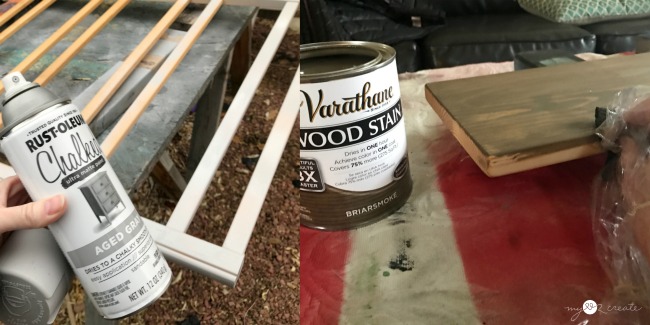
I filled any holes with spackle or wood filler and let it dry overnight. The next day, after sanding the filled areas, I tried the
Rust-Oleum Chalked Spray Paint Aged Gray for the crib sides. It is so cool that you can get the chalk paint texture from a spray paint can! For the top of the shelf I cut a scrap 1×8 board to fit and used
Rust-Oleum Briarsmoke to stain it.
After everything dried I brought it in (from the freezing cold) to put it together. I attached the crib sides to the shelf with 2” nails and glue.
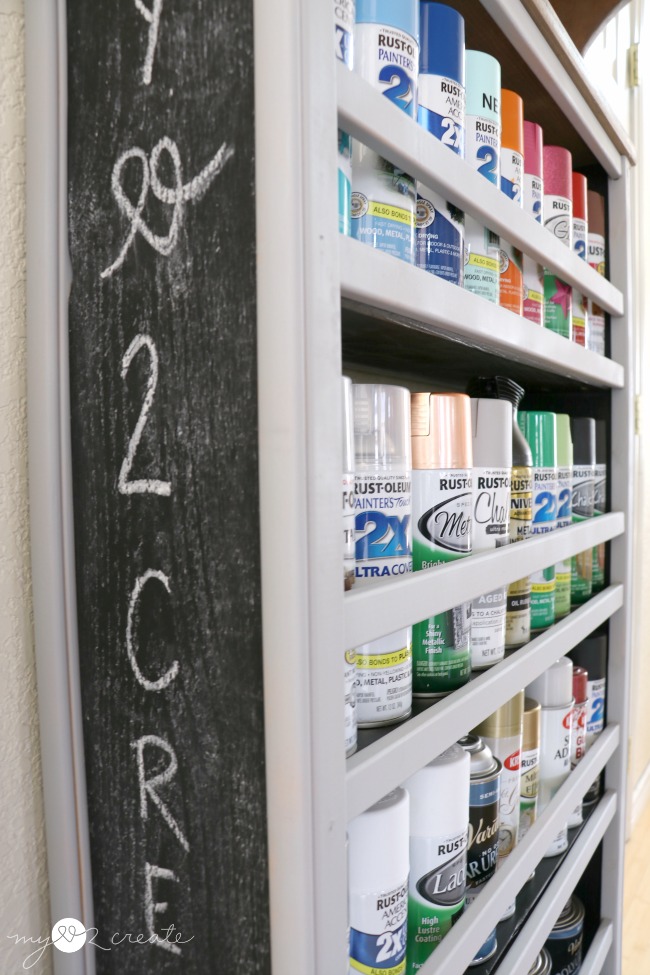
I also nailed on the top and primed the chalkboard sides, and it was ready to store some paint and stain!
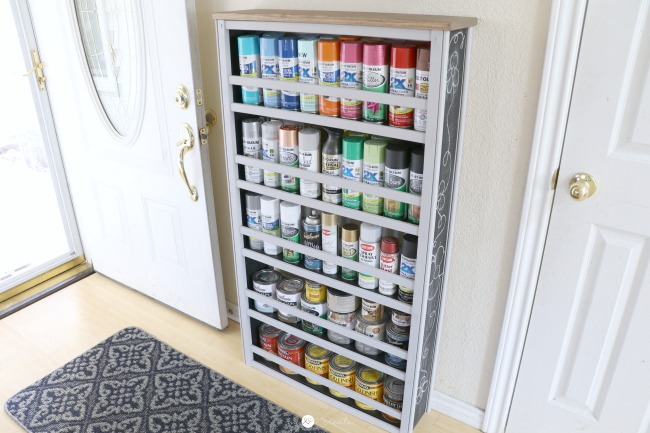
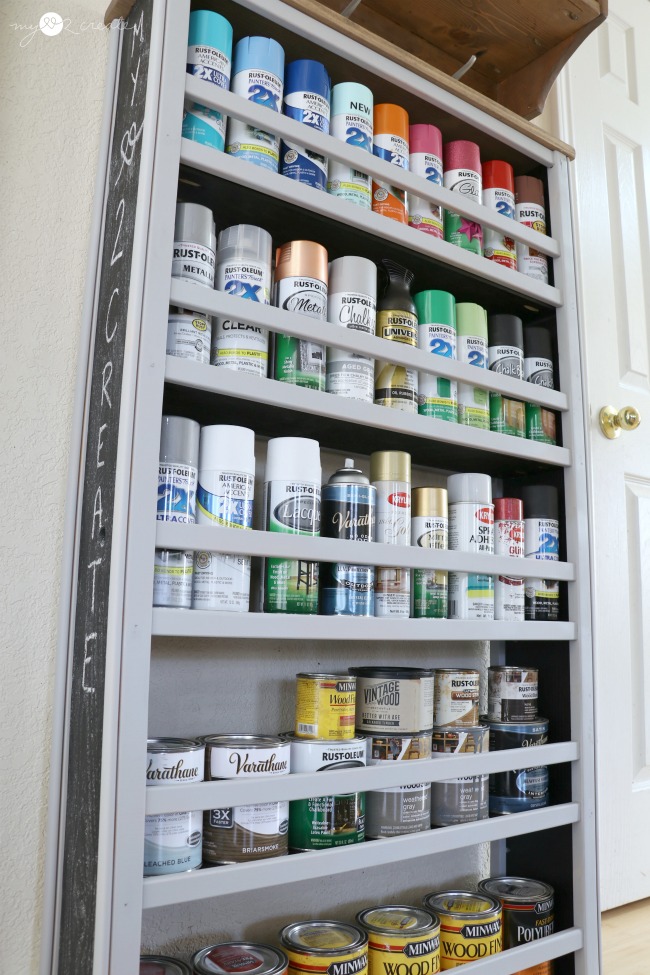
Now isn’t that a happy site?! I love being organized!! Each row fits 18 spray paint cans or six 1 quart stain or paint cans.
Plus you can add some little cans on top of the quarts too, just a little bonus!
I had planned on posting this project a few days ago on Wednesday, but I have been so sick, and just couldn’t get to it. So when I am feeling better it will get moved down to my craft room, but for now we are sporting a paint shelf in our entryway, ahhh the life of a blogger! I am loving the stained top, it just makes it look pretty and finished!
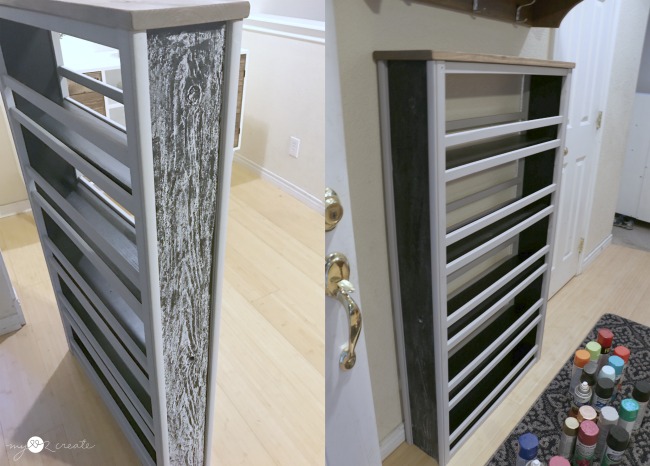
I did pull it out from the wall so you could see the back. How nice of me, it looks just like the front! 😉
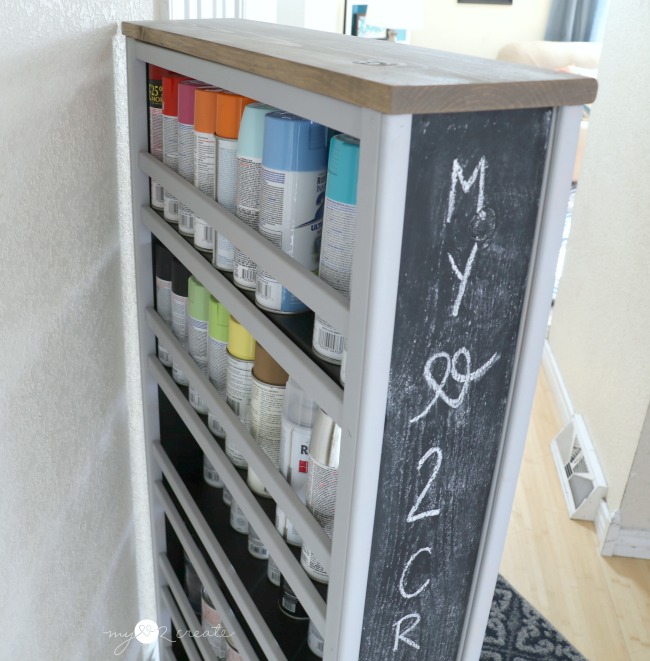
Do you like my mad chalkboard skills?! Ha! I enjoy having the option to use chalkboards, even though I am not good at writing on them. This wood was really rough, like most fence wood, but the chalkboard paint still works great.
This project went really fast, and it is super useful, plus I love the edges of the crib just gives it a little detail with no extra work!
Plus if you have different supplies you need to store you could use anything on this shelf, and if you wanted to make it wider, just use a bigger board, like a 1×8 or a 1×10 for the sides and shelves. You can find these drop down cribs on the free section of Craig’s list all the time because they are not up to code anymore.
So have you ever repurposed a crib, they can be very useful! I had big plans for the other parts of this crib, I can’t wait to get started on that idea!
I entered this project in a creative challenge if you want to come and “like” my project that would be awesome! Thanks!
Thanks for stopping by!
Mindi
I will be linking to these parties, Savvy Southern Style.










Fabulous, Mindi. I once made a children's bookcase with dowels across and that took me so dang long to make, this is a brilliant idea. I have an old crib and might just make a shelf like you did to hold signs or something in my shop. You have such good ideas and you always finish everything so nicely! Hope you are feeling better.
I love this! I might have to try it when I'm finished using the crib
Wow! Mindi! This is an awesome repurposed crib idea! You're so clever.
This would be great for a roll out shelf in a kitchen or laundry area…. You know in between the fridge and counter. (or did you mention that? it's late, I'm tired, and skimmed a little bit)
I hope you're feeling better!!! Sharing this on fb late tonight. ohhh and of course I'm pinning it!
gail
Thanks so much Gail! I did think of this as a great roll out shelf, in fact I forgot to include in the post that I tried putting casters on it, but it was too narrow for 4 free rolling casters and it made it very unstable, so I removed them. If I had tried stationary casters I might have had better luck. Thanks for sharing!!
Wow! That's a really neat repurpose.
Mindi, you always come up with the coolest ideas. This is awesome and oh does my workshop need one of these! Pinned
Nothing short of brilliant! Love it Mindi.
Thanks for sharing at the #InspirationSpotlight Party @DearCreatives Pinned & shared.
Brilliant idea! Thanks for sharing at To Grandma's House We Go link party – I'll be featuring your work at House of Hollingsworth Blog this Wednesday! xx
You are so clever to think of using an old crib for this purpose. Now your paint is neatly stored and you can see exactly what you have.
Hey, Mindi! Just wanted to let you know that we loved your Repurposed Crib so much when you shared it at the #HomeMattersParty last week, we’ve HIGHLIGHTED it THIS WEEK! Hope you can check it out when you get a sec. Happy Friday! http://ourcraftymom.com/home-matters-linky-party-123/
Michelle~Our Crafty Mom
This is so insanely creative! What a great storage piece!! XO
What a Neat and organized project! It turned out very professional looking! I'll have to be on the lookout for old cribs now! Thanks for sharing! b #HomeMattersParty
Jeannee
Such a great project! I love this, it would also be great for books in a kids room. #HomeMattersPArty
This is genius!!! I have so many paints and forget what I have and buy extra of the same stinkin color! Great idea! #HomeMattersParty
I see some of my favorite paint colors in there. Good idea!
How do you get the cans out? Do the bars swing open?