How to Trim out a Window
Howdy folks!
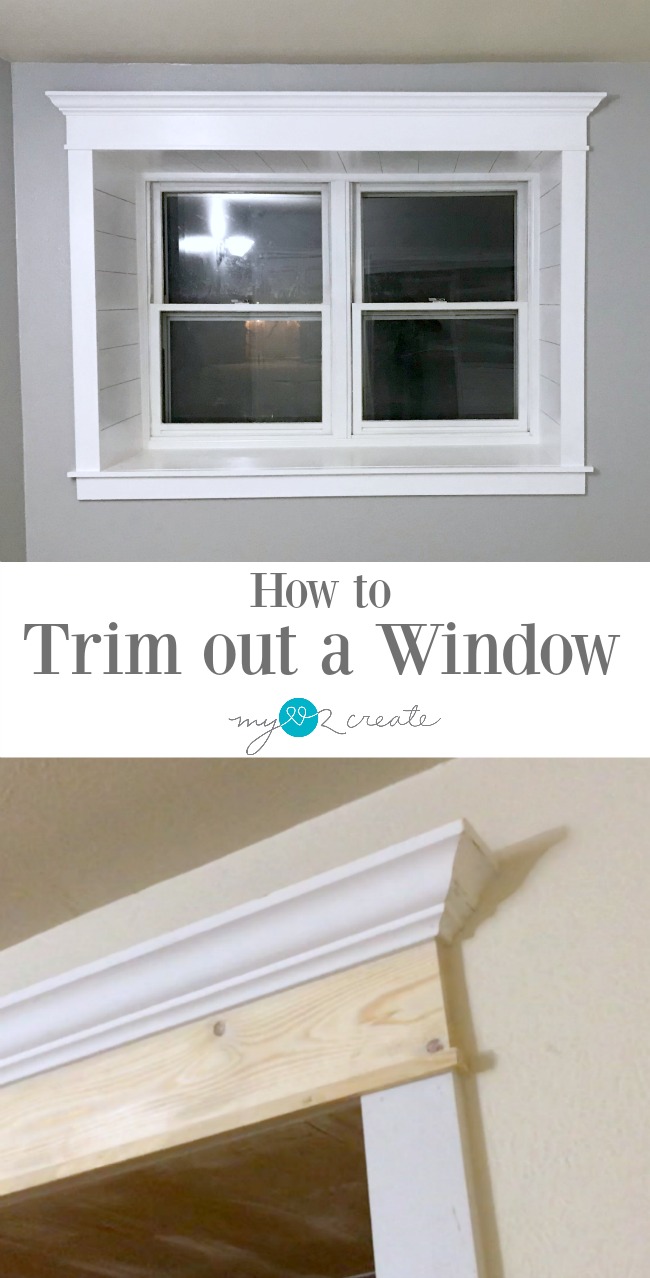
Week 4 of the one room challenge and I am going to show you How to Trim out a Window… because just look at this beauty!
I kind of love it, ok I totally love it, and wow- it looks so much better than what it was…
Right?! Glad we can agree on this.
Let’s get started so you can dress up all the windows in your home!
How to Trim out a Window
Supplies:
- Various wood trim, 1×4’s, 1×2’s, 1×6, crown moulding (optional) and any other sizes you desire.
- Miter saw
- Nail gun
- level
- stud finder
- finishing supplies
The cool thing about trimming a window is that you can be creative. It can be super simple or very decorative. You choose!
This is what I ended up trimming my window with…
Notice the planks on the sides and the top? Since this is such a deep window I opted to do this to match the plank wall I just did in the room. Most window’s won’t have room or need planks so that makes this window unique.
Oh yeah baby, that wall and window…a match made in heaven.
Here is a little before and in process shot of the plank wall. I am not showing you how I installed it because I already have a tutorial on “How to install a plank wall…and how to avoid the biggest mistake EVER!!” This is a must read!
Trust me I didn’t make the same “mistake” on this plank wall. It was happy sailing the whole time I am proud to report, and I was done in less than a day. I used 1/4” underlayment ripped into 6 inch strips and used the left over strips in my window just like I did in my Master Bedroom Reveal.
As my daughter and I thought about the design of this room we really wanted her room and mine to be complimentary since they are right next to each other.
To plank the inside of the window I cut the 1/4 x 6 inch planks to size (leave 1/8” on each side) then started on one side making sure the first board was level. Then I added each plank with pennies for spacers all the way around.
I nailed into the studs with 2 inch nails.
Now back to the window trim.
Step 1: Remove old trim and add your apron.
I used a 1×4 pre primed board for my apron. My window already had a very large piece of plywood covering the bottom of the window (part of the stool). I placed my apron right under it. It was 3 1/2” longer on each side of the window (this is because my side casings are 1/4’s and the apron needs to go out the same distance.
Step 2: Add your stool trim.
I used a 1×2 board cut 1” longer than the apron on each side and placed it on top of my apron, making it flush with the top of the plywood piece. I made sure it was level and used 2 inch nails to secure it to the apron and the plywood.
Step 3: Add the side casings.
 I used 1×4 boards for the side casings, they rest on the stool and come to the top of the window opening. Nail on with 2” nails.
Step 4: Add header casings.
I used a 1×6 board for my main header it is cut the same size as the apron and matches up with the side casings.
I also added a small piece of decorative trim to separate the header and side casings. You could place a 1×2 like I did with the stool on before you add the 1×6 header and then set the 1×6 on top of the 1×2. I opted to use a 1/4 x 3×4 piece of trim. The ends will wrap around the 1×6 to the wall. So you will need to cut two small pieces. I used miter cuts at 45 degrees.
You can see how it wraps, as well as the crown moulding.
The crown moulding is attached to the top of the 1×6 board. And let me tell you it is confusing to cut, so if you don’t want to do crown moulding, another option is to stack a 1×2 (like the stool) and then add a 1×3 on top of it, making them each a little wider than the 1×6 and each other for dimension.
Since I had done crown moulding in my room window, I opted to try it again here, and I survived! Barely.
Step 5: Caulk and Paint.
This little princess is a busy girl but she finally got to help me a little. We filled all the nail holes with spackle and then I caulked all the edges. She is getting excited about her new room taking shape!
It was a beast to paint, because I had to do the window frame too. I used two coats of Behr Ultra White, same as I used on the closet.
Taping windows is not my idea of fun, especially if a razor blade makes quick work of taking the paint off!
I finished off the walls with a fresh coat of Light French Gray SW0055. It is such a pretty color.
And it really makes the window pop!
And the closet too!
Now that the room is ready, minus the carpet. It is getting replaced on Friday, Yay! I need to get some serious work done on a bed and a desk and a….yeah. Too many things to make in two weeks! Welp!
I might need some extra prayers, there isn’t enough time in the day people!
Thanks for following along and I hope you enjoyed my tutorial on how to trim out a window, it is a great way to spruce up any room!
Now time to head on over to see everyone else in the One Room Challenge!
See you next week!


