DIY Daybed
Hello!
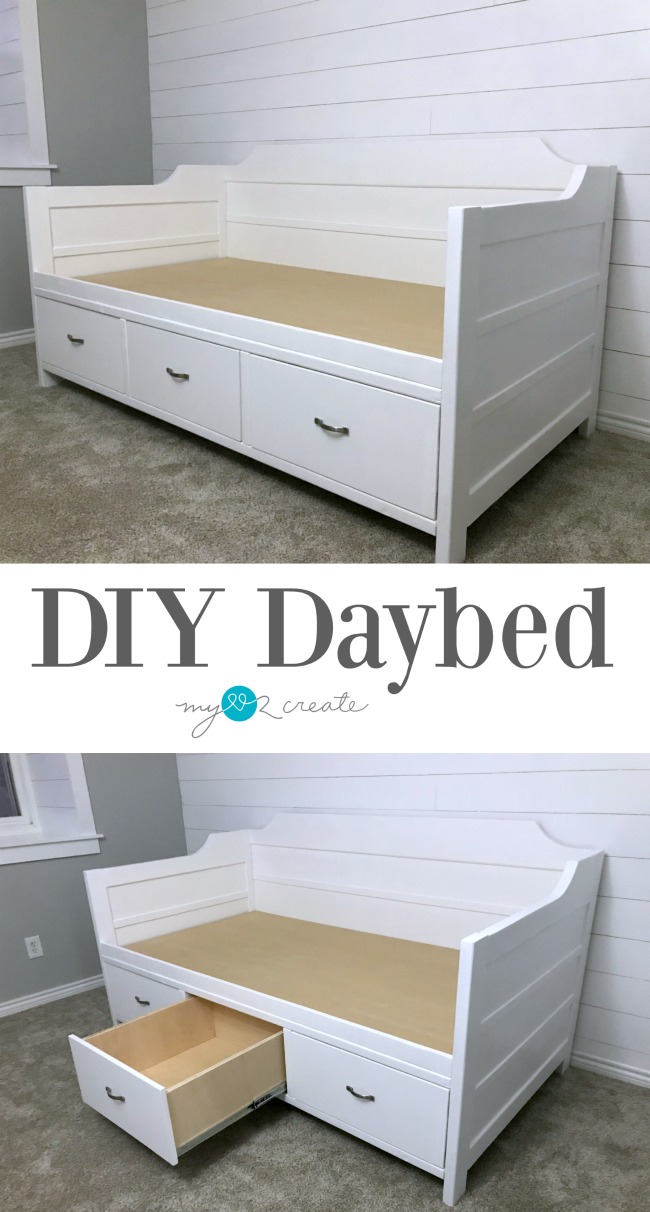
I am excited to show you my daughter’s new DIY Daybed!
Update: I have added plans for this Day Bed with Storage Drawers to my shop, If you have been wanting to build this you are in luck!!
I am still behind on the one room challenge and I personally think the freezing cold weather and snow has a part in it! What happened to the fall?!
With the small size of this room the daybed is supposed to be the focal point and it was imperative that it have storage drawers, because there is no room for a dresser. The new DIY closet will definitely carry a bulk of the storage in the room, but these drawers will be the secret weapon to keeping clutter at bay.
I did a lot of research into daybeds and looked at other DIY daybeds to see what had been done. I decided to design of the frame that housed the drawers using cheap 2×4 lumber. 

This post contains Affiliate Links, read more.
I started by cutting and prepping all my wood. You can see how bundled up I am…below freezing with almost a foot of snow on the ground does NOT make for happy building…good thing I have a small space heater, it takes the edge off.
I used my Kreg rip cut for my larger plywood pieces and my Kreg jig (this link takes you to the newer model, it’s on my wish list!) to drill my pocket holes. Once all the pieces were cut and sanded I headed inside to build. Must have warmth.
I began with building the front and back of the frame with my Roybi driver. The three windows will house the huge storage drawers.
Then I connected the front and back with my middle support boards using 2 1/2 pocket holes and my Kreg right angle clamp to hold the joints while I drilled.
With the frame built it was time to make the drawers. I used 3/4 pocket holes and 1 1/4 in pocket hole screws to attach them, then I screwed on a 3/4 plywood bottom to each drawer.
Just to give you an idea how large these drawers are…my daughter almost fits inside! Granted she is pretty small, but still. Ahh, it makes me happy…storage, she is pretty happy too!
To install the drawers I used temporary supports to hold the 24” drawer slides in place, then placed a piece of scrap wood acting as a drawer front to set how far back they needed to be. After attaching the drawer slides to the frame, I placed the drawer slides onto the drawer and tested it to make sure it fit correctly then I secured it with screws to the drawers.
With the drawers installed I cut the drawer fronts for a perfect fit. I used playing cards as spacers to get the drawer fronts to the exact position needed leaving an 1/8” on all sides. Once I had my drawer fronts in the proper place I used my nail gun to nail it onto the drawer. Then I screwed the drawer front on from the inside of the drawer.
I used yet another Kreg tool the cabinet hardware jig to drill the holes for my drawer pulls and the drawers were done! Phew!
Next, I built my sides and my back panel, using pocket hole screws. I also added some lath strips as trim for character. You can see I have a piece of wood cut as a spacer so I didn’t have to measure where to put the lath strips. On the back piece, to make my lath trim long enough, I cut the connecting ends at 45 degrees so they could match up pretty seamlessly. Just like you do with moulding. 🙂 Works like a charm.
Time for Paint! I filled all the pocket holes with spackle and then sanded them smooth when dry. I painted all the surfaces that would be seen once the bed was built, making sure to sand with a 400 grit sandpaper after the first coat.
Once the paint was dry it was time to build the bed! Yay! I took all the pieces into the room and decided to add some center supports on the bottom, just in case. Then I attached the sides to the middle frame.
I attached the back with pocket hole screws and added a 1×3 (thanks again Brad…) to the front to help keep the mattress in place. I could have used this on my Farmhouse Storage Bed, when my kids run and jump on my bed my mattress slides…a stopper would be helpful!
Last thing was to add the drawers!
Oh and did you notice the new carpet?! Yep, I got new carpet in the room this week. I couldn’t, in all good consciousness, redo a room with that nasty old carpet, it was just morally wrong.
I LOVE THIS BED! It is so fun and trust me it looks a little too white in here at the moment…but it won’t come next week!
So be sure to come back and see the final reveal! And don’t for get to grab the plans to build this bed!
In the meantime check out everyone else in the One Room Challenge! Lots of amazing transformations happening!
Thanks for stopping by and please come back soon!




Do you have plans for this bed?
I didn't see plans. Did you ever post them?
Also here for plan updates. I want to recreate the sides of this…they're gorgeous!
I have the plans up on my website now!! I know it has taken a while! Thanks for your interest!