A trash to treasure story
I took on a spur of the moment project last Thursday and I am so happy with how it turned out! Meet my new little table!

Isn’t it cute?! Well it wasn’t a totally perfect success I made the stupidest mistake and I was so mad at myself, but despite my fail, and my attempt to fix it, I still love it.
Before I tell you about my mess up, let’s start at the very beginning…

About a year ago I saw this baby in someone’s trash and it was, well….pretty trashed! I brought it home and thought I would have a go at fixing it. It couldn’t hurt right? One leg was totally cracked so I glued it back together first and then fit the rest together with glue as well.

This is what it has looked like for the past year, and it has been hard at work doing it’s job…

…holding a printer. So, when I was at the computer last Thursday I looked over and thought, “I should really build a lower shelf for that table so my Cricut has a spot besides on the floor…and since it was a nice day I went out and did it! Doesn’t it look better?

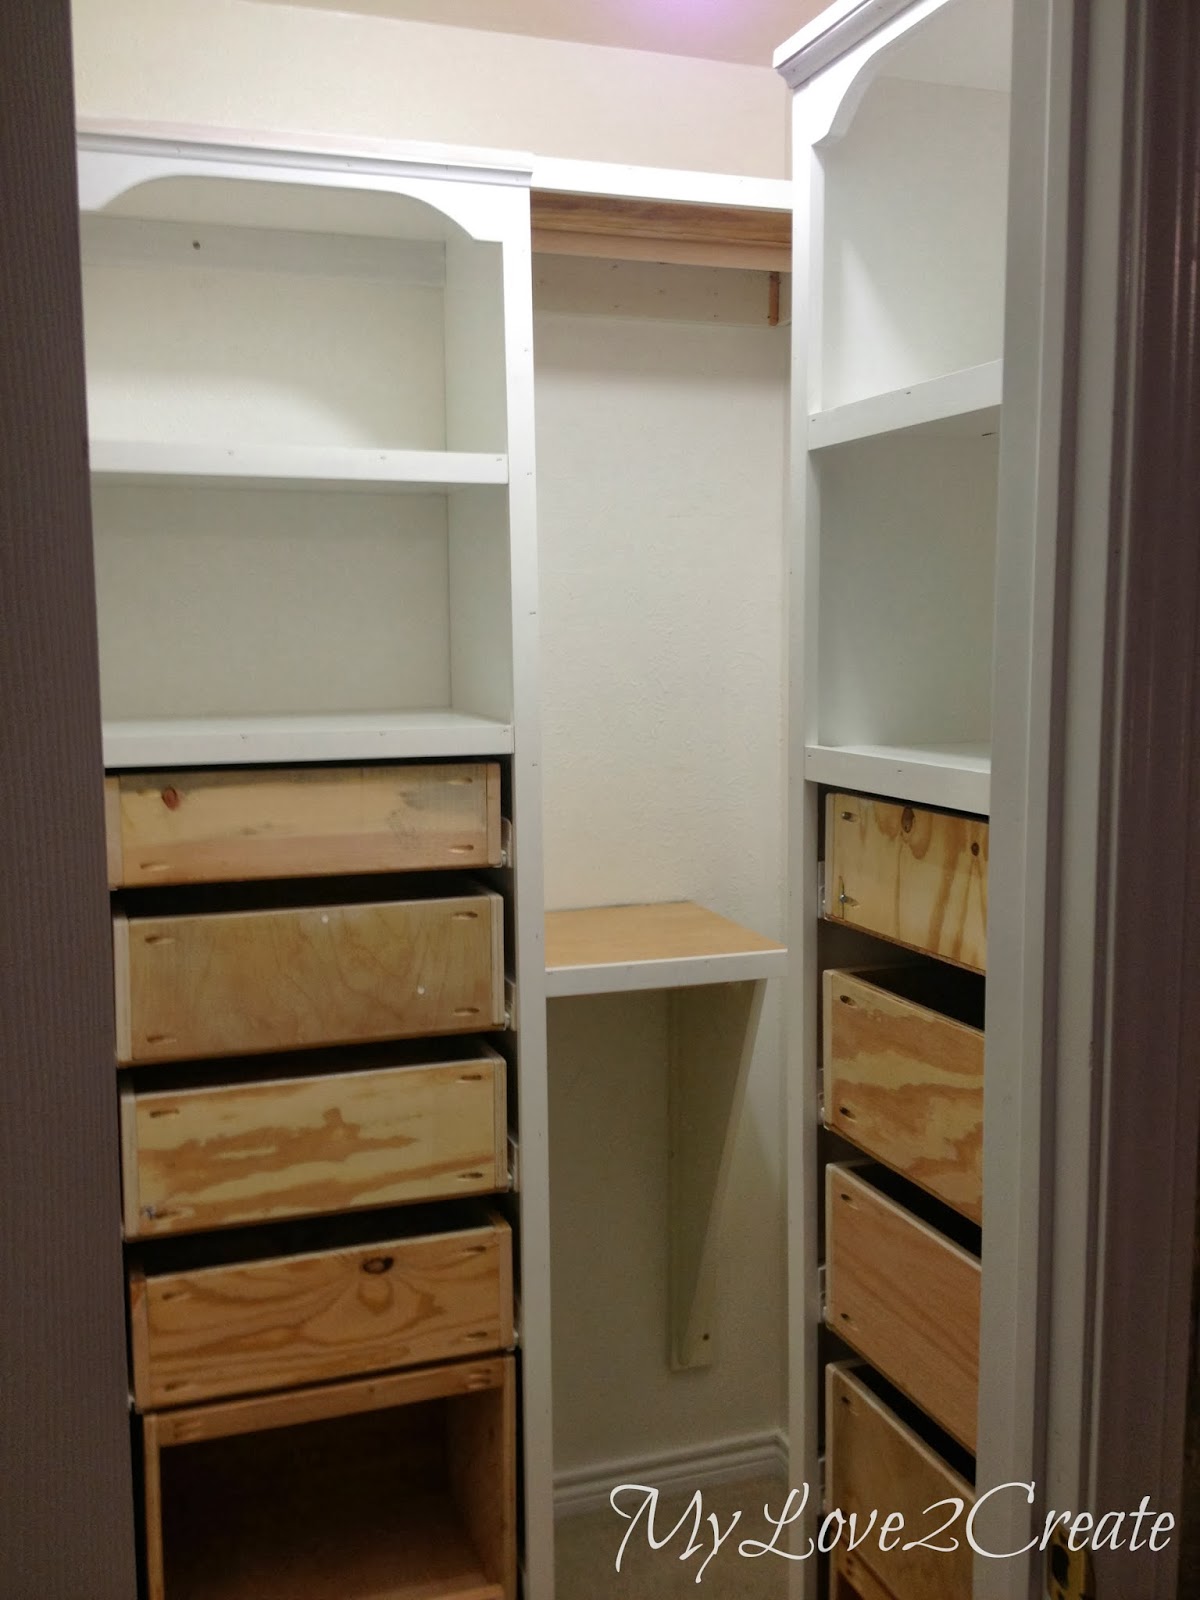
I used all scrap wood on this project, so it was FREE!!! The piece of wood I used for supports was pretty small and it was the closest I could get to the size of the legs. I measured the distance between each leg and cut four pieces. I drilled pocket holes and attached them using a level to make sure my shelf would be flat.
Did you notice that this table has been repaired before? The whole top had been been glued back together, that is probably why when it broke again they just trashed it! Well I am happy they did!

Once I had my supports on, I found some scraps and cut them for the shelf. I just eyeballed the notches (top left) and then using my friends jigsaw, I cut the notches out! Perfect fit!

Then I added glue to the supports, set the boards on top, and nailed them down!

At this point I thought I was done and brought it inside. I was going to paint it and maybe do a stencil as well but I thought the top needed something…

I didn’t have enough 3/4 inch boards like I used on the bottom shelf, for the top…ah ha! I did have some 5 gallon paint sticks though…
I taped them all together with painters tape and cut them all at once! It worked really well, then I tried them out on the table to see if I liked it, yep! I did.

Since I had changed the top up and the crack wouldn’t be seen I decided to stain the wood. I used dark walnut.
Then I went out and nailed on the paint sticks. This is where I totally messed up!!!! I just did the ends and it looked good. But I noticed the table top wasn’t totally flat and the middle needed to be clamped down so there wouldn’t be a gap.
My problem? I didn’t have time to clamp it because it was my second son’s birthday and we were having people over soon….So I thought why not just nail a row down the middle?
It would have been cute too….if I could nail in a straight line!!… arghhh it was totally crooked, but I just finished anyway, and I was so upset!!!!! I had just ruined the top (I will show you a picture in a minute, I didn’t take any “in process” I was…in shock?)
So what did I do? I just started nailing like a kamikaze fiend!! My husband came out and, I think he was a little horrified! Well, to tell the truth, I was too!
After I nailed the heck out of it, I left it in the shed and went to my son’s party in mourning. Ok, I wasn’t that bad, but I was pretty disappointed in myself for trying finish in a rush.

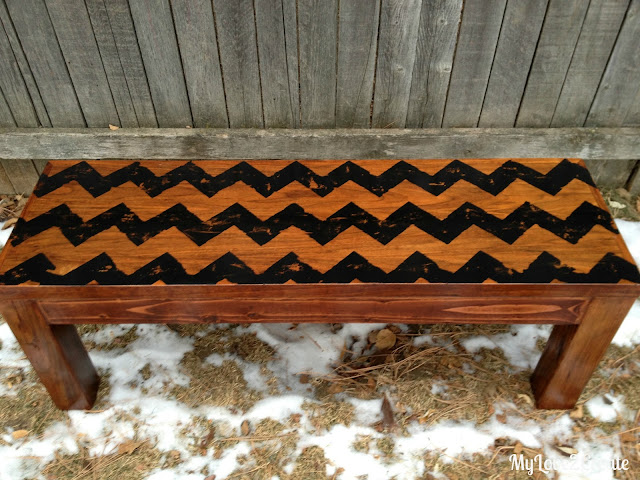
I decided that my mistake would have to be a visual learning lesson and I went ahead and painted, distressed, and waxed it anyway…and you know what I actually like it!

No, really. I do.

Crooked line and all!
I have to laugh, because when my husband came out, and I was in nail gun overload, he said, “What are you doing?” Me, “I am trying to fix my mistake, I made the middle line crooked, so I am just nailing a random pattern every where.” And he said, “Well you can still see the crooked line…” And he is right! Just goes to show my irrational thinking…what WAS I thinking?

So, lesson learned. DON’T DO THINGS IN A RUSH, It is always better to just wait and do it when you have the proper time.

And maybe this table wasn’t meant to hold a printer and a cricut anyway…

It seems to cute now for that job.

And we had fun grabbing stuff to put on it…

So maybe, just maybe…

It might stay awhile, just like this!

Have you done any makeovers lately?

I love bringing something back to life! Trash to treasures are for sure a personal fav!
Thank you for stopping by! Hugs,
Mindi
I will be linking to these parties.
Wow. That was an incredible transformation. I love the idea to use paint sticks…genius!
Denise
Great makeover! I love the look of the wood with the distressed paint. Such a clever way to use the paint sticks.
I like it!! I am bad about doing things in a hurry!!!
Charming DIY makeover you have here…looks GREAT!!!
Blessings,
Linda
It turned out so good! Great work. Thanks for linking up to The DIY'ers today!
Wow…only can take that kind of trash and turn into something so awesome. I love the nails all over on the top too.
I've been wondering if it's possible to add a shelf to a table and now I know it's possible. Totally need to do that for one of my side tables.
I love the plank board look you added to it. And the additional shelf is a plus!
Love it! You did such a fabulous job transforming it! Ah, FREE stuff can be so grand! 🙂
Hello, I just wanted to let you know that I have mentioned this post on my blog. If there is anything you would like for me to remove, please let me know. Cheers Jennifer
http://eatcraftsow.blogspot.com.au/2013/04/linkup-party-likes-home-wares.html
You are so right!!! It is wayyyy to cute for that job now!!! You had me laughing at loud on this one! I was just picturing you going crazy with the nail gun and your husband coming out in the midst of your work…too funny friend!!!! It is an amazing transformation! And the paint sticks are just pure genius!! What a great job!! On another note…I need your help…if I have a plan little cupboard (I got it a while ago from home goods…it was damaged so I got it super cheap) that is in my daughters room right now but I want to use it for a potting table in my garden…what should I use on it so that it can withstand the outdoor elements??? Do I just use Poly?? Thanks Mindi!!!!
Very nice. It is always worth it to try…you never know what treasure you will fall in love with.
Thank you for not just ditching your darling table. You really DID make something splendid out of something that you and hubs thought "wasn't quite right". I think it's awesome and I adore your little table!!
Visiting from If It's Not Baroque Linky Party today from NW Illinois,
Smiles, Suz @ MaytagNMom
Well I think your table turned out pretty darn cute! I love the idea of using paint sticks for the top. You can't even see the nail holes in the pictures. Thank you for sharing it at to What We Accomplished Wednesdays. Have a lovely week!
Hugs,
Deborah
Even while having all the time I get in so many mistakes! 🙂 You did a very cute mistake. All those nails give the top lots more interest. I love it!
It looks great! I actually like the way the top looks 🙂
It looks sooo good! I love what you did with the top and bottom shelf! Amazing transformation! Would love it if you would link this up to Give Me The Goods Monday: 1 Party, 5 Blogs! http://www.rainonatinroof.com/2013/04/give-me-goods-monday-link-party-4.html
Jenna @ Rain on a Tin Roof
What a transformation! Looks great and I love the extra shelf you've added.
Super cool ~ I love it! It's great with that second shelf, too. Love walnut and white together, yum!
I'm visiting you today from Wildy Original. I hope you get a chance to stop by my blog and leave a comment, too!
~ Megin of VMG206
Enter my Blog Birthday Giveaway
Great makeover! And I totally know about trying to rush through something all too well. 🙂 It's hard to get all the things done sometimes but you are right to wait until you have enough time to dedicate to it. Love the table!
Hi, This is such a funny story and I love how your project turned out. Lately when my husband takes time to stare at my projects, trying to figure out what I'm doing, I ask loudly "May I help you"? He doesn't always understand my madness. Check out my latest post. I, too used a paint stick in my project. hehe…Connie
I love the paintstick idea and especially the randomness of the nails ~ it makes it visually interesting! Found you through My Repurposed Life's Catch as Catch Can 118…
Cher @ Designs by Studio C
http://designsbystudioc.com
Wow, You really brought out the beauty in that table. I love it. Thanks for sharing at The Gathering Spot this week 🙂
Mindi this is sooooo creative and gorgeous! Thank you for sharing your project with us at the Pretty Things link party this week at twelveOeight. Hope you can join me tonight for another great party!
xo, Tanya
http://twelveoeight.blogspot.com/
Great job! I love those kinds of projects.. Yours turned out fabulous! Thanks so much for sharing with us at Weekend Wonders! Hope you're enjoying your week so far!
Awesome Job! I love the stained wood with the paint! Pinning!
You did a really nice job! Thanks for sharing at The Busy Bee's (Thursday party) We are so happy to have you join our party and make it so much more interesting.
Thanks again!
Joye & Myrna
The Busy Bee's
What a nice job………Thank you for sharing with the Clever Chicks Blog Hop this week; I hope you’ll join us again!
Cheers,
Kathy Shea Mormino
The Chicken Chick
http://www.The-Chicken-Chick.com
Love this trash to treasure project! Thanks for sharing with me @ DearCreatives.com Hope you have a great weekend ahead & join in again soon! xo
Mindi–oh Mindi! we as a creative bunch seem to lack impatience! why oh why? BUT that being said I truly LOVE, love, love this little table. Really love that you made the top match the new shelf! oh well, about the crazy mad nailing! hahaha
I think she's too cute to hold a printer and a cricut!
catching you!!!
gail
WHat an amazing transformation. Thank you so much for linking up this week! Hope you can join the party again.