Chalkboard Coat Rack, Styled X3
I am back today with a fun project! A Chalkboard Coat Rack…
My friend Stacy from Not Just a Housewife does a monthly series called Styled X3, and I am honored to participate this month!
Stacy selects an item for the month and then ships it to two other bloggers plus herself. Then all three style the item anyway they wish, and you can stop and check out all three different ideas! I love following this series, it is so fun to see how the same item can be used in different ways, and it always give me great inspiration.
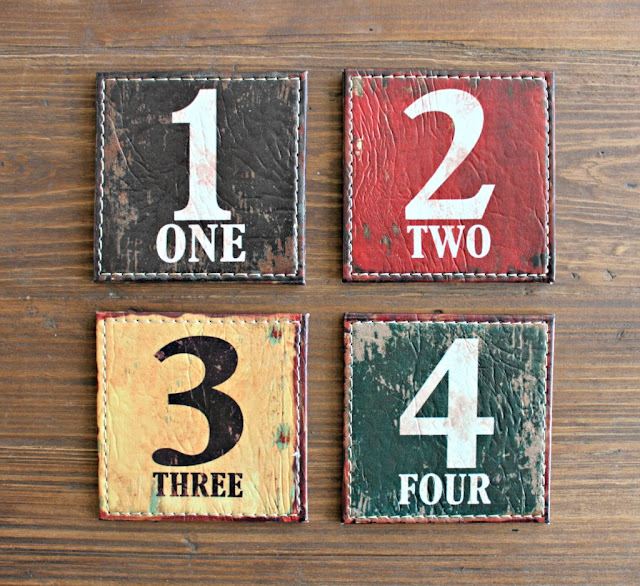
Stacy sent Michelle (4 Men 1 Lady), and myself a set of Numbered Leather Coasters.
I think they are super cute, and my first thought was coat rack…so I went with it.
In my scrap pile and found a 1×10 scrap board which was the perfect size. Then I spotted this scrap piece of chalkboard that I had left over from my DIY Chalkboard Easel, and of course I decided to add it as well. Leave it to me to make a simple project a little more complicated, but hey that is what makes it fun, right?! 🙂
I used some cut off scraps (they are almost the same width as 1×2’s and started by measuring them around my chalkboard. I marked where to cut, and then used my miter saw to get them the length I needed.
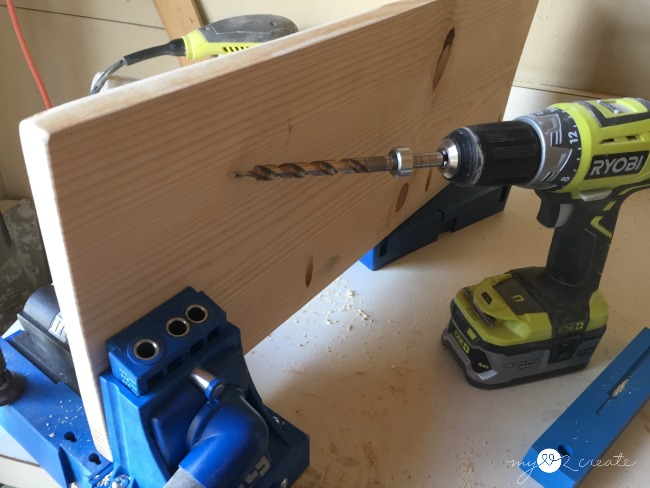
Then I drilled 3/4” pocket holes with my Kreg K5 Pocket-Hole Jig
in the small side pieces. I used glue and 1 1/4” pocket hole screws to attach them to the top piece.
I decided to test it by doing a dry fit and see what I thought. I liked it, but it felt a little…not finished.
So I grabbed some scrap 1×2’s and cut two of them 1/2” longer on each side and put one on the top and one in the middle. Ahhh, much better.
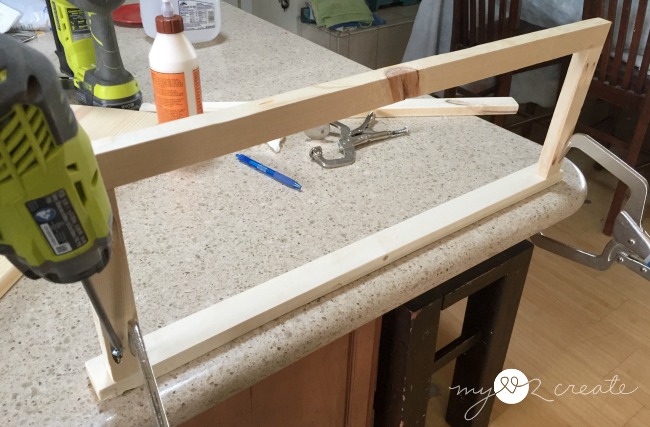
Next, I attached the top frame to the middle 1×2 with pocket hole screws and glue. You can see I am using my handy dandy Right Angle Clampsto help me out. Love.
Because I added the divider I needed to drill more pocket holes, again using my Kreg K5 Pocket-Hole Jig.
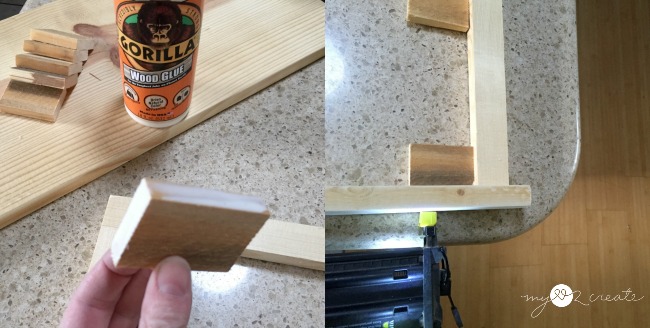
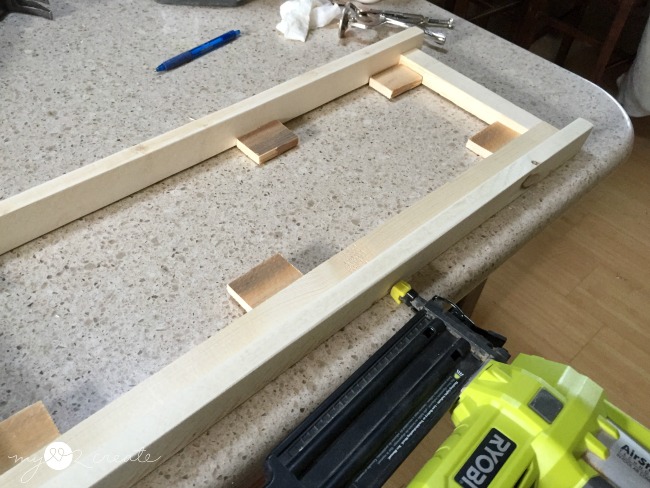
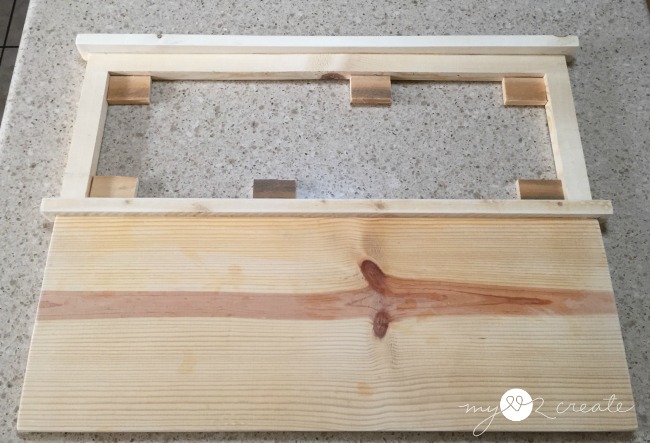
I also was aware that I needed a way to attach my chalkboard. I found a piece wood that was about a 1/4” thick and cut it into small pieces to used as supports for my chalkboard to rest on. If I had a longer piece of wood, I would have cut two long ones to fit the length of the frame on the top and bottom, but I was going with what I had. I used wood glue and nails to attach it to the corners and middle of the frame opening.
Once all my chalkboard supports were attached I glued and nailed on my top 1×2 with my Ryobi Nail Gun.
Then I used a 1×2 as a support to hold up my 1×10, as I screwed in the pocket holes attaching it to the middle 1×2. I made sure to use wood glue here too.
Here it is at this point. I decided to off center my too support pieces to avoid the knots in the wood, sometimes nails don’t like to go through knots very well. 🙂
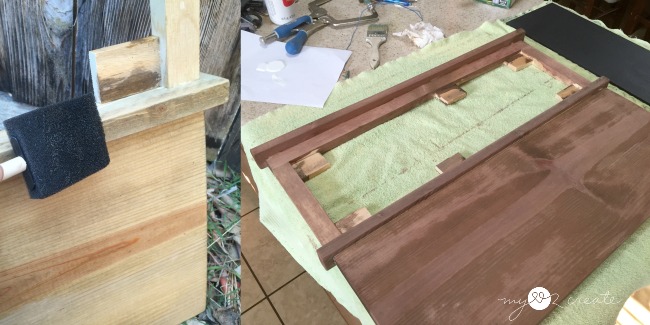
I went with a natural stain. To make it you use: 1 piece of 0000 steel wool shredded up into a jar, pour white distilled vinegar over it until it is covered, put the lid on, and let it sit for a couple of days. Then all you do is paint the wood with it and watch it change before your eyes. So cool.
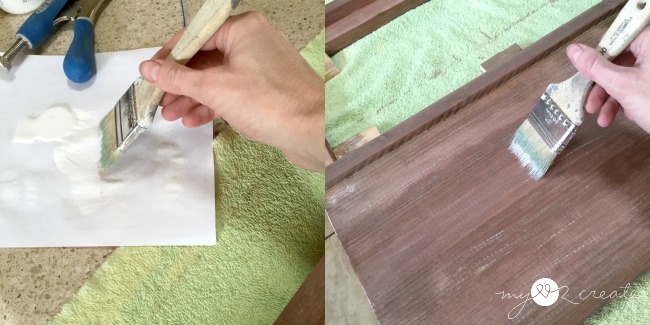
To help the wood have more texture and variation, I took white craft paint and a chip brush, loaded and unloaded the paint (until there was hardly any left on the brush) and lightly brushed it onto the wood.
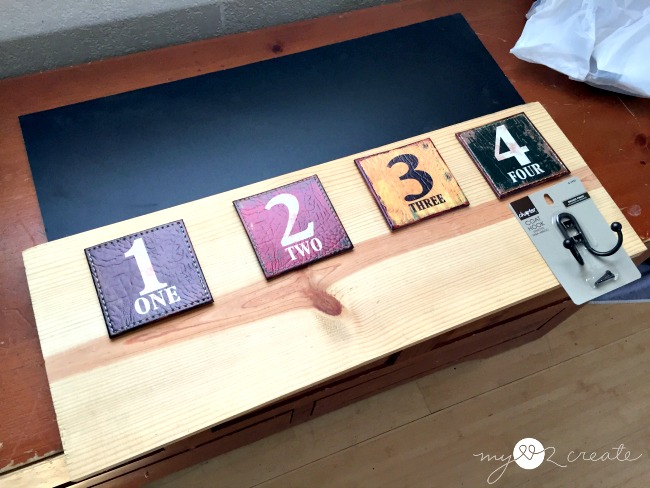
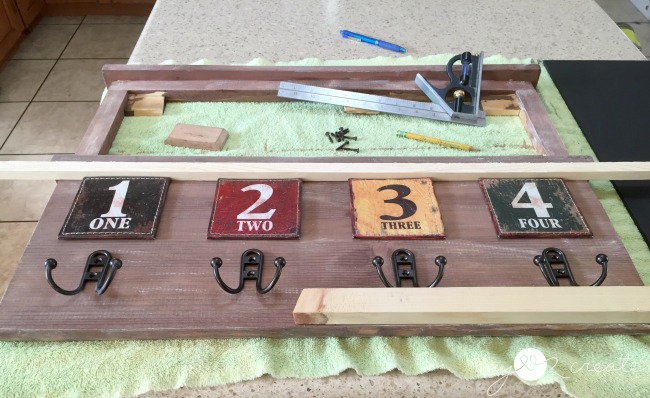
In order to easily space my coasters and hooks I used some scrap wood as spacers. This saved me time on measuring, cause I am lazy, and only measure when absolutely necessary. I did measure from side to side. 🙂
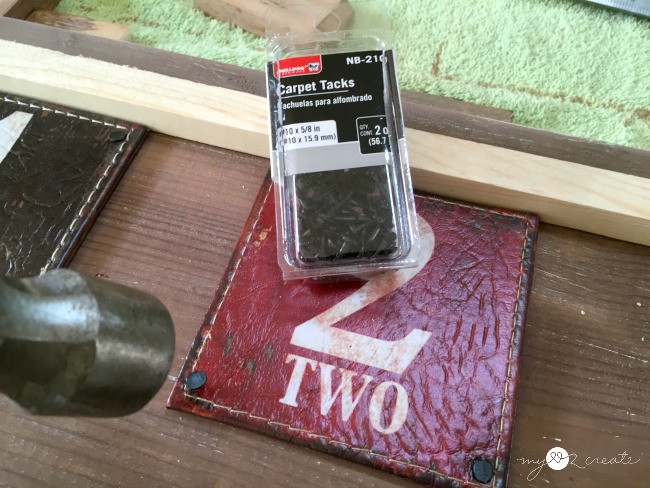
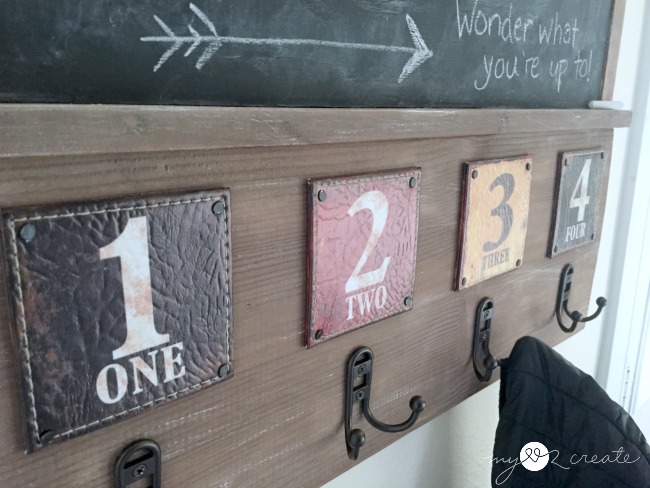
I used carpet tacks to attach my leather coasters to the wood. They are super easy to hammer in and look great too.
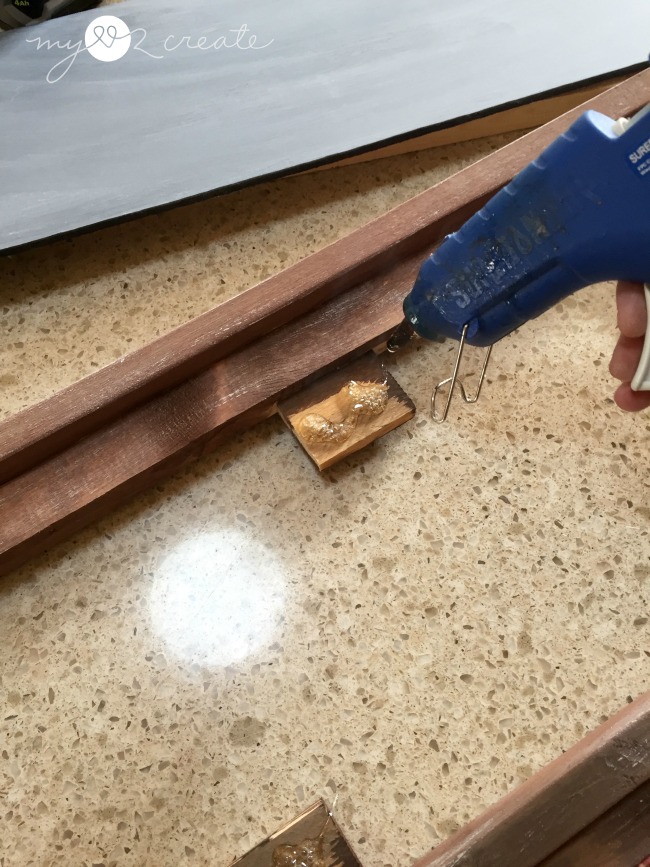
Last, I gave my chalkboard supports a generous amount of hot glue and then set the chalkboard in place and held it until the hot glue dried.
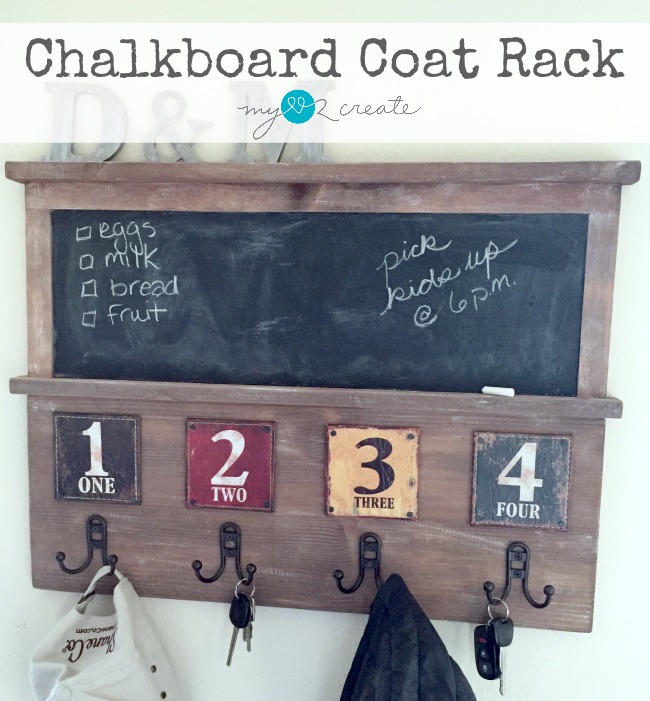
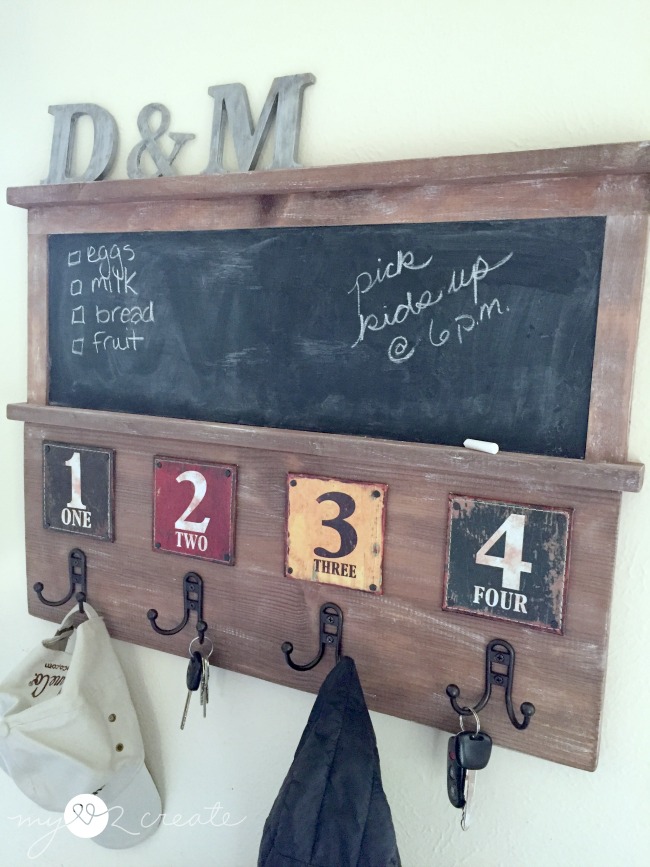
DONE!
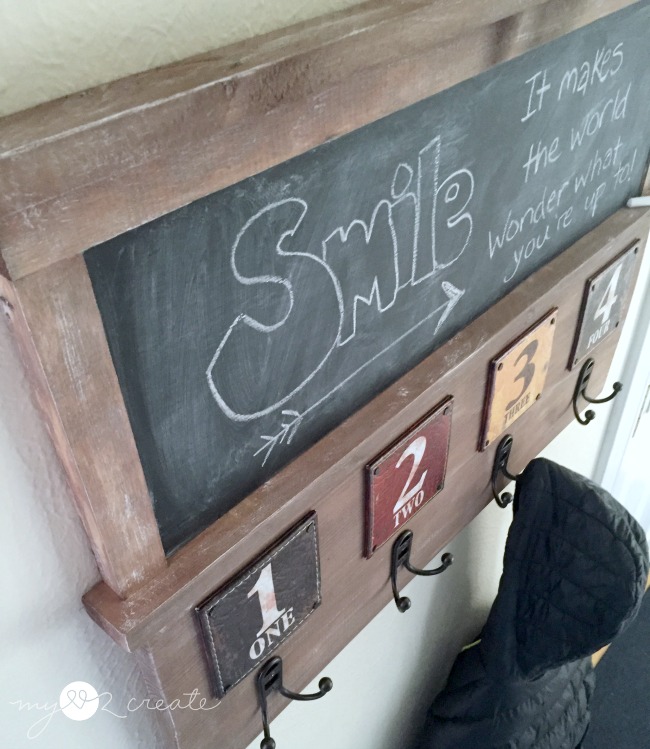
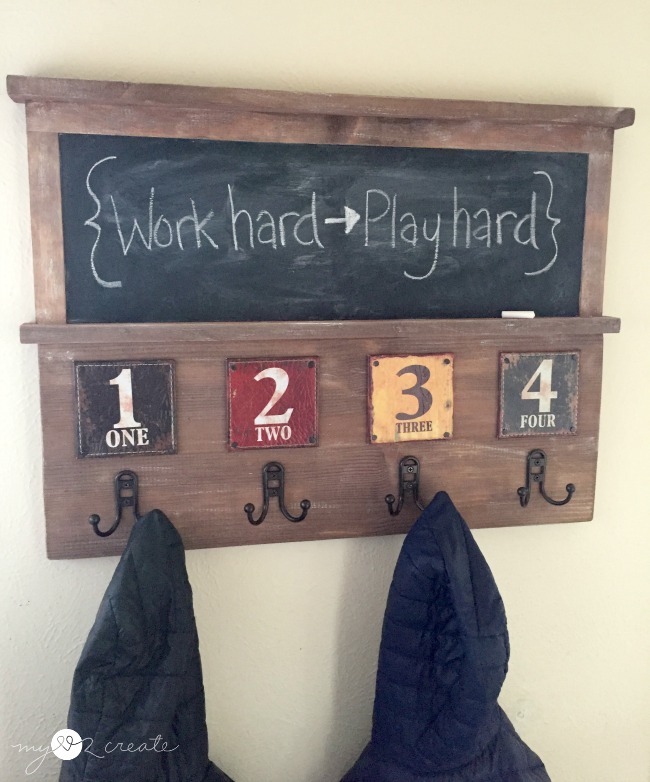
Woo hoo! I knew these coasters would look great on a coat rack! 🙂
I love the hooks too, I got them at Walmart.
I am glad I decided to add the 1×2’s I think they give it that extra oomph. Plus you need a place for your chalk if you have a chalkboard, and this little ledge is perfect.
I am going to hang this in my younger boys room, since I just did my older boys room and they have their own coat rack.
I also think it would look pretty great in a kitchen for keys and purses, and of course quick notes and shopping lists.
So what do you think?! I kind of love it, and my kids are super excited about it too, which makes it even better!
Now don’t forget to head on over and check out Stacy and Michelle and see how they styled their coasters!
Hugs!
Mindi
I will be linking to these parties and Savvy Southern Style







I LOVE this! I put mine up temporarily since we are still in the process of getting the boys' room done but when I put them up for real, I may have to steal this idea 🙂 Thanks for participating and I love that we had a similar idea 🙂
Holy cow that is awesome! I love, love, love it! Bravo. Michell (4men1lady.com)
Awesome job Mindi! I love a great chalkboard, and of course coat racks! It's a win/win!
pinning!
gail
I love your chalkboard coat rack! You did a wonderful job on it. I've never seen leather coaster like that. They go perfect on the coat rack.
LOVE it… just beautiful (cool numbers and great hooks).
I love anything with numbers and I especially like your colorful numbers.
Thanks for sharing at SYC.
This is so pretty and really easy to do! I'm kind of obsessed with chalkboard projects now, ever since I discovered chalk pens were a thing. Apparently I was last on the boat with that revelation. LOL! – Jerusha, TheDisneyChef.com
I love everything about this project. The numbers make this chalkboard/coat rack really unique!
LOVE this Mindi and the leather coaster's are perfect for labelling each hook. Pinning to share ☺
Amazing project! Thanks so much for the easy step-by-step directions.
This is so fabulous! You did a great job on the tutorial, as well. Thanks for sharing! Cynthia
Fabulous ! Love the use of those leather coaster really gives it character.
Super Cute, and one of a kind. I love it!
This is awesome! Love it–thanks for linking up to the Talk of the Town party!
As always, I love this! Thanks for sharing at Talk of the Town – pinning it on the party board here – https://www.pinterest.com/knickoftime/talk-of-the-town-repurposed-upcycled-vintage-recip/
This is such a cute project! I love how you used the coasters.
This is so fun!! My Styled x3 is coming up this week so I had to catch up and see what everyone has made so far. I love those fun coasters and your project!
I really love this idea. Perfect for putting right next to the door to make it easy for the kids to grab their coats and to leave the messages.