Drawers and drawer slides, Master closet makeover
Today I am posting my drawers and drawer slides, for the master closet makeover. To catch up click Here and Here. This was probably the most time consuming part of the towers, and I still have to do the drawer faces, but I will get to those…eventually!
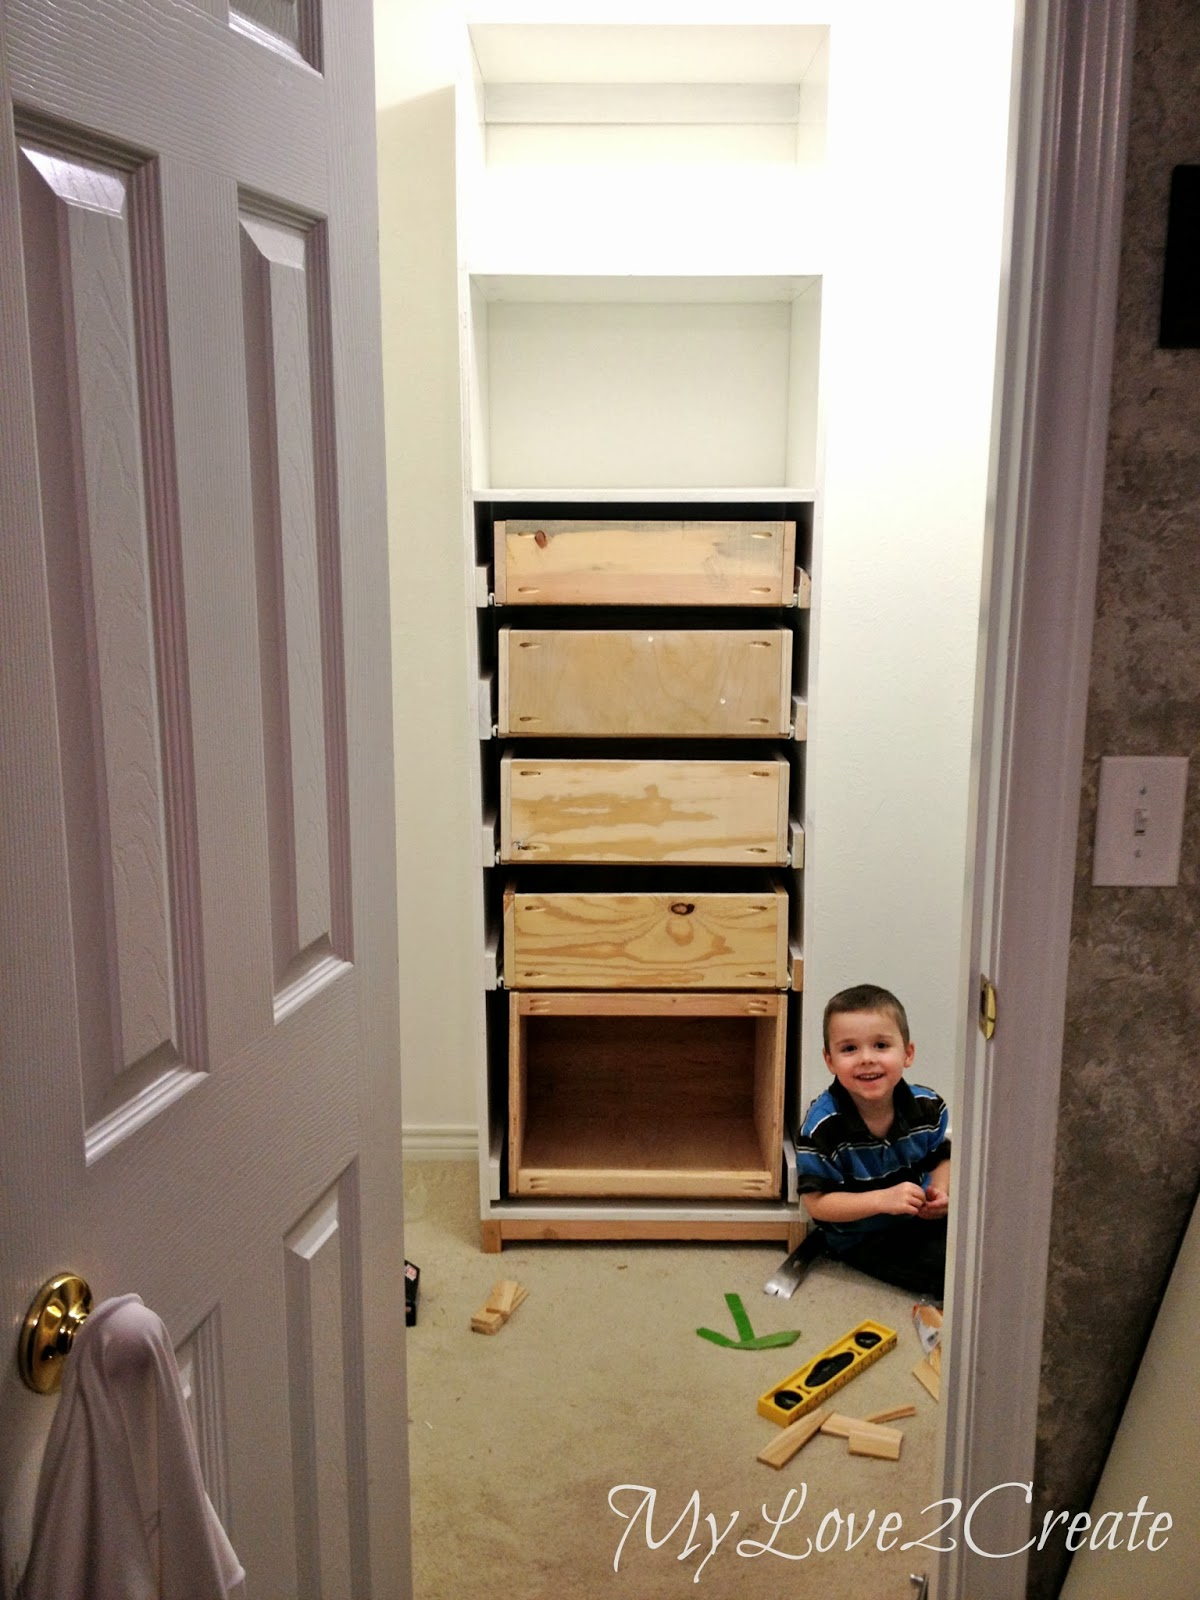
What a cute little helper! He is such a sweet little nipper!
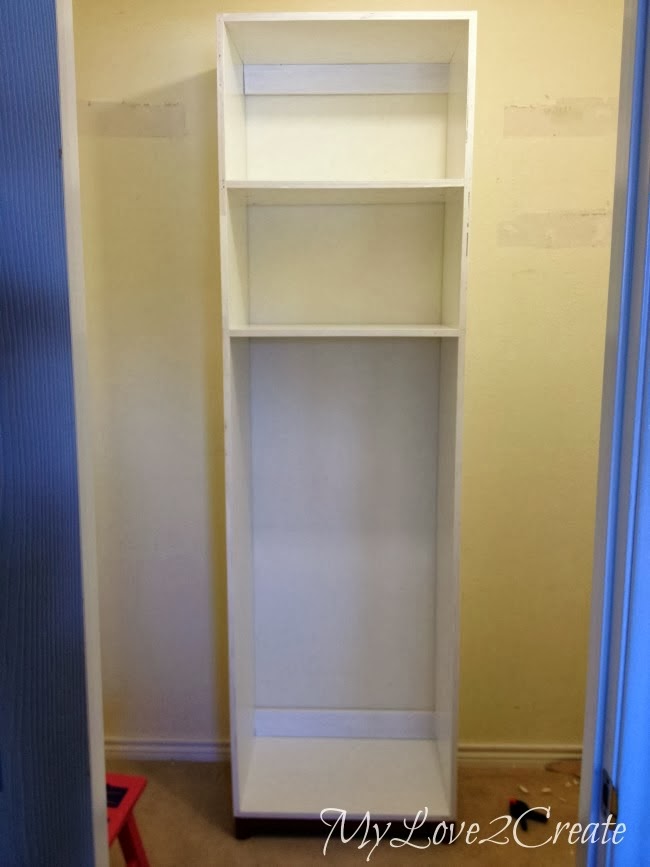
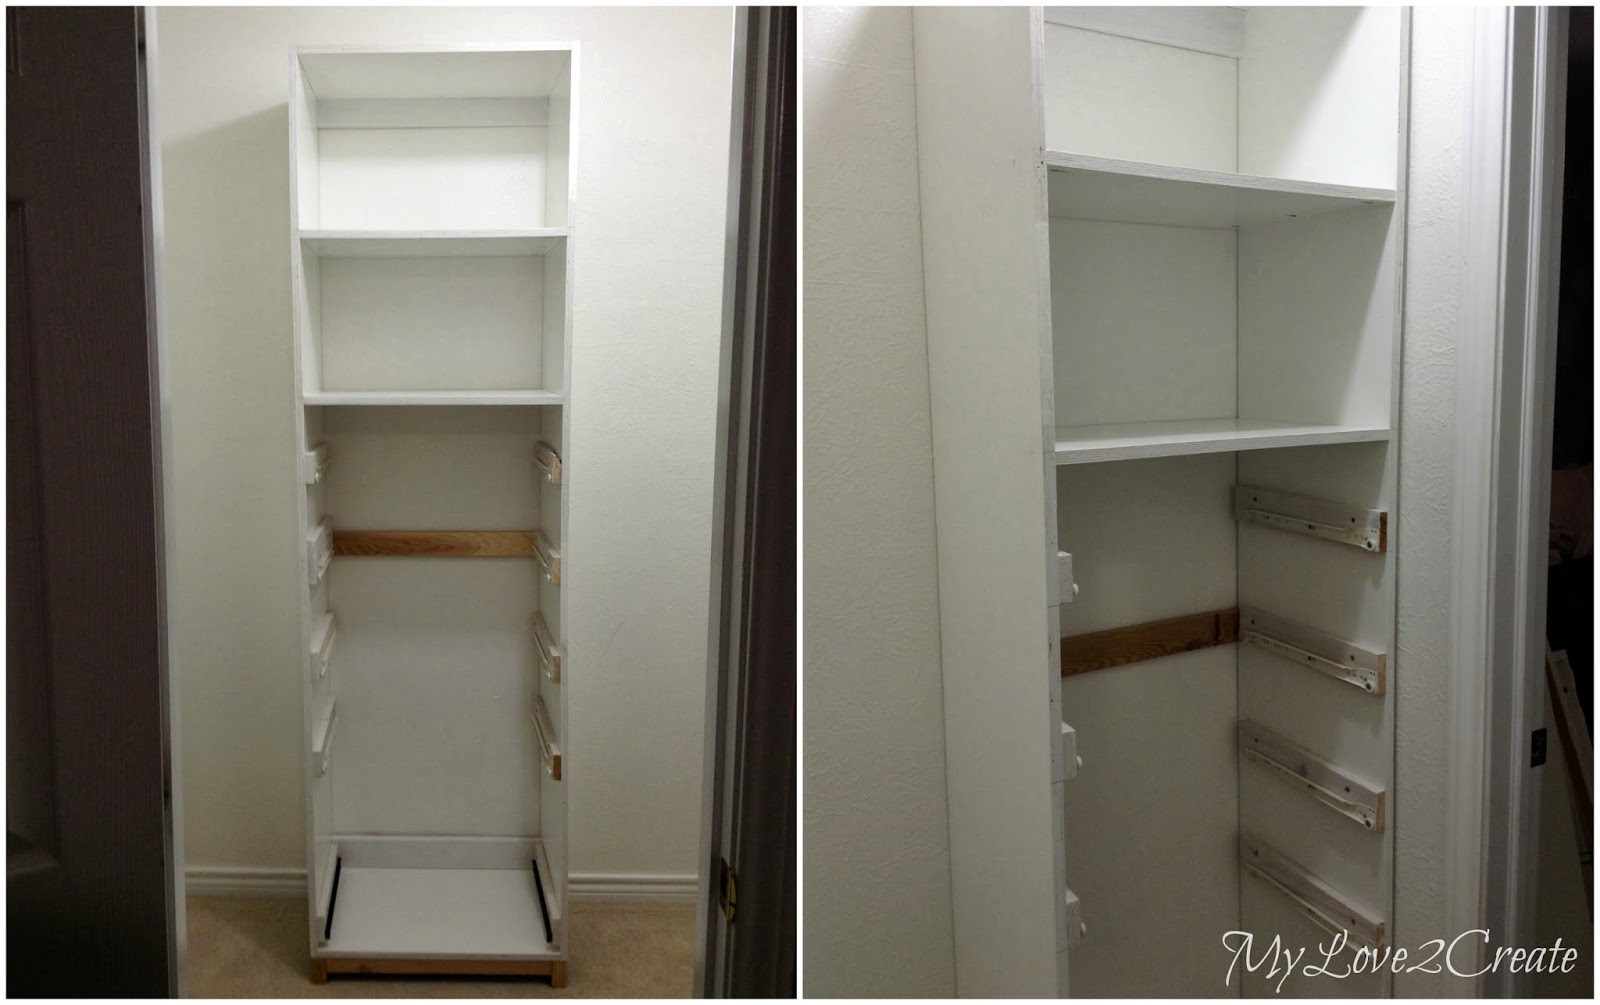
Remember we left off here…
I started off by taking all my drawer slides and mounting them to scrap pieces of wood. Just collecting the scrap wood and then cutting to size took a while. Then I had to mount all the slides on them. Sorry no picture of this process, too busy.
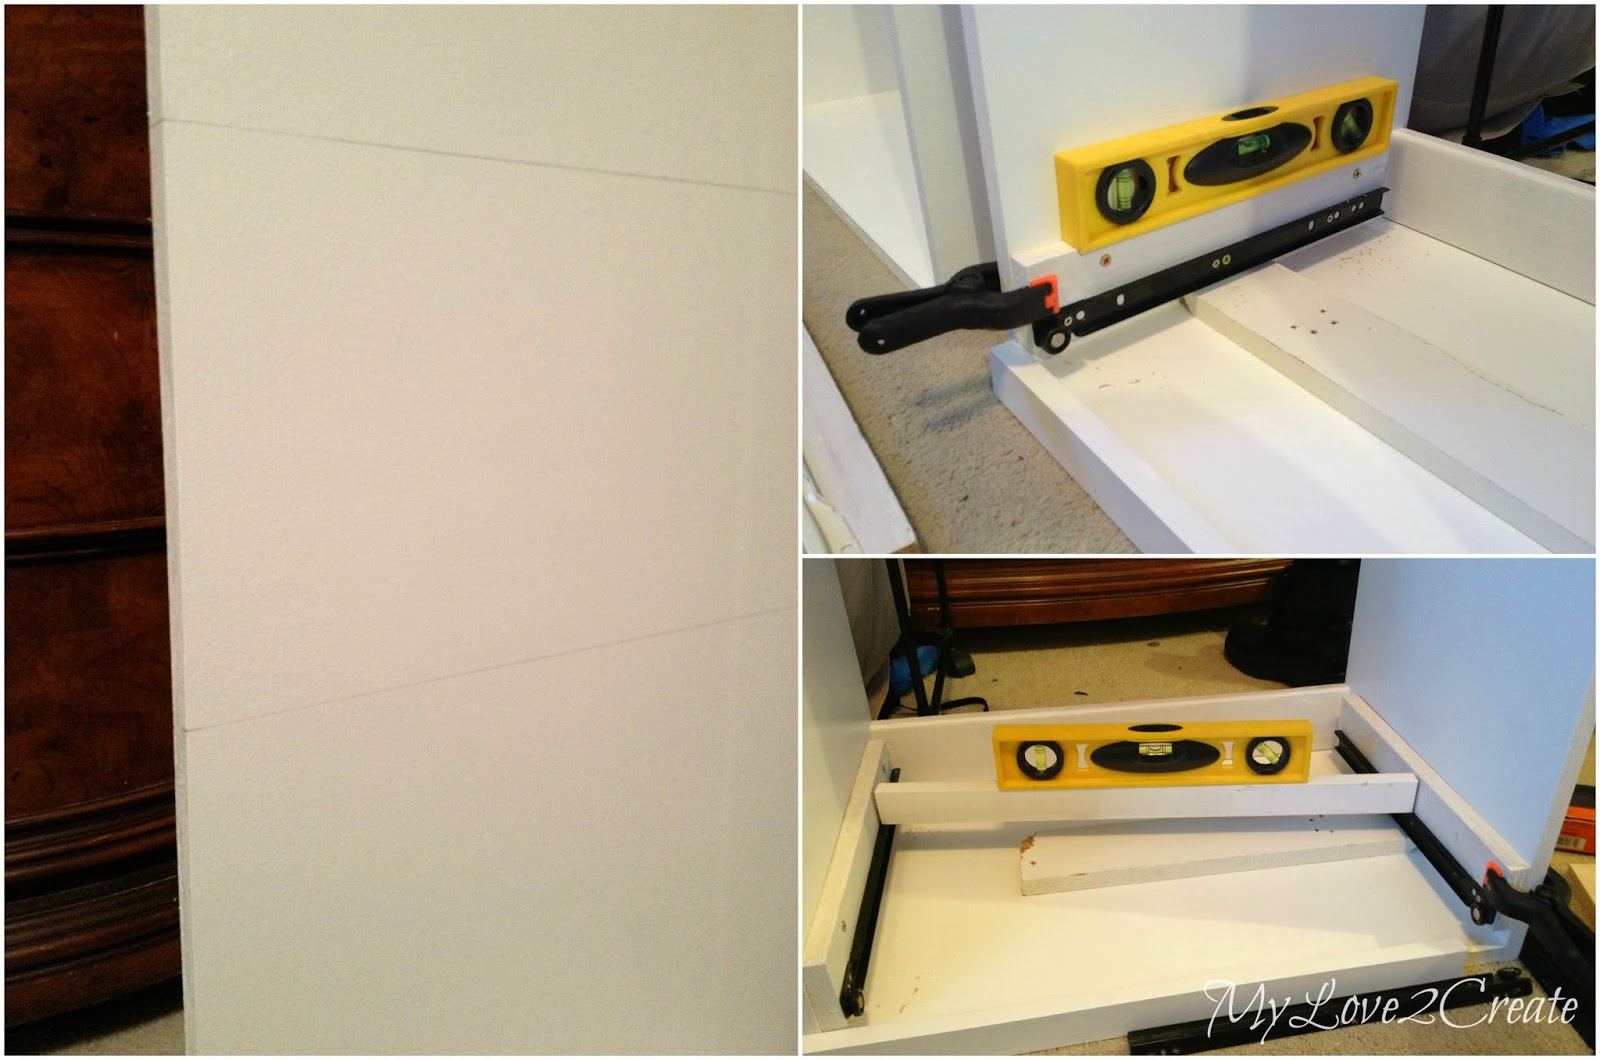
After I had all twenty done, (I have five drawers on each tower, so two for each drawer equals twenty…yikes) it was time to mount them in the towers. You can see in the top right photo above, I started on the bottom. I used a scrap piece of wood to get it to the right height and then clamped it to the tower. After checking for level I pre drilled holes and then screwed it into the tower using 1 1/4 inch screws. I did the same on the opposite side, but before I screwed it on I used a board across on the drawer slides themselves (not the wood scraps, see bottom right photo above) and checked for level, then adjusted if necessary, and screwed it on. Repeat 18 more times. To make it easier I drew lines where the bottom of each drawer slide would need to go, I did make sure these lines were level as well, see left photo above.
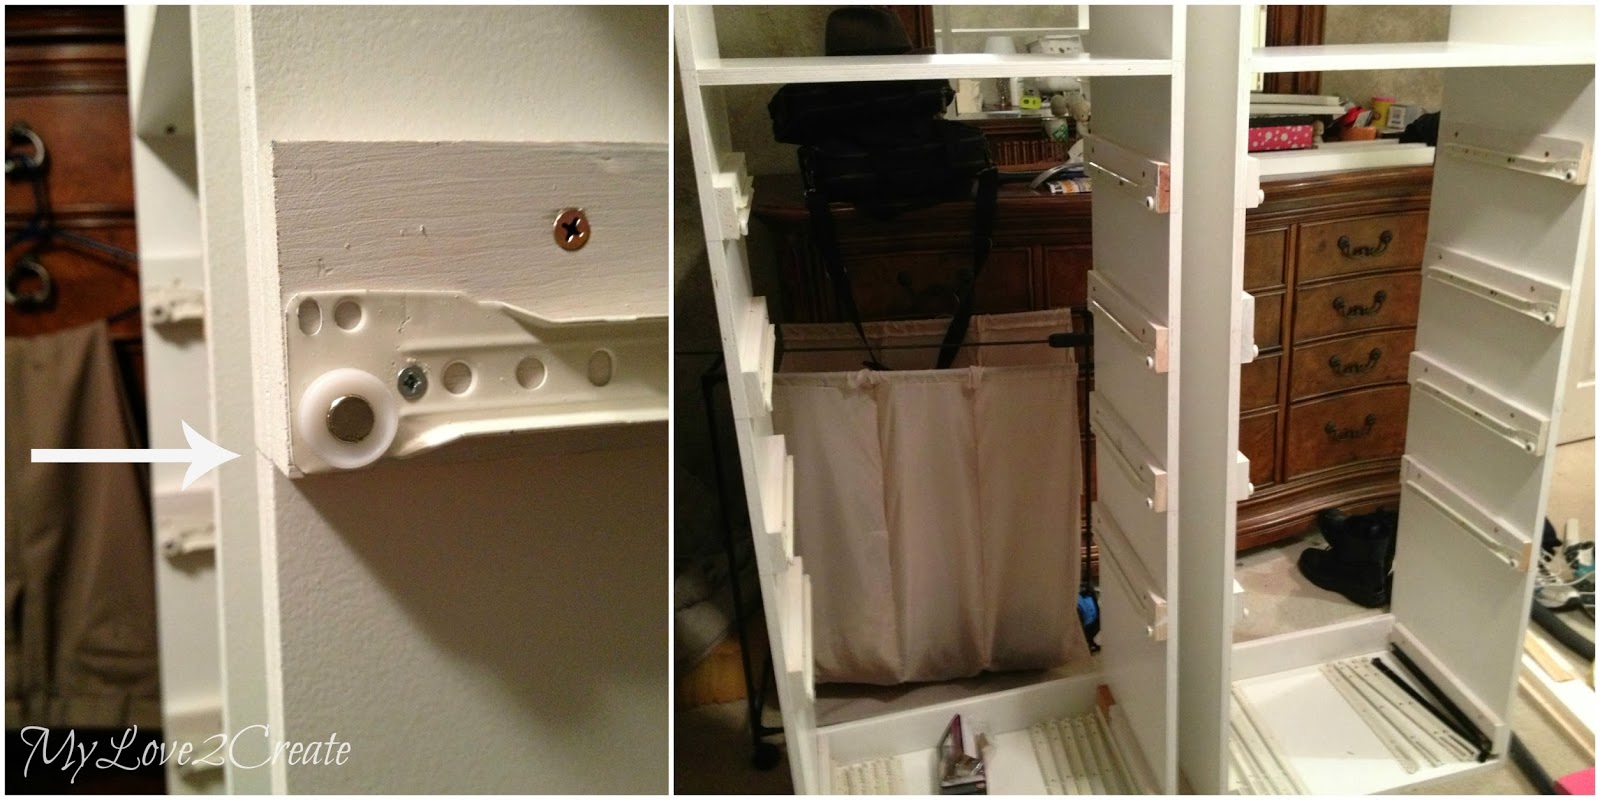
See the arrow? It is pointing to the line I drew, these were helpful so I knew were to clamp the drawer slide, then I could adjust as necessary to make it level. Also, you get an idea of how I mounted the drawer slides on the scrap wood. I made sure to do each one at the very bottom of the wood and flush with the front. On the right, the two towers are with all drawer slides installed! At the bottom you can see twenty more pieces ready for installation on the bottom of the drawers. I guess I should build the drawers…
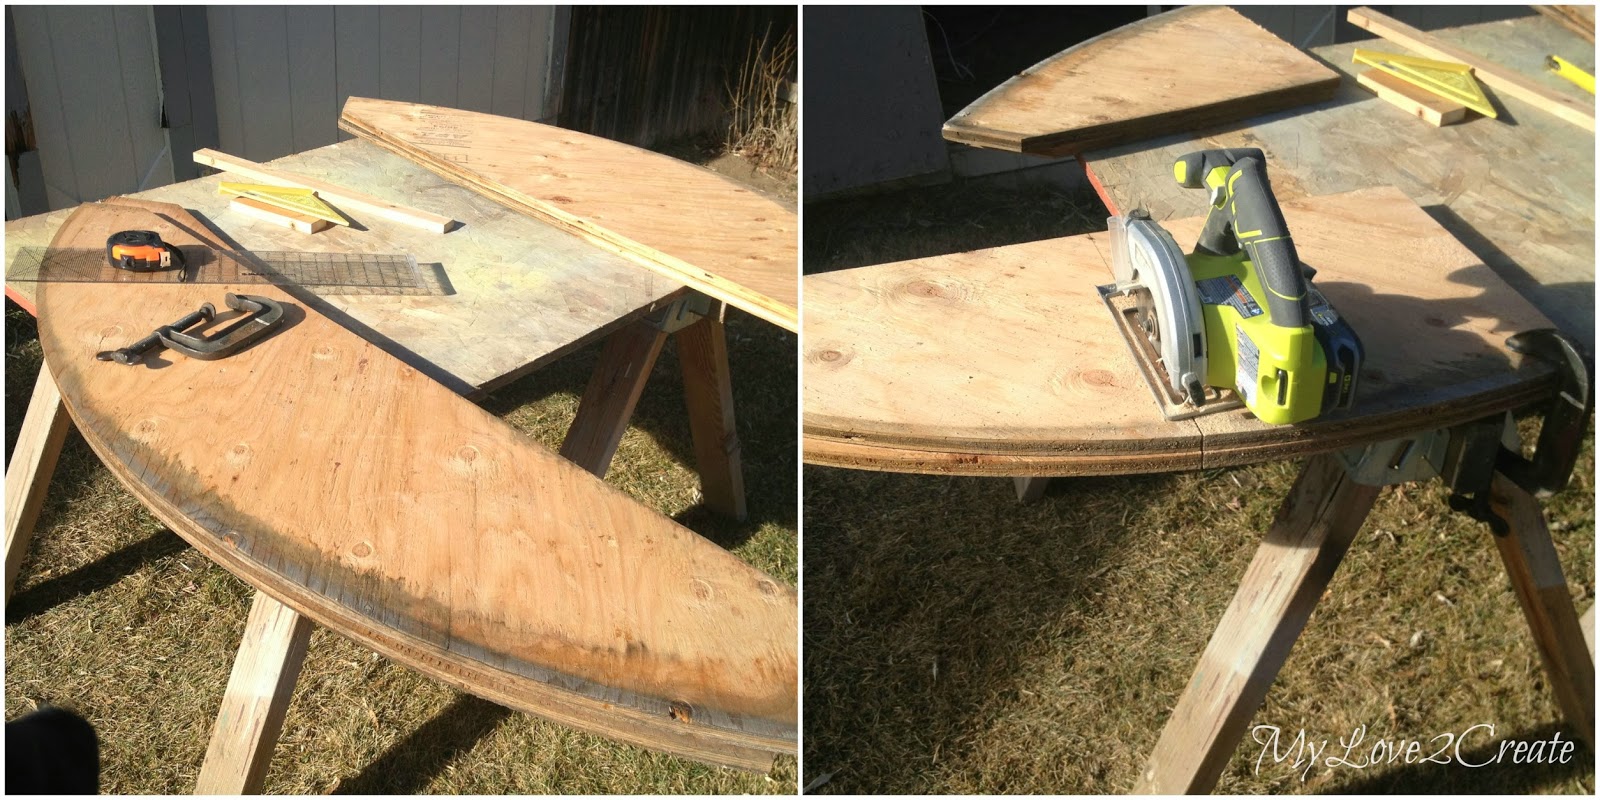
I measured the towers with the drawer slides installed to make sure to cut the right sizes. From the plywood I bought for the two towers I could only get about eight boards for drawers out of what was left. With 5 drawers, each needing 4 walls, that equals 40 boards. So I had to get creative, and when you have to get creative it takes more time. The above photo is me cutting some scrap plywood I got for free last year. I couldn’t have done it without my new circular saw, and my hoard of free wood!
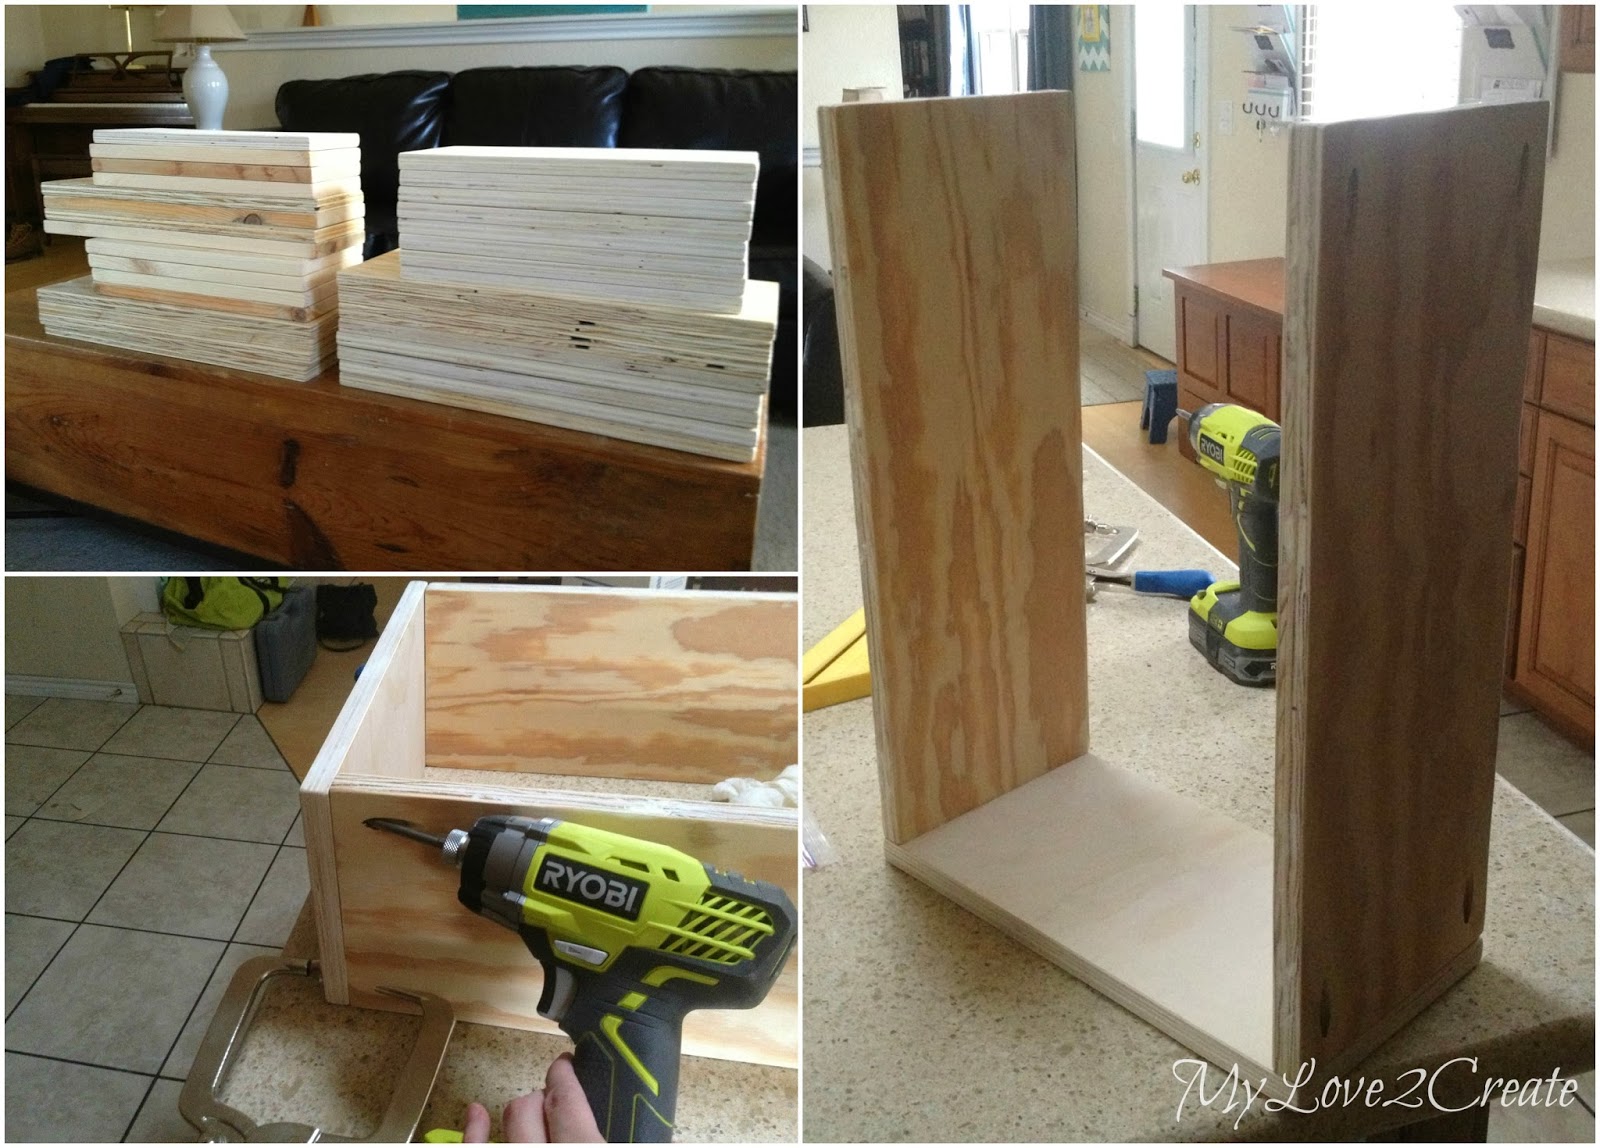
In the top left photo above you can see my stack of wood for 8 of my drawers (I will get to the hamper drawers in a bit). I love it when the wood is all stacked and sanded! I drilled pocket holes and used my new right angle clamps to help me hold the pieces together while I screwed in the screws.
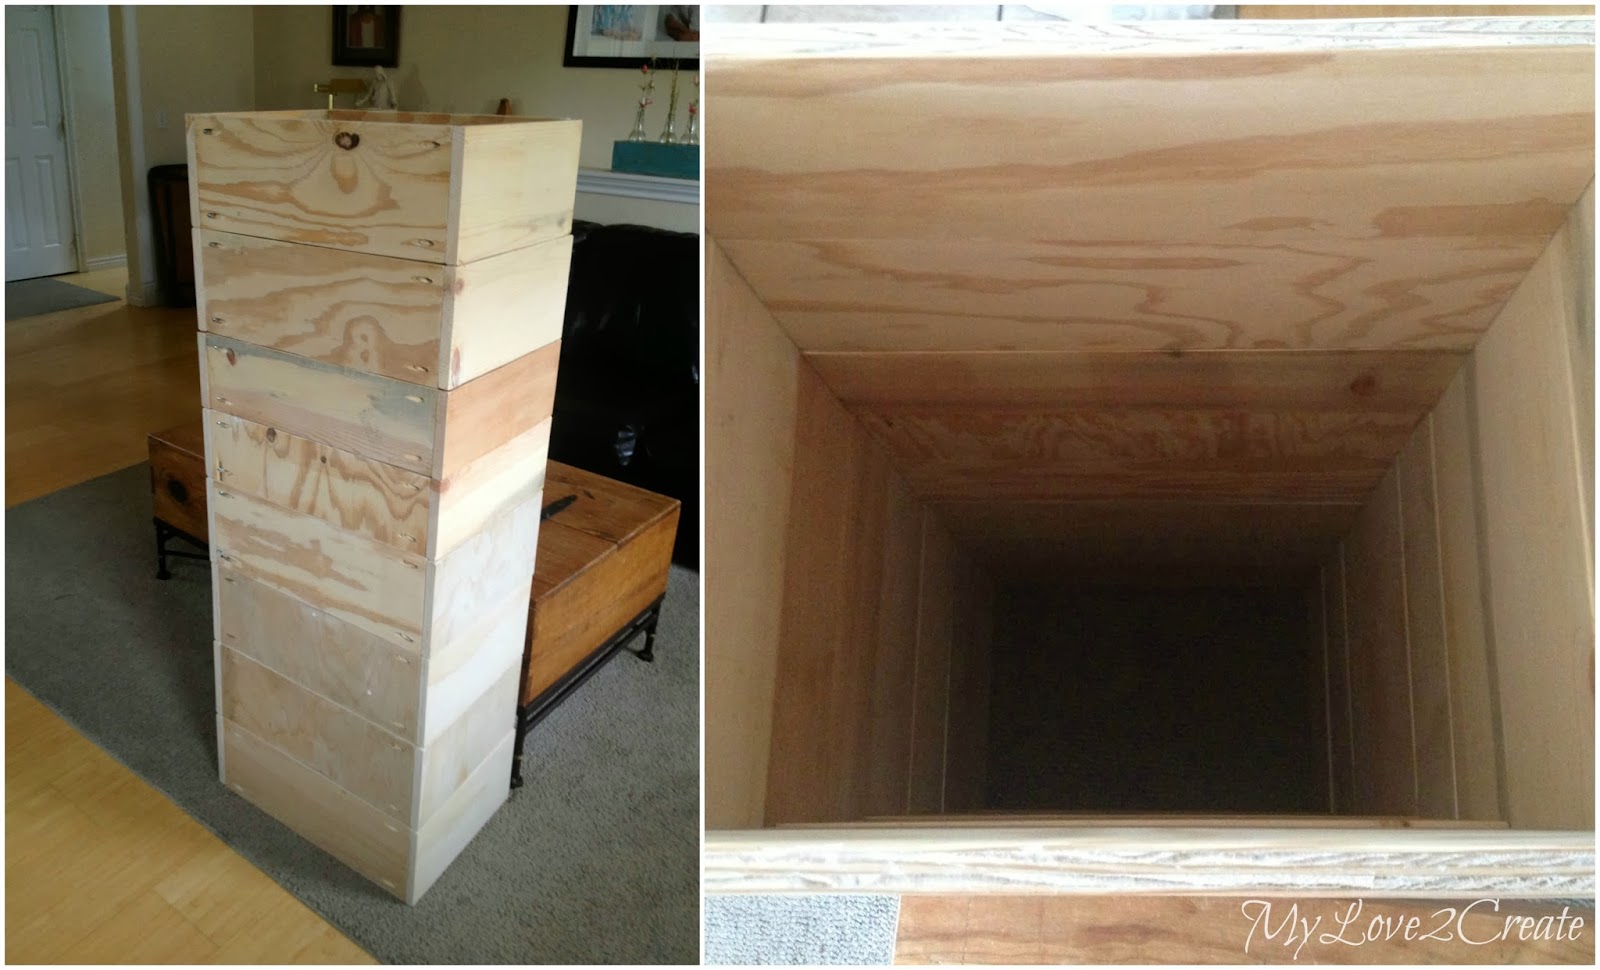
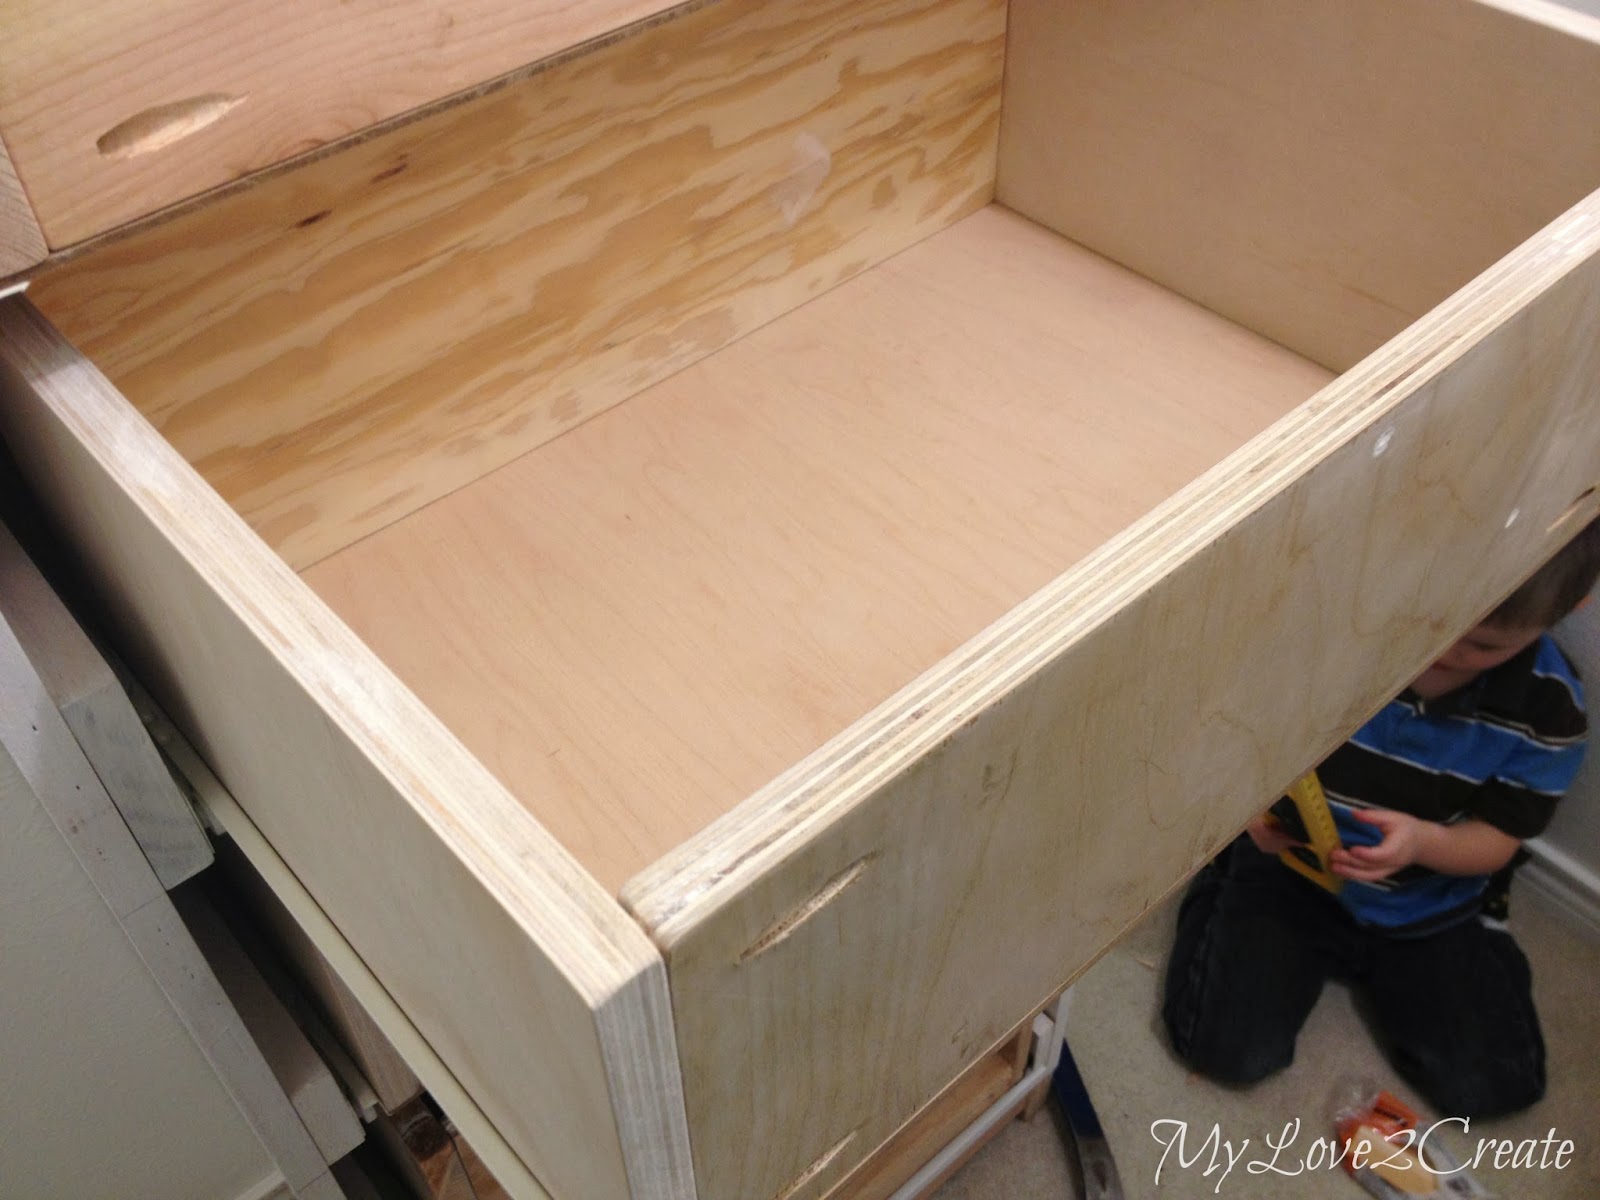
As I finished each drawer I started stacking them. Until I had a really cool chimney! Ha ha! This was a very satisfying moment for me, after all the hours of work to measure, cut, and sand, I was very pleased with my little “chimney”. I couldn’t resist a picture inside.
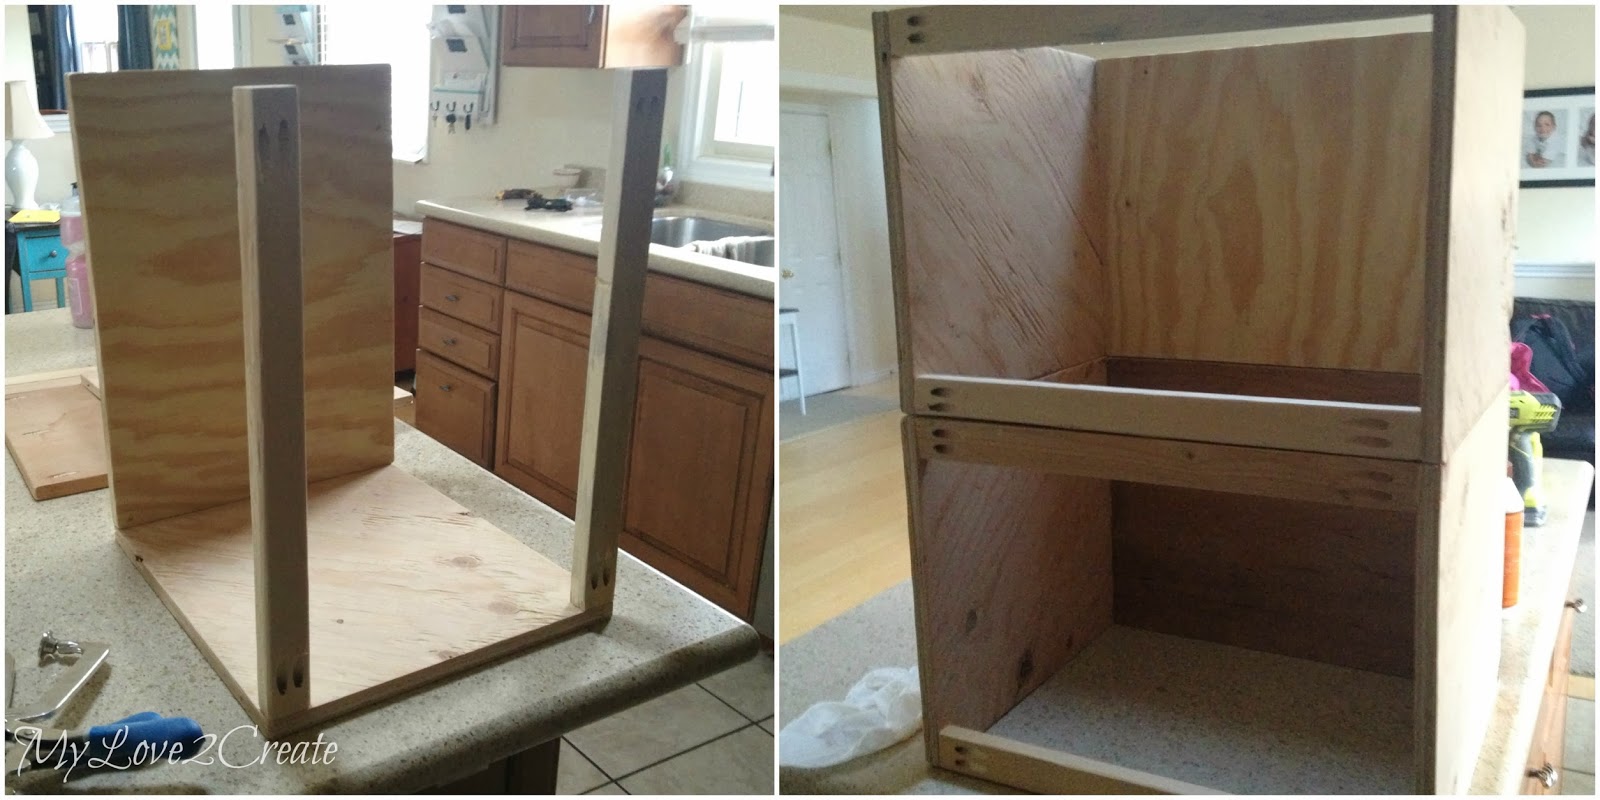
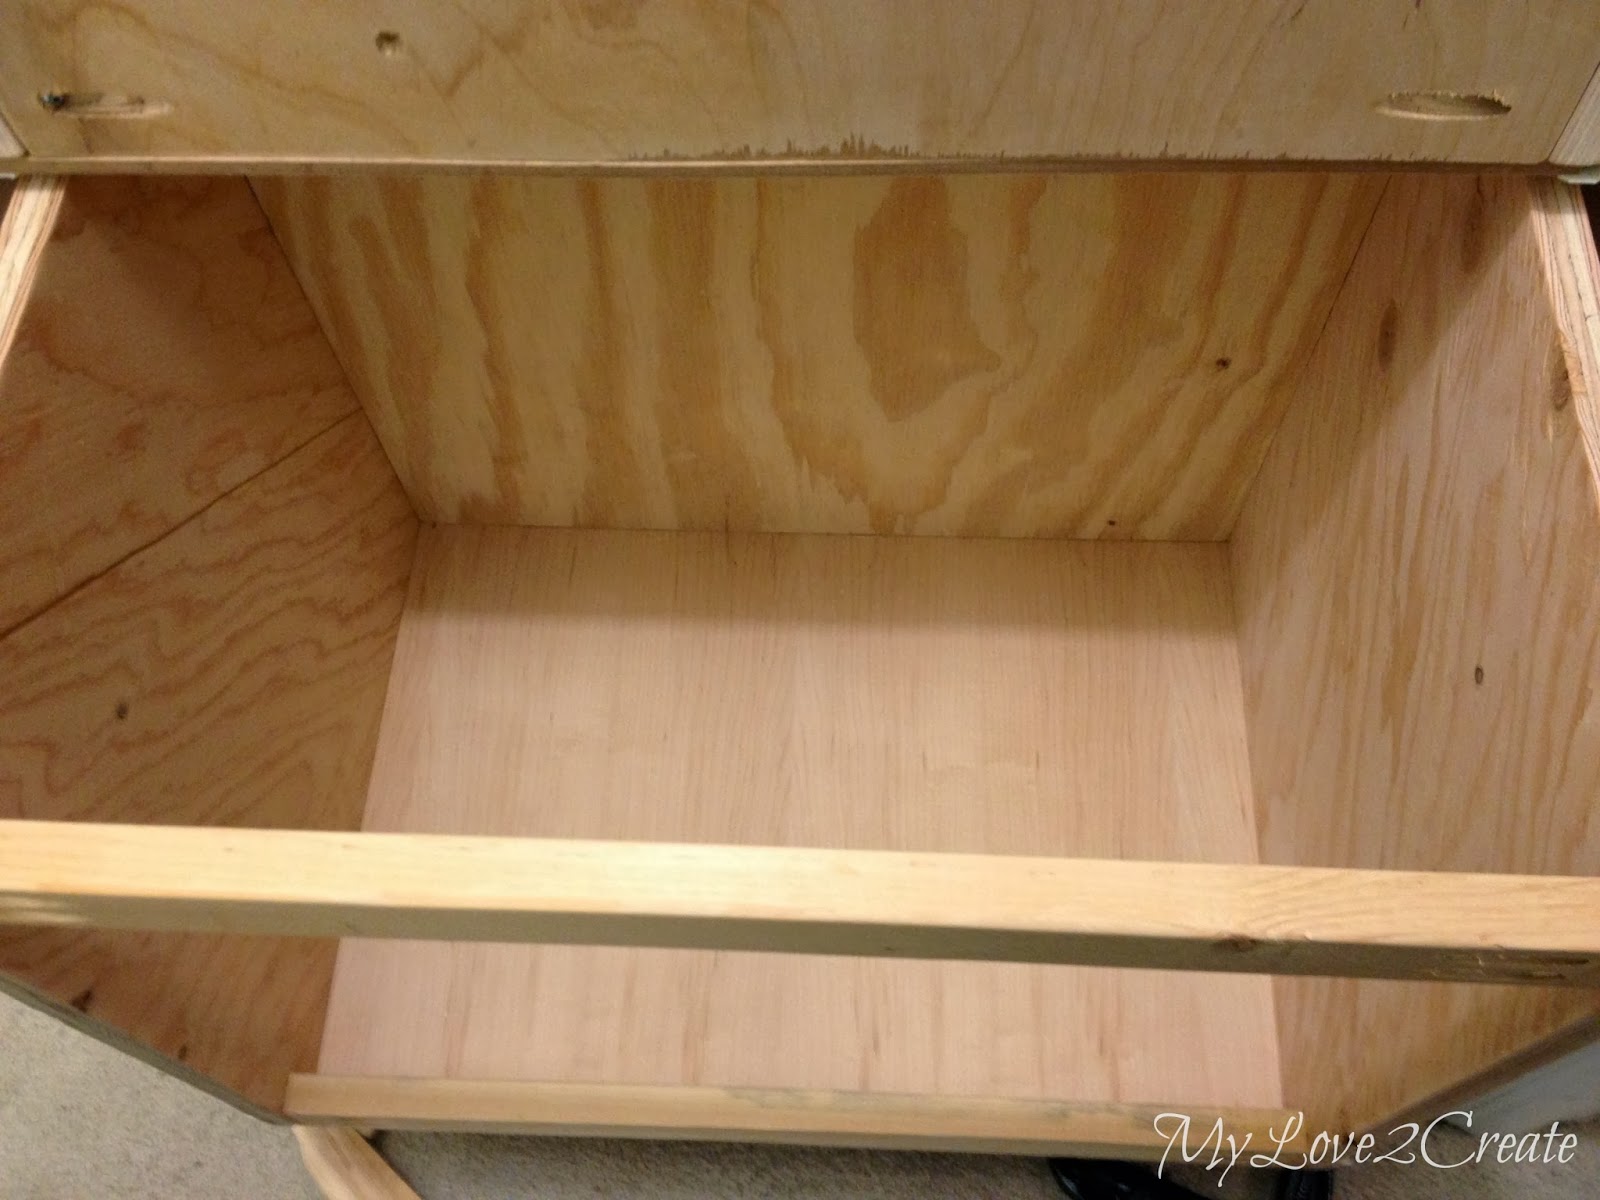
For my hamper drawers, I am doing something a little different, and you will see in the end what that is, but for now the above photo shows my process of building those. Basically I just used two 1×2’s instead of a whole piece of plywood on the front.
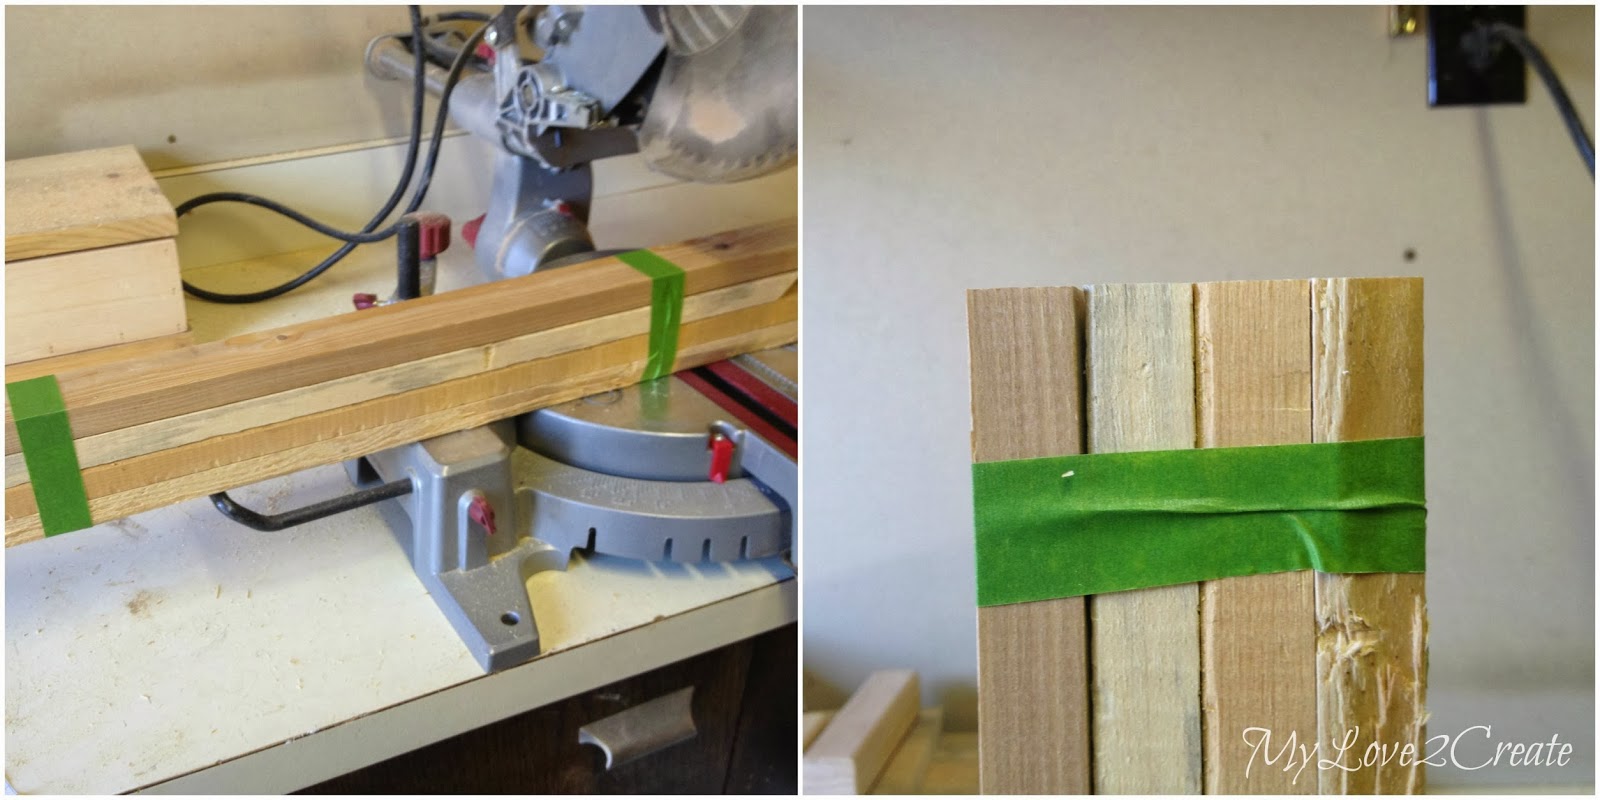
To make life easier I cut all four of my scrap 1×2’s for the hamper drawers at once buy taping them together with painters tape. Perfect!
And this brings us to the bottom of the drawers…I still had to cut those. I ended up finding some 1/4 plywood in my stash (are you beginning to realize how big my stash is?) and I got all 10 measured and cut. I was so excited to finish my drawers I brought them in: glued and nailed the bottoms onto each drawer, and installed all twenty drawers slides….and I didn’t take one single picture. I think I remember thinking I should stop and take a photo…but really it is not rocket science, and you can still see Ana’s drawer post, it has pictures, yea!!
When I went to install the drawers they weren’t all perfect, but little imperfections can be hidden behind the drawer fronts, and I am OKAY with that! Some shims were needed behind some of the towers drawer slides in a couple of places because my cuts were a little short, but in the end it all worked out, and I feel like having to use a circular saw for my very first time and cutting odd and random pieces of plywood gives me a good reason to be imperfect!
They slide great and I am very excited to have them in!
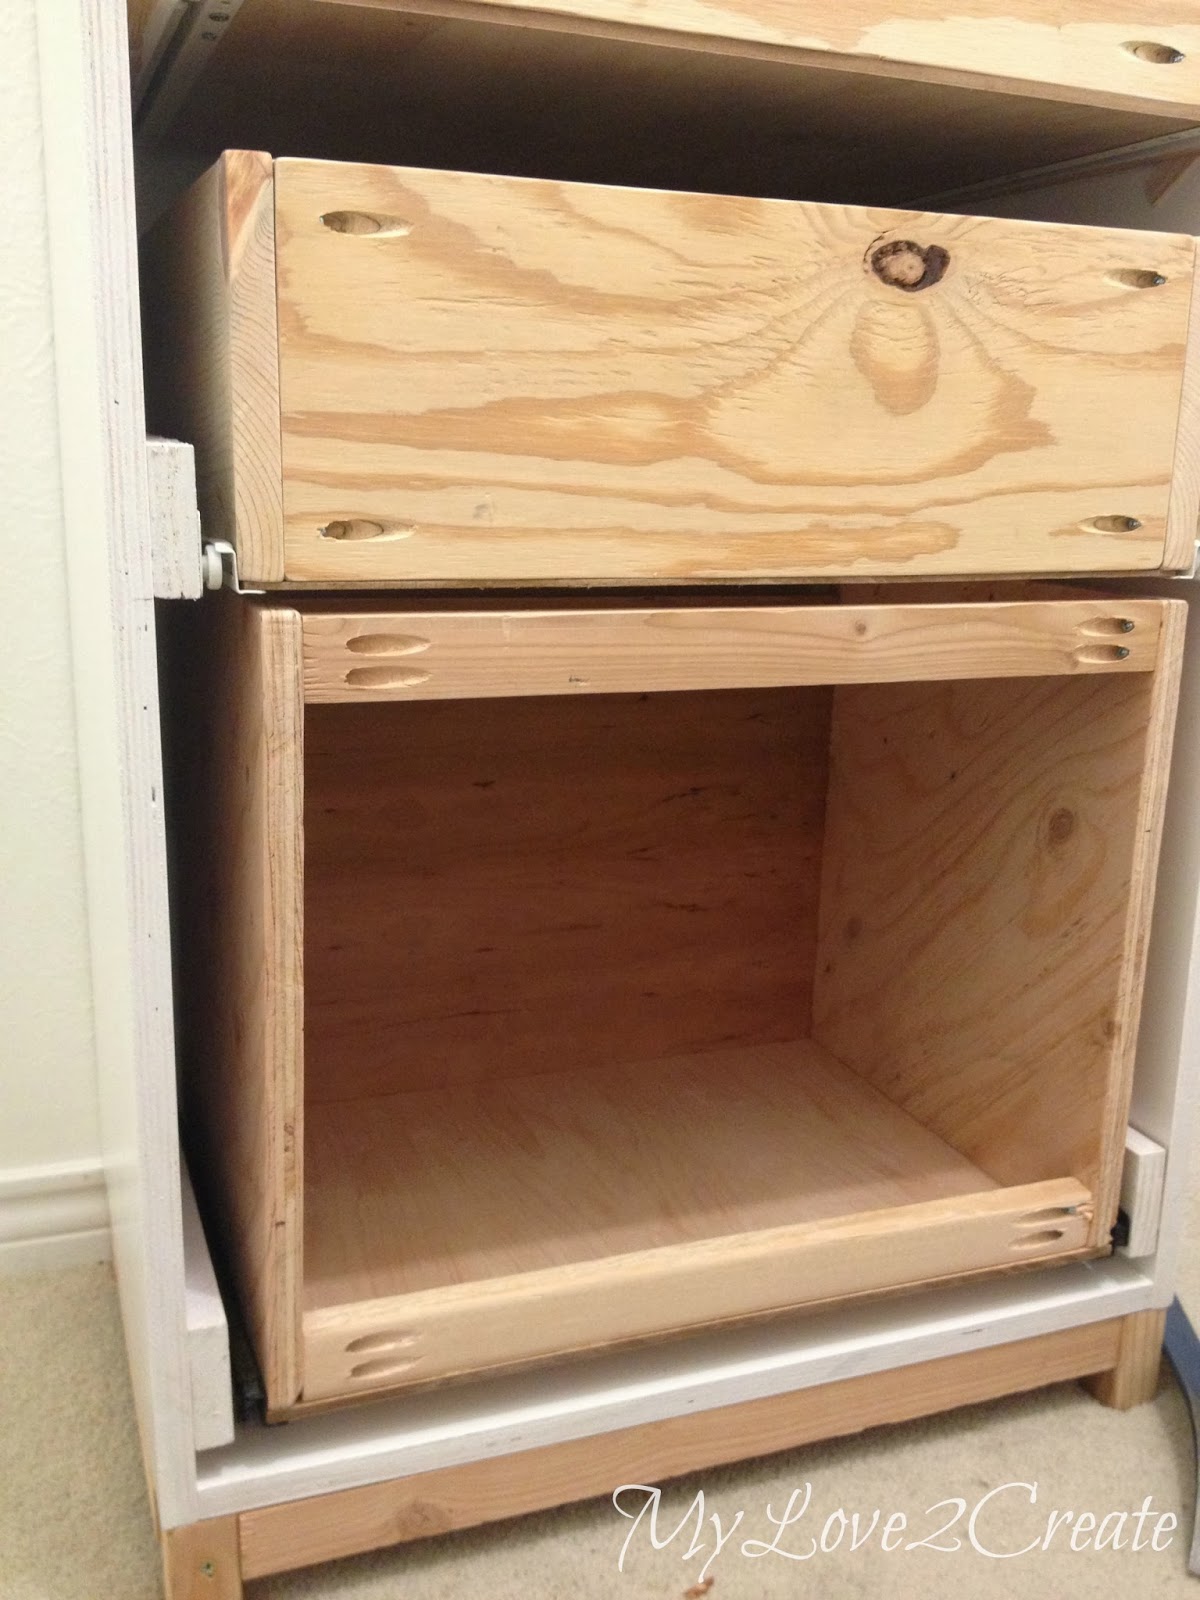
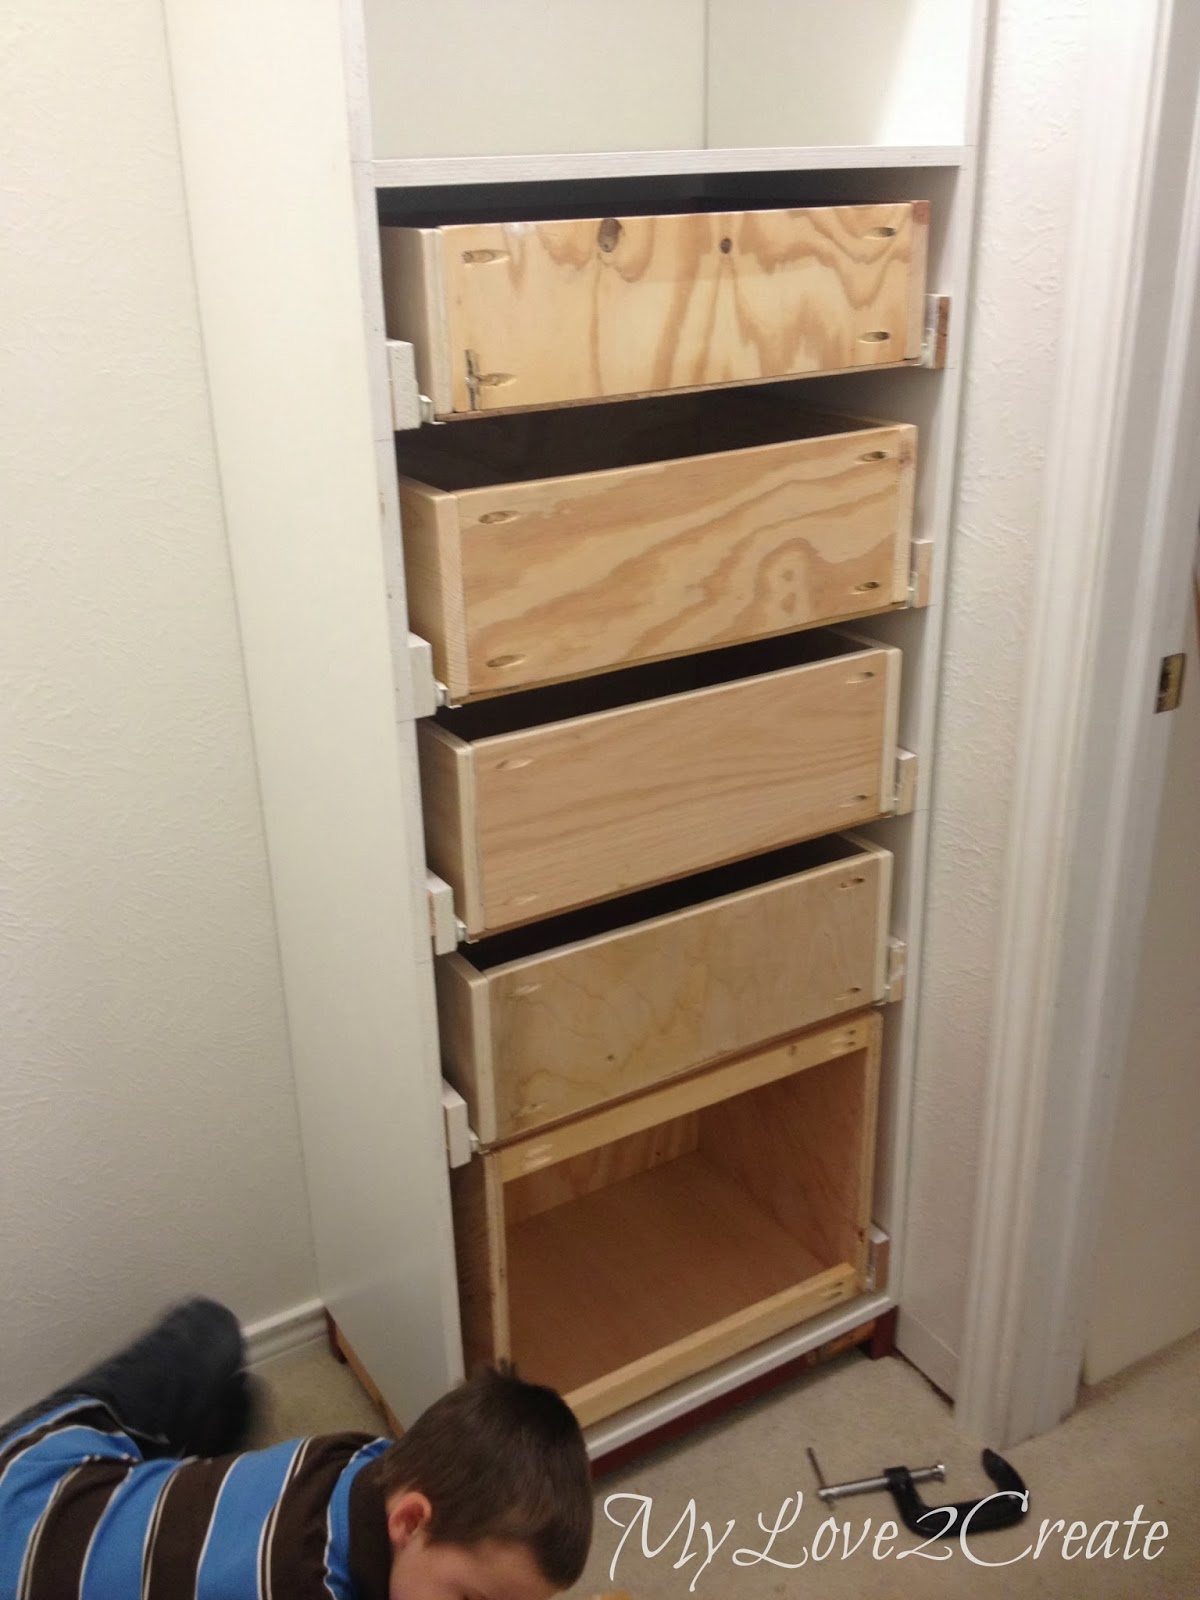
Here is one of the hampers sliding out, I can’t wait to show you what I am doing for the front! And you can also see the bottom of the drawer thickness in the drawer above it, and a random shim on the floor.
Here are the two towers without the drawers in. I wanted to point out that I added another support board in the middle. It was really helpful to sturdy things up.
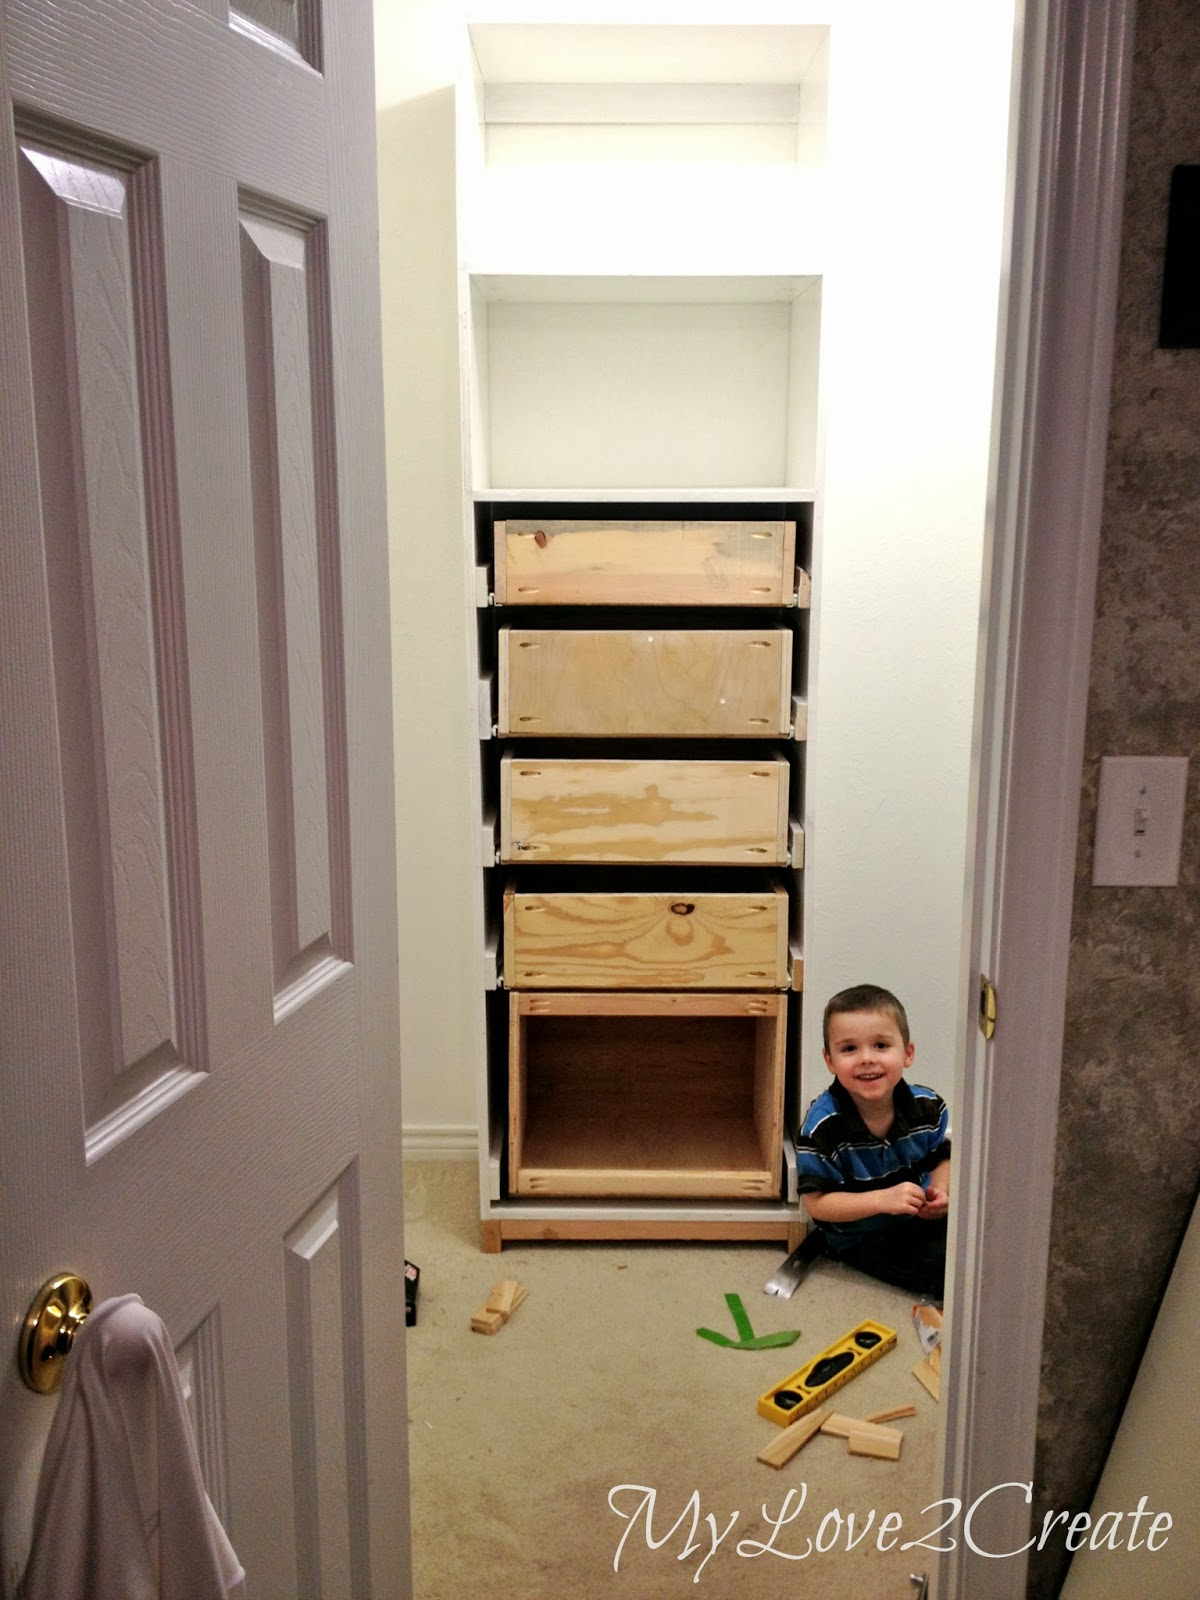
Tower two with drawers, and that cute little helper…
And again tower one with drawers! My next post will not contain the drawer fronts but some great progress on that back wall! Eeek this is so exciting!!
Hugs,
Mindi
I will be linking to these parties.

Looking good! Drawers can be so tricky, I'm not jealous of you during this stage!
Oh my gosh! it's coming right along…. even though I'm sure you're ready to be d.o.n.e. (if you're not already)
That adorable helper puts a big smile on my face… what a cutie!!!
looking forward to see the next steps Mindi
gail
Wow, amazing Mindi!! What progress – and I am so impressed with your building skills!! (PS your little guy is adorable:)
Hey, all those drawers look great! That's what I need to do in my closeet. Can't wait to see more. Things going fast with your big helper 😉
Holy cow! That tower with the drawers is beautiful! It amazes me that you are doing this while I am struggling on how to make a simple bench out of old wood to hold some of my planters! Ha! Inspiring!! Keep up the hard work friend! Nicole xoxo
Girl, I am loving those two towers and what you have accomplished so far! I still do not know how you are able to get so much done and be mom. Do you drink a lot of coffee? 😉 Seriously, I read your past post / plans for the closets and I am super excited and am here to cheer you on! 😀
Great job on the drawers and slides. Do the right angle clamps keep the drawer square or just hold it in place while you put the screws in? That's the one thing I didn't buy with my Kreg jig and wish I did.
I don't know why, but I dread putting in drawer slides and I have a stack to do like yours. I hope I do as good a job as you did.
Wow Mindi this is going to be awesome storage. I'm beyond impressed with your talent!
Marie@TheInteriorFrugalista
I am so impressed!! Love it!!
I Co hosted last week's Fluster's Creative Muster Party! Thanks for linking up!!
Hugs,
Debbie
I'm impressed Mindy! Great job! That is a lot of measuring and cutting and assembly. I can't wait to see the finished product. Thanks for sharing this at What We Accomplished Wednesdays! Have a super week!
Deborah
I really want to do this on our new house! thanks for sharing!
Sisters, Sisters
This is perfect. I have been helping a friend with her bathroom remodel and she had some space to make something like this. I am so glad I found this to pass on to her.
Thanks for linking up to Twirl and Take a Bow! Hope to see you next Tuesday!
You are doing such a great job! It is so smart to have plenty of drawers in a closet.
Wow Mindi, you and your helper are doing some great work together!
Good job with the circular saw, too!
I haven't tackled drawer installation yet, but your tutorial is inspiring me to try it!
Val @ artsybuildinglady
you make this look so simple…which I know is not 🙂 (btw…I am running the Country Music City Marathon in April)
that's great. we were just talking about maybe doing something like this with our pantry closet.
These look wonderful! So nice for neat, organized storage. I have been looking for ideas for our bedroom/closet remodel, so thank you so much for the inspiration:)
What a great idea for keep thing organized. You also did a very nice tutorial on the drawers and drawer slides. Thank you for sharing with the Clever Chicks Blog Hop! I hope you’ll join us again next week!
Cheers,
Kathy Shea Mormino
The Chicken Chick
http://www.The-Chicken-Chick.com
Oh Mindy! These drawers are so awesome! I bet you could store an elephant in one of them: so sturdy! Good for you for utilizing all that free wood you collected: you go girl!!!
🙂
hugs x, Crystelle
Crystelle Boutique
Oh Mindy! These drawers are so awesome! I bet you could store an elephant in one of them: so sturdy! Good for you for utilizing all that free wood you collected: you go girl!!!
🙂
hugs x, Crystelle
Crystelle Boutique
WOW…you did GREAT. Thank for sharing on Twirl and Take a Bow! ~Tammy
I love how you love to build things! So impressive! Thank you for linking to Whimsy Wednesday last week! I featured your closet drawers in my featured project post!
You can see it here http://www.ohmy-creative.com/home/10-diy-made-wood-home-projects/
The party is open this week…stop by and link up!
Have a great week!
Susan