Foam Core and Poster Board Marquee Angel
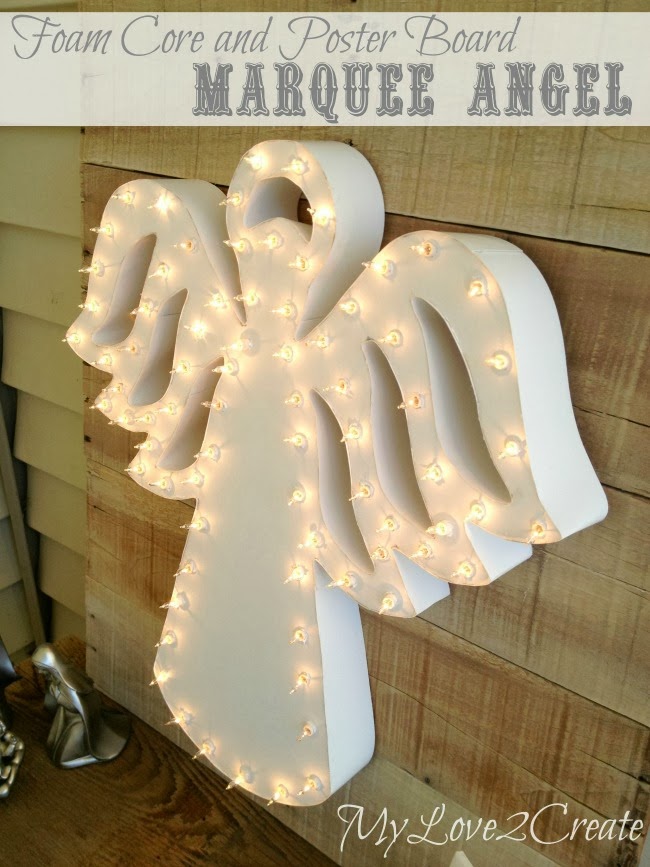
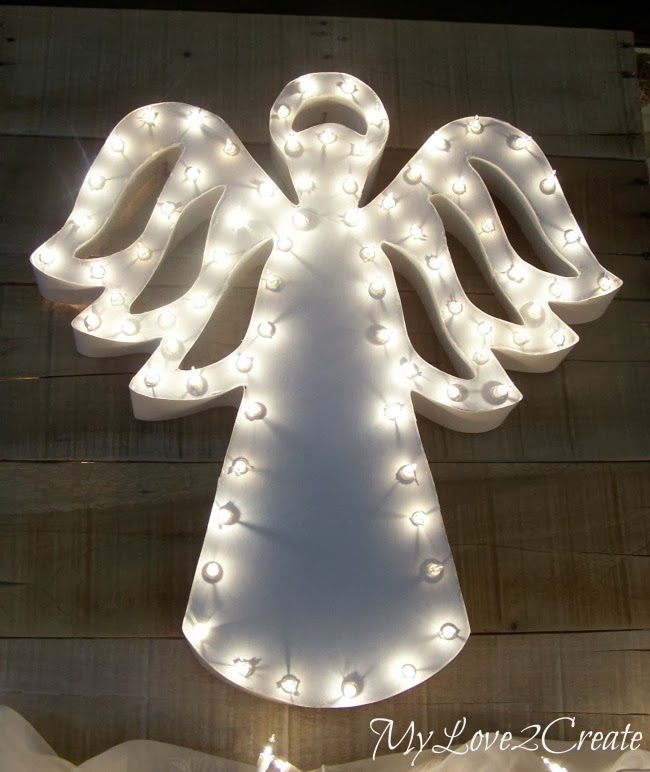
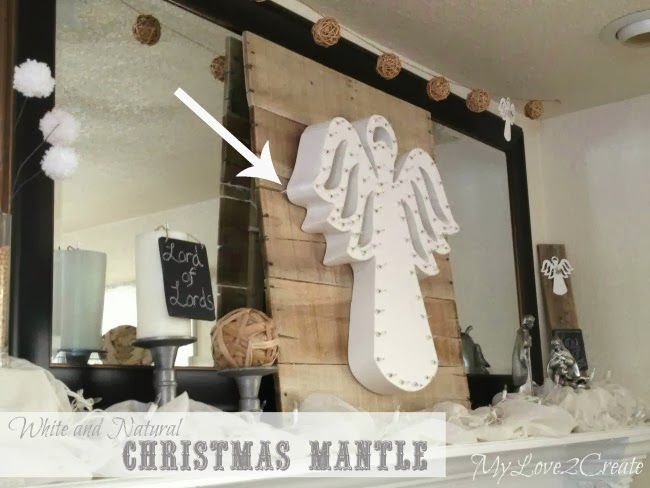
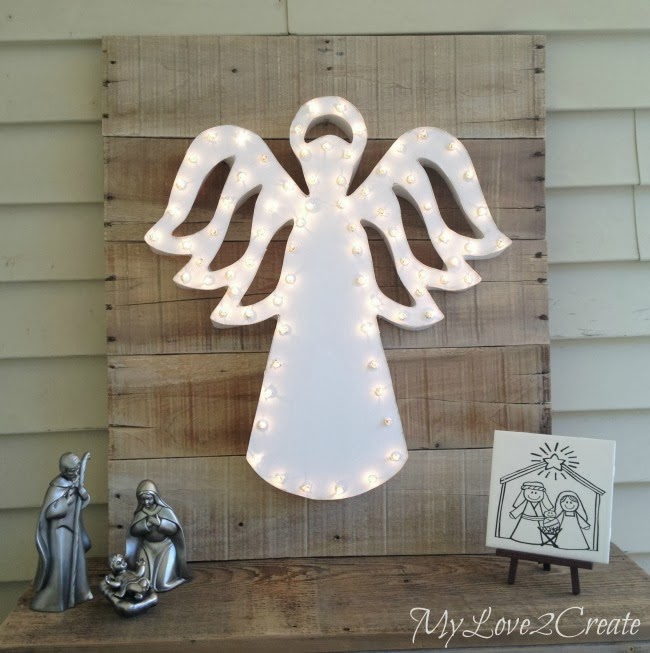
I am super excited to share how I made my Marquee Angel that you saw in my White and Natural Christmas Mantle yesterday!
It was pretty simple to make, although it took a little bit of time. However it was totally worth it, and it only cost me $1! I used one piece of foam core board from the dollar store, and one piece of white poster board that I already had on hand, as well as a string of Christmas lights, which I also had.
It is so fun and festive, I love having it light up my home! So how did this angel come about? Well it wasn’t my plan all along, it just sort of happened…
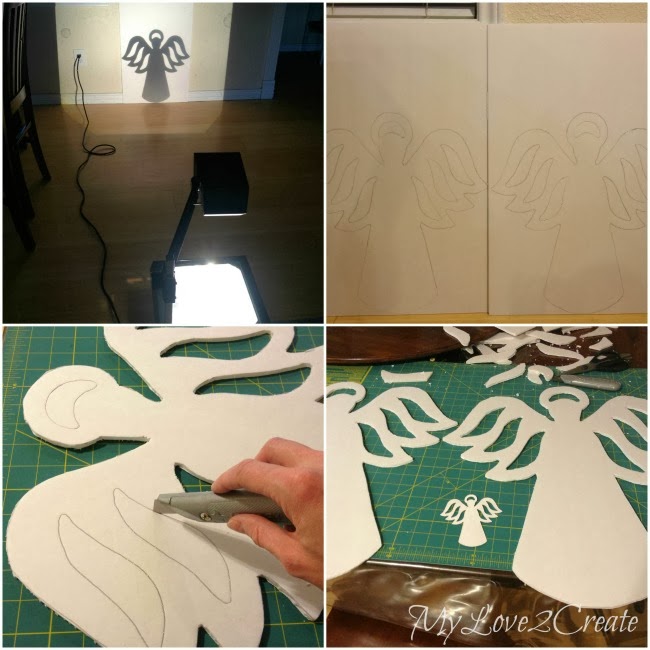
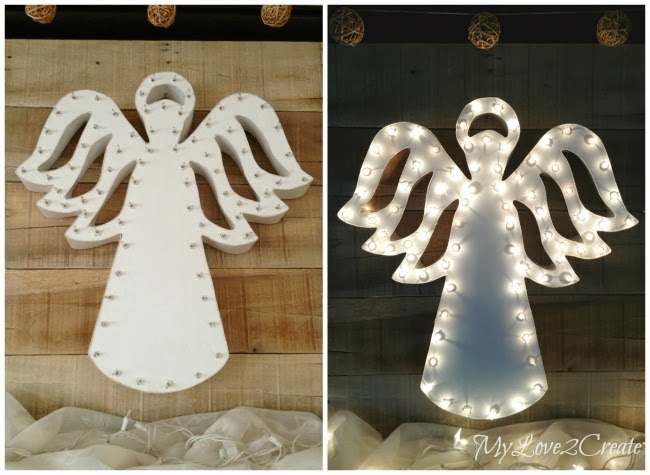
It all started with this cute little die cut angel in the bottom right photo above. In my church I help plan activities for the women that we hold throughout the year that teach, uplift and inspire. This little angel was a favor we gave out for our Christmas Activity. I had this thought that it would be fun to make a few bigger angels to display that would match the little die cut angel. So that is what I did.
You can see above that I used an overhead projector to trace the angel onto the foam core. I simply put the die cut angel right onto the projector and it blew it up for me! You could do any shape you wanted! I traced the outline onto the foam core, then I used a cutting mat and an exacto knife to cut out the angel shapes.
After the activity was over, I was left with these foam core cut out angels and they sat around my house for a week. I keep looking at them thinking what should I do, throw them away? Of course I couldn’t do that, but they needed some kind of sprucing up, and at some point the marquee idea came to me. So I tried poking holes into a scrap piece of foam core with a pair of scissors, and it was so easy I decided to go for it. I poked them all around the angel.
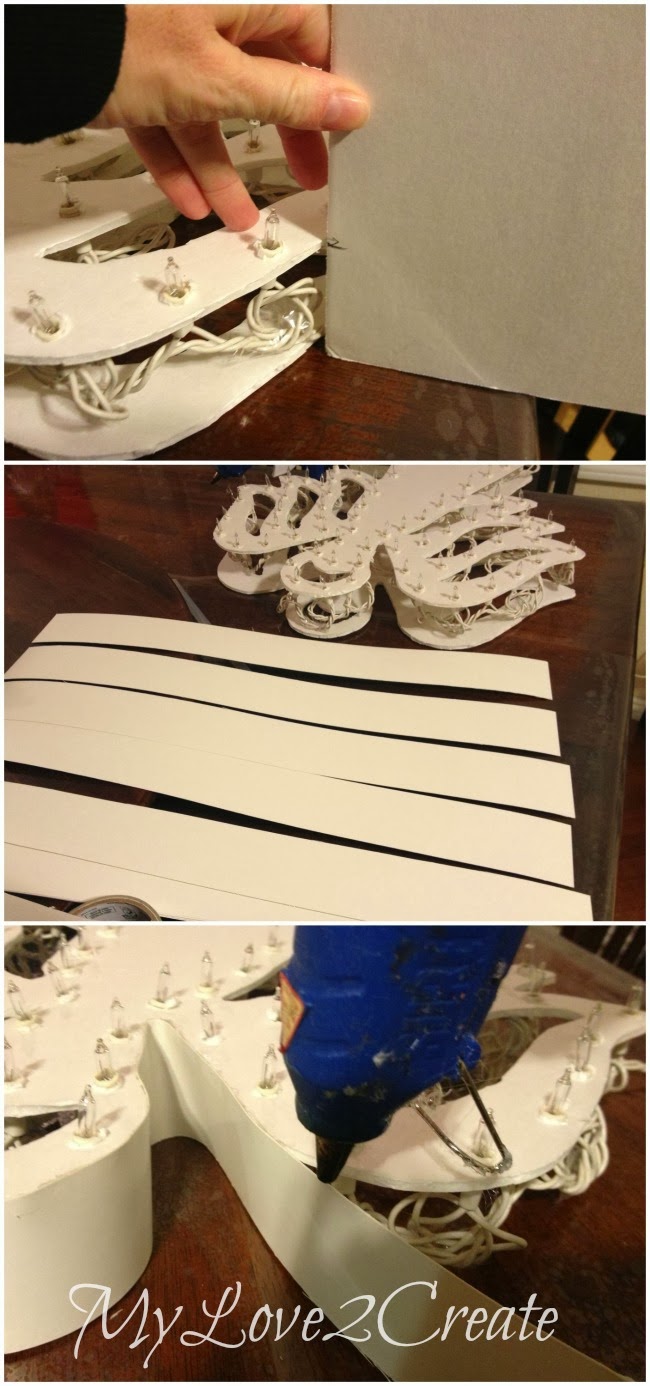
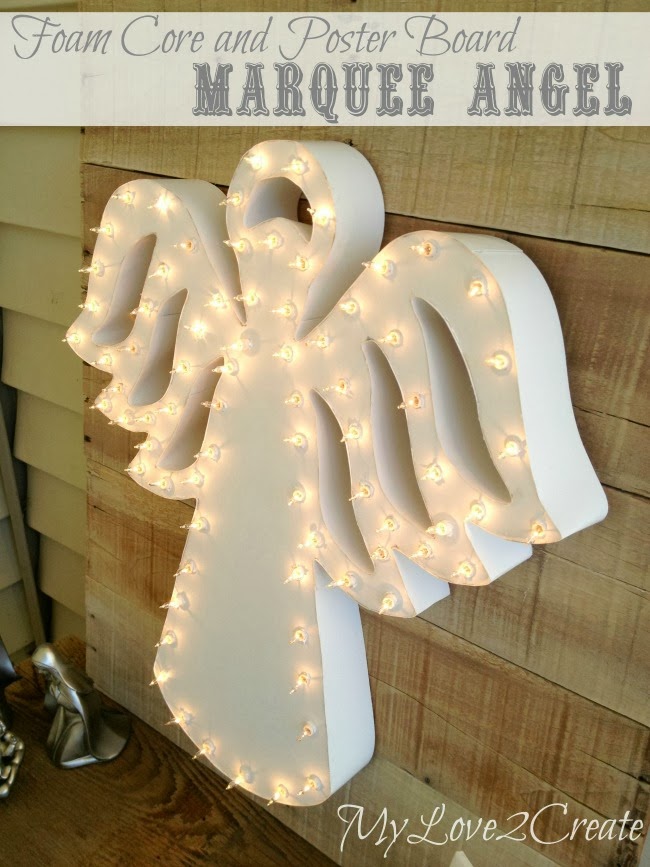
Then I grabbed my string of lights and started filling in the holes. It was so cool! When I finished I flipped it over and realized that I had to do something about all those wires! So…
I used a scrap piece of foam core and marked on it how tall the angel stood with the wires in the back. Then I got some poster board and cut it into strips at that same width. My strips ended up being 2 1/4 inches wide. Having no idea if this would actually work, I just went for it and started hot glueing the edges of the foam core and placing the poster board strips flush with the top of the angel.
I worked in small sections and held them in place until the glue hardened. I was so pleased with how easy it was, and how the poster board just went to the shape of the foam core so simply! When my strip ran out I just overlapped a new strip and kept going.
You can see above how I fit the poster board into the angel’s wings. I found the best way to do this was to fit the poster board in by bending the corner shapes first without glue. Next, I pulled out the poster board from one corner. I added hot glue to the corner and put the poster board back on and held it until it was set. After that first corner was done I worked around until the whole shape was glued on. It does take a little time to do this, but I had a book I was listening to on my phone and it seemed pretty fast!
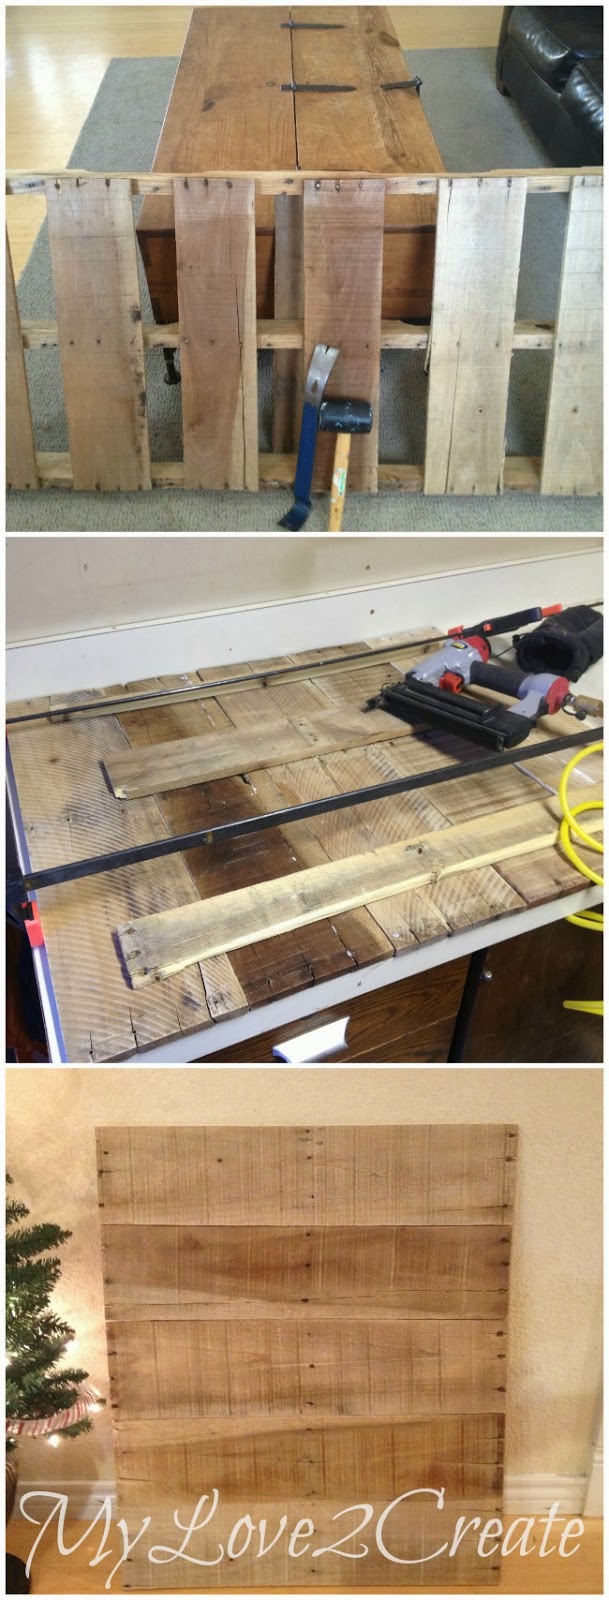
Once the Marquee Angel was ready it needed a backdrop I could mount it on. It is no surprise I chose reclaimed pallet wood! I love it! I used a crow bar and mallet to remove the wood from the pallet, which was free.
The three middle pieces of wood all split. It is ok if that happens, you can see the dried glue in the middle photo above. I tried to glue them together first, but I could see it wasn’t necessary. I just clamped them all together. To connect them I used other scraps from the pallet, and nailed them on the back, making sure to hit all the pieces of wood. Oh, and I did sand to prevent splinters!
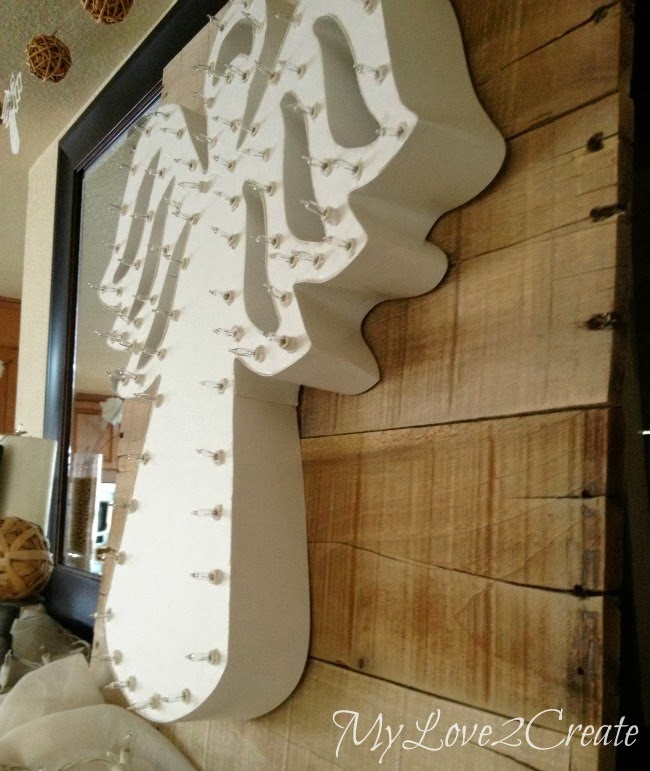
You can kind of see in the left photo above a nail holding the halo of the angel. I centered the angel on the pallet wood, marked the center of the halo, and the top two wing openings with a marker. Then I removed the angel and hammered a nail into all three marks. All I had to do was set the angel onto the nails to hang it!
So, I are you wondering how I hid the cord for the lights? I didn’t want to drill a hole in my pallet boards, because I will probably use it for something else throughout the year. See the arrow above? I had that small slat that I slid the wires into from the side, and hid it under the wing, it was perfect! Well, except for the fact that you can notice it barley in this photo. But I promise you wouldn’t have noticed if I didn’t show you! =) Muwah ha ha! That is our little secret!
And that is it! Can you imagine all the cool thinks you could make for super cheap with this method?!! You could paint the foam core and poster board too, I obviously didn’t need to, as angels are supposed to be white.
I am so glad this project evolved how it did! I wish you could see it in person, it looks a million times better, I promise!
Thanks for sticking with this long tutorial, I hope it was helpful and you are inspired to make your own creation!
Hugs,
Mindi
I will be linking to these parties.




Wow! You are so creative. I love it so much. Keep it up!
Military spouse benefits
This is absolutely amazing. I'm sending this out on my Facebook page today… Awesome. This is the real deal.. DIY. Linda
This is absolutely amazing. I'm sending this out on my Facebook page today… Awesome. This is the real deal.. DIY. Linda
What a major undertaking…amazing how beautiful your angel project is. Absolutely awesome! Kudos for creating this wonderful decoration. TFS. I am now a follower of your blog and look forward to return visits. I invite you to join me as well on my blog at http://atastefultouch.blogspot.com
Hugs, Gayle.
Really cute and chic! Pinned and new follow to your social media. Merry Christmas
Mindi–I kept wondering how you gave it depth! strips of poster board=genius! I love the angel, and as I was reading your tutorial I was thinking the same thing… ohhh the things that could be made like this. fabulous!
great tute!
gail
ps catching you!
This is just genius! She is gorgeous friend! Such a beautiful piece in its simplicity and the lights just add that bit of magic! And I love how the white pairs with the rustic wood! Well done friend! I can totally see using this method to make a star or other patterns for upcoming holidays! Just gorgeous! A very merry weekend to you! Nicole xoxo
What a fabulous creation from start to finish and except for the pallet, made with stuff most crafters have around. I love these kinds of inspired ideas.
What a fabulous creation from start to finish and except for the pallet, made with stuff most crafters have around. I love these kinds of inspired ideas.
This is seriously amazing Mindi- you are so talented!! Love it- pinning:)
That is amazing and beautiful! Thanks for linking up to Gingerly Made's Show & Tell.
This is so lovely! I am pinning this! Love it Mindi! Happy Holidays Theresa @DearCreatives
I love this marquee!! It turned out awesome and I can't believe it only cost $1! Thanks so much for sharing this with my Frugal Crafty Home Blog Hop readers!
Beautiful design and truly inspired!
I am loving the marquee look right now! This turned out amazing! I'm featuring this on my blog today.
http://www.sumossweetstuff.com/2013/12/showcase-saturday-christmas.html
Thanks for linking up to the Block Party!
Sumo:)
Love love love this! I nominated you for the Liebster Award… to accept head on over to the blog!http://therusticredhead.blogspot.com/2013/12/liebster-award.html#more
Dang, lady! Your creativeness never ceases to amaze me. I love this! It is beautiful! 🙂
Really inspiring DIY efforts to make marquee boards attractive and different. It's reflects your creativeness in this filed. You should start to think thisproviding marquees for all events.
I so love Angels and luckily have everything I need. Except the blowup part. I will figure it out. Many thanks for a way to honor them.
Merry Christmas.
I love this idea, thanks for sharing!