Free Dresser- Free Makeover!
Anyone who knows me knows I love FREE things! Who doesn’t right? A good percentage of things throughout my house were free. I am cheap lets face it. I cringe if I have to buy something new and full price. Don’t get me wrong…I love new things, but, at a discount. A lot of the time something old can be made to look new and then you feel this huge since of accomplishment….Look what I did! Such a better feeling than paying tons of money. (which by the way I don’t have…)
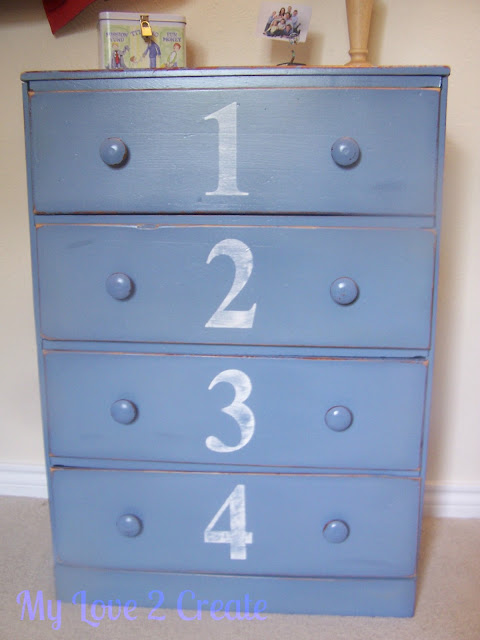
So this is what I ended up with….for Free!!
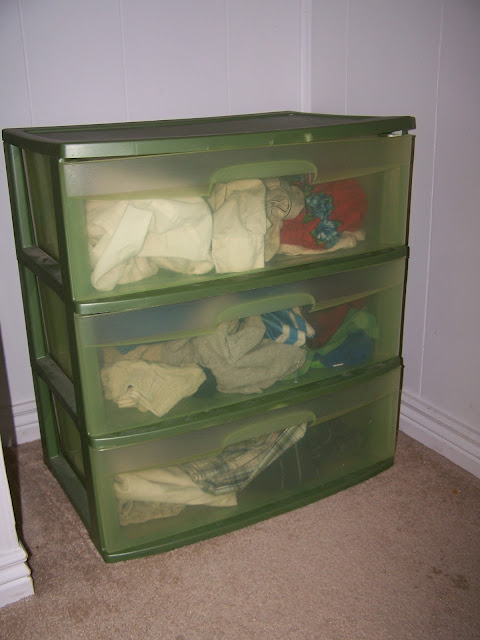
So, most of my kids have been using these kinds of dressers for many many years. (If you can even call it a dresser…)
Lovely right? Um, No.
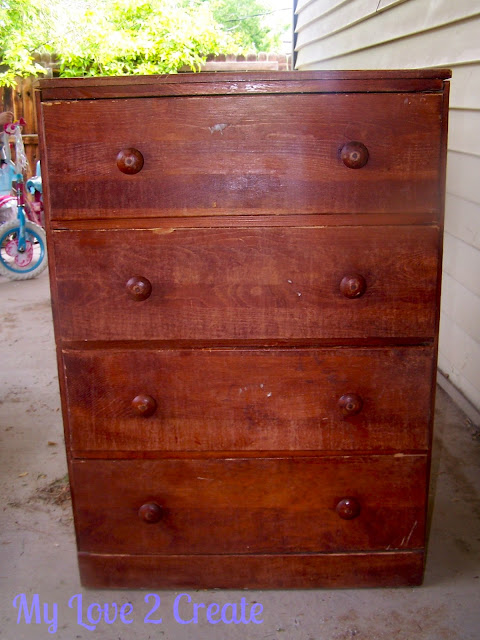
So, I am always on the hunt for free dressers. I got this little cutie from the free section of craigslist a little while back. (You and the free section should become good friends!)
Now this little guy looks pretty good in the pictures, but I did give him some TLC. It is amazing what people will do in their own repair work. Some of these drawers were hot glued back together! I did a few nailing and wood gluing to make things better.
I also sanded it pretty good, because there was a lot of…I don’t know what…sticky stuff on it.
Then I went to get some paint, from my garage.
I wanted some type of blue, but I only had a small amount. So I got some white paint and an old perler bead bucket and started mixing. A little blue goes a long way!
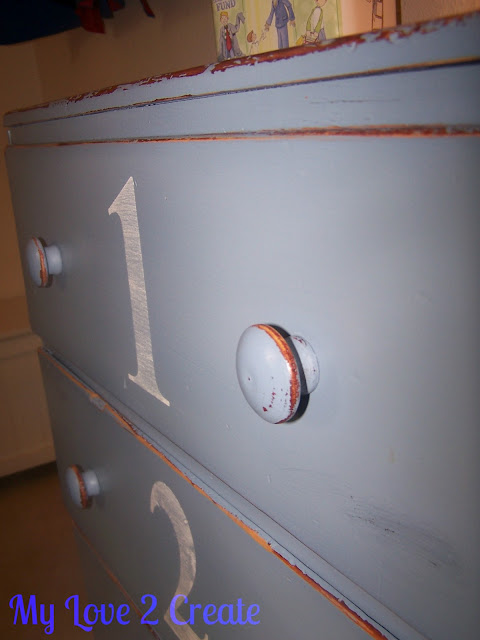
Then I painted the dresser. I wanted to try something different since it was going in my little 3 year old’s room, so I busted out some vinyl and cut letters to use as a stencil, and painted some numbers on each drawer. I didn’t have the money to replace the knobs, so they just got painted too. Then I distressed it on the edges and the numbers….. Voila!
A “new” dresser for free!
I am so happy with how it turned out and, yes…I get a little grin on my face when I walk into my little boy’s room! Look what I did!
Gotta love that “I accomplished something” feeling!
Lots of Love,
Mindi
I will be linking to these parties.



Thanks so much!
Beautiful job – love working with numbers ( and you nailed it )and your distressing is just perfect!
Your newest follower – would love to have you come by and follow back when you have the time!
Hugs,
Suzan
Thanks so much Suzan, you made my day! I am on my way over now!
Super cute! I always love a numbered dresser. I'm featuring yours at the Power of Paint Spotlight this weekend.
How exciting! Thank you so much!!!
Mindi-
Your capes are darling. The dresser turned out fabulous too! Thanks for stopping by my blog.
WOW Mindi. . . I just paroozed (Have no idea how to spell that) your entire blog and am amazed. Amazed. Amazed. Amazed.
And comment above. . . I totally agree. The capes are darling too. Something I need for my little brood. Any pattern suggestions on that one?
Where did you get the numbered stencils? Thanks! JM
I used contact paper and cut them out on my cricut. I wish I could remember the font, but it has been awhile! If you don't have a cutting machine you could use this method I describe in this post http://mylove2create.blogspot.com/2012/10/good-old-fashioned-pencil-transfer-signs.html
It would be super easy to do!
I REALLY LOVE your projects they make me want to cry sometimes because they are better than mine come on visit me if you like to
http://sweetntidy.blogspot.com/2014/05/nursery-organizing-with-zero-budget-my.html
http://sweetntidy.blogspot.com/2014/05/diy-chaning-table-organizer-for-baby.html