Headboard Bench, or loving referred to as the Puzzle Bench
I don’t think I can describe how much I LOVE headboard benches. It is so amazing to me that you can take something that another deems as garbage, and make it into something cute and useful! I know I have said that before, but it is still true!
This is my second ever headboard bench and I love it…not just because it is so cute, but because it was so fun to make. Check out my first HERE.
It is my puzzle bench…
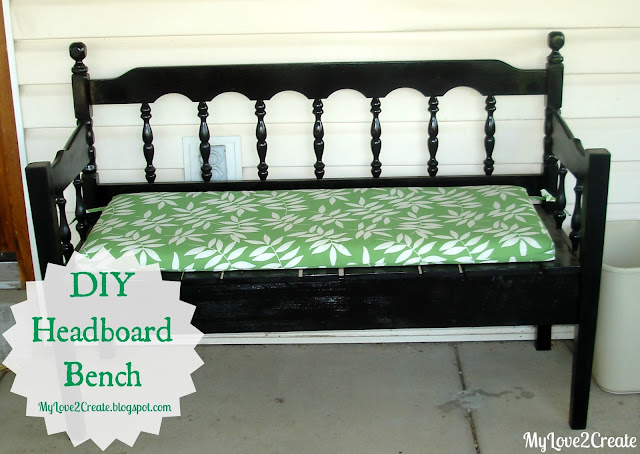
Why a puzzle…because I made it from several random FREE parts, yes all parts of this bench were free materials I have stashed collected.
Lets see how it came together…
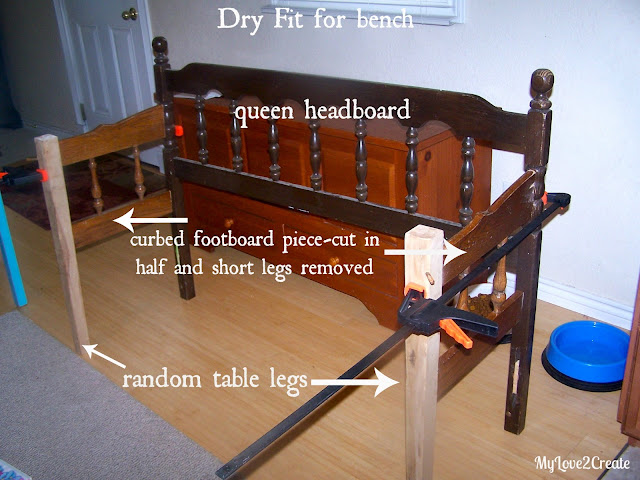
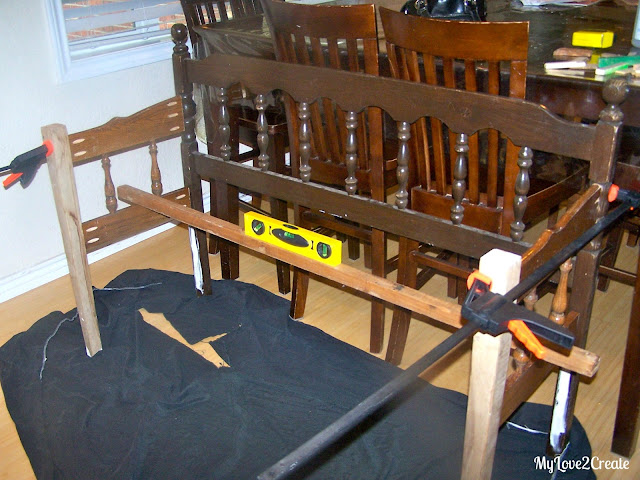
This photo is my dry fit- seeing if the bench would work with all the random pieces I pulled together. It took me a while to get it to stay this way with just the clamps, since I was doing by myself, I can’t remember but I might have used a kid to hold one end while I clamped the other….
Since I did not have a footboard to match the headboard, I got creative with a footboard from a different bed. The only problem? The legs on the footboard were only 3 inches off of the floor. I needed longer legs…. I cut off the short legs, when I cut the footboard in half, and decided it was worth it to break up my set of four table legs.
Here is a quick break down of where I got everything,
Queen Headboard- Free section of Craigslist
Footboard- Curbed from someone’s trash on the city trash removal weekend
Table legs- Free section of Craigslist, were in a pile with a lot of wood scraps
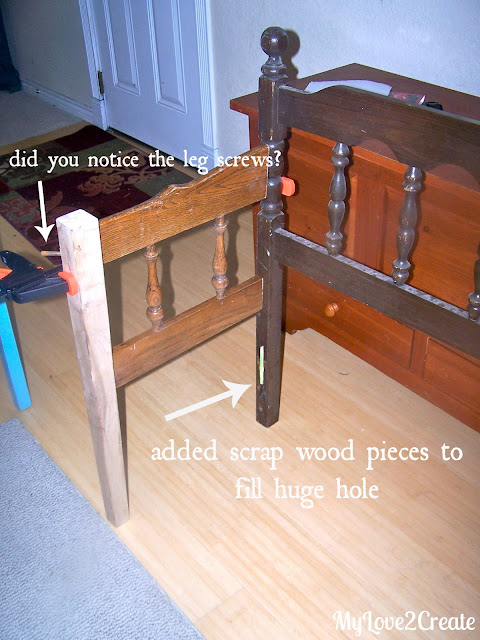
If you look closely at the table legs they still have a screw in them near the top, I had to have my strong husband get them out, they were pretty rusty.
If you don’t like to throw things away, like me….I have proof that small cuts at the end of a board come in handy….They filled those huge holes, and I save on spackle, sa-weet.
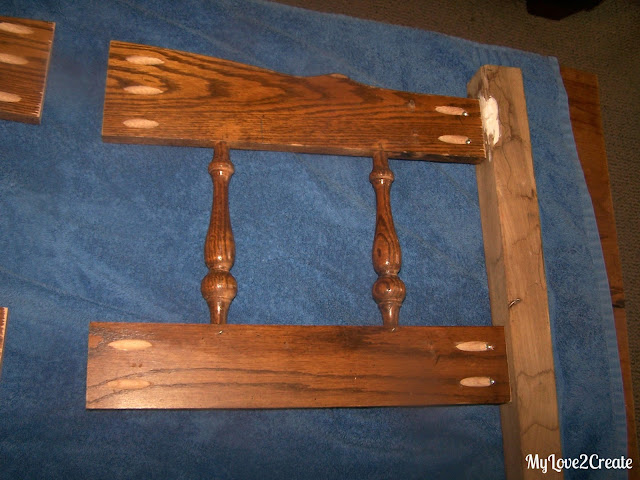
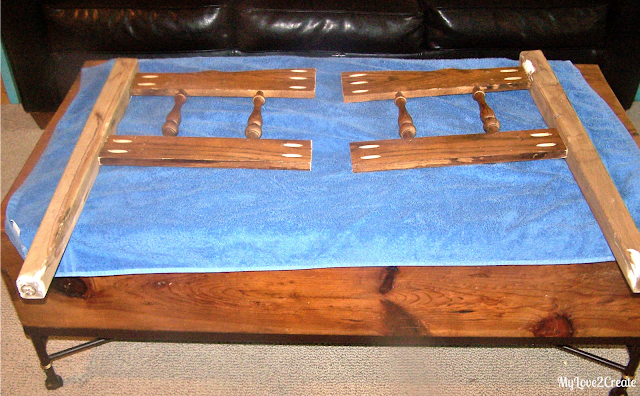
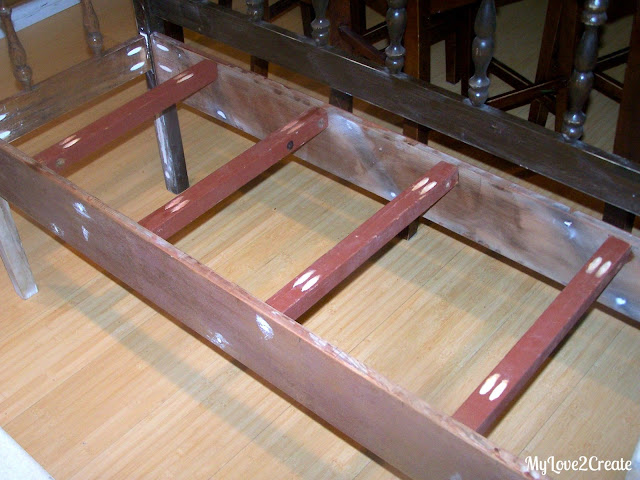
Once I was happy the bench would work I drilled pocket holes in the foot board pieces, on both sides. I measured down the same distance on each table leg and glued and screwed them in. You can see where I filled in the hole from the table leg screw.
Here they are ready to be screwed to the headboard.
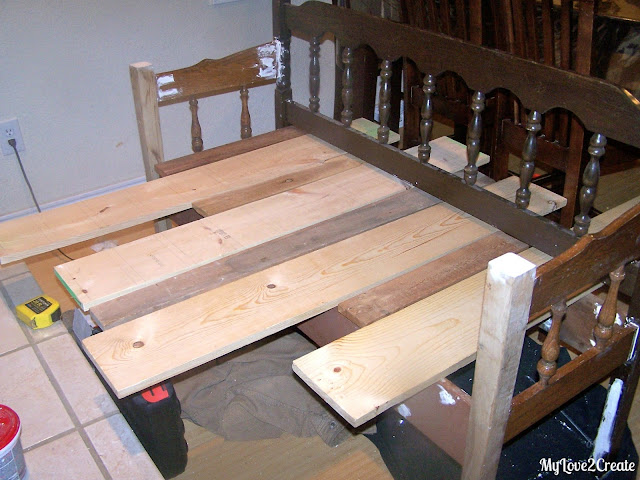
I clamped the sides to the headboard. You can see I wanted to make sure the bench would be level. That long scrap piece of wood is just to hold my level. I adjusted the sides until it was level and then traced around the footboard pieces onto the headboard so I would know exactly where it should attach. Then I glued and screwed in the pocket holes! The puzzle is coming together!
I know this is not a perfect tutorial (I wasn’t blogging when I made it), if you need more specific details check out Gail’s headboard bench tutorial Here. She is truly a pro at this!
Now I needed to make some aprons for the seat. My in-laws (who are now the owner’s of this very bench) had given me some great old deck wood that their friend was getting rid of. I was more than happy to accept the generous offer!
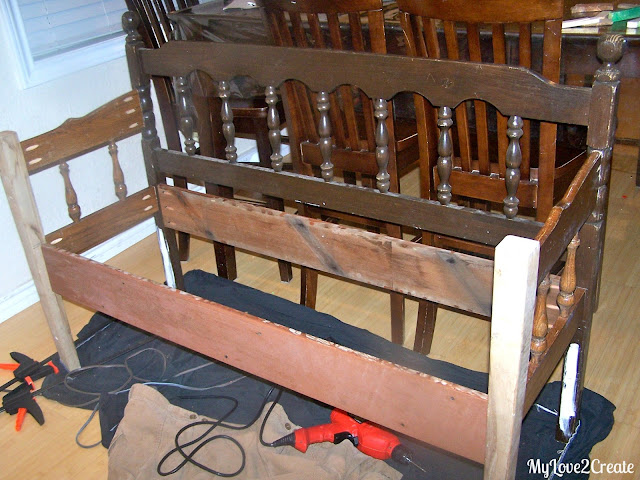
I measured and cut the wood then drilled pocket holes on each end. I put the pocket hole facing the center so I wouldn’t have to fill them. I also did check for level on this step as well, putting a scrap board from front to back resting on the aprons with the level on top of that, sorry no picture.
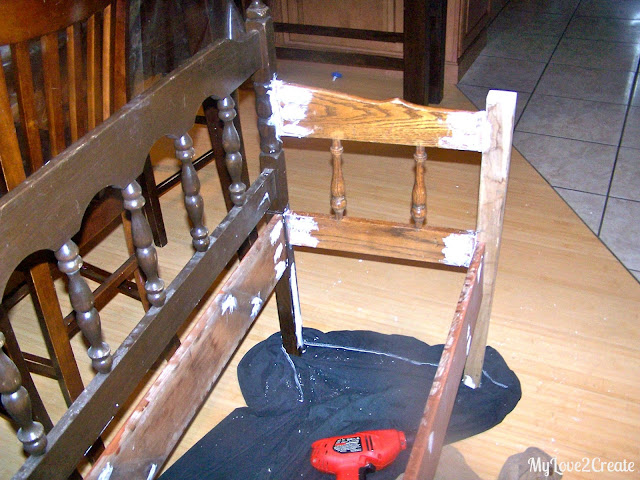
Remember how I said I wouldn’t have to fill the pocket holes that were facing the center? Well I guess I am a little obsessive, and I filled them anyway….with spackle.
Ok, so maybe I am not only obsessive about filling the pocket holes….I am also obsessive about some other things…I will always drill more pocket holes than probably necessary, and check and double check, and even triple check to make sure I added everything right when I balance my check book…I may also be guilty of measuring things for a recipe to perfect EXACTNESS.
So, my point is I had to make sure this bench was super sturdy. The headboard was pretty flimsy and to make up for that I added these old deck posts, with pocket holes and glue. (by the way, they were in the garbage in the back of the Restore, so I asked, and they said I could have them for free!- Insert happy dance) (I used them also for extra support on the underside of my counter height bench and on my step stool) I’m telling you someone else’s crap scrap is another’s treasure!
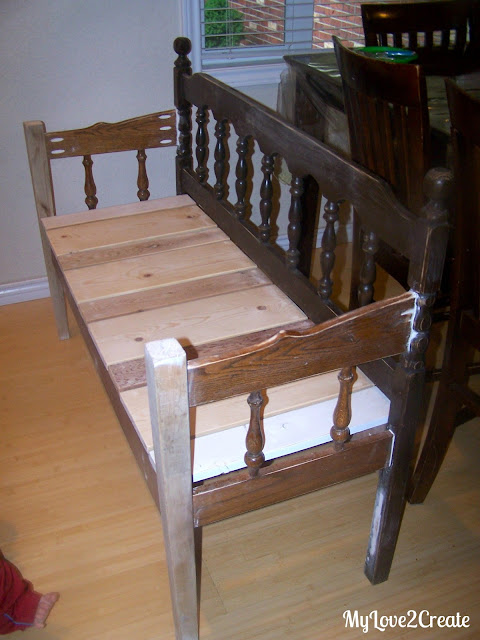
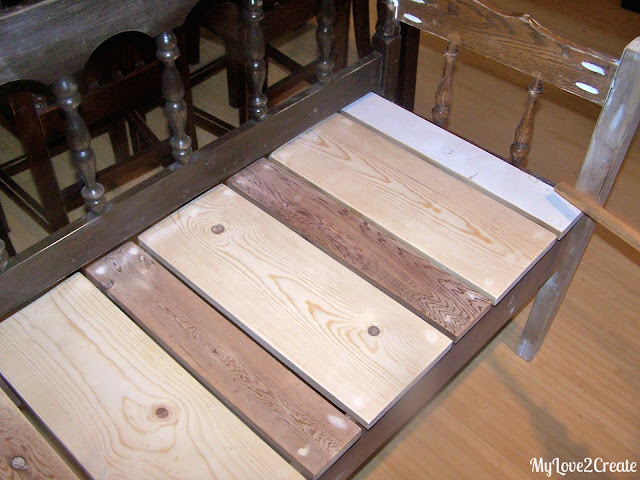
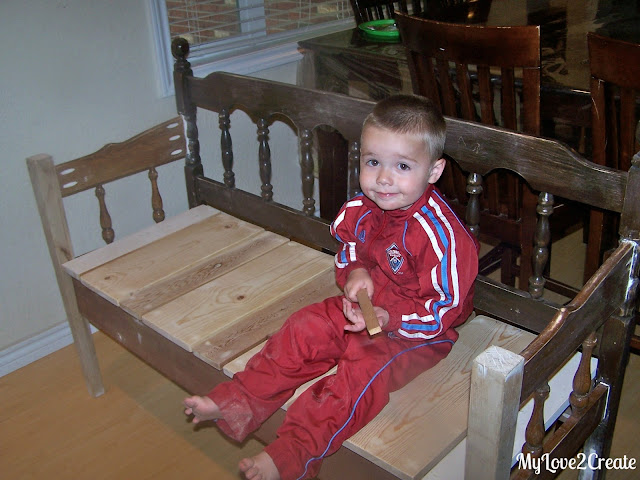
Now I was ready for the seat! I had no money to by wood so I headed out to the shed and found some boards. Of course I didn’t have enough of all the same size…so I improvised. I actually like the different size boards. If you notice I was one board short, I ended up adding an old piece of fence wood. (That would be the white piece below)
Check out that cute little foot in the above picture…(also did you notice every thing is nicely sanded?)
It belongs to the kid holding the stick in this picture…can you see it?
I always have lots of helpers around here, he just wanted to try the bench out and be in the picture! I couldn’t resist!
I hope you noticed the seat has been glued and nailed down and all holes filled…we are ready to paint!
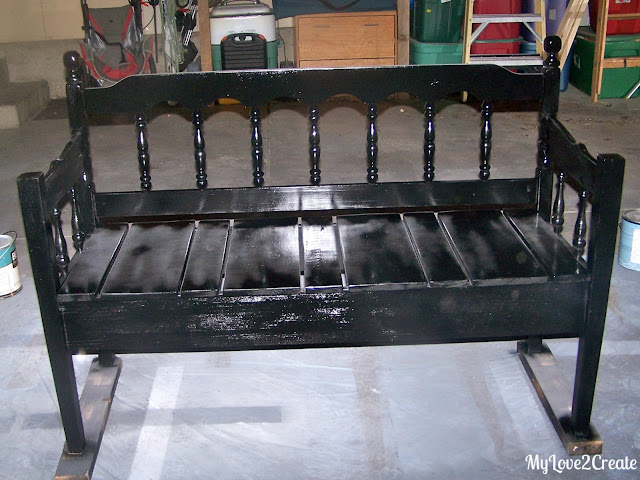
After the time consuming process of painting my first bench by hand I knew I didn’t want to hand paint this one…especially with all those pretty spindles! Sorry about the weird picture with some strange glares…
Problem…no money. But I did have some flat black spray paint that I had gotten on super clearance at Home Depot, for like, 75 cents a can. I am sure because it was flat, but I did have a couple of cans of glossy sealer too…..
I went with it. Luckily I had bought 6 cans of the black, I think I used 5. It is amazing how much paint you have to use to cover spindles. I only used two of the sealer, but it made it look much better than the flat black.
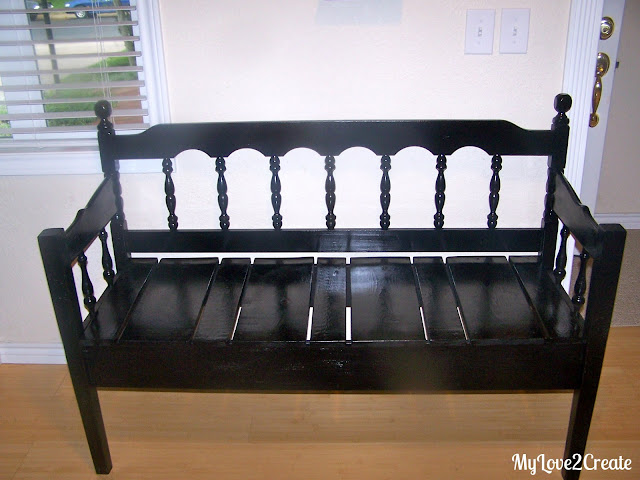
And here it is! Yippee! I was SO happy with the finished product!
Very pretty in black.
As I mentioned above it was a gift to my in-laws. A small measure of gratitude for helping watch our kids…
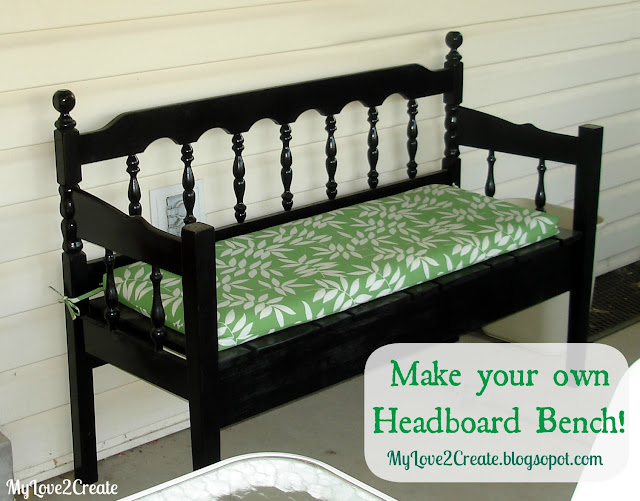
They are pretty awesome! I love the fun cushion they bought for it (next time I make a bench, maybe I will have to make a cushion too).
It looks so cute on their back porch!
Do you have an old headboard/footboard laying around? Maybe you should make a bench too….
Hugs!
Mindi
I will be linking to these parties.

Really well done! I found your blog when I was deciding who to nominate for the Liebster Blog Award. I hadn't heard of it until today but I loved your blog right from the first post. You have a clean layout and design and I look for that in a blog. Also you are a thrifter and DIYer (and furniture flipper), as am I, so I just had to nominate you and I'm now a new follower. I look forward to your future creations. If you're interested, from one furniture flipper to another, I have a post on furniture I flipped or made from scraps. Anywho, I could talk DIYing all day, for more on the Liebster award, here is my post on it: http://www.projectlovegood.com/2012/11/liebster-blog-award.html
~Aubrey
Oh and I forgot to add, I especially love that you do it all on a budget. Me too! I hope to incorporate budgeting more into my blog.
Wow =O The stuff you do on your blog is amazing!!! Totally following you now 😉
xo
summer
This is super creative!! Love the colors you chose! Nice work 🙂
Hi Mindi! I came on over to your blog to spy a bit (ha!) when you left the comment on my DIY painting and HOLY COW! I love everything you build! I've been hanging on to the parts of my son's old crib to make a bench and I think I might finally try it. I haven't built much… mostly sewing, but I'm totally going to try it now 🙂
Amazing work!
I just saw this on Pinterest! 🙂 I guess I missed it the first time around.
love the bench Mindi! pinning!
I think your son sitting on the bench makes it even cuter!!! 6 kids – WOW! I was 1 of 6 so I admire you . . . . and my mom! lol