How to tile a Cement Floor, Bathroom/Laundry Room, One Room Challenge Week 3
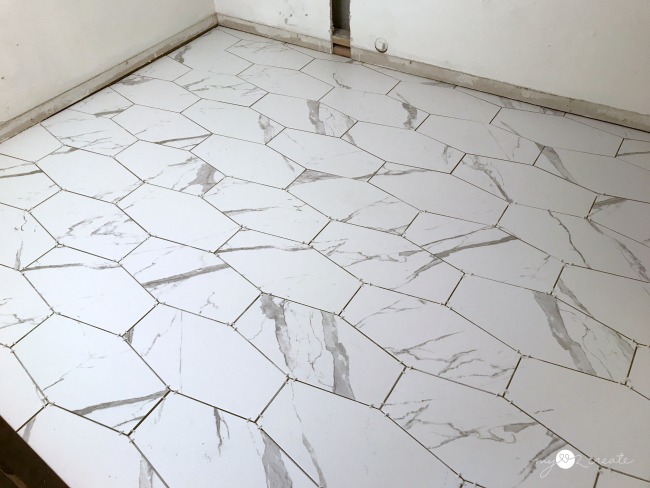
First lets start with a pretty picture! Yay!! This is my new floor, which I still need grout, but you can’t beat that beautiful Jeffery Court Tile!!
As part of the one room challenge (ORC) Jeffery Court is holding their own ORC competition. I am one of 16 bloggers participating! I am so honored and thrilled to be a part of this and to be working their amazing tile.
I choose Statuary Path Hexagon Floor tile because I LOVE Hexagons. And… you guys…it just makes me happy inside!
But before I get too excited about tile…lets back up to what happened so I could start tiling my floor.
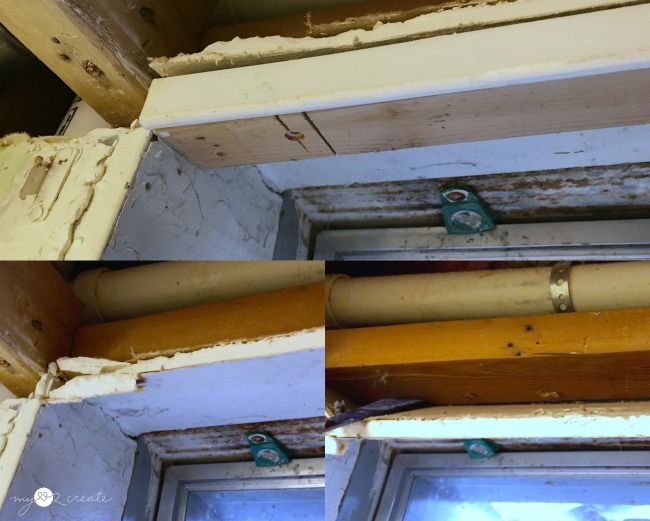
I worked on a few odd projects while I waited for my shower pan to be ready for installation. The window frame was pretty bad…I took off the piece that held the blinds and decide to remove the drywall since it was so damaged.
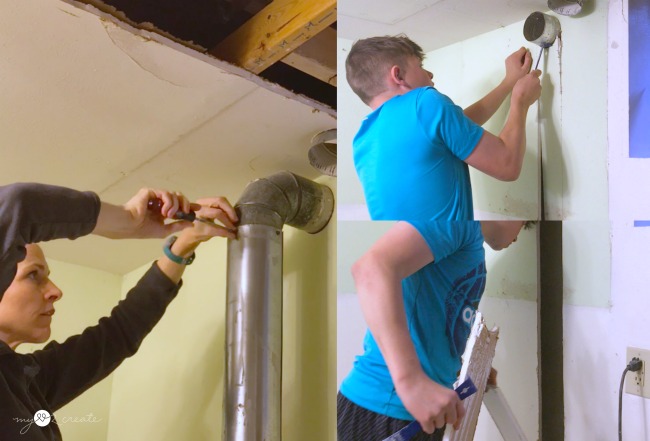
I un-hooked the dryer vent which I had reinstalled after removing the cabinets so we could wash clothes. Then my second son helped me remove the drywall so I can inset the dryer vent into the wall. This is as far as I have gotten on this project…but I need to get to it soon, we have piles of laundry!
I had some amazing help with my shower progress, and the first item was…
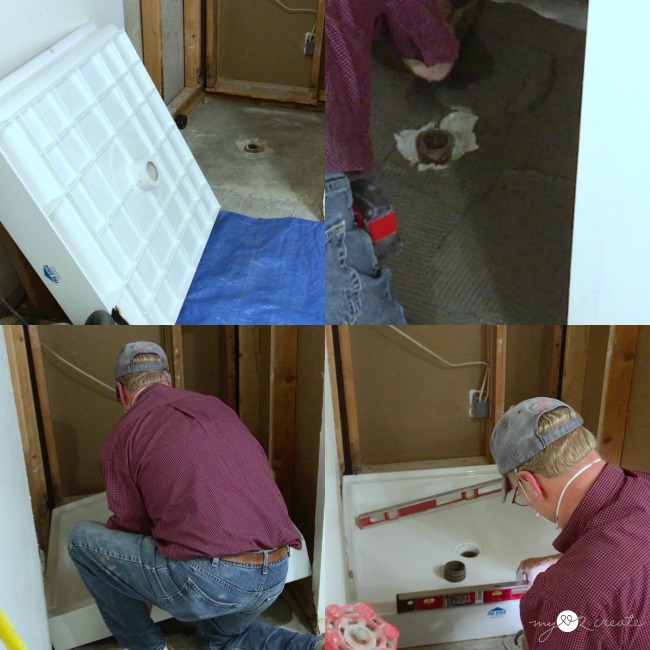
Getting the shower pan installed! I needed this done before I could tackle the floor.
The shower surface was cleaned and the pan was planed down on the bottom where floor was higher, to help it sit level on the concrete. This was a trial and error process until it sat level, so patience is required!
Next, thin set was applied and the pan installed. It is important to check for level at this point. Screws were drilled into the studs over the edges of the pan to keep it in place while the thin set dried.
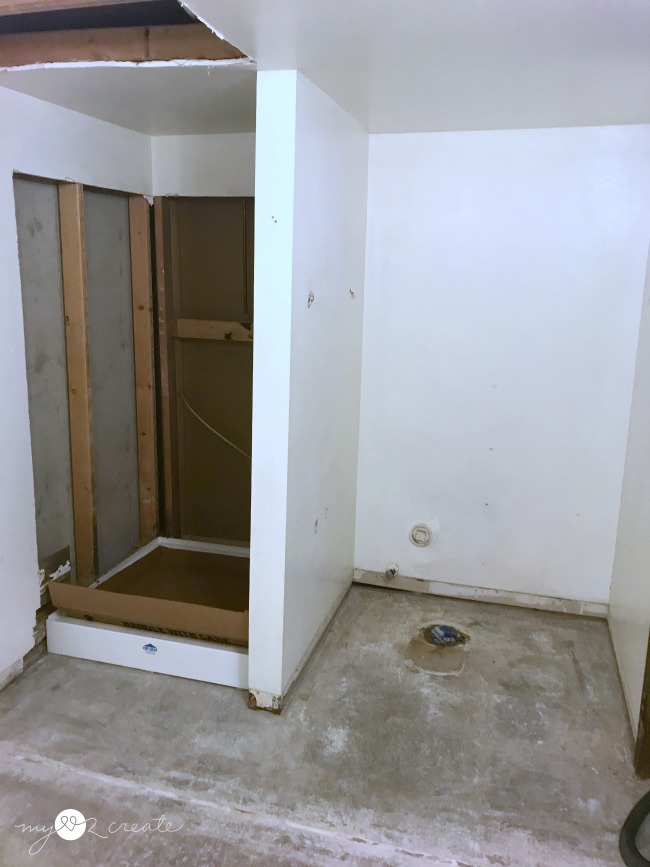
Once my shower pan was set I was ready to prepare for tile!
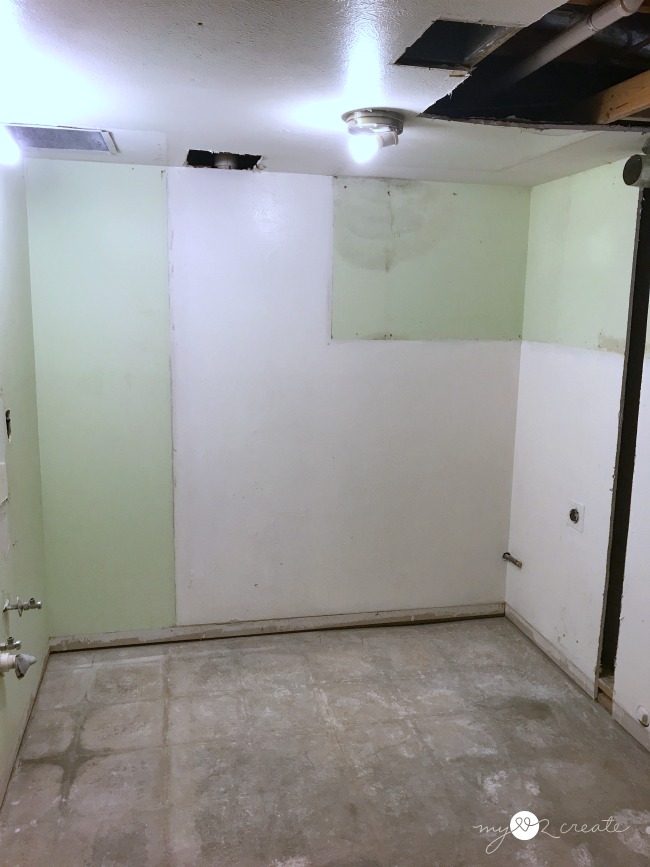
Here is the other side of the room. The concrete was prepped by sweeping and vacuuming it really well. Then it was cleaned and a concrete sealer was applied.
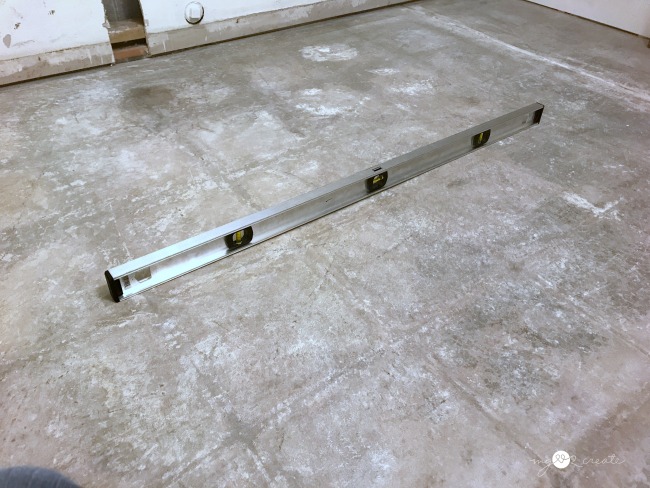
It is also important to check for level all over your floor. If the floor is really uneven you can use a self leveler product. I only had smaller uneven spots so I opted to proceed with tiling. In all cases when you do home repair nothing is ever totally straight or level…you have to work with the imperfections.
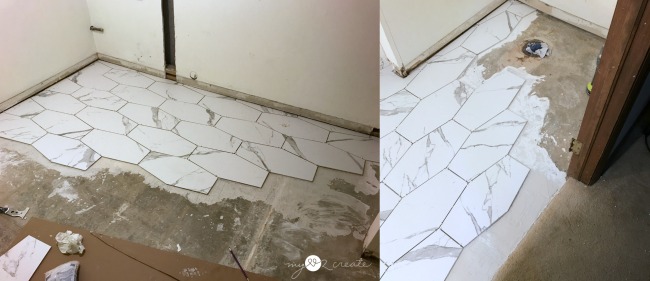
The floor was mapped out for tile and measured to make sure the tile would look good visually in the room. Start at the center or at the doorway and place tiles to get an idea of how it will look. It also prevents having a sliver of a tile on one side and a whole piece on the other, keep it balanced.
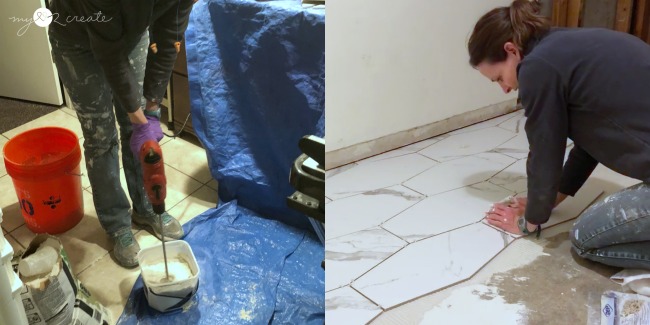
For my first row of tile my friend helped me use a chalk line to keep the tiles straight. Prepare your thin set so it is a peanut butter consistency. Make sure your tile trowel is the correct size. The gaps in the sides should be less than the thickness of your tile. Place the thin set on the cement floor (no backer board is needed on cement) and scrap it so you have grooves throughout.
Then place your tile and wiggle it until it is suctioned down and put your spacers in place.
Because life is so busy for me I had to work in sections. I got two rows done and then did another several rows another day.
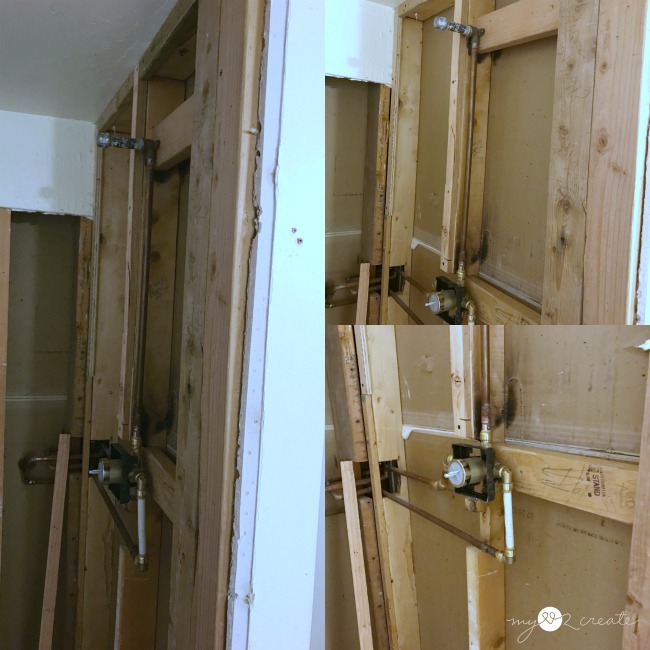
When the shower pan was installed it was discovered that my shower wall was very un-level. My Friend was able to do some framing and tapering of the wood to make it level for when the tile is installed. He also replaced the plumbing from two handles to one.
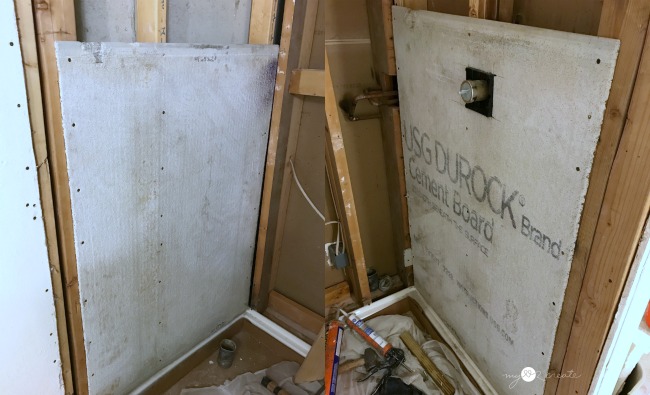
The beginning of the cement board in the shower! So exciting!
Here are some tile progress shots.
I eventually made it to the dreaded toilet drain! Dun dun Duuuunn!!
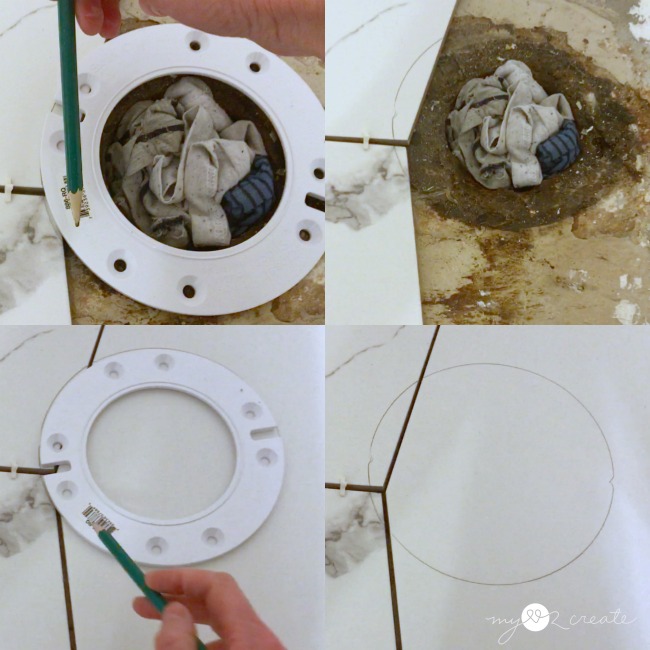
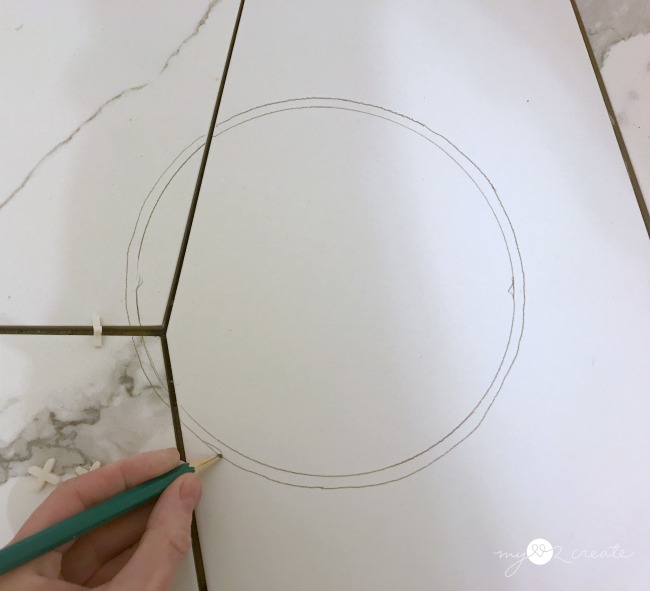
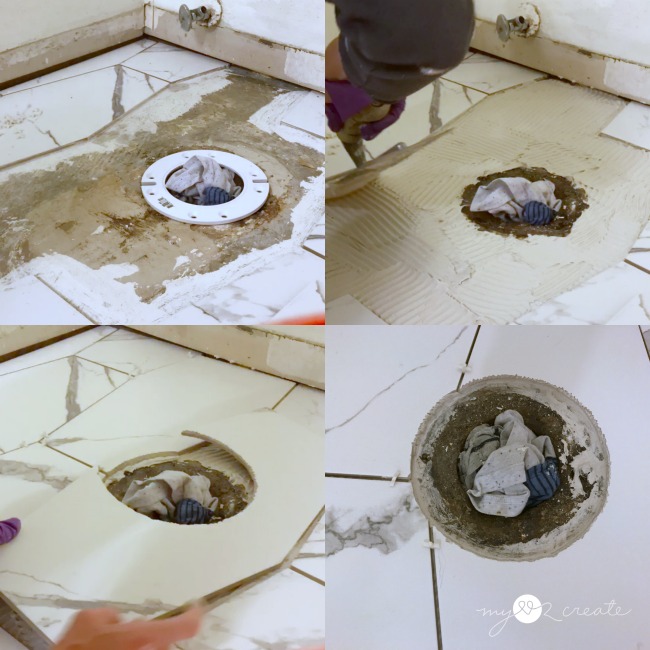
I placed my tiles that were around the drain in with spacers so I knew where they would sit in reference to the drain. I used a flange spacer (I think that is what it is called!) and centered it over the drain so I could mark the two smaller cuts on the tiles. Then I placed in the last tile and used the smaller marked tiles to line up the flange spacer so I could mark the bigger tile.
Before I went to cut I marked a bigger circle by 1/4” all the way around to make sure I cut the hole big enough.
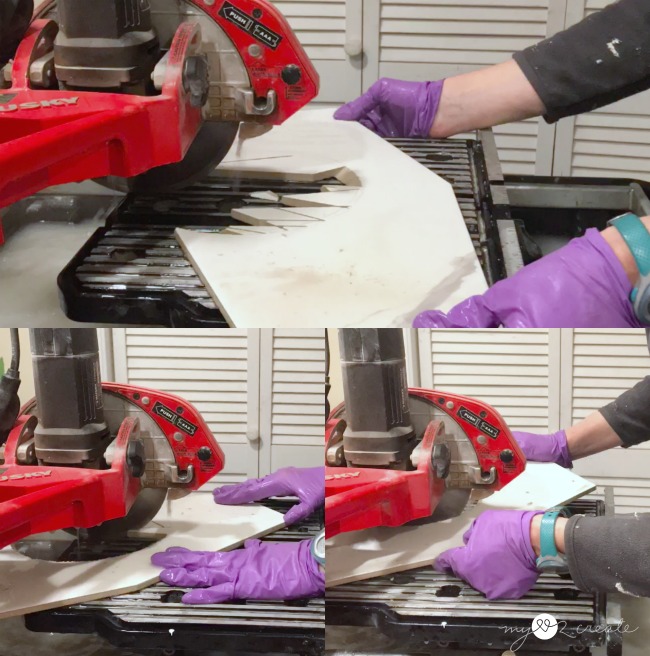
I used a regular wet saw to cut out my circle pieces. I took a little while. I cut straight cuts into my tile until the pieces broke off. Think of small slivers… Then I used the wet saw blade to cut/grind off the excess tile on the edges of my circle.
I tested the pieces to make sure they fit, and they I installed them! If a toilet drain can ever look pretty, this circle does the trick! Ok not really but I sure felt that way when I was done!
It is not anywhere near perfect, but it looks good to me. Not too shabby for my first time tiling a floor and cutting on a tile saw!
My next step is to grout and finish up the shower so I can do MORE TILING!! It’s going to be awesome!! I can’t wait to see my other tiles installed…LOVE.
Stay connected with the One Room Challenge Week 3 by checking out all the other rooms!
Also check out my Bathroom/Laundry Room Demo, One Room Challenge Week 2
and my Bathroom/Laundry One Room Challenge Week 1.
Thanks for following a long…I have a TON of work to do…until next week!







It's looking great! I love that tile!
I LOVE that tile! You did an amazing job, especially with that circle cut. It's coming along nicely!
Mindi, I feel like a sloth compared to you. LOL! I love this tile and it is so you. I am sure other readers know how much you like hexagons. 🙂 Mindi, everything is looking AMAZING! I get that sometimes one needs to hire out (and that's okay), but I like the fact that you are doing as much of the work yourself. You get your hands dirty and get it done and not sit on the sidelines while your hire someone else to do everything. Nothing but respect for all your hard work. 😉 Looking forward to seeing the tile in the shower. You are making great progress.
*hugs and high fives* Julie