Repurposed Shutter Desk
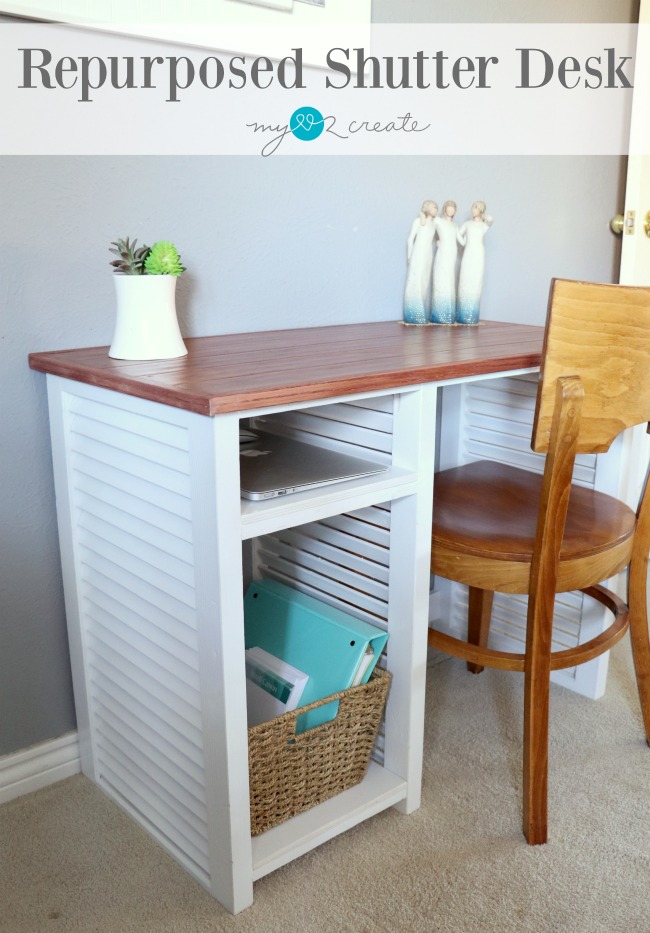
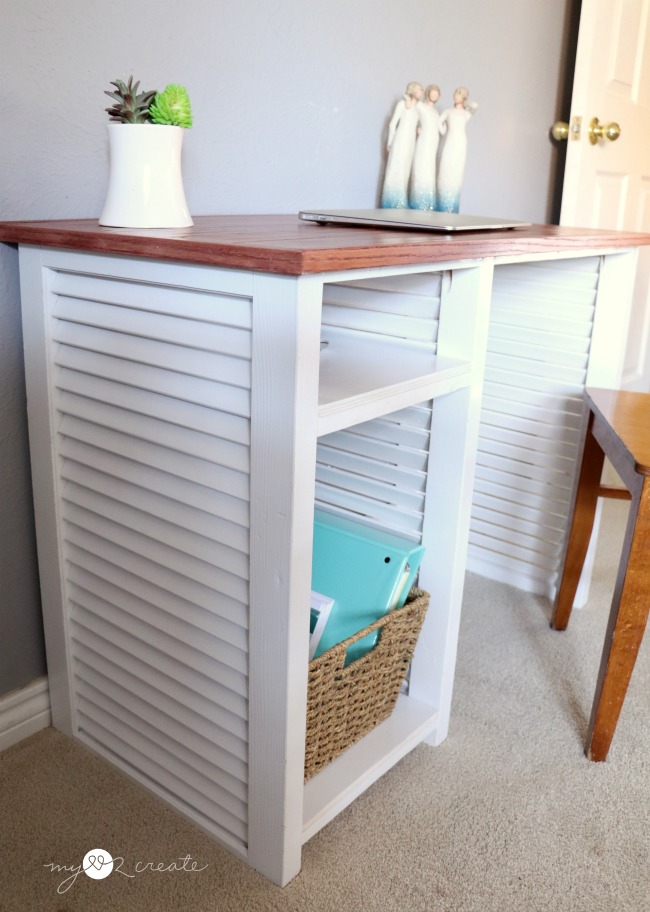
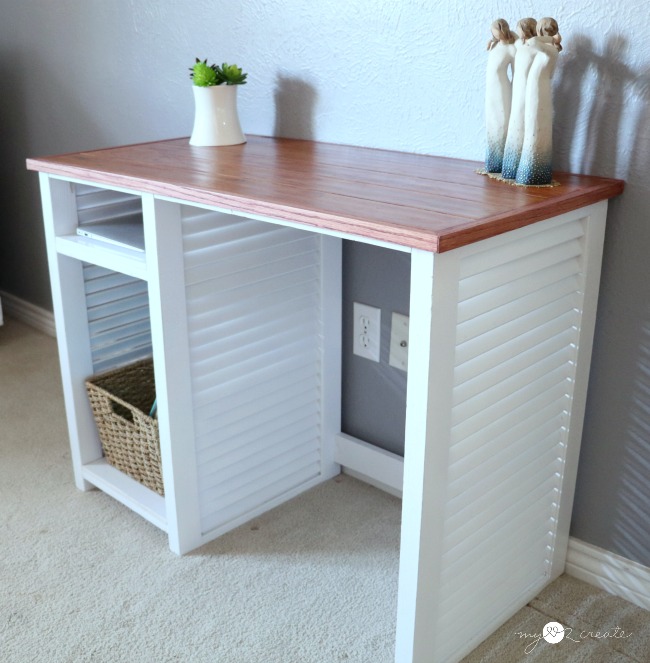
I am super excited to show you how I built my Repurposed Shutter Desk!
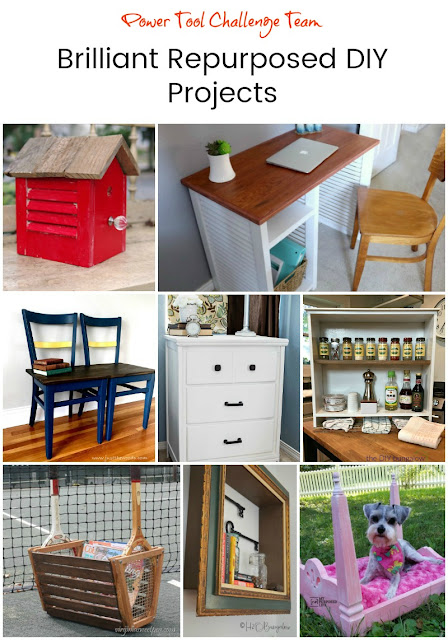
Plus, read to the end for some awesome Power Tool Challenge Team Repurposed Projects and….A Reader Challenge and Giveaway!! Fun stuff, we want to see what you can repurpose!!
Seriously you guys… I have been needing a desk in my room for for-ever! But I really didn’t want to spend any money.
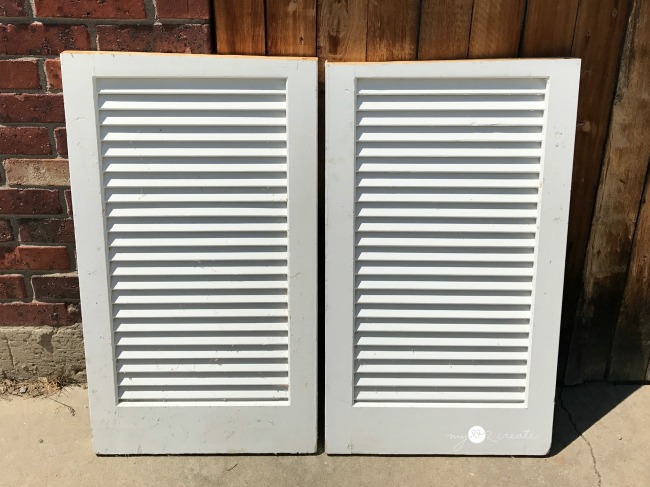
So, when my neighbor was throwing out some shutters in her trash a month or so ago, I quickly snatched them up! (I actually got more then just the two pictured)
At first I didn’t know what I wanted to do with them, but inspiration finally struck and I knew they would be the perfect solution to my desk issue!
Supplies: *This post contains affiliate links, read more.
- 3 Shutters of equal size
- Scrap wood flooring (for desk top, or plywood, or planked wood)
- 1×2 boards for the top aprons, shelf supports, and back support (I used a 1×3 for the back support)
- 1/2” plywood for shelves (or planked wood)
- 1/2″ square trim for edge of desk top (optional- needed to cover the edge of the floor boards)
- 1/4” scraps, or paint sticks for securing desk top planks
- Kreg Jig Pocket Hole System
- Miter Saw
- Sander
- Drill and Impact Driver
- Nail gun
- 1 1/4” pocket hole screws
- 1 1/4” and 1 1/2” finish nails
- wood glue
- clamps
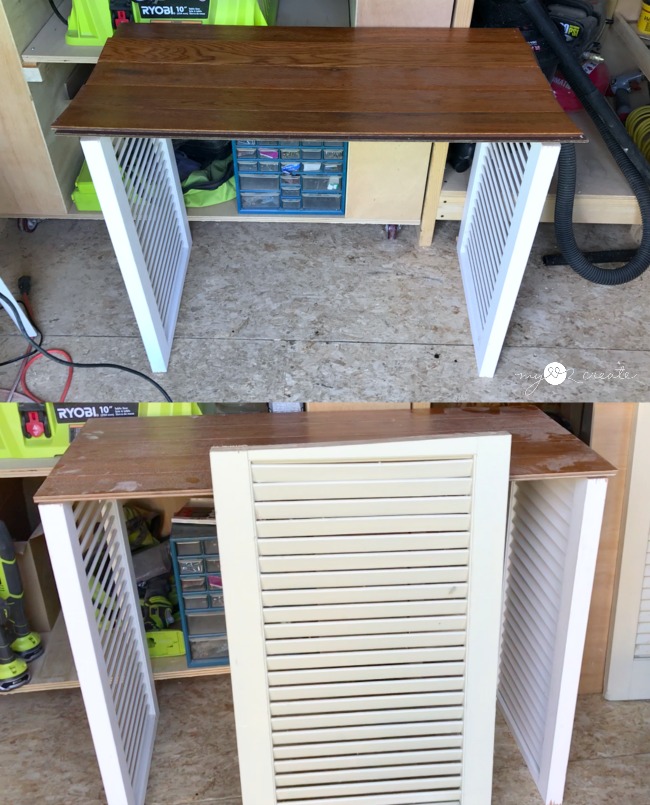
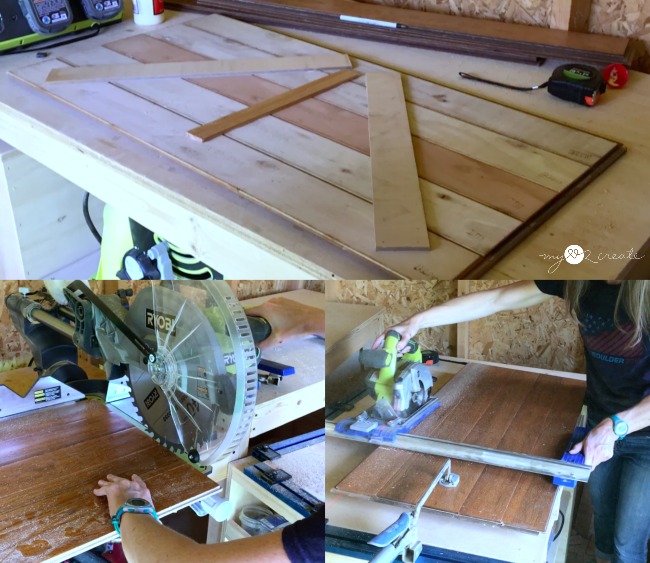
I actually started this project a few weeks back and at the time I only planned to use 2 shutters, in the top photo I was dry fitting some floor boards on top of the shutters to see how it would look.
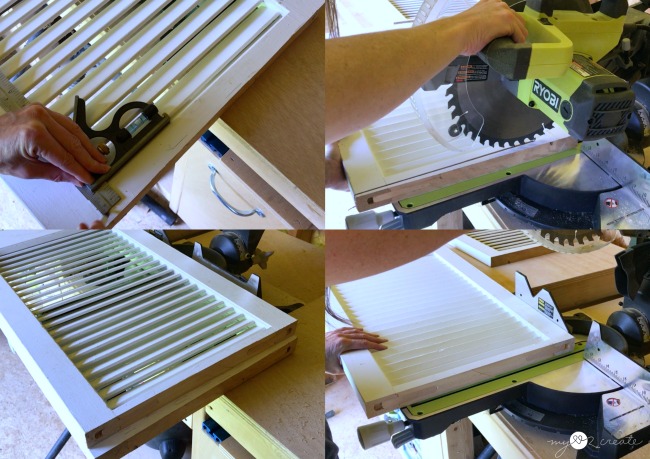
It wasn’t until I started working on this project again this week, that I decided to use a third shutter to make shelves. Here is my third shutter before it was trimmed down…so crooked! The bottom rail of the shutter was much thicker. Sorry it is cut off in the photo, so I ended up only trimming a little off the top, which you can see and a few inches off the bottom.
Step 2: Build your top
I determined how long I wanted my desk to be and then cut my floor boards accordingly. Since I used some free floor boards I had gotten off of the craig’s list free section they were already cut to a shorter size.
I did mine according to my longest floor boards which was 35 1/2”. Using wood glue and some scrap 1/4” strips and a 5 gallon paint stick I secured my planked boards on the back, you can also add nails to secure them to the planks before the wood glue dries.
Since I used floor boards they had tongue and groove edges on two sides that needed trimming. Once my desk top was built, I used my miter saw to trim the short edge, which was 17 1/2” deep, I did have to flip it over, because my miter saw doesn’t cut that long.
For the longer side I used my Kreg Rip-Cut and Ryobi Circular Saw
to get rid of the extra tongue and groove edges.
An important thing to consider…
When I built the top I didn’t think about the top aprons (1×2’s) that would attach to the bottom side of the desk top. I also didn’t realize I would be adding a third shutter…so I ended up having to cut down my scrap pieces on the edges and in the middle to make room for my apron pieces and my third shutter. Oops!
I used my Ryobi Multi-Tool to cut down into the 1/4” pieces then a crow bar to pry them off. If you do it right you can omit this step. 😉
Step 3: Cut top apron pieces and support pieces
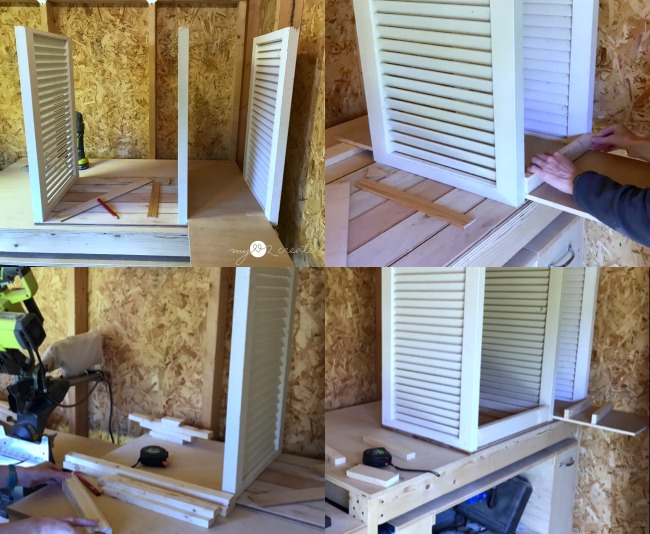
Using my desk top (upside down) as a guide I placed my end shutters on the edges of my top. Then I used my scrap plywood which I will use as my shelves as my spacer for where my third middle shutter needed to be placed.
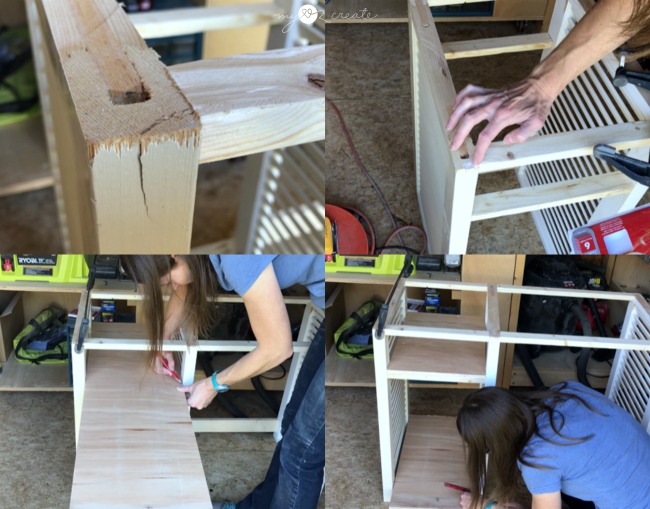
With the shutters in the proper place I then used my scrap 1×2’s and measured, marked and cut, my aprons and support pieces. I cut 6 of the shorter 1×2’s two will be for the top aprons and the other four will be shelf supports.
I cut two longer 1×2 apron pieces, and then a 1×3 for a bottom support piece.
Step 4: Drill Pocket holes
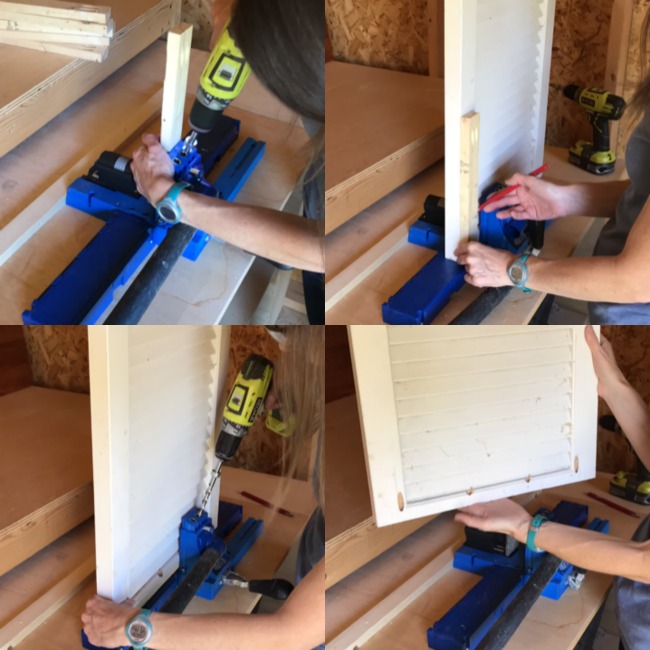
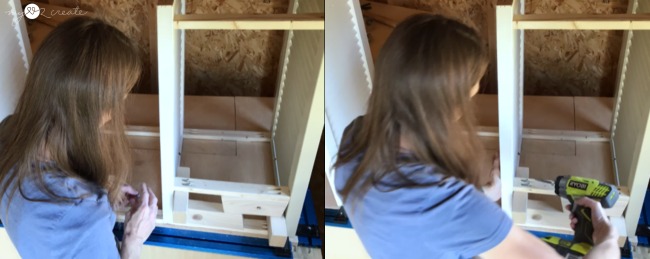
Once I had all my pieces cut I drilled my pocket holes. Each apron and support piece got 2 3/4” pocket holes in each end. I also drilled 4 3/4” pocket holes into the top of the shutters. These will be used to attach the desk top later on.
In the top right photo above you can see I am using a 1×2 as a spacer to mark where my aprons will be on each side of the shutter, this way I can drill my pocket holes 1 1/2” over from the edge so the aprons don’t cover them up.
After the pocket holes were drilled then I sanded all my aprons and support pieces.
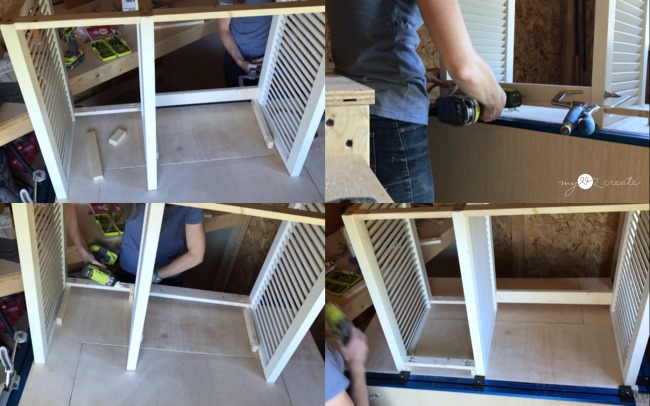
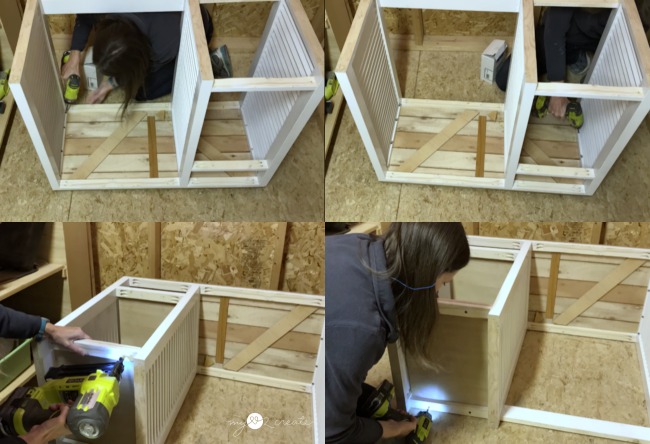
Step 5: Attach top aprons to shutters
Just The Woods
H2OBungalow
Now that you’ve seen our projects, let’s see yours!
To qualify, an item needs to be repurposed using at least one power tool of any kind in the process. Simple enough? Everyone can enter up to four DIY repurposed projects.
There will be two Ryobi Power Tool Prizes! One random drawing and one voted Best Repurposed Project Overall.
Every entry counts towards a chance in a random drawing and the winner gets to choose either an 18 Volt One + jigsaw or an 18 Volt One + Drill.
To pick the Best Overall Repurposed DIY project, the team and a Ryobi Power Tools team member will vote on their top choice. And the winner gets to choose up to $230 in Ryobi Power Tools!
How to enter:
Enter your project in the linky below. The linky will be open for 2 weeks (ending midnight November 2nd). Readers can submit their own projects directly, make a Facebook post and share that link.
If any of you need help or want me to post your project for you just send me an email with your project photo to Mindi@MyLove2Create.com, be sure to include your name and your project title too!
Must be 18 or older to win, giveaway and contest is open to USA resident only.
Good Luck and have fun! I can’t wait to see what you create!











This is awesome! LOVE the shutter sides, I've never seen a desk made from shutters and shutters are one of my favorite repurposing items! Pinned and shared!!
Thank you for sharing Wendi! I love shutter projects too, I am really enjoying my desk!
What a great idea! I love how you used flooring for the top. I actually have some extra wood flooring in my shed – I think I'll repurpose it into a work table top! Thank you for the inspiration!
Thanks Karen, I love that idea!
I love neighbor's trash! I am always carrying something back from my morning walks on trash day! This is a great recycle, now go sell it to your neighbor!
Ha ha! You are a girl after my own heart!
That is such a neat desk. My dad had a bunch of shutters that he was trying to get rid of when he moved. At the time I couldn't think of what I would do with them and I really didn't have room for them. I've been kicking myself ever since.
Awe man, I have done that before!
I love the shutter sides – so clever!
Thank you so much Maryann!
You are so creative! I never in a million years would have thought to use shutters to make a desk and it worked perfectly! I really like the wood floor top that you used. Such a great project!!
WOW! It's NOT blue! 😉 just kidding. Mindi I love your shutter desk. It is so awesome. The best thing about DIY is customization–well that and your project was FREE!
pinning!
gail
What an awesome idea!! I love the character the shutters add to the sides. That is the coolest desk ever!
This turned out amazing! Such a cute desk. Looks like something I'd buy from a store. Thanks for sharing with our link party!
Thanks for sharing with us at the To Grandma's House we go link party, I'll be featuring this tomorrow morning on my site when the new party starts!
This is such a great idea! You really have a creative mind. Thanks for sharing with SYC,
hugs,
Jann