Crafts & Sewing | DIY Projects | Fall | Home Decor | Scrap Wood | Seasonal | Winter
Reversible Seasonal Door Hanger
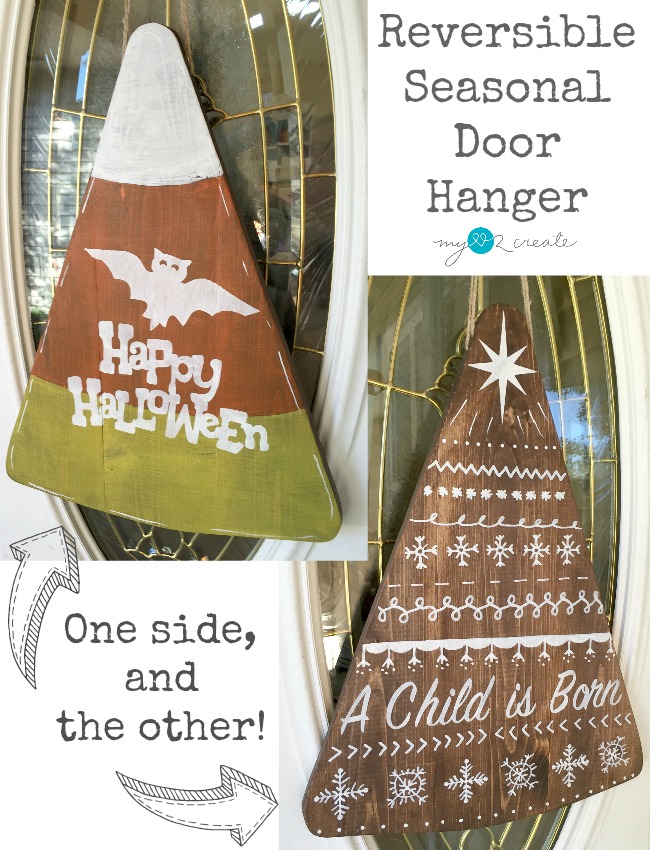
Halloween is fast approaching, and if you are anything like me you are just barely realizing that you need to put up your decorations! It is not too late!! I am super excited to show you my easy reversible seasonal door hanger! Yep, you can use it for Halloween and Christmas!
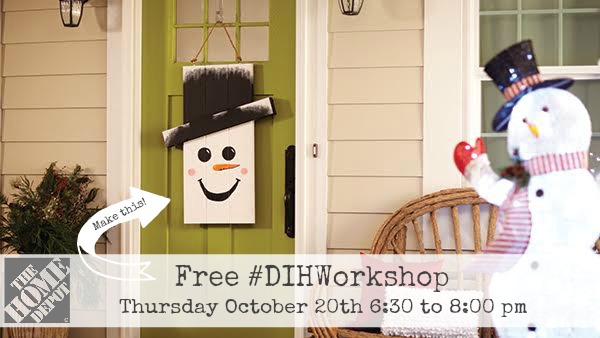
So fun right?! This really is a super easy project, and if you Register Here to sign up for Home Depot’s free #DIHWorkshop, you can get help making one! #sponsored
Of course my door hanger is different than the one at the workshop, but they are both equally cute…and reversible!
Which is the best way to do holiday decor in my opinion! Just like my Pottery Barn inspired “It’s the most wonderful time of the year” sign, I can use it all year round and flip it over for Christmas. Love.
Let me show you how I made my Reversible Seasonal Door Hanger:
Supplies: (This post contains affiliate links, read more)
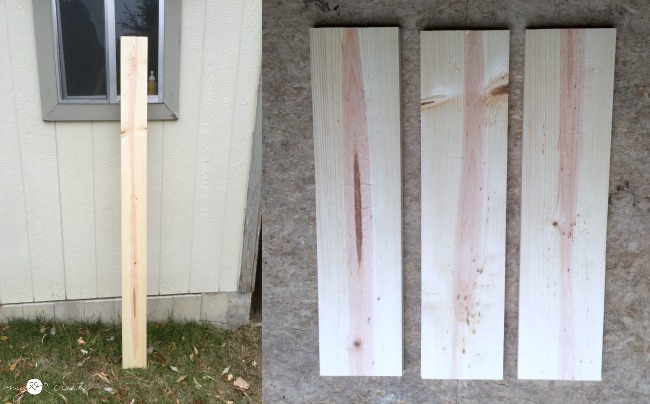
1- 1x6x6 board cut into 3 pieces @23” each
twine
wood glue
drill and bit
miter saw/Ryobi Circular Saw
paint (colors of your choice) and paint pen (if desired)
For my version of seasonal door hanger I just used one 1x6x6 board. I cut it into three pieces, each piece at 23”. I used my miter saw to cut these boards but you could use a circular saw as well.
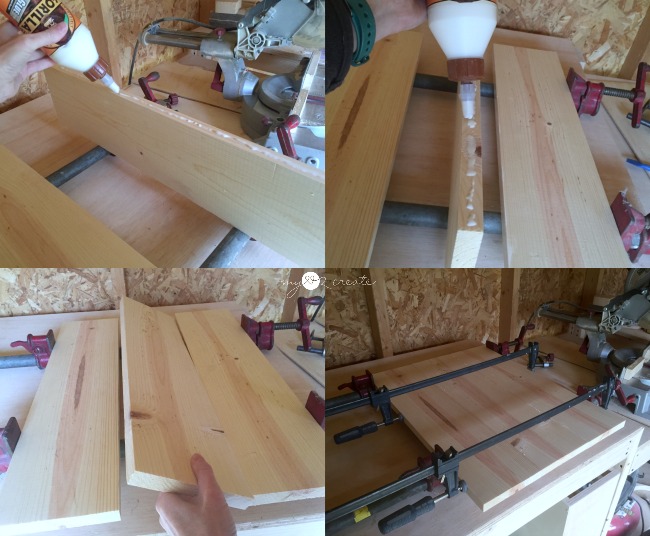
To attach my three boards together I used wood glue and and clamped them with bar clamps until it dried.
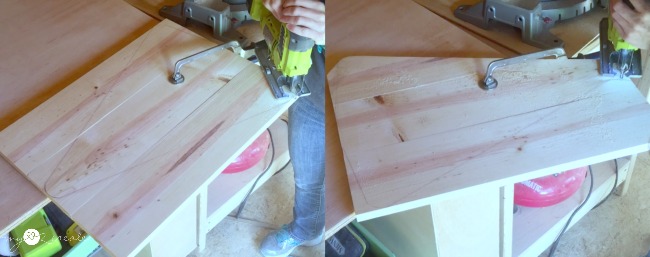
To get my candy corn/tree shape I grabbed a small jar to used for the rounded ends, and then I used a ruler to attach them with straight lines. I kept the bottom a little curved, but you could do it straight as well, just personal preference.
Once my shape was drawn out I clamped it to my workbench and cut it out with myRyobi jig saw . Super easy, and don’t worry about it being perfect. Perfection is overrated!
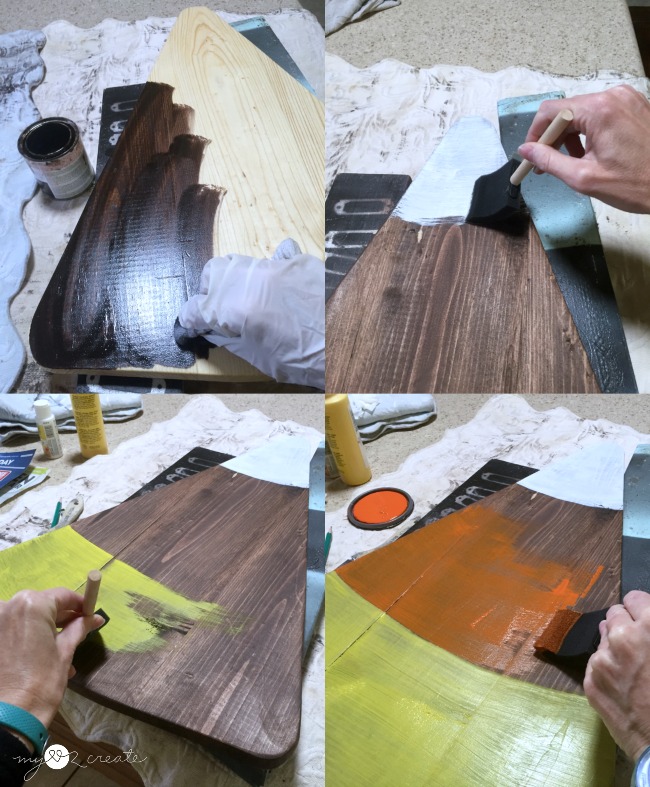
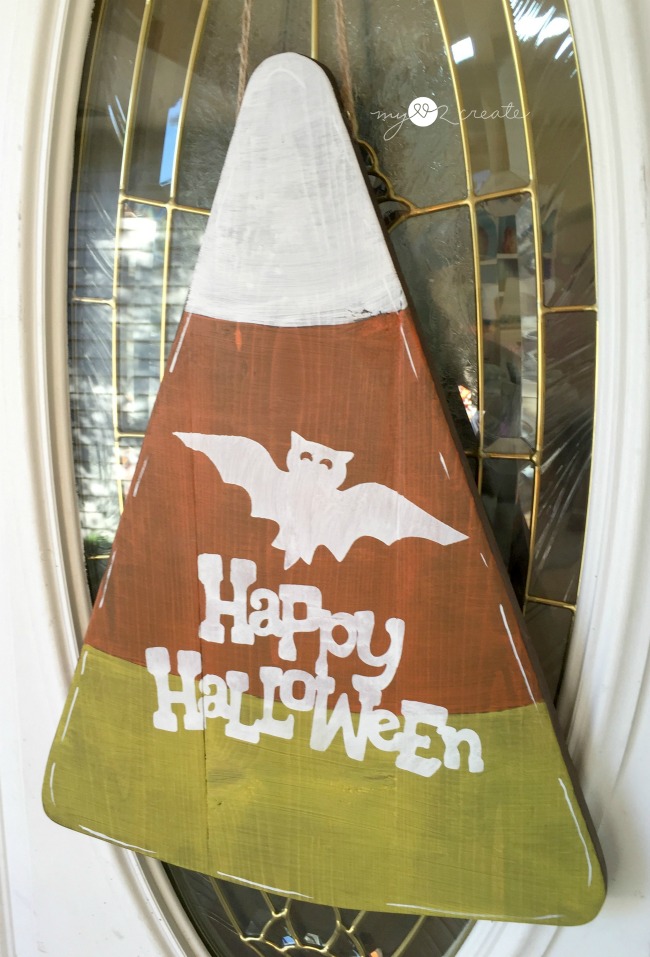
For the finish you can do whatever you want! This is the fun part! I wanted to stain mine with Rustoleum’s Kona stain first. For my candy corn side I used white, orange, and yellow paint to draw on my stripes. I didn’t measure just eyeballed it, you could do pencil lines first to give you a guide. I only did one quick coat of paint on mine to give it more of an aged/washed look.
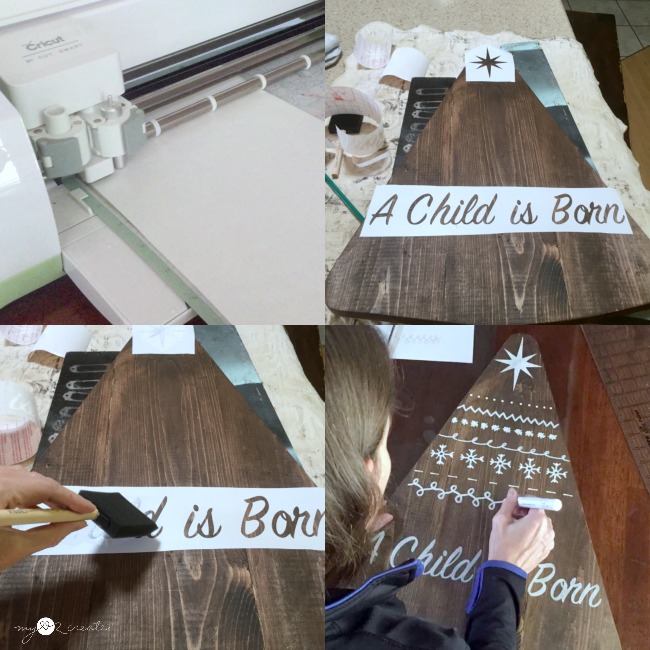
For the Christmas Tree side I struggled on what to do for quite a while…I eventually decided to do a stencil since I am not good a free handing words. I cut a star and phrase on my Cricut Explore One Cutting Machine (if you don’t have a cutting machine don’t worry! I show you How to Make your own signs with out one). I cut my stencil out of contact paper, it is very cheap and makes a great stencil.
I free handed (ha ha, see I told you I wasn’t that good!) the other designs with a white paint pen. I totally did this at random and made things up as I went, but I love how it turned out!
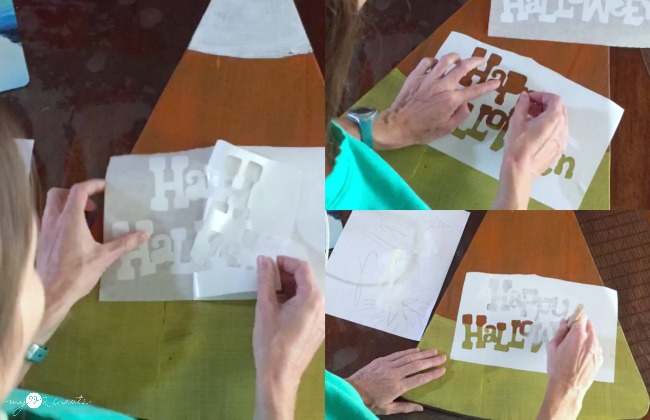
You can leave the candy corn as is, or paint designs on it, there are a lot of fun ideas if you google candy corn door hanger. I choose to cut a happy Halloween on my circut and stencil it on.
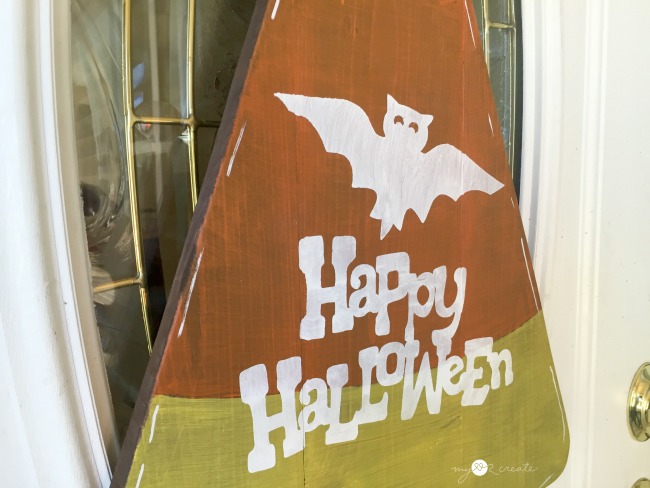
I wasn’t loving just the words, I felt like it needed something more, so I found a cute bat, and cut it out as well. When you stencil make sure you are using hardly any paint (apply paint to your brush, then wipe most of it off, then stencil) that is the trick to making it come out perfect! I used my paint pen to add some lines for a simple boarder as well.
I drilled a hole through the top of the board, and threaded it with twine for easy hanging!
I am quite happy with how it turned out! I decided not to distress because I did such a light coat of paint, but it would be cute with a light sanding.
Even imperfect hand drawn designs can look good! 😉 A traditional Christmas tree would be fun as well, but I wanted mine a little different. Plus a reminder to my family of the true meaning of Christmas!
So for a few weeks this is my front door…
Then I can turn it over for Christmas!! Yay!
So what do you think? Want to make your own?
If you sign up for the workshop you will get to make a fun reversible door hanger like the one below… (click through to see the other side)
The Home Depot offers free workshops at all their locations for do-it-yourselfers of all ages and experience levels. There are three types of Workshops offered – Do-It- Yourself (DIY), Do-It-Herself (DIH) and Kids. Customers can learn how to build décor projects, how to make easy home repairs and how to operate tools through demonstrations and step-by-step instructions.
To learn more visit http://workshops.homedepot.com and don’t forget to mark your calendar for the workshops this month!
The Home Depot DIH Workshop
Thursday, October 20, 2016
6:30 pm to 8:00 pm
Now for the fun part…check out all custom versions of these bloggers door hangers below, and get ready to be inspired!
Hugs!
Mindi
I will be linking to these parties, Savvy Southern Style, and Bloom Designs









SO clever! I love your take on it!
This is such a fun idea. I love that you used the same shape for both sides.
So adorable! Really great job!
Genius! I love this rendition of the project! And that candy corn is so adorable!
what a great idea, this type of décor is fabulous since it can be used for several months of the year and save some space on storage.
So fun! What a great idea – reversible is so practical and cute! Stencil tutorial is great!
What a fun and lovely project you made. I am so happy I stopped by to see it and appreciate you sharing at Dishing it and Digging it link party. We love seeing you this coming Sunday. Enjoy your weekend.
Mindi, this is so clever! Large seasonal things are hard to store and having this work for two holidays is definitely an added bonus! Thanks for sharing with SYC.
hugs,
Jann
What a great idea! Thank you for sharing with us at the To Grandma's house we go link party – pinned – hope to see you tomorrow when the next party starts!