Salvage Style, Lamp Shade Basket
I am super excited to be sharing a very fun event today. Salvage Style! Eight AMAZING (I admit I am a little star struck to be affiliated with such talented ladies 🙂 bloggers and I have teamed up to share our salvaged projects.
Here we are with a little head shot action…
I’ll bet you recognize most, if not all, of these bloggers. We are each sharing our own projects on our blogs, and hosting a link party too! So you can share YOUR AWESOME SALVAGE STYLE projects as well! Yippee!
How cool is that? Let’s begin with my Lamp Shade Basket.
It all started with a lonely lamp shade that I never used, but couldn’t throw away. I mean, I MIGHT use it someday, right?! Sound familiar?
I have seen all sorts of things turned into light fixtures. Bowls, baskets, various random objects (that I can’t think of presently), it is sort of a fun fad right now (unique light fixtures)… a fad that I love, by the way.
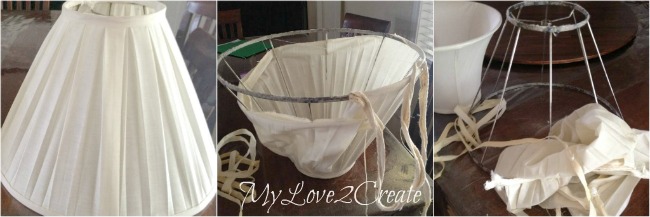
I thought, why can’t I turn a lampshade into a bowl or basket? You know, the reverse effect. So I began undressing my old cast out lamp shade.
At this point I had visions of very cool wooden sides and it would be a simple project, slap on 8 different wooden edges…done.
Or not. I tried it and the wood needed to bend, which wasn’t going to happen. My first envisioned project was not going to turn into a reality.
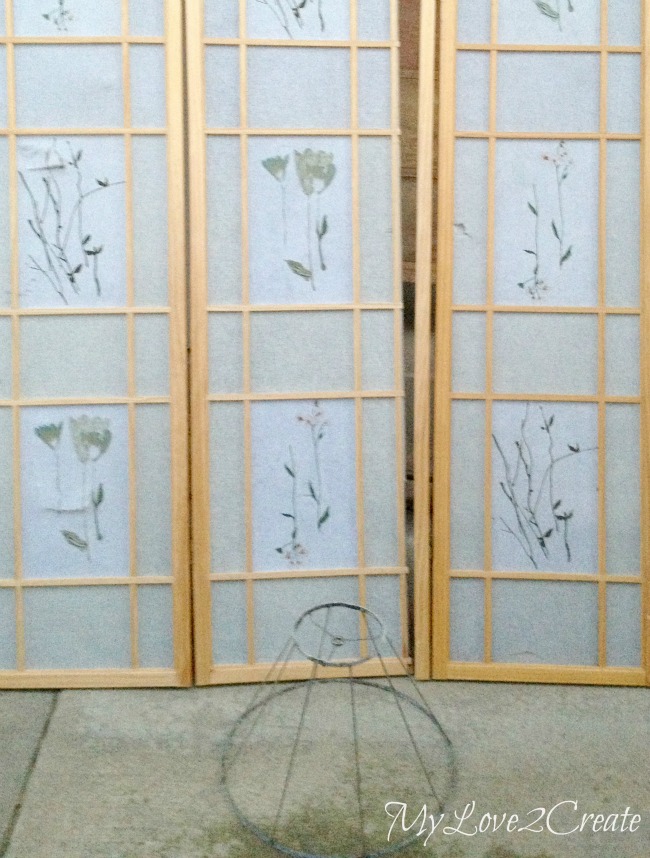
So I proceeded to put the project off, and ponder on it while I wandered around and did nothing but look at my staches of junk hidden in various places around my house over and over again cleaned my kitchen. When I happened upon this privacy screen. I had gotten it free, of course. It had a few tears in the screen and some wood was broken, but I brought it home because… I knew I might use it someday…
Apparently this was to be the fateful day, so I hurried outside, as the sun was about to completely disappear, and snapped this “awesome” shot above, of said screen and naked lamp shade.
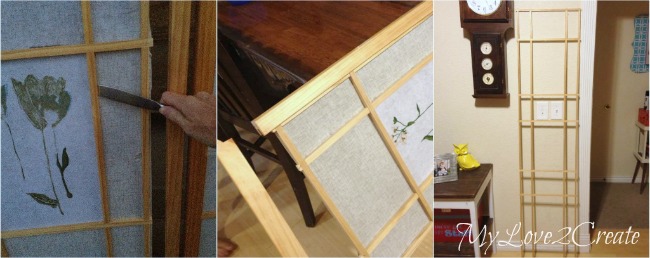
I promptly started tearing the screen fabric from the wood, because I finally had a plan and I needed to know if it was going to work. It finally got too dark to work outside, so I brought it inside to finish.
I needed the wood for my idea and this was the perfect size and thickness. The next morning I set to work cutting until I had enough pieces to test out my theory.
I started by laying wood on the lamp shade to see how they would fit. It was going to work, eeek! I proceeded in counting how many pieces I would need. I ended up needing 100 pieces of wood, what?! So much for a simple project…but I was committed now!
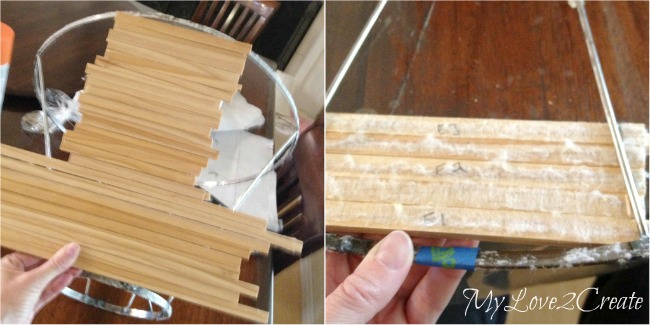
The lamp shade had 8 sections so I put painter’s tape at the top of each and labeled them A thru H. Grabbing my wood I started marking and labeling. You see the fabric on the back of the wood, I eventually sanded it off very easily. I used a piece of wood as a spacer (the pieces that are not marked), since I was doing an alternating pattern, this helped me to get several pieces of wood marked for cutting all at once.
I glued my first pieces of wood to sections ACEG (top left photo). For the second row I glued on the wood a space lower for sections BDFH (top middle photo) to create the alternating pattern. I hope that makes since…. Then I just kept repeating til I finished (top right photo). It worked perfectly because the wood overlapped just a bit on the metal so I could line up the new piece of wood right under the previous row.
Here is a shot of me measuring more pieces of wood to cut. I would place the wood and use a pencil to mark where to cut. I cut them all at an angle, I think I set my saw to 30 degrees. Since not every metal section was the same I had to label each piece so that I knew it would fit after I cut it, because it would be in the right section and right place.
Here are all my pieces marked, measured, cut, sanded and ready to be glued on.
My first couple of rows I used hot glue, but when a piece fell off I knew I had to do something stronger. So I busted out my Gorilla Super Glue in gel form and it was soooooo awesome! (this is not the expandable kind of Gorilla glue) I was happy Gorilla had a gel super glue because I didn’t have to worry about it sliding down the wood or metal as I worked.
I applied the glue to the wood set it on the metal and held it for 15 to 20 seconds, and it stayed! My fingers are now buff, I was pushing extra hard. 🙂
Once I had all my wood pieces attached I traced the bottom (formally the top) onto a piece of wood and cut out a circle. Then I used the super glue to attach it to the bottom of the lamp shade.
At this point I thought I was done, but it needed…something?
….A handle!
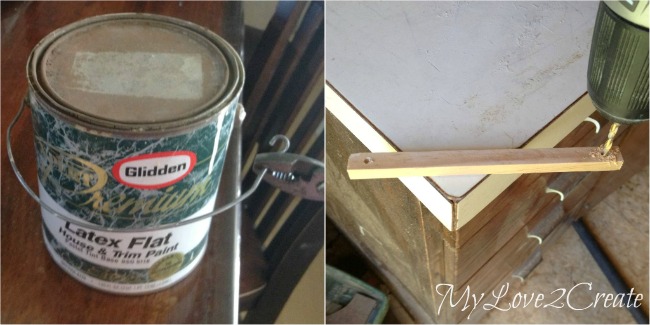
Since I was going for a completely free project I had to get creative. I first thought of a wire hanger, but knew it wouldn’t be strong enough. It then dawned on me that paint cans have very sturdy handles…
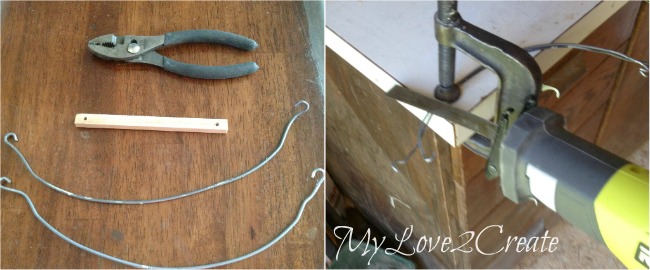
So I stole some from a couple of old paint cans. It was easy to just grab it with pliers and twist it out. I also grabbed another piece of wood and drilled holes big enough for the metal to go into, this would serve as my handle.
With my paint can handles and wood, I measured it against the lamp shade basket and determined the wires needed to be cut. My Roybi sawzall did the trick.
Now, if you make jewelry this would be a cinch. It took me a few tries to figure it out, but I eventually came up with something I liked. I bent the wire, stuck it through the holes in the wood, and then bent it back down. Perfect.
I then hooked the ends on opposite sides of the basket and used a really cool welding technique called….hot glue. It holds my handle in place so it doesn’t fall. I did this on the top of the handle too where the wire goes into holes in the wood, so it wasn’t wobbly.
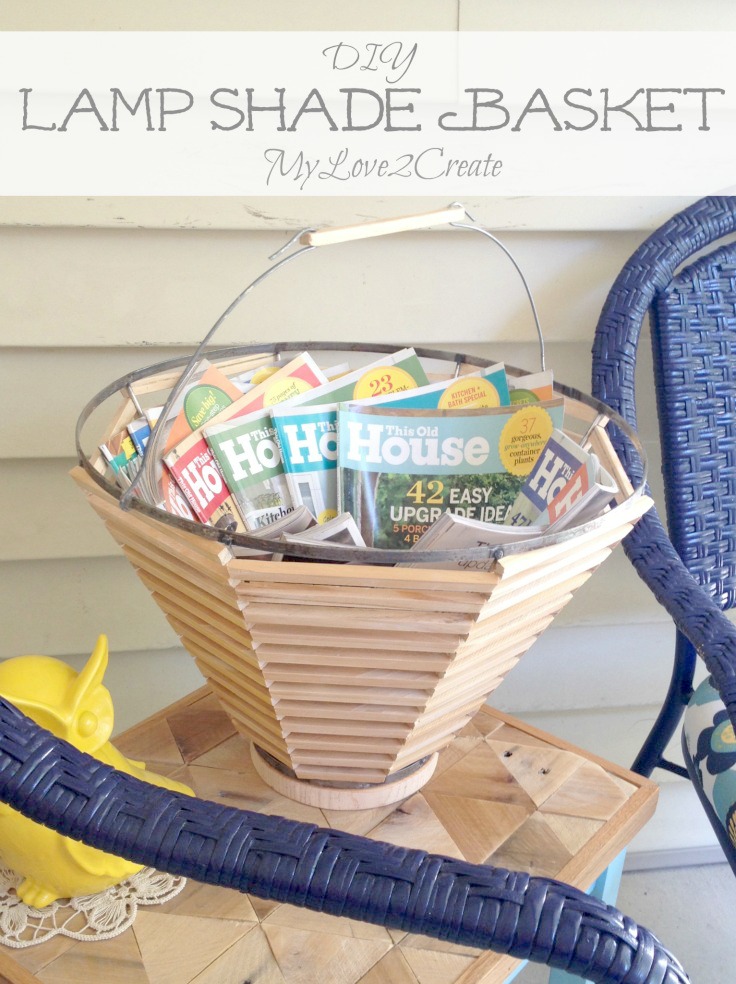
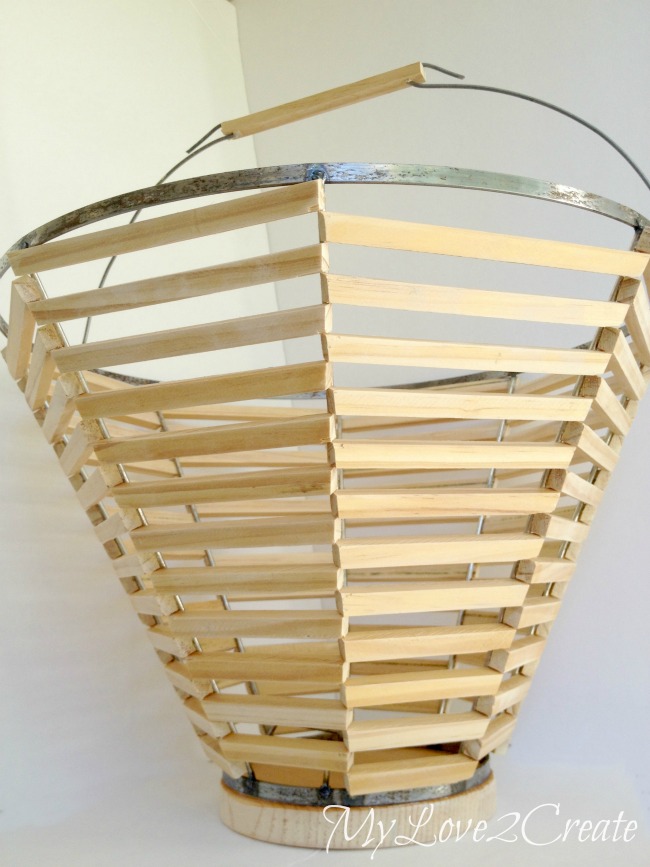
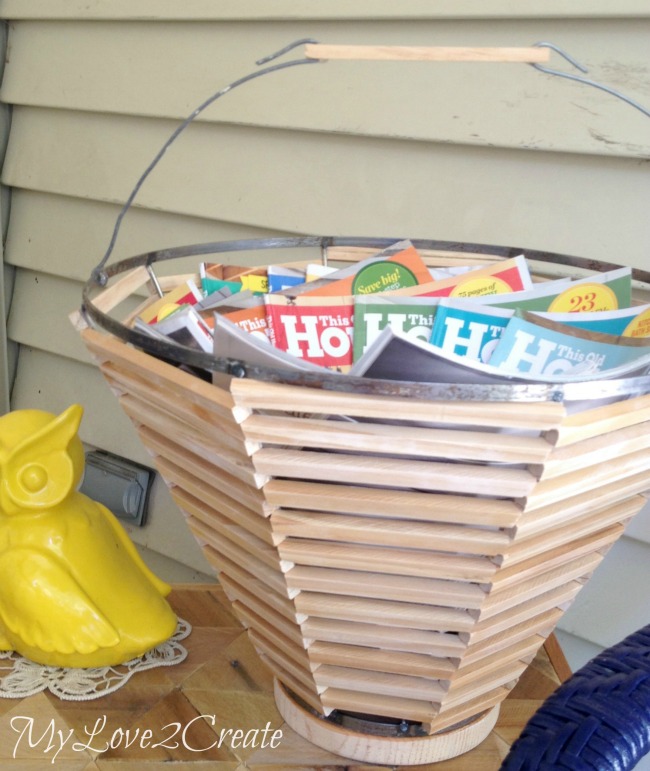
I now have a funky salvage style basket made from an old lamp shade and privacy screen. Who knew right!?
I kinda love it.
After I finished I couldn’t stop staring at it. Something about the design makes me happy, and maybe too, because I was glad it actually turned out…
Coolest part? It holds stuff. Imagine that a basket that holds stuff, ha!
I was thinking rolled up towels in the bathroom would be cute in it, but it eventually got a job holding my magazines. I mean my husband got a magazine rack, why not me?
The circular design is perfect for finding the right magazine in a hurry.
So the next time you see something that is trash, think twice. It might just need a little “Salvage Style” to make it beautiful once again!
Are you ready for more great salvage style projects? Of course you are!
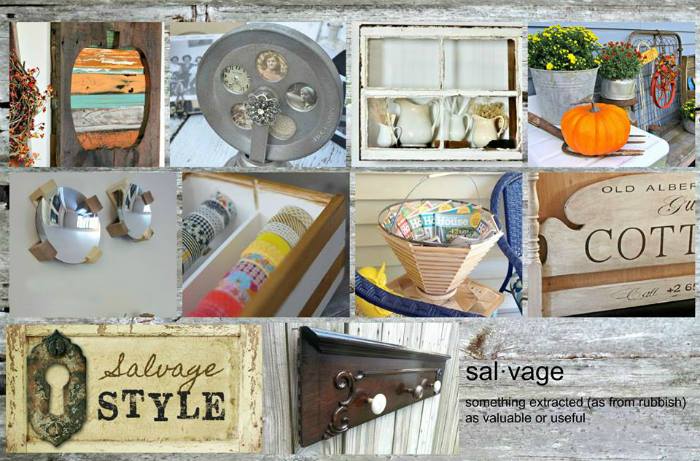
I’ll bet you can’t guess which blogger made what? Well maybe you can…but to be sure, you don’t want to miss a single one. Click on each blogger’s name below to see which trash they salvaged into a treasure from the photo above. Isn’t this a fun game?
Also, I’m sure you noticed our beautiful Salvage Style Logo, you have to stop by and visit Kerryanne English at Woodberry Designs, she designed it and did a fabulous job! Thank you Kerryanne!
One last thing before the link party. We have started a Salvage Style board on Pinterest and you most definitely want to follow along for more great salvage ideas!
Now it is your turn, link up your best salvage style projects below, share on social media and invite your friends, let’s make this a rockin’ party!
An InLinkz Link-upHugs!
Mindi
Mindi
I will be linking to these parties.














I never would have guessed what this was made from. What a clever idea!
This is super clever! A wooden basket out of a lamp shade! It's awesome.
Aren't you the clever one. Glad you used magazines in your photo, it makes it easy to see just how big that basket is. And paint can handles…. I'm gonna go steal them off our cans.
I agree with Bliss about the handles!! pure genius! I used one once–to hold my ceiling fan so I could paint it. Then I just threw it away. You can bet one will end up in one of my projects some day! Thanks for the inspiration!
Now, to the rest of the project–great job! You have a LOT of patience! It's a lot bigger than I thought it was going to be (big enough to hold those magazines)
LOVE your lamp shade basket!
gail
Oh my goodness, well if that doesn't scream creative, I don't know what does! I never would have guessed that adorable basket started life as a lampshade!
This is so darn creative, Mindi! Never in a million years would it have occurred to me to do that with a lampshade!
Mindi, this is so cool. I love your process and the way you think. I also can relate to that "committed" feeling.
You really are a creative genius. I love how you followed where your thoughts led you, and just look at the results! I love it! Thanks for sharing 🙂
It looks like a million bucks. What a patience this project took, 100 pieces of wood to cut and attach. But the result is well worth it.
Very fun and clever! Great thinking 🙂
Super genius, Mindi! That is AMAZING! You've hit unique of the richter scale!
Wow, that is so cool! I would never have guessed it was a lampshade in a former life. Looks like a little boutique artisan find now!
That's a super cool project, Mindi! Love the handle!
Great job! I love the look!
Oh I really like that. You are very handy and talented. Thanks for linking to the Monday party. Come back next Monday.
Isabelle
My brain is so confused as to how you are able to see things with a different perception. lol Only you would see a magazine basket within an old lamp shade. 🙂 That is some talent and using the handles form paint can is genius! I a going to remember that tip. 🙂
I agree this is genius. I love when someone can see new things in old things and make them beautiful. Hope you come back tomorrow for the party!
Xo
Isabelle
http://www.lechateaudesfleurs.com
what a fun project! Looks good filled with the magazines
girl, you are just too much!!! 🙂 I have so many lampshades that I don't know what to do with…. what an awesome idea! Thanks for linking up to Trash 2 Treasure Tuesday. Featuring you tonight!
So clever, I love how it turned out. Pinned. Thanks for sharing at the party! @DearCreatives Theresa
Amazing! I would not have thought to use those two items to create a basket, but it turned out great! Thank you for sharing at What We Accomplished Wednesdays. Have a lovely week! ~Deborah