Standing Coat Rack
It is winter you guys! At least where I live, maybe you are luckier than me. 🙂
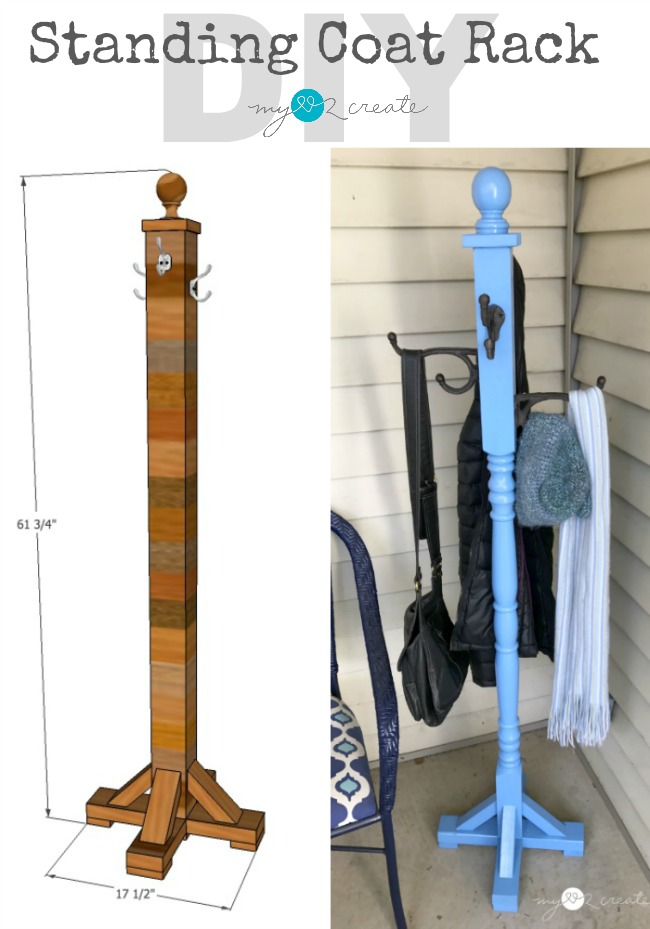
One of the hardest things about the cold months is keeping track of all the coats and hats and scarves, and I was thinking that a coat rack that didn’t have to hang on the wall in one place would be so nice to have…
So I built one!
I kind of love it, and it was really quick and easy to build. ANYONE can make this!
I have teamed up with BuildSomething, Kreg’s new DIY project plan site to bring you the free plans so you can build your own! You can get the free plans HERE.
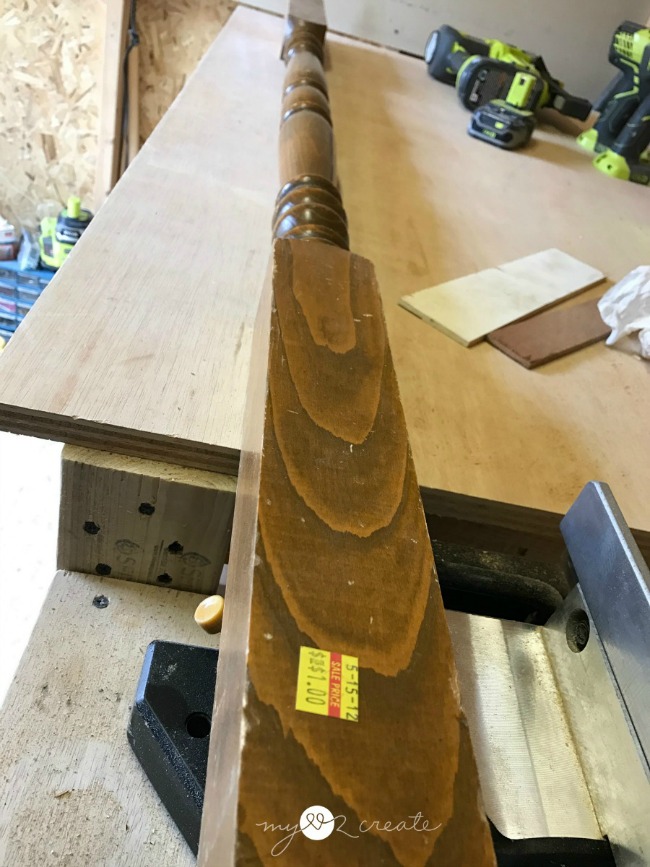
I originally was going to use a 4×4 post to make this, which is what is drawn up in the plans, but then I remembered I had this cute Newel post that I had gotten from the Restore for on $1, and I had to use it! You can use any type of post you want for your coat rack.
Can you see that price tag?! Woo hoo! I actually bought a few of these several years ago. I made my Kids street sign with one, but this is only the second one I have used. I had to cut the ends on my miter saw so they were square.
This post contains affiliate links, read more.
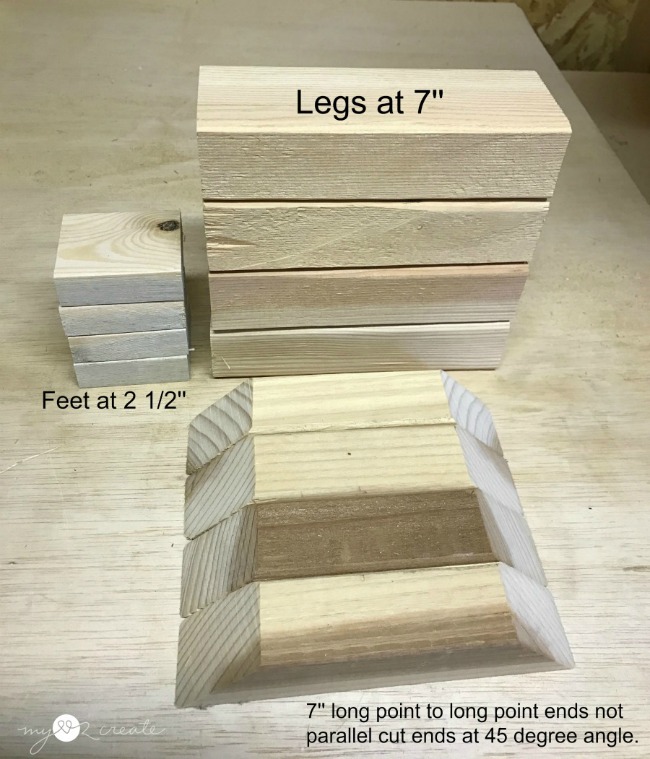
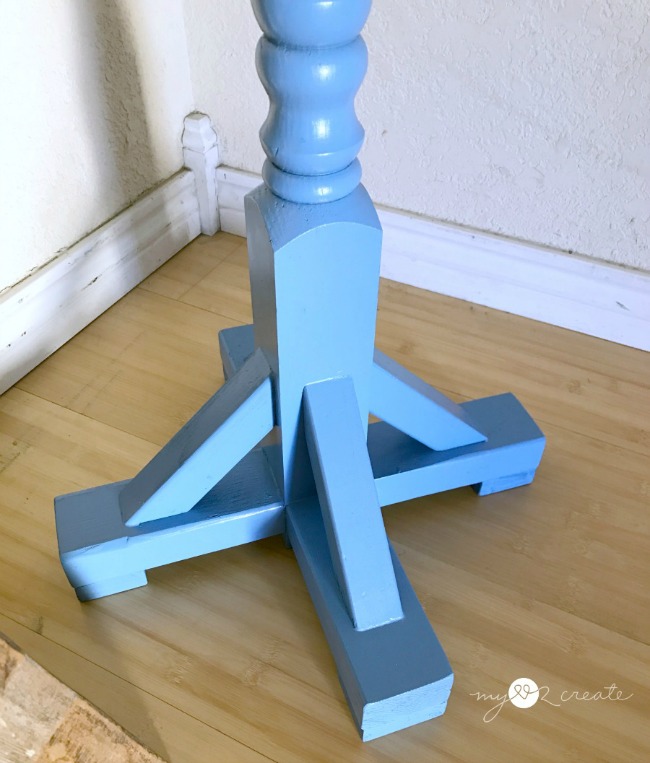
Because the post I used for my coat rack was 2 1/2” square instead of 3 1/2” square like a 4×4, I had to modify the feet to match the width of the post. I used 2×3’s for the legs, 1×3’s for the feet, and 2×2’s for the angled supports. All the measurements are the same as the original plans.
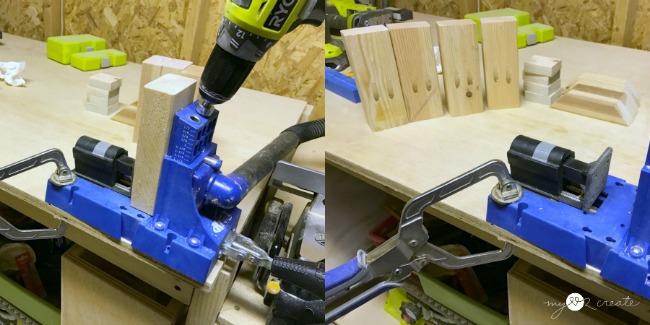
I used my Kreg K5 Pocket-Hole Jig to drill my 1 1/2” pocket holes into the legs.
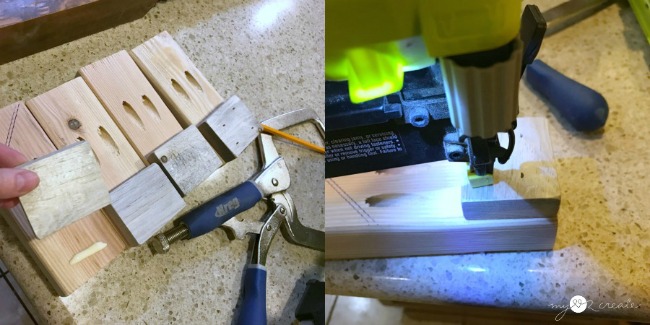
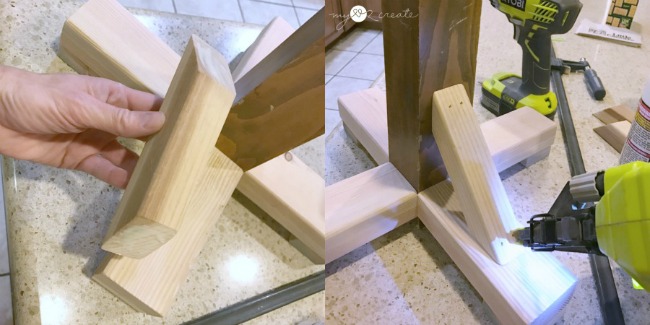
Then I attached the feet to the legs with glue and 1 1/2” finish nails using my Ryobi Nail gun. I recommend you do this after you attach the legs to the post, because the feet made it a little difficult to drill in the pocket holes. Learn from my mistakes. 🙂
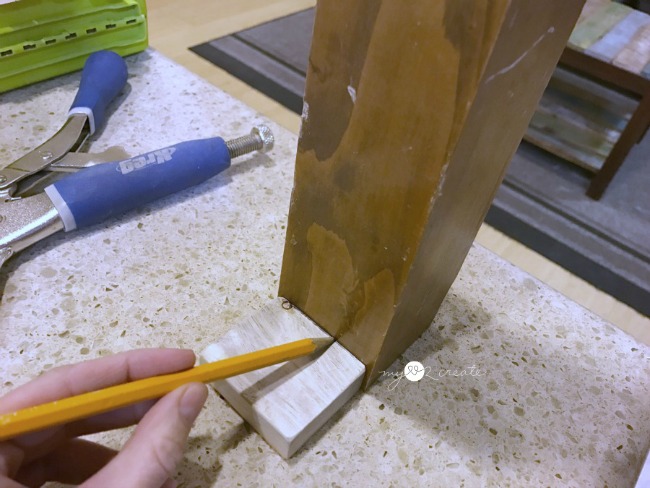
I designed this so that the post actually sits on the floor with the feet, to add stability. In order to get the correct placement for your legs, take a scrap 1×3 and use the 3/4” side to mark all sides of your post.
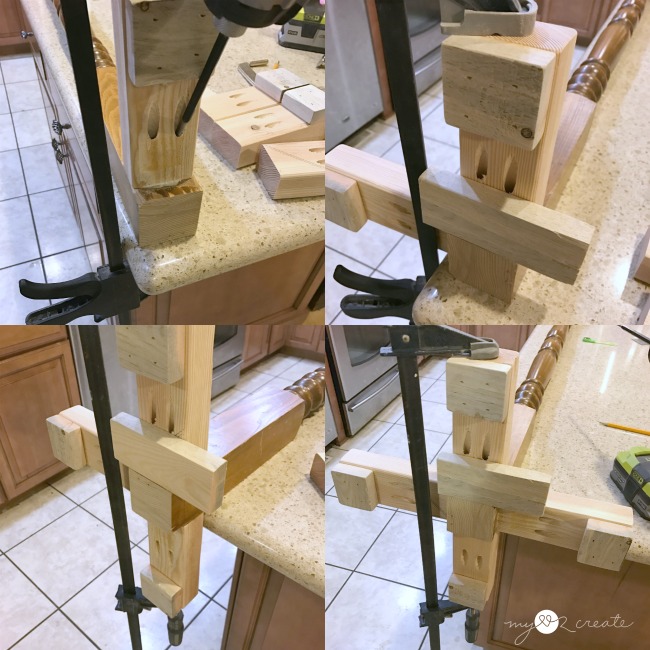
Then attach your legs with glue and 2 1/2” pocket hole screws 3/4” from the bottom (at the line you just drew). I clamped the legs while drilling in the screws. You can see I used a 1×3 set on the end, this scrap piece was flush with the bottom of the post while I clamped on the feet to ensure it was properly placed. I had to move the post to the end of the counter to add the last two legs.
The angled supports are more decorative than supportive, so they can be optional. Place them in the center of the legs and the post and glue and nail them on with 2” finish nails. When I nailed into the feet I made sure to go in at an angle.
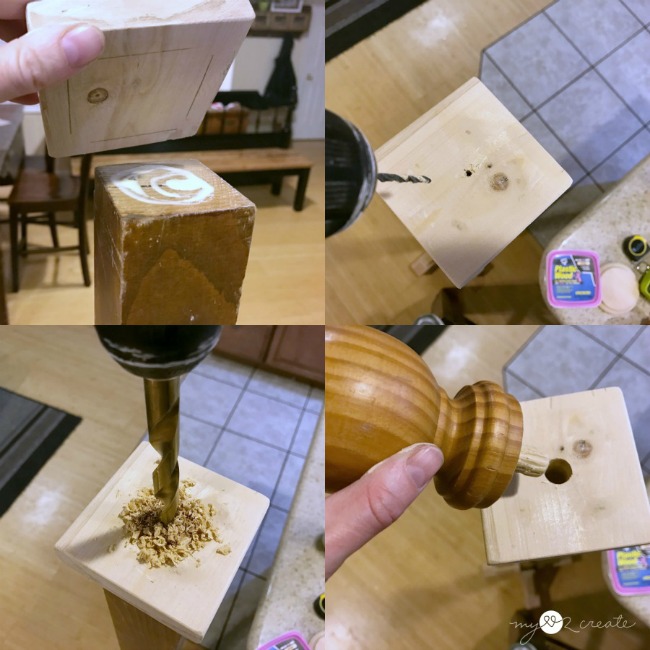
I used a scrap piece of 1×4 for the base of my ball finial. I measured 1/2” on all sides and then glued and nailed it to the top After marking center I drilled a small guide hole as a guide before drilling the bigger hole for my finial. I got this finial from a bag of random ones at the Restore, I am not sure where it was originally from, but most finial’s will have a metal piece you can screw into the wood.
That was it for my build! See I told you it was easy!
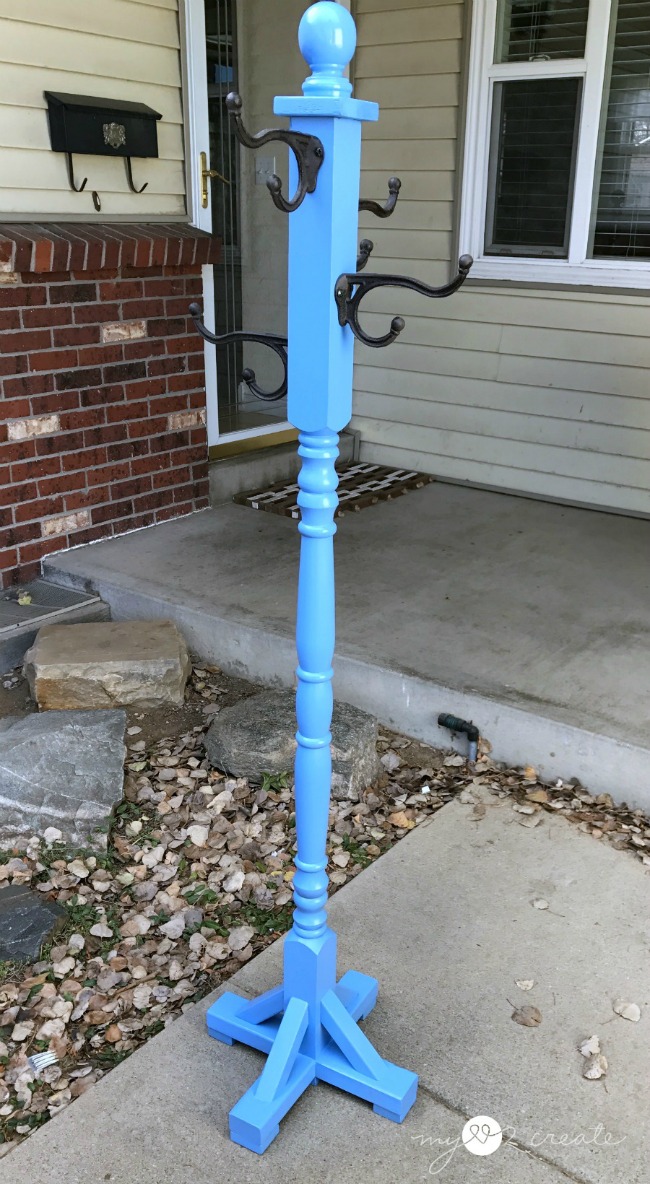
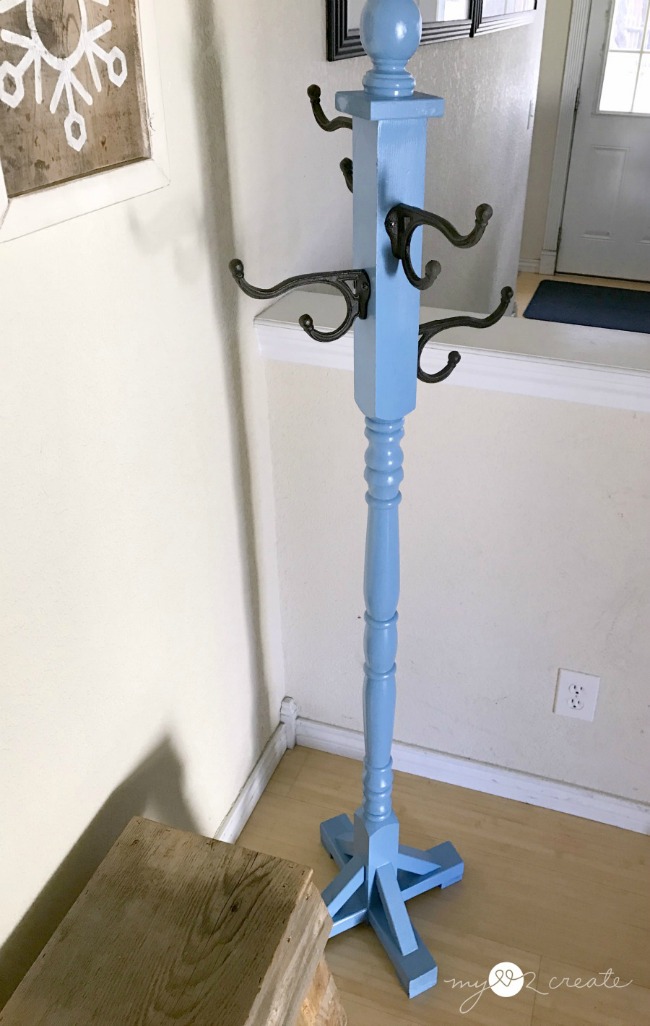
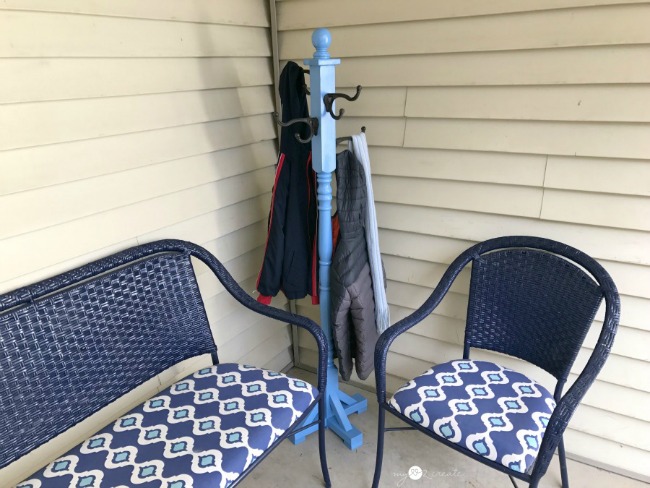
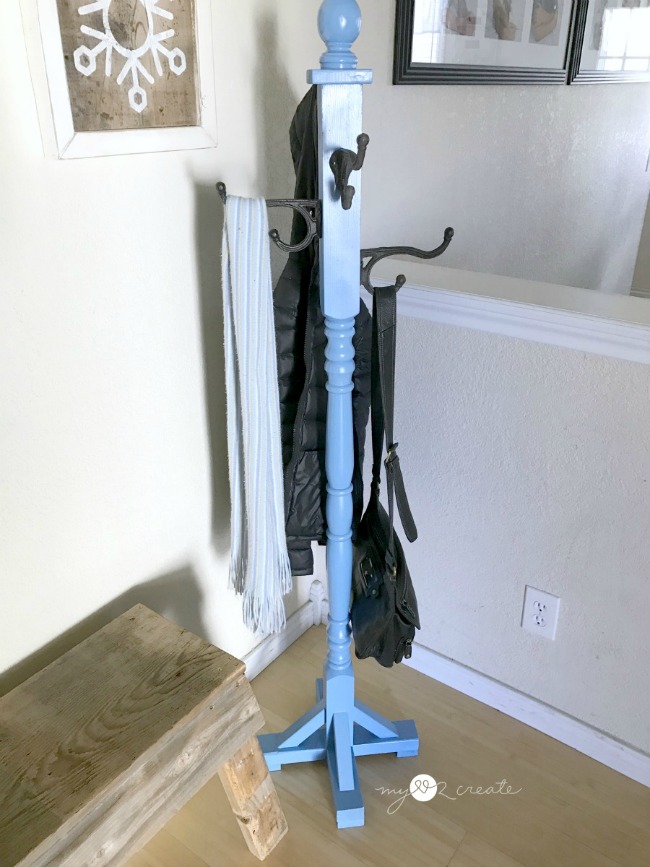
Since my kids will be using this in the basement it got a pretty coat of blue spray paint. I purchased the hooks from Hobby Lobby when they were 50% off, and so I ended up getting all four for $8. Not bad for some pretty cool hooks, and that is all I spent on this project, because I used scrap wood for the rest. 🙂
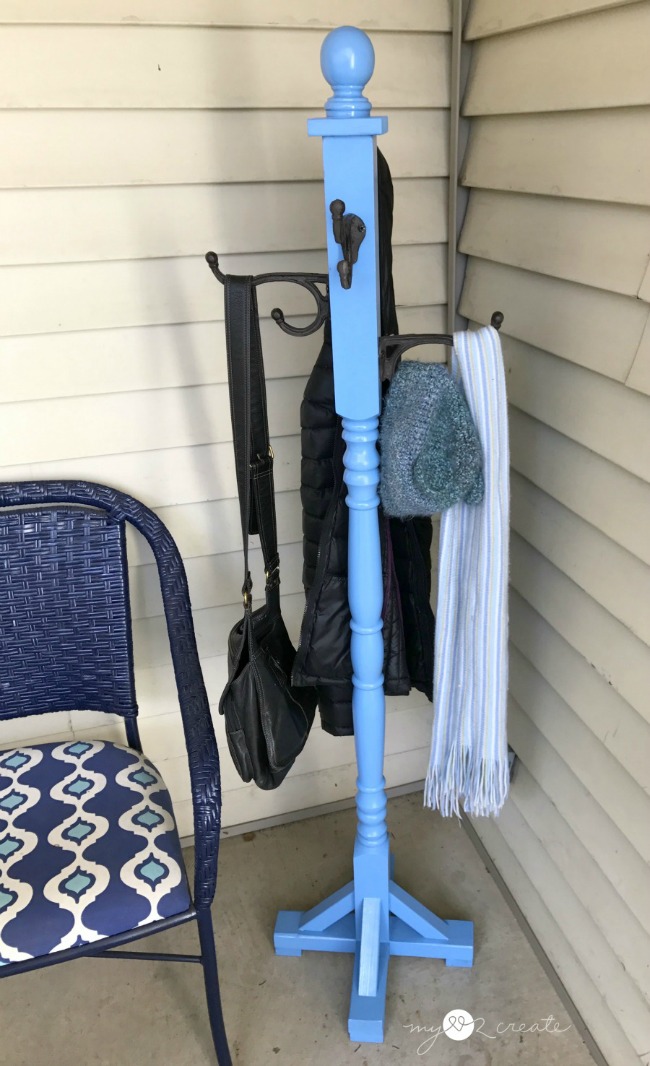
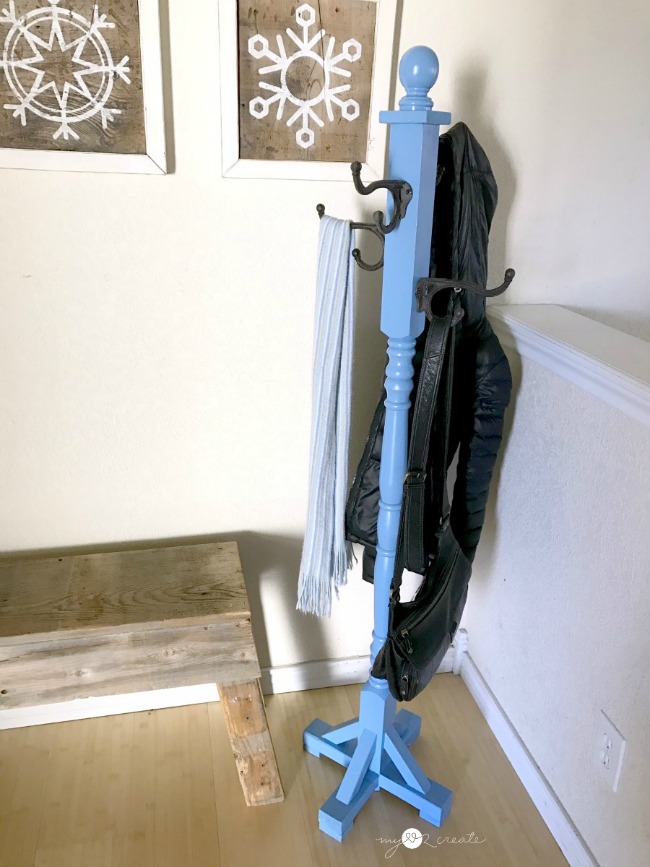
I did some staging outside since my basement doesn’t have the best lighting. I love that each hook allows you to hang two things, with lots of room. These hooks are 6” long!
A lot of standing coat racks have wide bases. I made this one as narrow as possible while keeping it sturdy, and it really is very sturdy! I also made the post shorter than average, so that helps. If you want a taller post, then you may have to increase the length of your legs as well to help with balance. I like this one, because it isn’t too tall for the kids to hang their stuff on. 🙂
It hardly takes up any room and would be great for a guest room as a place to hang clothes. I am going to bring it upstairs when we have guests over in the winter to avoid opening the hall closet.
I can see this as being a perfect entryway piece right next to a bench!
It would make a great gift, so maybe someone on your Christmas list needs one?! I think it would look super nice painted white…which is what I would have done if the kids weren’t getting it! 😉 Or nicely stained would look pretty too!
Now head on over to Build Something for the free plans and get building!
Hugs,
Mindi
Disclaimer: I have partnered with Build Something to bring you these plans, all opinions, thoughts and design ideas are my own. #sponsored
I will be linking to these parties, Savvy Southern Style.


I love that blue you chose! Thank you for sharing with us at the To grandma's house we go link party! Hope to see you there tomorrow when the new party starts!