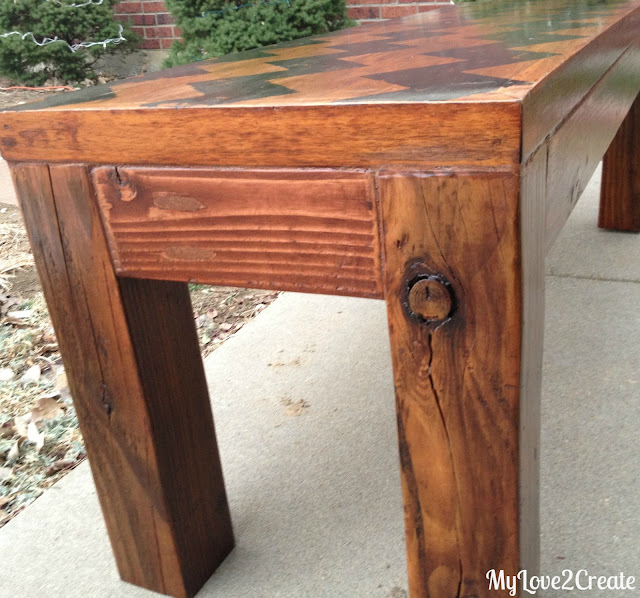
The Charlie Brown Bench
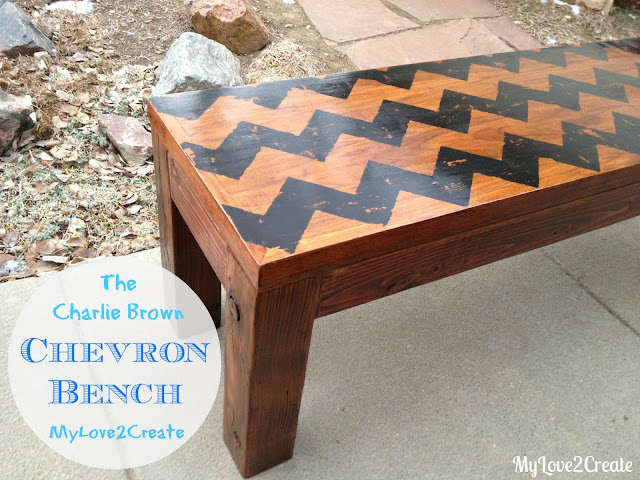
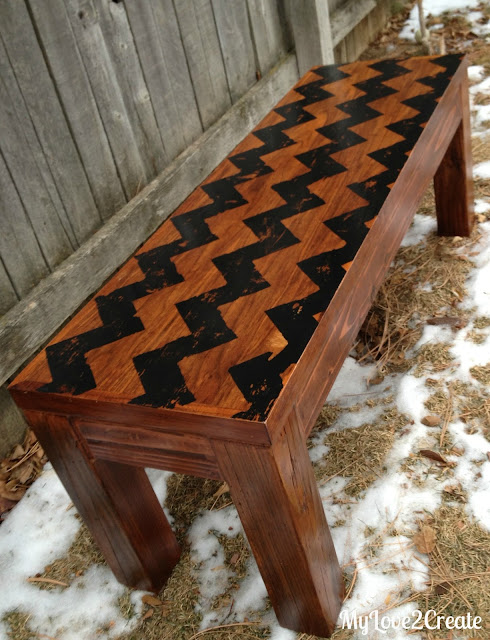
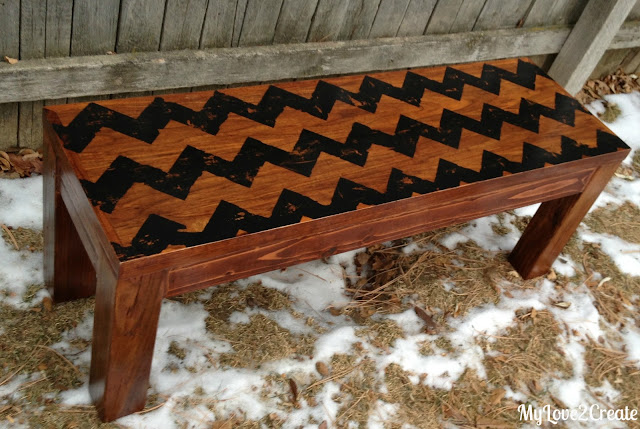
When I look at this bench I think…Charlie Brown! Hence the name of this post. It was supposed to just be a cool chevron pattern bench….
This bench is for my husband’s office, he is a teacher and was needing seating space for his students, and I had just the thing in mind, plus just after Christmas I was itching for a project.
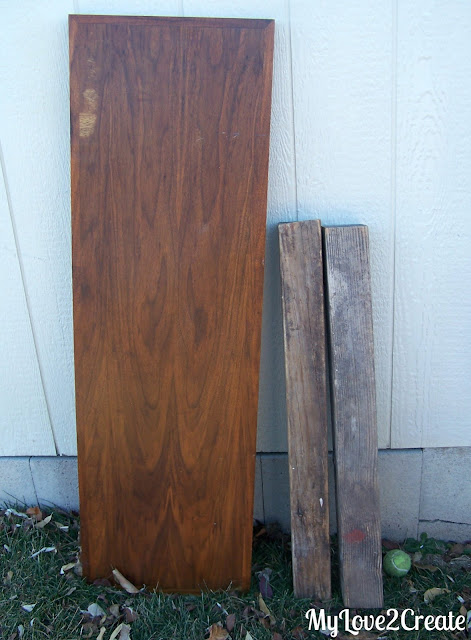
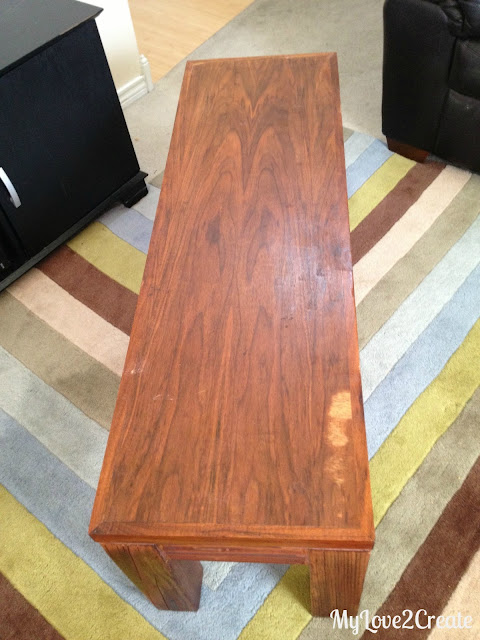
I got this top from a garage sale last summer for $1! Sa-weet! and the 4×4 posts were from one of my many free collections of wood that I got off of craigslist.
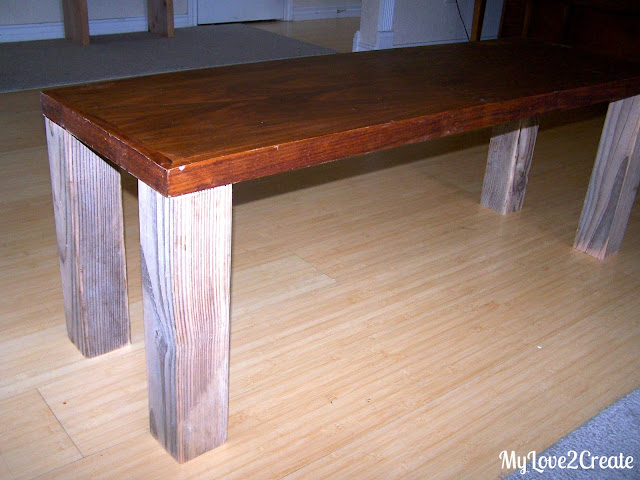
I measured and cut the legs for standard seat height and brought it inside to try out. I loved it. After getting some advice from the Kreg jig owner’s community I decided it did need aprons for stability. I already knew that it probably did, but I liked it without and wanted to see if I could get away with it…It never hurts to ask!
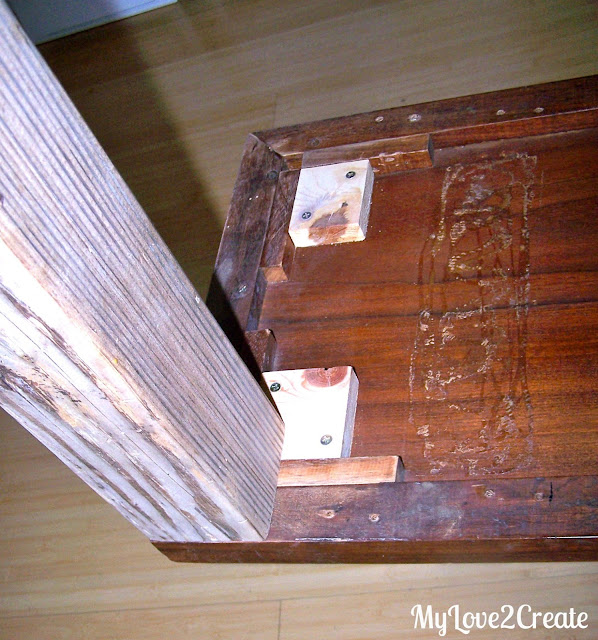
Before the I got wood for the aprons, I got 4 small pieces of scrap wood and screwed them down on each end so the legs had full support.
I lucked out and got some super straight 2×4’s in the cull bin at Home Depot (in the back of the store) for only 51 cents each board. I bought 3 boards, which came to just over a $1.50.
So yes, this bench cost me just over…$2.50. Booyeah! (Is that even how you spell it?) I LOVE CHEAP.
I measured and cut the aprons and set them on the top to test it out. Perfect! You can see my Kreg Jig all set up and ready to go, just ignore the background mess. =) And yes, I do build in my kitchen…it’s too cold outside!
I then drilled the pocket holes to attach the aprons to the legs (two in each side) and also I drilled some so I could attach the base to the top later on.
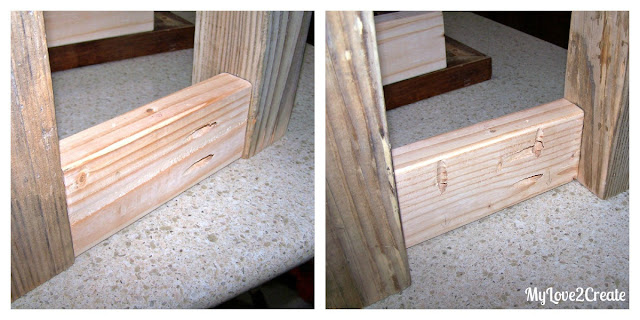
I started by building both ends. You may notice that there are pocket holes on the outside, but only one set. This is because if I were to put them both on the inside, when drilling my second leg on, my drill would not fit, to screw in the screws. (I learned that the hard way when I made my Counter height bench) So I drill the first leg from the inside and then attached the second from the outside. Make since?
Here is a picture of both sides…. In the picture on the right above, I attached the apron to the leg on the right, then I flipped it around and attached the other leg from the outside, left picture above.
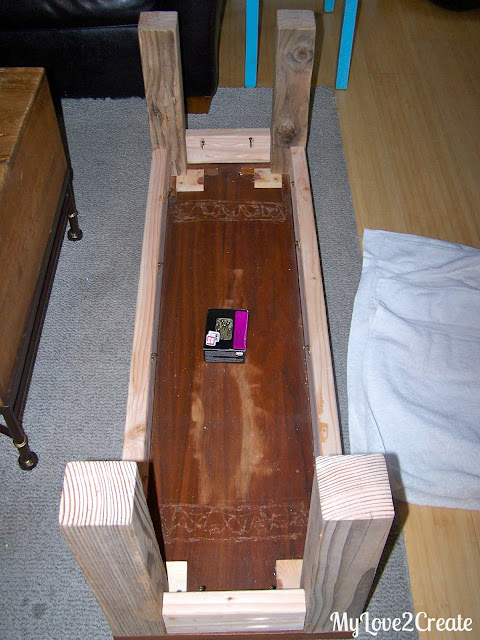
After I finished the two ends I added the long aprons to one end, and then the other. I always use glue before I attach the boards.
The next step is adding the glue to the base so I can screw it to the top. I squiggled it on and flipped it over…
…right onto the top and placed screws in each pocket hole.
Then I screwed them in! Instant bench!
PS- don’t strip your screws, drill slowly and if the screw feels like it is going a little farther than it should- STOP, and reverse slowly….Just sayin’….I may have had an issue with one of my screws on this bad boy going all the way through the top of the bench (who knows why?), and I couldn’t get it out, ugh! Seriously you don’t want to strip your screw…or you might have to dig it out….that’s really fun let me tell ya!
Once the bench was built I had the ever daunting step of how in the heck am I going to finish this?
I really wanted to have the wood stained so I had to match to the top.
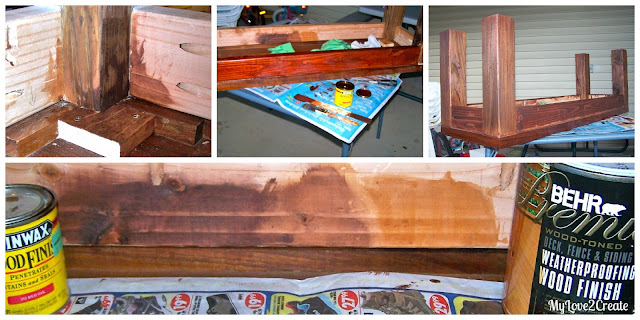
The bottom photo and top left photo above show how I tested different colors of stain in different places, on the inside of the bench. Well, actually I only had two colors that might work, and I had those because… want to guess? Yep, free section of craigslist (my fav place!) As luck would have it the Minwax red oak was a near perfect match and I went with it. Middle picture is when I applied it on my aprons, and the top right is after the first coat. Notice the legs are a little different? I used the lighter Behr finish on the first coat for the legs, because they were already darker. On the second coat I used the red oak on both the legs and aprons.
Looks pretty good eh? I was super happy with it….
Except the top had some imperfections…and yes I could have just stained it… but I wanted something like this picture below… but in chevron…
Which I super LOVE, but ( I knew this already, and didn’t listen to the little voice in the back of my head….stubborn? Me? Nah!) the top of the bench was a really strong nice finish, and no amount of sanding was going to give me a pretty natural wood pattern, be-lieve me I tried.
So…I decided to paint it on and distress it nice and good.
Here is how I did it using the cool tutorial Here.
I printed and cut out the chevron pattern found Here. Then taped around it. Except I was confused after the first row when I tried to keep the spaces even, so I placed the pattern on top of the green tape from the row above and taped under it. That would make my rows unevenly spaced, so I removed the pattern and taped just above the bottom row I had just finished, and peeled off the bottom row of tape (second picture), and filled in the rest of the space with tape. In the third picture I am creating the top of the next row, and then I had to repeat the last process to finish it off. Then I painted over the tape with two coats of paint. (Sorry if that is too confusing…it makes since when you actually do it)
Looking back I should have only done one coat, because this was really nice thick paint. I removed the tape when it was still a little wet after the second coat.
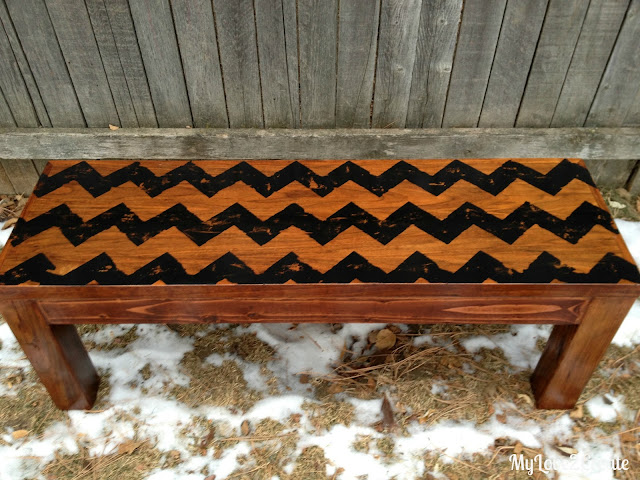
And there you have it- perfect chevron (or Charlie Brown) stripes. But they were a little too perfect…
So I sanded them down, to the dismay of EVERYONE in my house. “Mommy what happened?” “Why are there holes in it?” “Mom, it looked better the other way…” “What did you do?” Or, “I just wanted a plain bench, not something with so much pizzazz”….
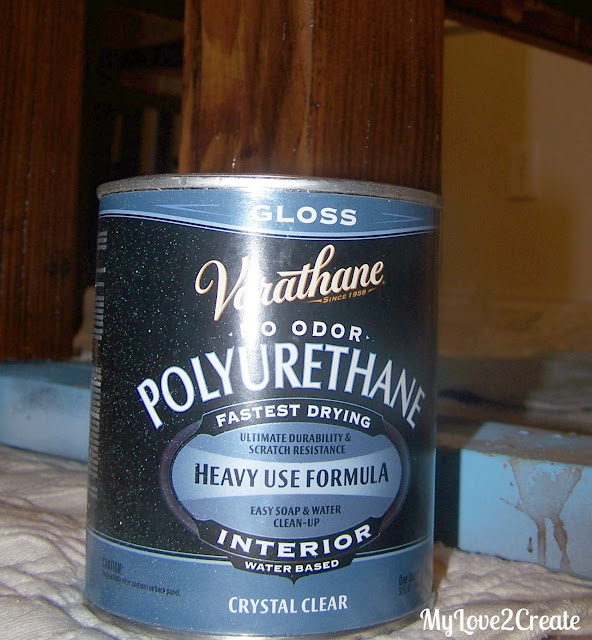
You can imagine my discouragement at this point. I went ahead and gave it two coats of poly any way…I was done…
I guess what’s done is done. What do you think?
Thanks for stopping by!
Mindi
I will be linking to these parties.










i like how this turned out! a chevron is always glassic and the tone of the wood is just beautiful. i'm super impressed you built this all on your own – amazing!
— jackiejade.blogspot.com
I absolutely, absolutely love it. I see Charlie Brown but that makes me love it more. You did such a nice job!
stopping in from diana rambles, pinning & following you 🙂 what an awesome table.. kinda wish I had the space/need for something like this. hmmm I could redo my desk? haha. nice project!
Aaaamazing! Mindi, I love it! It turned out so well. I love the chevron of course and totally love that you sanded it. So much more personality. Those legs look even more gorgeous now that they are stained. Seriously….my most favorite project ever!!!!
The bench is super cute! The "Charlie Brown" lines give it a fun character.
totally made me smile.
hope you'll stop over soon–we'd love to have you.
michele
You are soooo craft! Love the name and just how fabulous the bench looks 😉 Wonderful job!
xo
summer
I love your creativity! Nominated you for a Liebster Award. Details here if you wish to participate http://renewedprojects.blogspot.com/2013/01/liebster-award-nomination.html
Audra @ Renewed Projects
Love it and chuck brown too!
I love Charlie Brown, Snoopy and Woodstock! They won't just be childhood memories for me… I bring them along with me and I will till my old age 🙂 Great site! Found you from Diana Rambles pin link party!
this turned out absolutely amazing!! seriously, it looks store bought, how you even whipped up this diy is beyond me. and i LOVE the charlie brown detailing- i totally see it too 🙂
this looks brilliant. You did such an amazing job!!
I had to think about it for a moment…but I get it. Charlie Brown's shirt!! Cute!
So cute. It does have a Charlie Brown vibe but I think its rad. If you get a chance come link up at my Pin Party.
http://sarahdawndesigns.blogspot.com/
Peppermint Patty would love this – and dare I say, even Lucy!
Kelly
I love how this turned out!!! The color is gorgeous. So deep and rich. Love that you call it the Charlie Brown bench! Thanks for linking to One Creative Weekend!
I am so digging that bench! I found you on the link party! Look forward to following along!!!
LOVE! So happy my tutorial helped you! I'm posting this on my fb page! OH and… thank you for linking up to Monday Funday!
I love how this turned out! Thanks for sharing @ DearCreatives.com Hope you are having a great week & hope to see you again soon!
couple of questions:
did you set your jig for the thickness of your "top"?
are your screws pocket hole screws?
I'm amazed how well you matched the color! I think your (hubs) bench looks fabulous Mindi! You really did a nice job.
so funny to see you build in your kitchen. (I always notice, so I thought it was funny you mentioned it)
thanks for sharing, catching you!
gail
ps you have me wanting to build! I think I can build if I take it easy, but I can't "sand" anything. 🙁
Love the "charlie brown" look of it! I have a friend that would love this in her livingroom! Shes all about the peanut gang! Thanks for sharing and Come visit me sometime. http://www.lifeawayfromtheofficechair.blogspot.com
I would have never thought of Charlie Brown until you mentioned it. Now I can totally see it! I'm so happy that you visited and linked up at One Creative Weekend at OneCreativeMommy.com. The next party starts tonight at 8:00 PM MST. I hope you'll be back.
Mindi – your bench is gorgeous! I love this look – beautiful job!
Cute!
Thanks for linking up at Inspired Weekends! This week's round is open if you would like to stop by.
I think this turned out fabulously! And yes, I totally see the Charlie Brown (I'm a huge fan), but it also looks super chic. I'm a lover of all things distressed (in fact, I have a wood sanding project today), so I'll be that voice that cheers you on.
I love this. It turned out so good! I host a DIY link party every Monday and would love for you to join! http://homecomingmn.blogspot.com/2013/02/the-diyers-link-party.html
The color is gorgeous! Beautiful job!