Hey everyone!!
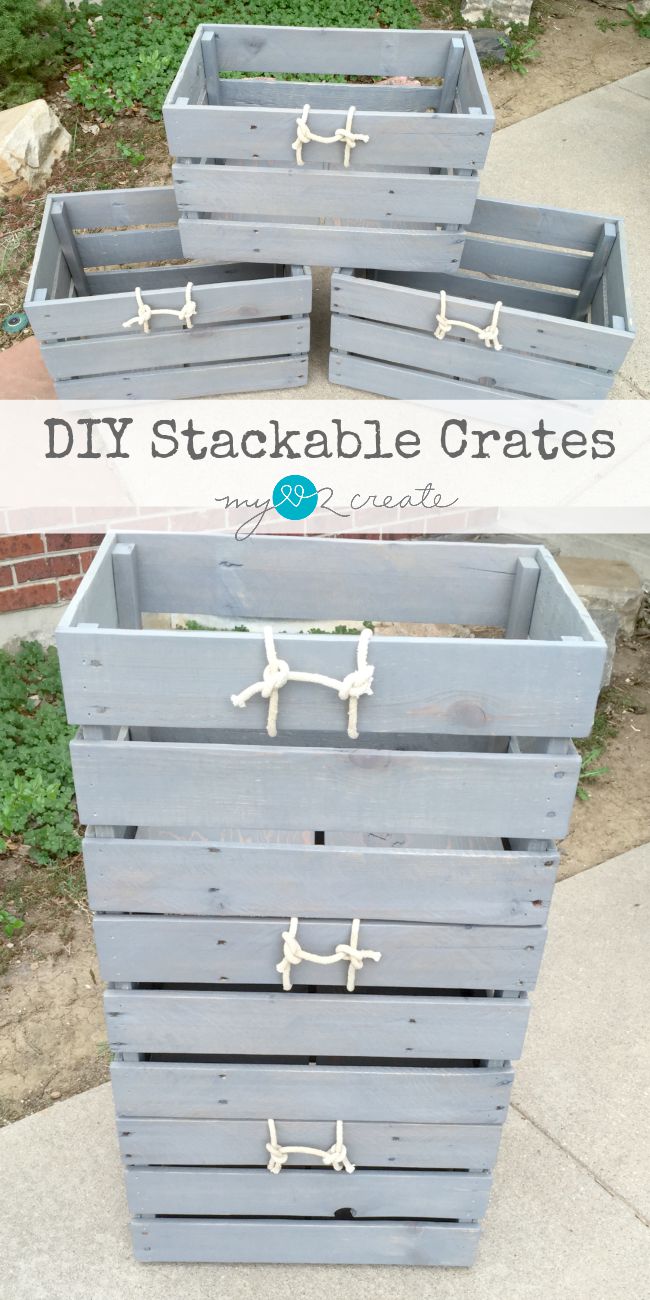
So remember when I shared How to Transform Laminate furniture a few weeks ago? Well, to day I am going to share two easy tips to build stackable crates…
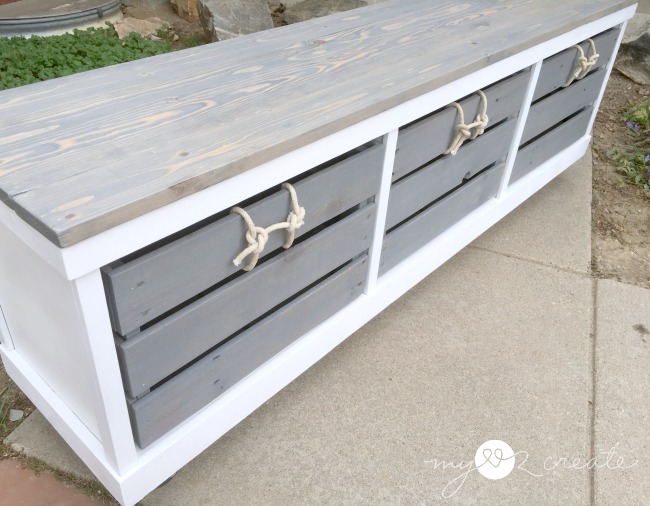
I built these crates from some free pallet wood and scraps to go into my new bench that I transformed, but I really wanted to make them stackable just in case I wanted to use them somewhere else. 🙂
Since I shared this at
My Repurposed Life several months back I am not going to give a full tutorial here, but two important tips for making your crates stackable.
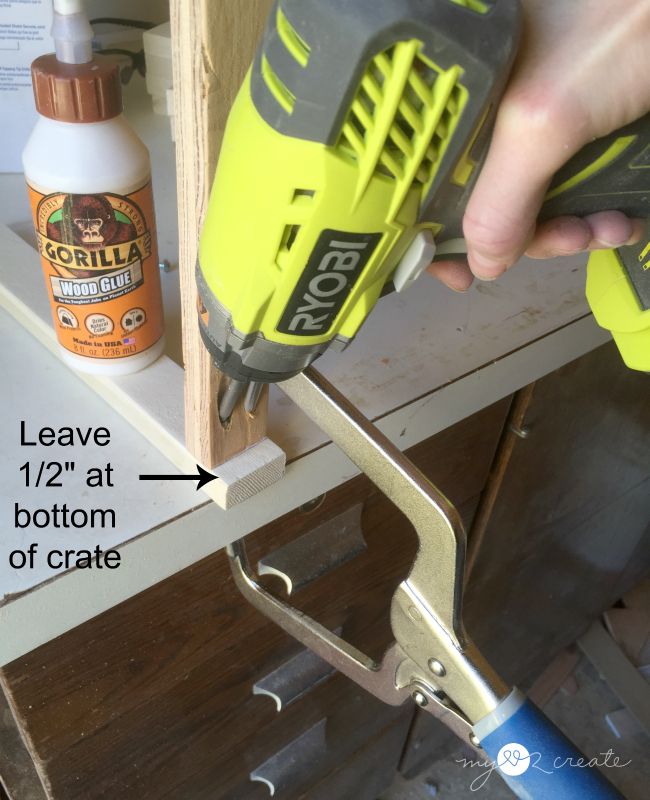
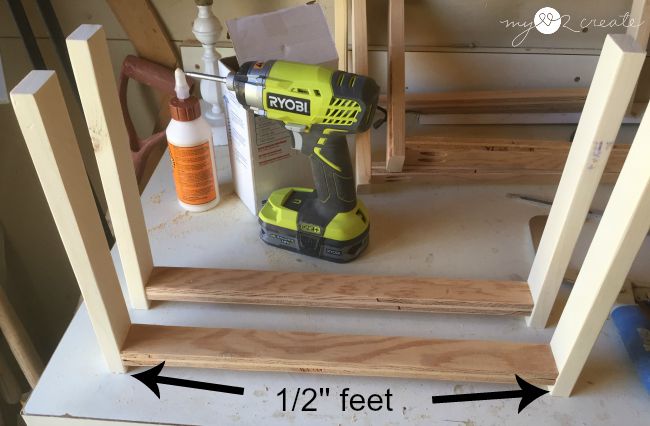
Tip #1- Your crate needs to have feet.
When I was building my crates I made sure that my bottom support piece was connected 1/2” from the bottom of the inside support piece. This little space will become the “feet” of my crate, which allow it to stack into another crate.
Now that you have made the feet on your support pieces you can start adding the end slats to your crate but this is where you need the next tip…
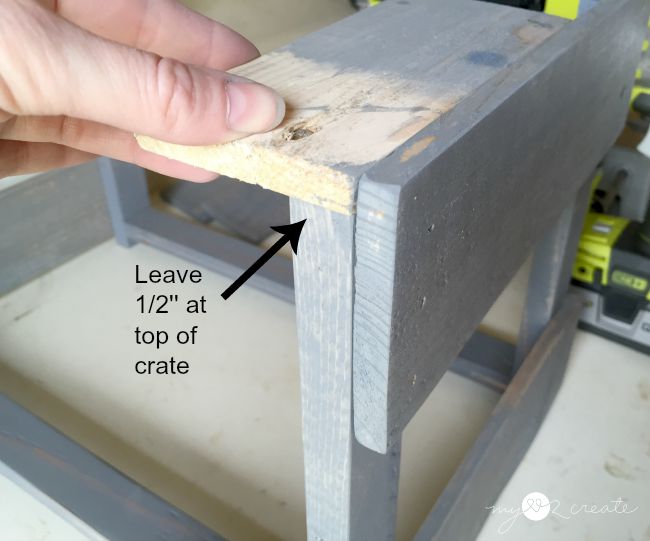
Tip #2- The top of each crate needs a space for the feet to stack into.
This is very easy to do. When I added my side slats to the support pieces I simply used a scrap 1/2” board (the length of my feet) to make sure that I was leaving the correct amount of space before I glued and nailed them on.
Oh, and you may have noticed I stained the wood too, I wanted to do it before I built my crates, I find it easier that way. 🙂 That is it!! Two quick and easy steps to make your crates stackable!
My crate’s feet fit right inside the bottom crate, and they are nice and sturdy when stacked. I did add felt pads to my crate feet so they slide nice and easy in and out of my bench, this is not necessary if you are just stacking.
I also wanted to note that you can make your crate feet longer if you desire, this would make more of a space when your crates are stacked. I didn’t worry about it for this project, but it would be easy to do! As long as you have feet and place to stack them you can customize them anyway you want!
Here are my crates in their home! I fit them for this bench and I love how they turned out, especially since I made them out of pallet and scrap wood, so they were free, my favorite kind of project!
If you are a crate lover like me you can check out my
20+ DIY Crates post for more great ideas!
Thanks so much for stopping by!
Mindi
I will be linking to these parties and Savvy Southern Style


Oh, I really like how these look in the bench you repurposed! I am loving the look of it all. 🙂
Have a great weekend!
I haven't had the time to do much for a few years but you've given me lots of inspiration. Thank you so much.
You're crates look great – love the gray!
Carole @ Garden Up Green
I love your crates Mindi, and WHO doesn't LOVE Gorilla Glue!!!
gail
Love these crates, and they look fab in that bench!
I love how creative you are with crates, they came out beautiful. Thank you for sharing with the Clever Chicks Blog Hop! I hope you’ll join us again next week!
Cheers,
Kathy Shea Mormino
The Chicken Chick
http://www.The-Chicken-Chick.com
You make the best stuff!!
Nice work, I'm impressed! Thanks for linking up to Home Matters Party, pinning! #HomeMattersParty http://cu-rio.net/home-matters-linky-party-57/
Such a great redo of a pallet. I love the crates! Thanks for sharing with SYC.
hugs,
Jann
Awesome that you build these by yourself!! Pinned to my Pinterest board. Linda @Crafts a la mode