White Faux Brick Wall, One Room Challenge Week 3
I’m not going to lie.
I am kind of freaking out that this is week 3, holy guac you guys!
Ok deep breaths I can do this…let me show what I got done this past week…It is no where near where I wanted to be.
Why is it that when you take on a huge project a million things, that never come up when you have nothing going on, drop like bombs. EVERY. Day. Why?!
Ok rant over. I did accomplish some things so movin on.
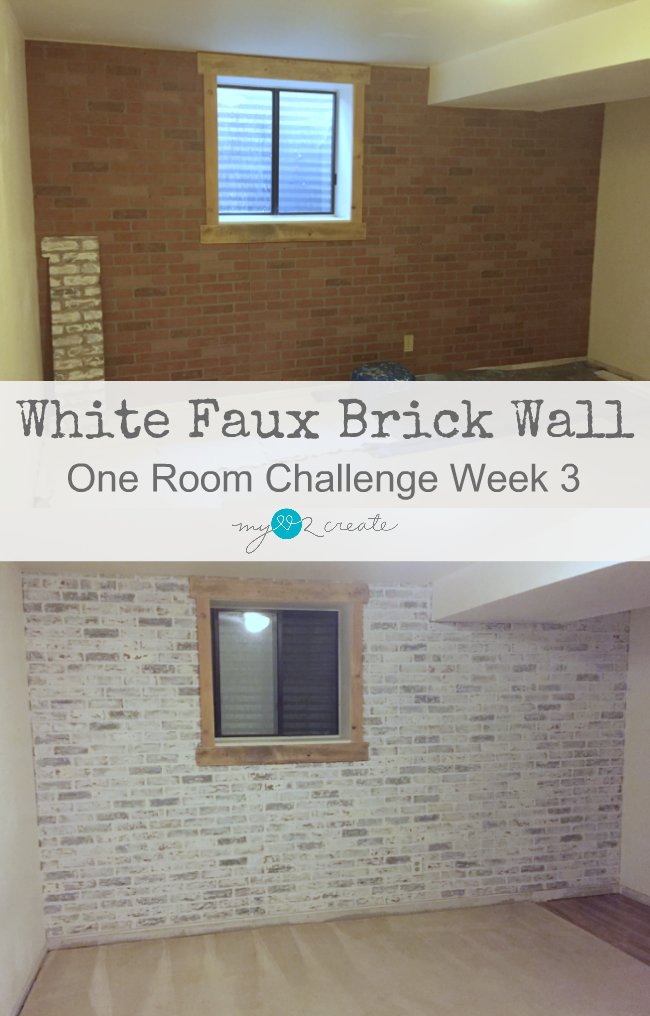
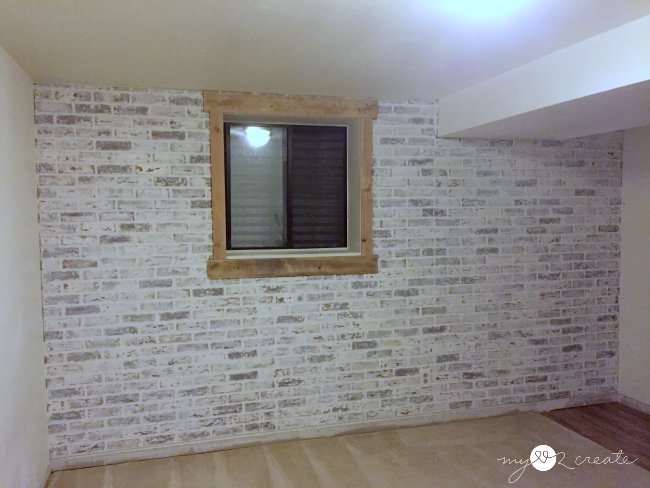
Like this awesome White Faux Brick Wall!! I sort of love it, even if I am one of the only ones in the house that does. Luckily my boys do, but my husband keeps asking if that is how I wanted it to look…hmmm. 🙂
If you are new here…Hi! I am so happy to have you join me on this adventure. 🙂 You may want to take a look at last week’s process, and my room before shots and inspiration board.
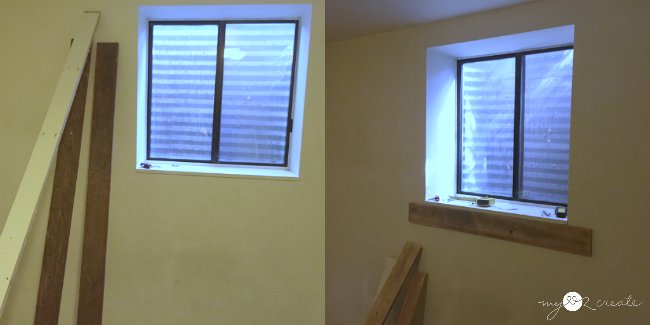
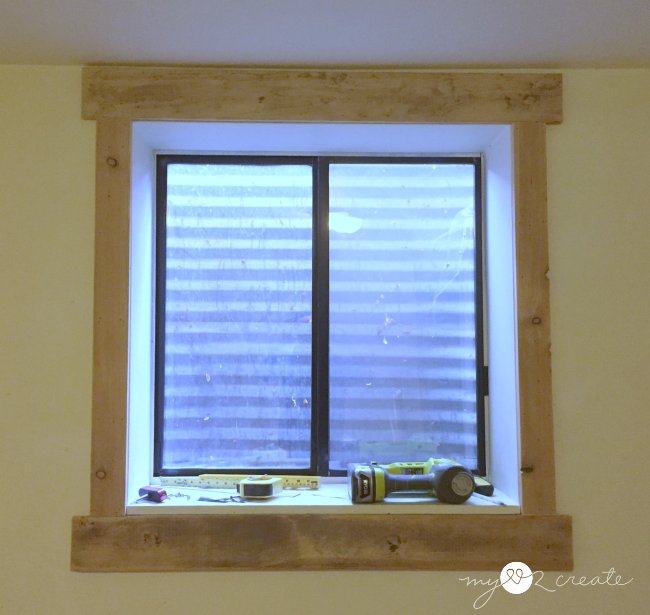
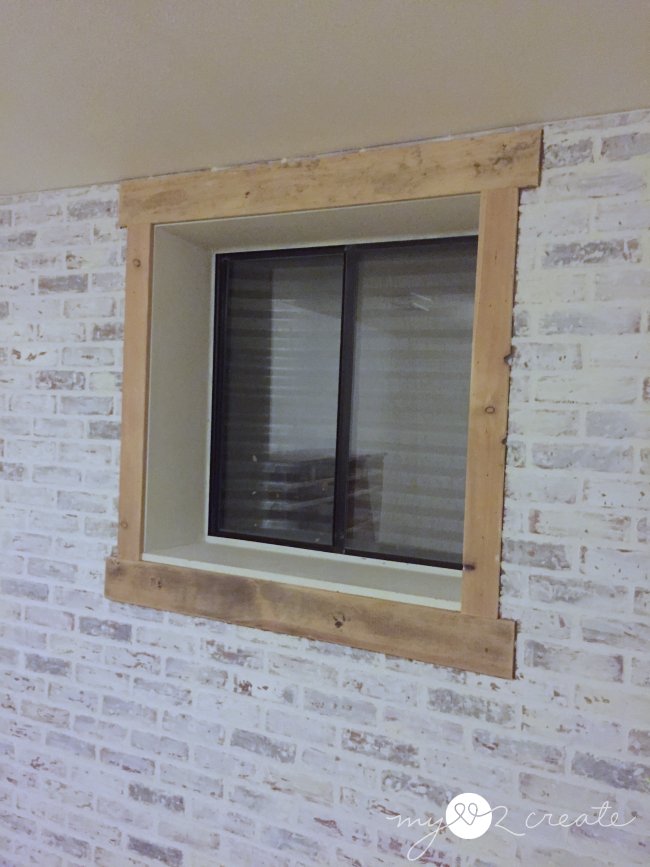
I started week 3 with framing out my boys window. It was so lonely and plain so I grabbed the wood from when I ripped out the closet, and repurposed it for window trim! Perfect for my I am selling things on craig’s list to pay for this room makeover budget.
This post contains Affiliate Links
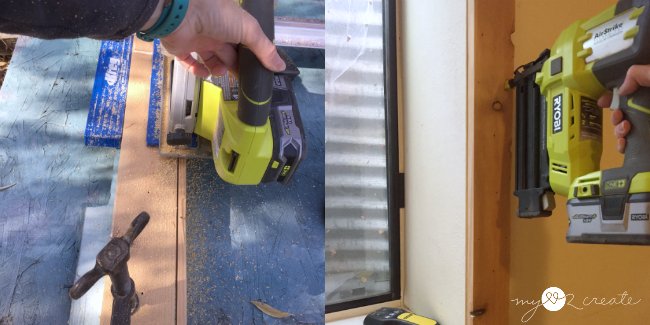
The 1×4’s from inside the closet (they were nailed on the wall holding the shelf up) were sanded down. Then I used my Kreg Rip-Cut to cut them a little thinner. They were too close in width to the top and bottom trim and I wanted more of a difference in board width. Since I don’t have a table saw my Rip cut is the next best thing. Then I nailed the boards to the outside of the window frame with my Ryobi Nail gun
 .
.
I wanted something simple and free. Check. Oh, and you gotta love the uneven ceiling, I promise I make my boards level. 😉
After ripping out my closet walls I decided to get some laminate flooring at Home Depot. I found This and loved it for the price, less than $20 for the box and I only needed one to cover the closet floor. Sa-weet!
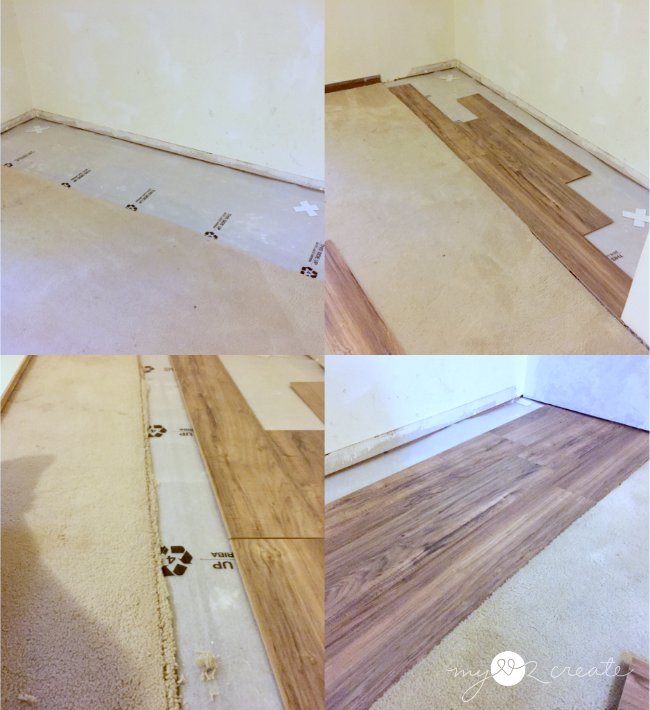
I laid down the underlayment and tried fitting my first row. I had to re-mark and cut the carpet again. You can see in the bottom left photo where I marked the carpet for cutting. I must have forgotten to take a photo, but I added a new carpet tack strip under the carpet with liquid nails to hold middle section in place.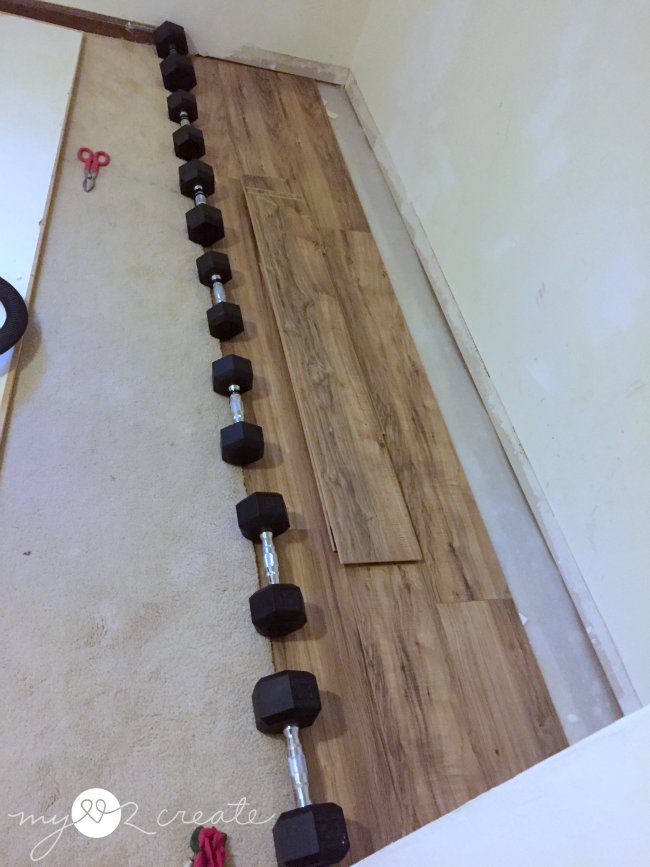

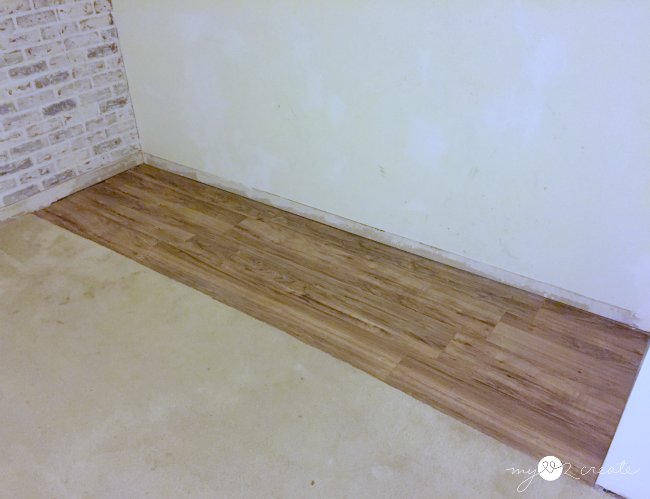
Once I had the carpet perfect I was able to add the first few rows of flooring. I was too cheap to buy a connecter for the carpet and the floor, but the nice flooring guy at Home Depot helped me work out a solution. I put a bead of liquid nails down at the very edge of the carpet and put my flooring on it right at my carpet strip. Even thought this is a floating floor and it says not to glue it down, we decided it was my best option. This will ensure my carpet and flooring seam are good. I let it dry over night. The rest of the floor is still floating.
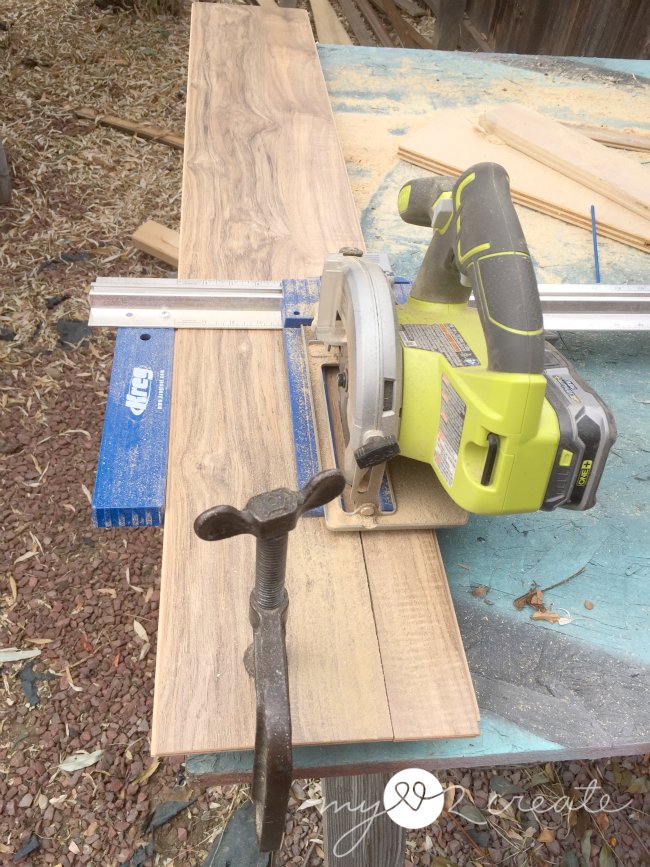
I again busted out my Kreg Rip-Cut and Ryobi Circular Saw (my favorite tool combo) for my last row of flooring.
I love how it turned out! Now I just need to paint and add wall trim.
On to the faux brick wall! I got a great deal on the faux brick. I needed 4 to cover the wall. When the guy helped me load them on my cart I said I didn’t want the one that had some slight damage. He told me that if I knew I would be making cuts and not using that end, I could get $5 off the damaged piece. I took it. When I checked out, the guy gave me $20 off. I told him it was only supposed to be $5. He said it was just easier to take it off for each panel so he gave me $5 off each one. I LOVE HIM, ok not really. I love his laziness. 🙂
To fit the panels to the wall I had to do some measuring and marking from my wall and mark it onto the panel. Then I cut out my markings with my Ryobi Jig Saw and put it up on the wall by drilling into the studs. It took me several hours on Saturday to get these up, but It was so awesome to be done. Ha ha, not done yet.
I had searched for awesome faux brick walls and my boys and I decided we wanted this one (which is a great tutorial, I am just giving the basics right now.) AND, of course it was the hardest one to do, but we loved the look so it was worth the effort. Right?
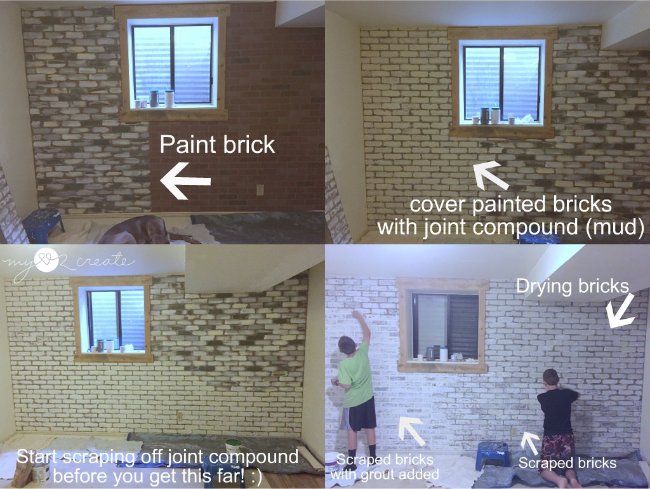
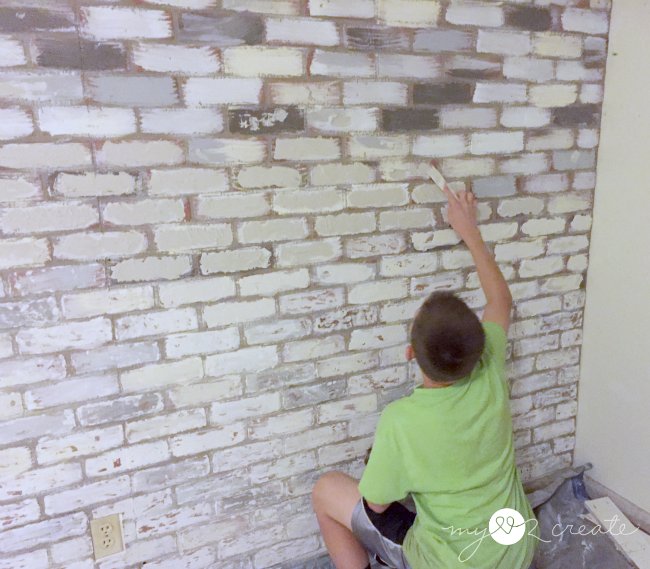
Basically you paint the brick in random order with the colors you want. Then you cover the painted bricks with joint compound. Make sure to do this in small sections. I got mud happy and forgot to start scraping the joint compound off in small sections. It is harder to scrape when it gets too hard. You scrape it off trying not to remove too much of the paint underneath, it leaves some white from the mud and gives it a nice white washed look. Then you grout whatever color you want, we did white.
Here is A scraping on some mud. Scrape on. Scrape off. It was a LOT of work.
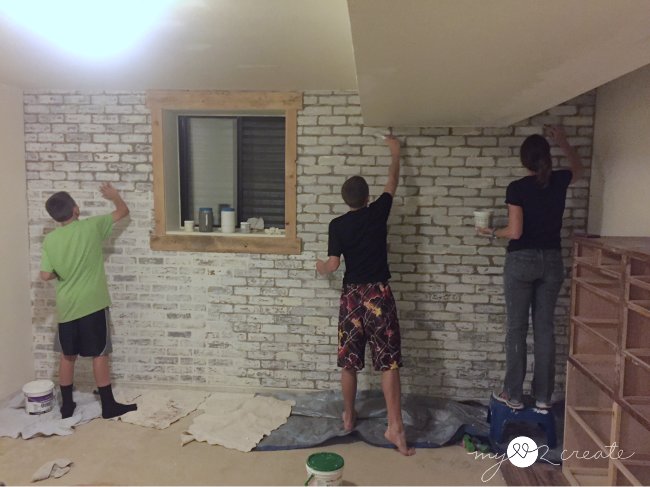
I loved working with my boys! Besides, they need to have some part in this room and I am trying to involve them every chance I can.
Sorry for the bad photos, but we finished Wed night, and I wanted to get some shots up for today’s post!
We have had serious mixed reviews in our home for this wall treatment. So I am DYING to know what you think! Love it? Hate it? And while you are at it, what do you think of the window trim? Paint it, leave the wood…I keep going back and forth.
And while I am asking questions, because indecisive is my middle name… 🙂
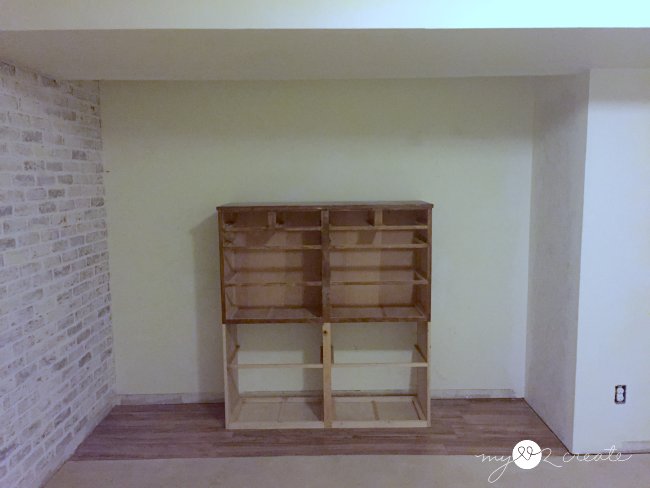
I also worked on this dresser…I am going to add it to the closet as a built-in. The top half is a dresser I got for free off of craig’s list and the bottom half I built up for another big drawer and hamper, like I did in my master closet makeover.
The idea is to add desks on either side of the built-in. I am good with it, but I wonder if that would be too weird as a “closet” with built in desks? Thoughts?
Up next week I hope to paint the room, finish the closet, and the beds…eeek I am running out of time!
Thanks for stopping by, and don’t forget to stop by Calling It Home to see what everyone else has done!
Mindi
I will be linking to these parties and Savvy Southern Style




Holy cow you got a lot done! I know you didn't accomplish as much as you wanted, but you are doing great! I can't wait to check in next week!
That was a lot of work! You are doing just fine. You'll get there.
Oh my Lord you were very busy & the brick wall look amazing!
Holy moly…that was a HUGE job but the good news is that your brick wall looks amazing!!!!!!
That's a ton of work for 1 week! I think that's more than I'll do during the entire 6 week challenge:) Way to go!
This is looking amazing! You have gotten so much done! I love the brick and the trim around the window. I would love if my kids were older and could be helpers. I am also taking part in the challenge and wondering where the last 3 weeks have gone!
The wall looks fantastic! I'll have to hire you to help us do the brick wall we want to put in the basement in our new house! I'd paint the window trim white, but the boys might prefer the rustic look. Either way, it will look fantastic! Are you going to paint the stuff in the closet? I'd match the closet interior to the window frame whichever way you go. Mindi, I so admire you and how much you accomplish with everything else you do! Great job!
Soooo… I hope you realize that you got a TON done!! The wall isn't for me, but if you love it!! ROCK IT!! I planned on doing desks in my girls' closets, but their closets are like shoe boxes, so getting desks and built-in dressers in there is just NOT happening. But it looks like you could totally fit it, so I say go for it!
There. Decision made. Change your middle name 😉
I love the brick wall, the closet floor looks great for an inexpensive laminate, and I love the window trim! My vote would be to leave the window trim as is. I think the natural wood looks amazing with the brick. Great job this week!
WOAH! This my dear looks fantastic! That brick wall is soooo good!
That brick wall rocks!!! It looks tons better than before adding character and interest to the room.
WOWZERS! That brick wall is amazing. So great to have extra help. 🙂 Just finally able to check in on my fellow participants and I can't believe how much you have done already.
The wall ROCKS! I don't think the desks in the closet is weird I did that in our last house for our 2 boys, part was clothes storage part was desk space…worked great! The window trim looks great! I would leave it wood for now…you may feel different after other things are in there…I say that because I don't know what is going to be on that wall if anything….If you change your mind it is easy enough and small enough to paint later. harder to remove the paint if you decide it blends too much painted! You go girl!!!
the wall looks so great! I would whitewash the trim, but I agree with Karen…. leave it and you can always change it later.
I say go floor to ceiling with as much FREE stuff as you can in the former closet. 😉 Those boys will need lots of storage and display options.
so excited that y'all are making this a family affair.
gail
Holy cow! That wall is gorgeous- can't believe how much effort goes into this stuff, but sooo worth it. I like the contrast of the window trim as it is. The rustic wood looks great with the brick. Good luck in the second half- it's looking amazing!
That wall looks awesome! And how sweet that your boys gave you a hand with it. I like the wooden tone on the trim, I would leave it just like that.
Press on dear Mindi-you are headed in the very right direction. Everything in this room is screaming industrial chic. Love the rustic wood, faux or any kind of brick, re-purposed dressers into functional divided study space, and even the reflection of the galvanized corrugated window well add up to "most creative and efficient use of time, talent and raw material I have seen in forever." The fact that you have corralled the young men into service in the very best Tom Sawyer fashion only adds to the adventure. Your "budget" figure makes you a girl after my own heart. You are and will always be a winner in the save the world one project at a time race.
I love the way the brick wall has turned out! Good for you for involving the boys in the room transformation, I think it will make them appreciate all that you do for them even more…
I agree with Gail about the window trim, I would also would have gone with white wash for the window trim.
Can't wait to see the room transformation. Tali
Looks like a lot of work. I'm sure you were glad to have such great helpers. Thanks for sharing with us at the #HomeMattersParty link party.
Your wall came out great! I so enjoy seeing before and after pictures. Thank you for sharing with the Clever Chicks Blog Hop! I hope you’ll join us again next week!
Cheers,
Kathy Shea Mormino
The Chicken Chick
http://www.The-Chicken-Chick.com
A lot of work, but I love the results! I actually like the unfinished wood with the brick. Thanks for sharing it with SYC.
hugs,
Jann
First, from the pictures, the brick wall is fabulous! You guys did an amazing job and hats off to all of you for the hard work! I've seen this done in other blogs, it is an amazing effort to do…love the way you framed the window out too!
The dresser in the closet is very cool as well. I've used dressers in closets for years…they work really well. Suggestion…make sure as time goes by and the boys grow, that you can move the dresser…I've found that needs change and if you make it too permanent you might be sorry down the road. But….love all the hard work! Make sure too, that whatever closet door you use doesn't block access to the dresser either….
Great Job!
Nancy
wildoakdesigns.blogspot.com
Yes, I have been looking for this all day better now than never!
deck flooring supplier in india
I just LOVE your wall… fabulous but wow, lots of work! It's good you got help with it.
I really, really LOVE the wall! And, what better way to use dumbbells! Ha! Love it!
I love the brick wall, what a wonderful job!! I want to do this in my kitchen/living room but hubby is not going for it, lol. What is it with men and brick!? Great job!!
I love the faux brick!! I think you did a fabulous job. We just did our house with the Lakeshore Pecan flooring from Home Depot. I has such a nice vibe and such a nice price. Love. Love. 🙂
You keep saying scrap, do you mean scrape? Otherwise nothing you're saying makes any sense. Or is scrap a masonry term that means something completely different from the conventional meaning of the word "scrap"?
Ha ha! I did mean scrape! I can't believe I didn't even notice that I was writing scrap! I guess that is what happens when you are over tired and writing a post late at night! Sorry to confuse you, I have fixed it in the post. 🙂
I am in the process of doing this project and cannot get the grout to stay, it just rolls off. how did you apply it?
Hi, I am sorry you are having this issue! Did you mix your own grout? If the grout is too thick I can imagine it would have a hard time staying on the faux brick, make sure it is a wet consistency. I used a pre-mixed grout and had no problems, just make sure you apply a thin coat, you don't need a lot! I hope that helps! Good luck!
We applied the grout with our finger, just wiped it on between the bricks. 🙂