Do you ever have those moments when you can’t take something any longer? You have just had it.
And you have to do something about it…NOW?
That was me and my hall closet a few weeks ago. So…I ripped it apart and put it back together, the right way. Ahhh, I feel so much better!
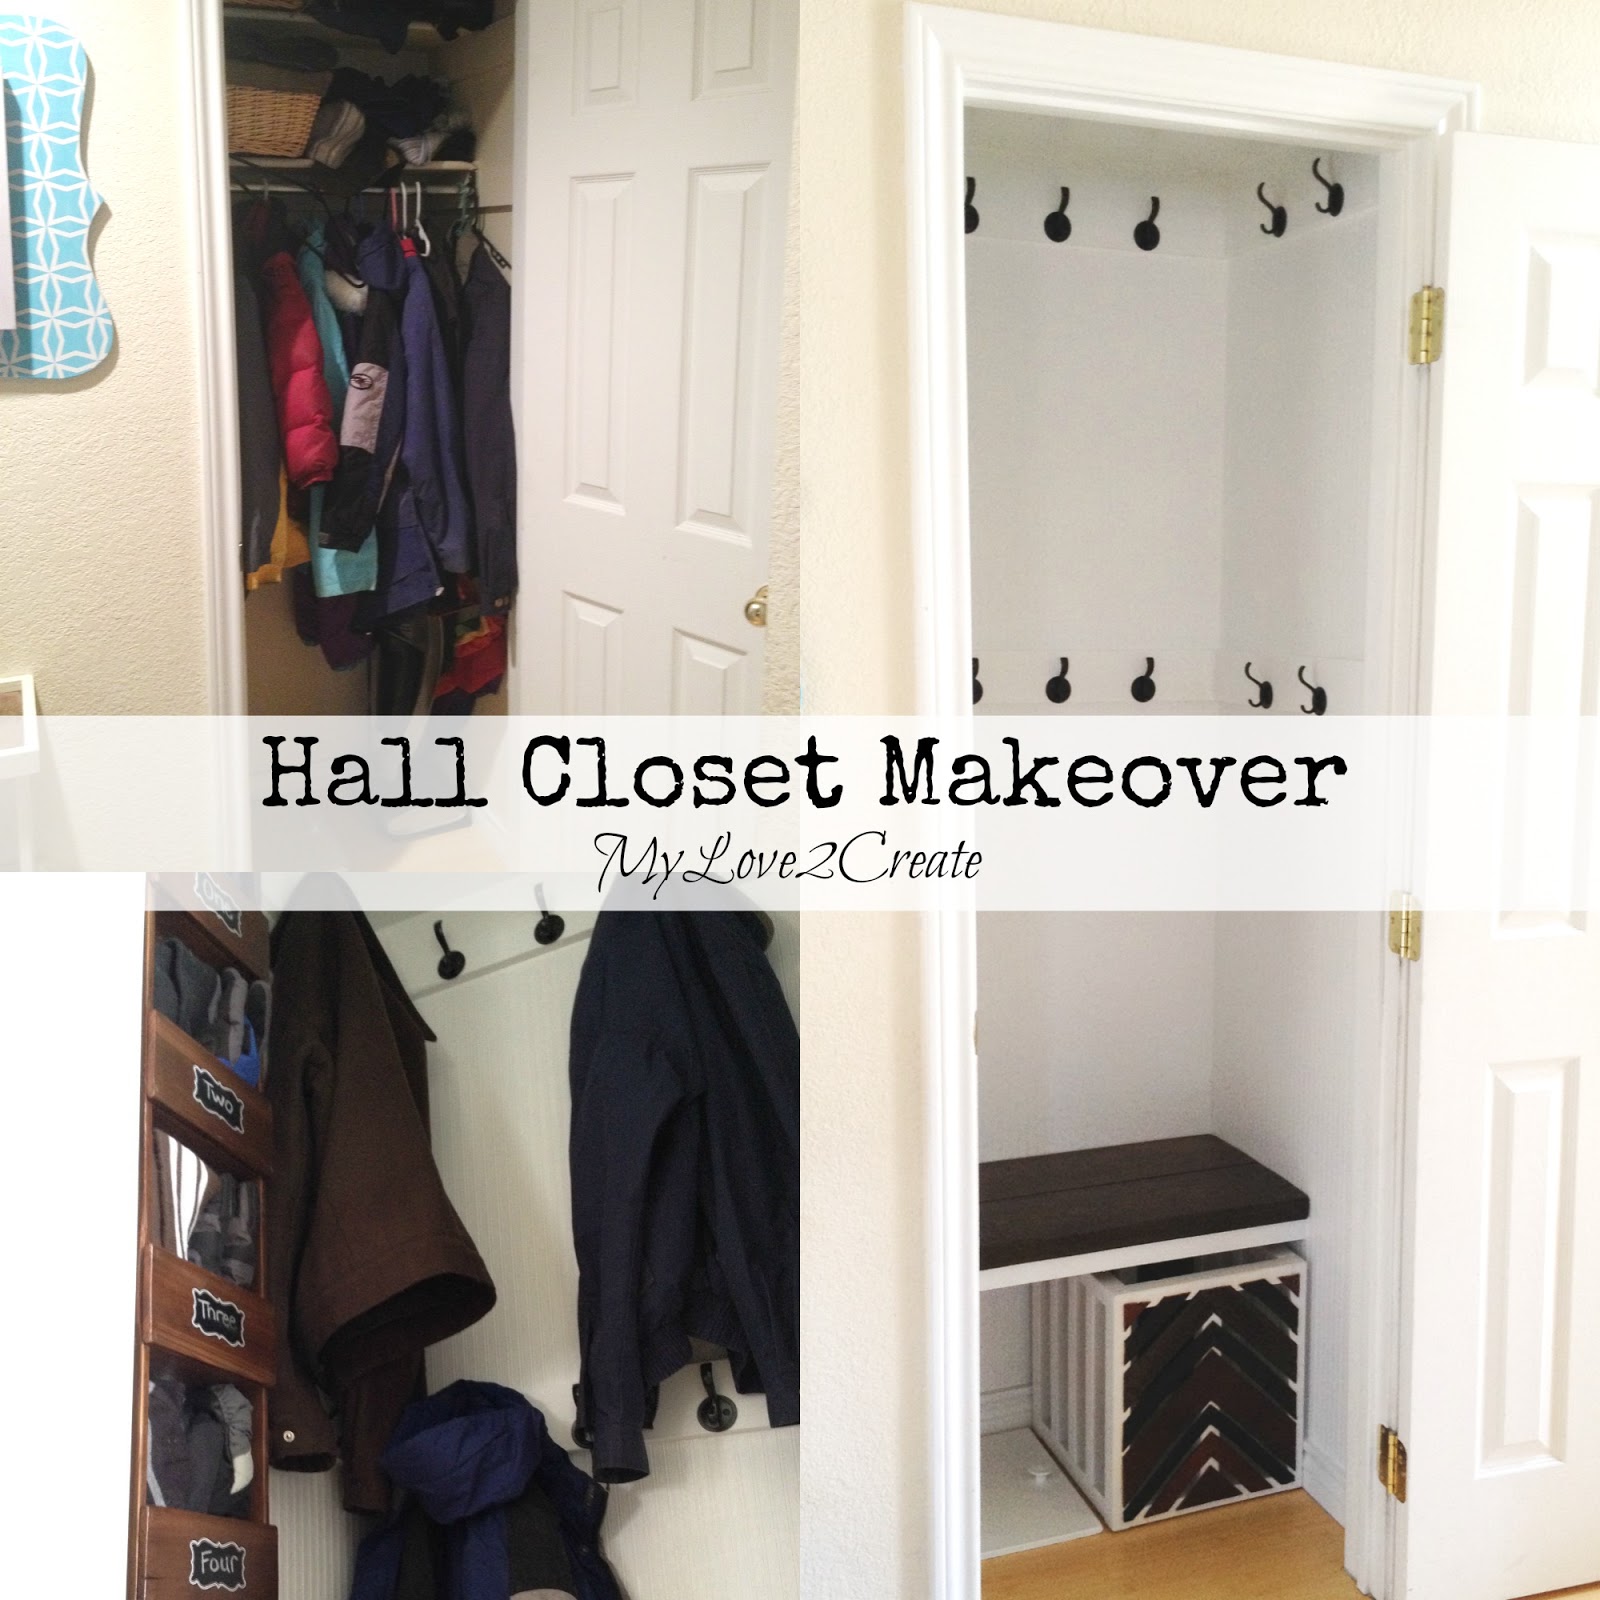
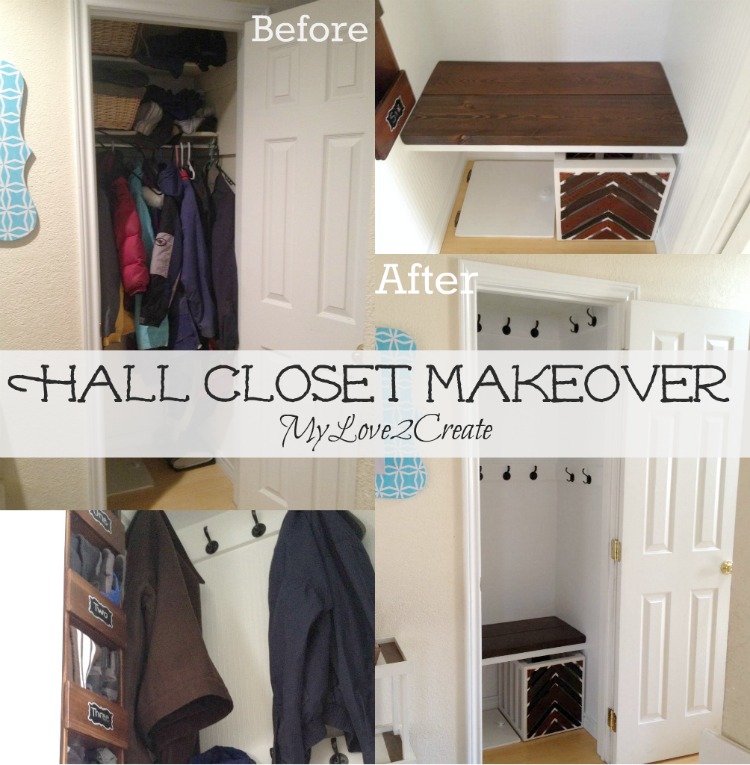
Yep a Hall Closet Makeover. Love.
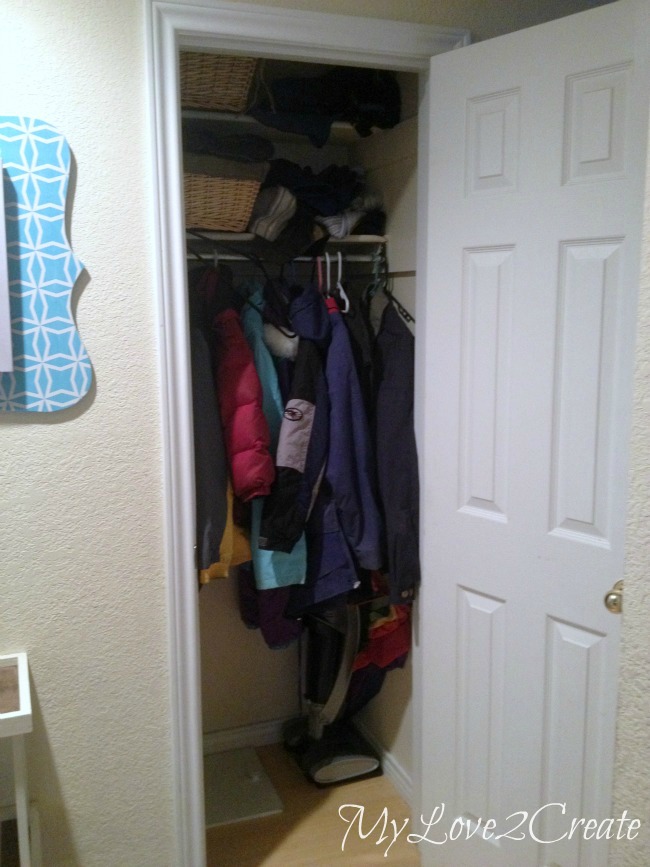
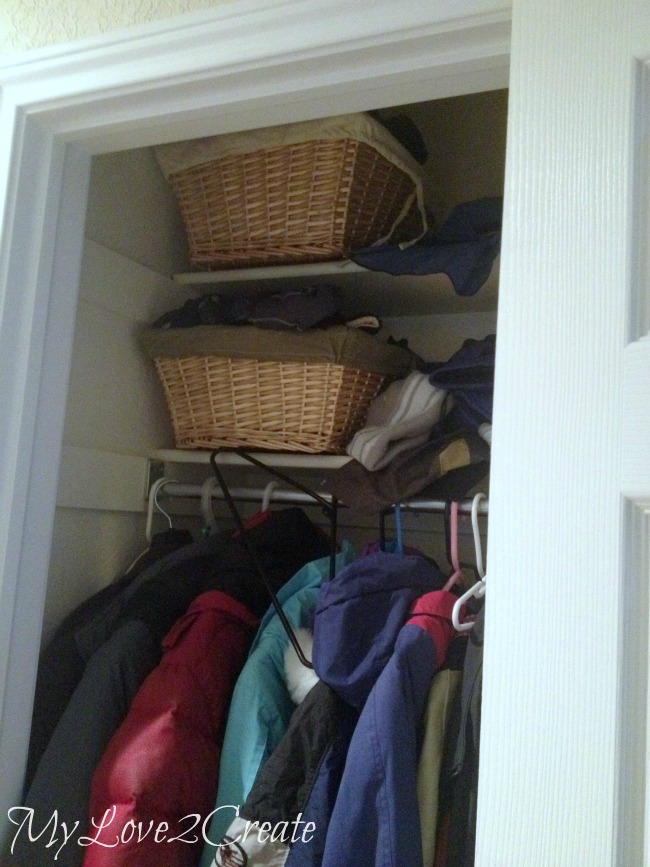
This is the before. A typical closet with a rod, hangers and a couple of shelves. Oh, and a laundry shoot, maybe that part isn’t normal…
The problem? Well first off, nobody could would hang their coats up. Something about not being able to reach the hangers? Ok, half can’t reach…not sure what everyone else’s excuse was.
So the coats would collect at the bottom of the closet. If the laundry shoot happened to be open…yep you guessed it, the coats would end up sliding down into the dirty clothes.
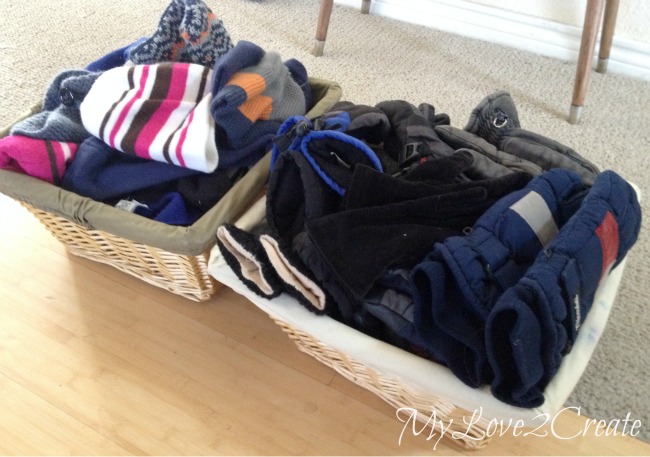
See the baskets on the shelves? That is where all the winter gloves and hats are located. Right. Problem number two.
Kids can’t reach that high either. So I would set the baskets out in the morning for the kids to dig through to find their stuff. Can you see what’s coming?
After the rush to get them out the door to school I would turn around to find the baskets empty and the remaining unused contents scattered ALL OVER THE FLOOR. Should have taken photo of that, I mean it happened everyday…. not sure how I missed that opportunity.
This post contains Affiliate Links. |
| Add caption |
I have been wanting to get this closest fixed for a couple of years now, and I finally snapped. I knew if I ripped it out, I would have to put it back together. Right?
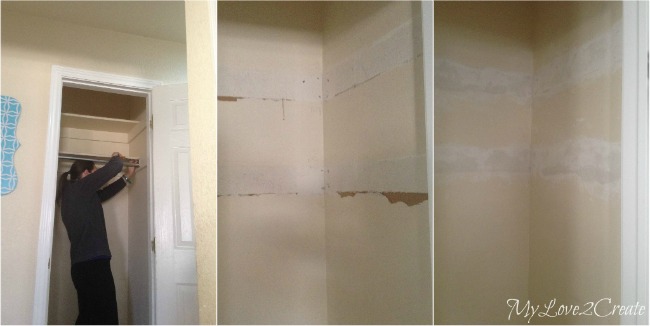
Sometimes a girl’s got to do what a girl’s got to do. So I cleared it out dumped it all in my husbands office, and began the demo. My five year old took that shot of me unscrewing the rod, pretty good eh!?
I used a crow bar and mallet to pry off the shelves and support board. I also tore off a bit of wall texture…oops! I forgot to use a utility knife to score the caulk before I ripped it out, lesson learned. Then I attempted to patch it up with watered down spackle and tried failed to match the wall texture. In the photo on the right it is still wet, but it wasn’t too bad of a patch job. 🙂
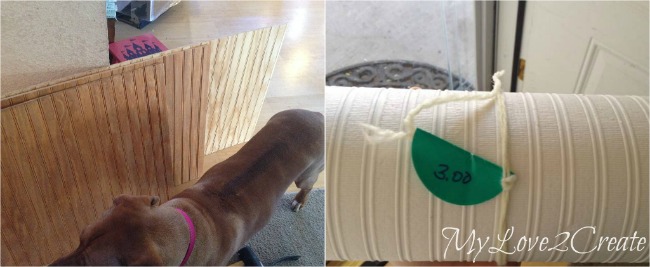
After I fixed the wall I remembered that I had some bead board (top left) that I had picked up for free off of Craig’s list, so I pulled it out and was planning on using it above the bench I was going to install. I built the bench support and the bench seat, and then decided that the bead board was going to be too short. Dang. (I knew it was all along, but some how I was hoping…it would…grow?…)
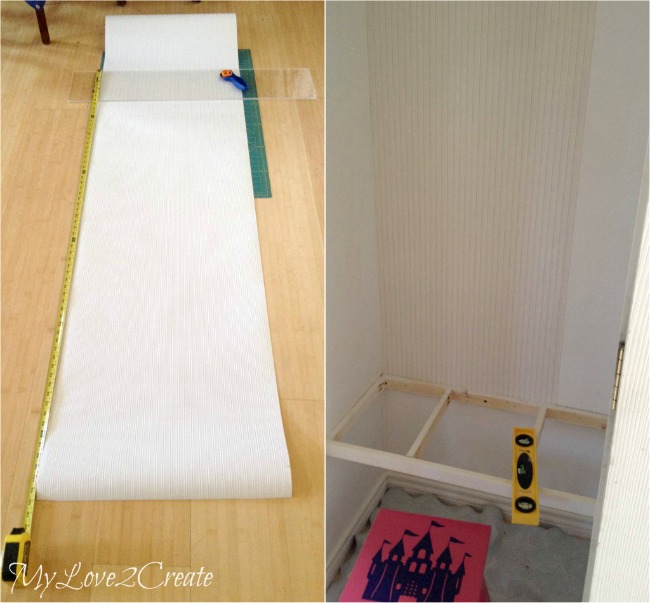
I really didn’t have a big budget (since I did this on the fly…) but I really wanted to cover the walls. (ahem) After a few hours of stewing about it, I remembered that I had gotten some bead board wall paper from the Restore a while ago and it was just collecting dust. Sa-weet! It was a decent sized roll and I got it for $3. Bam!
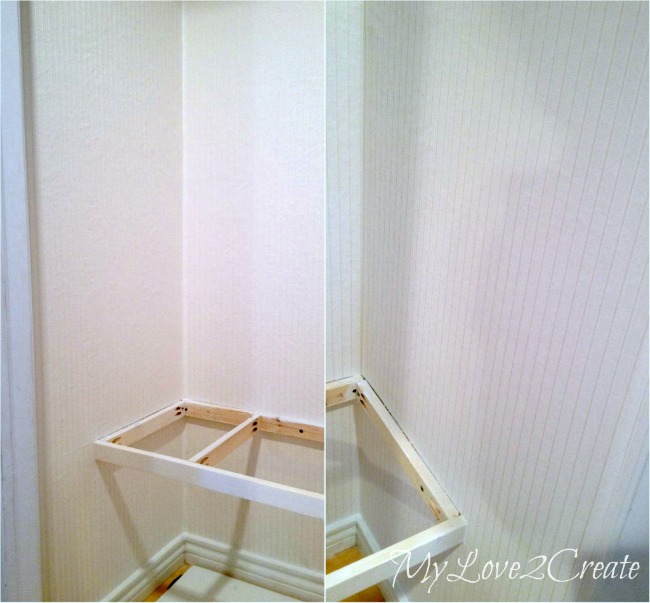
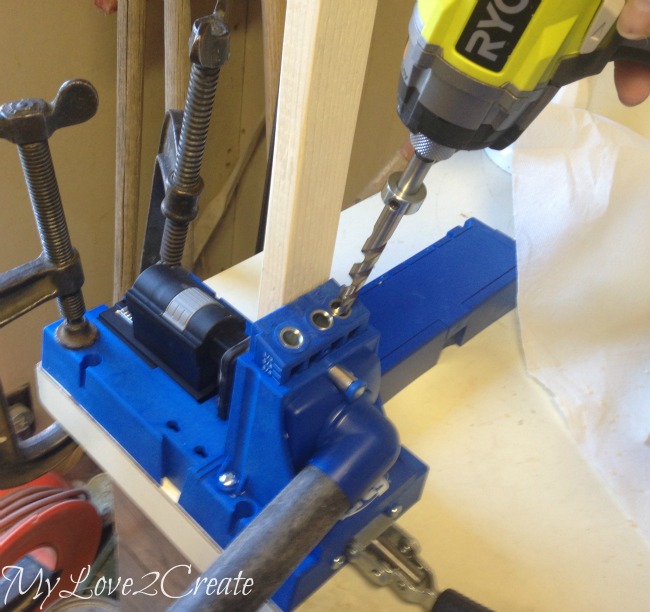
Now if I had realized I was going to used the beadboard wallpaper, I would have put it on the walls first. That would have saved me at least an hour. But I didn’t, so here is how I built the bench support. I measured the walls for the bench support frame and cut scrap 1×2’s, then I drilled pocket holes with my new
Kreg Jig K5 (awesome new model of the Kreg jig that my husband got me for christmas!).
Of course the walls were not straight and I didn’t want to have to use shims like I did in my
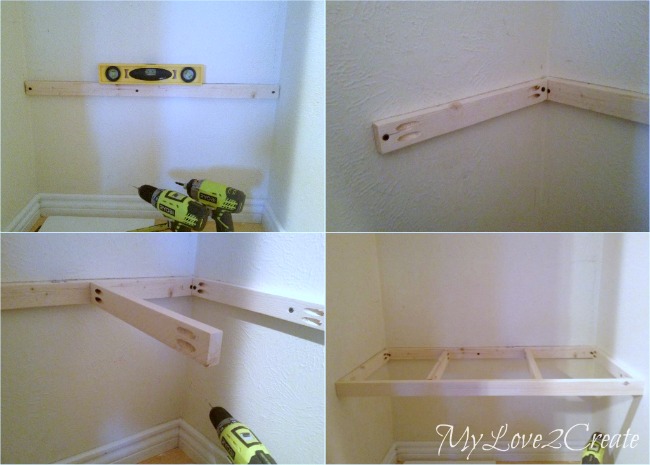
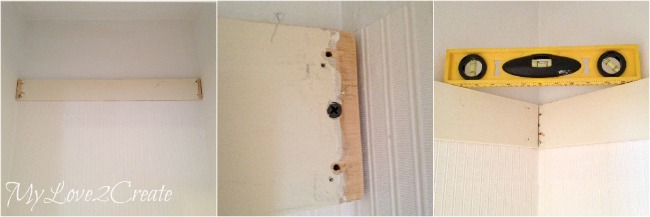
Master Closet Makeover Floating Shelves, so I added the back piece to the wall first (top left) instead of building my frame first. I made sure it was level and screwed it into the studs. Then I attached the side pieces directly to the wall into the studs (top right), again checking for level.
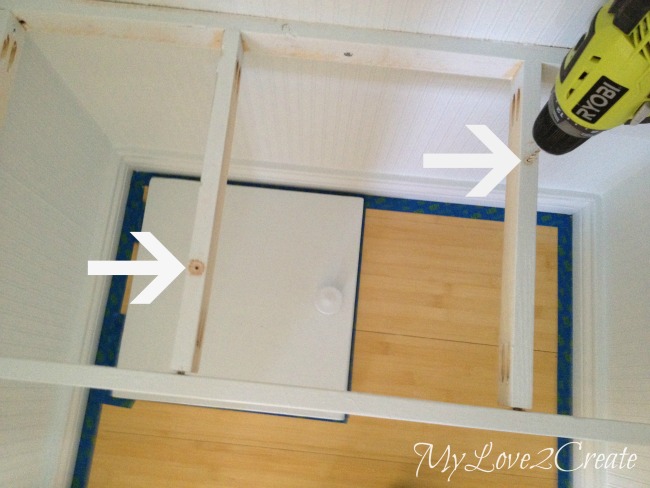
Because I like to over do things I also drilled pocket hole screws into the back support board. This step isn’t necessary because I drilled into the studs, but since I had drilled the pocket holes I figured I should use them. 🙂
Next I attached my two middle support boards with the
pocket hole screws (bottom left). To finish I attached my front board, again with pocket hole screws. You could do this project without the pocket holes, you would simply need to pre-drill holes and screw the boards in from the ends, and build it before you put it on the wall.
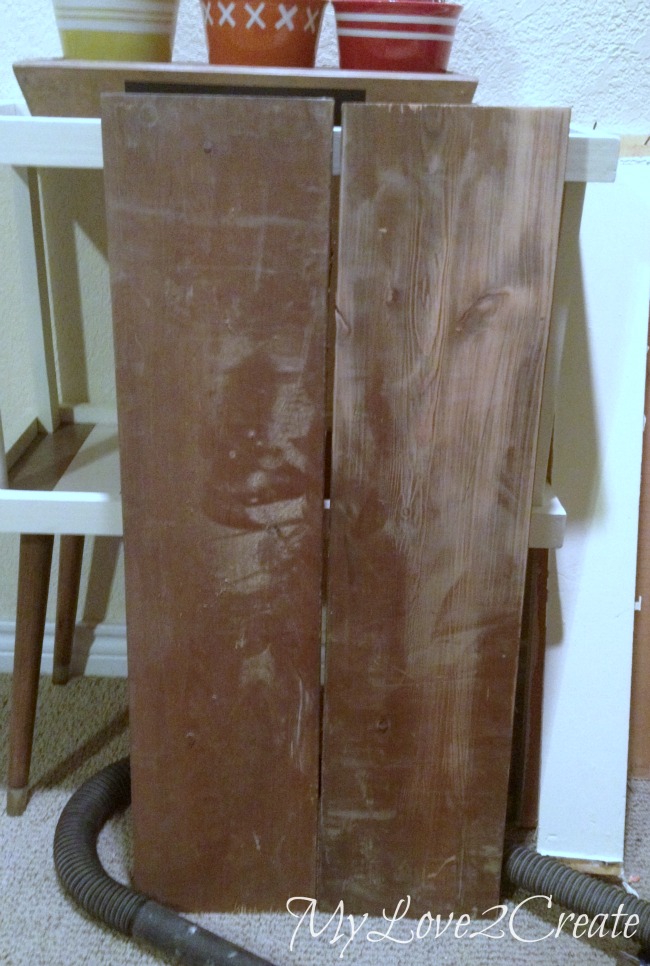
I love stained 2x wood and I had recently gotten some from Craig’s list for free so I hurried out to the shed to see if it would work for my bench seat. I had started sanding it down when I remembered that I needed a before shot. I wasn’t digging the finish on it, but it was a quick job to sand it all off. I drilled pocket holes on the back and attached the two pieces together.
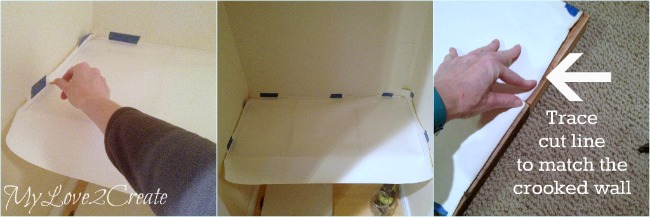
Since I knew my walls were not straight I made a template out of my son’s art paper that I stole from his
Pull Down Art Desk. I taped it on the bench support and drew lines where I needed to cut on the sides to match the wall. I cut out the paper right on the lines. Then I put the paper on the boards I had just put together for the bench top. I lined up the back flush with the edge of the board and then traced along the sides where I cut the paper so it would match the shape of the wall. I hope that makes since! Then I used my circular saw to cut on the lines.
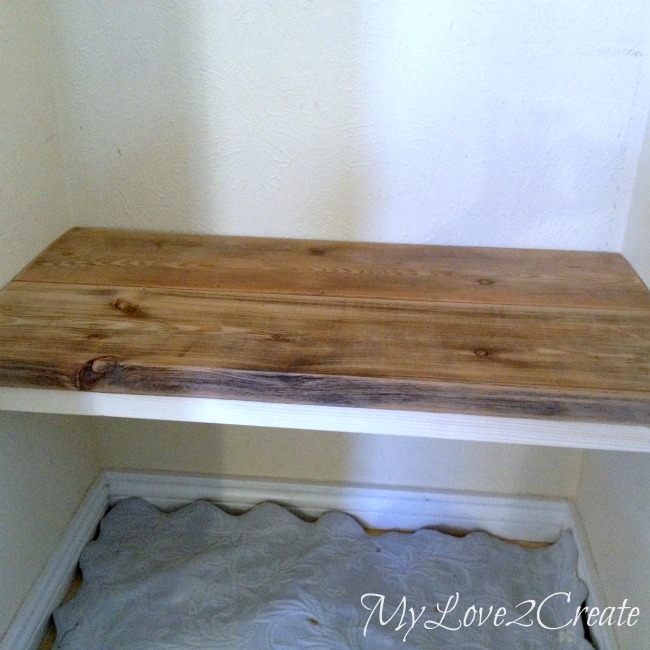
And it fits!! Ok, I did have to cut a little more off the very back ends at an angle, and then it fit!
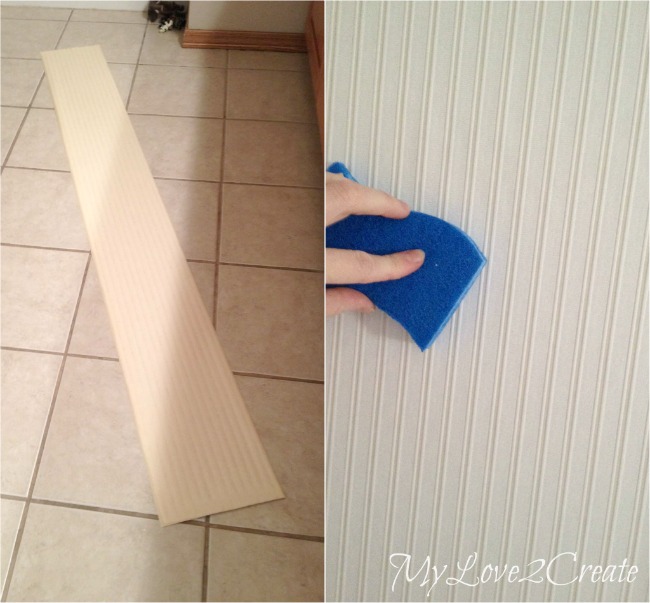
I got each piece of wallpaper totally wet by dunking it in a bathtub of water, then I put it on the bathroom floor (glue side up) to set for five minutes while the glue activated. I set my watch timer so I wouldn’t forget, and after five minutes I put it on the wall. I made sure it was straight, and used a sponge to get out any air bubbles. It was pretty easy, but it would have been way easier if I hadn’t installed my bench support first. I had to do a lot of measuring and cutting to get it to fit under the bench, because I was using the last of the wallpaper scraps, I barely had enough! Phew.
Since I got my beadboard wallpaper from the Restore it is a little different, and I actually like the kind you get at
HomeDepot much better, but I was using what I had. It is pretty inexpensive and I would totally use it again, it looks great!
Now to install the top shelf, I reused the boards I had ripped out of the closet, and attached them to the studs with screws, and checked for level. You will notice I first nailed the board into the studs then added the screws, it just makes it easier.
I added the top shelf with nails into the support boards. I realized I would need a little more room for hooks, so I added a 1×2 (middle) just under the support boards (that was the last of my scrap 1×2). Then I added a lower support board the same way. It will be for lower hooks (right) and you can see I left a space off the left side for cubby storage that I built.
I got everything caulked and ready for paint, then I remembered to drill holes for attaching the bench seat from the bottom later. I figured it would be easier to drill from the top than the bottom. And it was because I attached the bench with self taping screws.
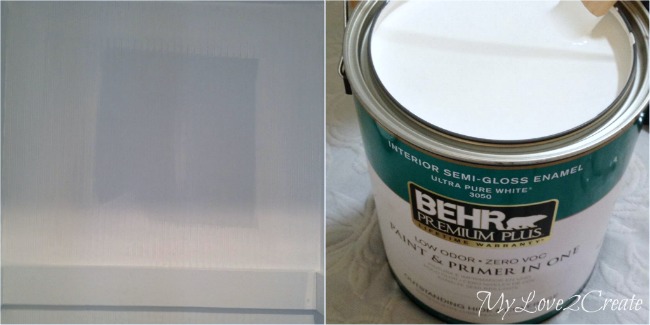
Here is where you get to learn another tip from my mistakes! I had a gallon of oops “white” paint that I had gotten from Home Depot. I decided to use it so I wouldn’t have to buy paint, and I did. But it was soooo wrong. I spent all that time painting and I knew it was too blueish. I let it sit for a couple of days and I stewed over it, until I reconciled with myself. It would drive me crazy and I wouldn’t love it, so I bit the bullet and bought
Behr ultra pure white and re-painted.
It was totally worth it and I hardly used any paint so I can use this white for future projects. It is all good. You can see the middle section above of how blue the oops white was. Eeew.
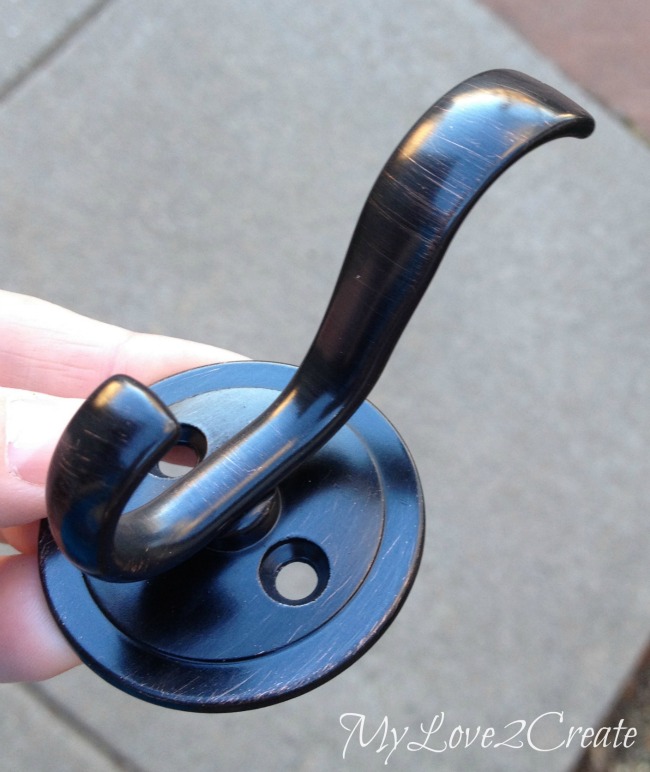
Next up Hooks!! I was given these
Bronze Wall Hooks to try from
D. Lawless Hardware and I LOVE them! They were the perfect size and had a fun color, not to mention they are a great price.
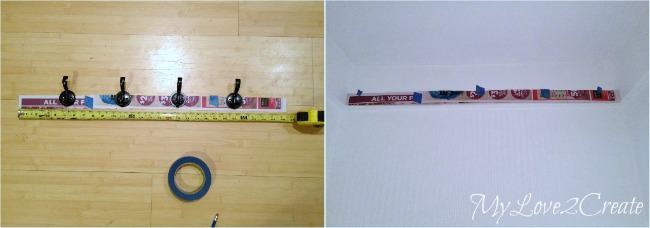
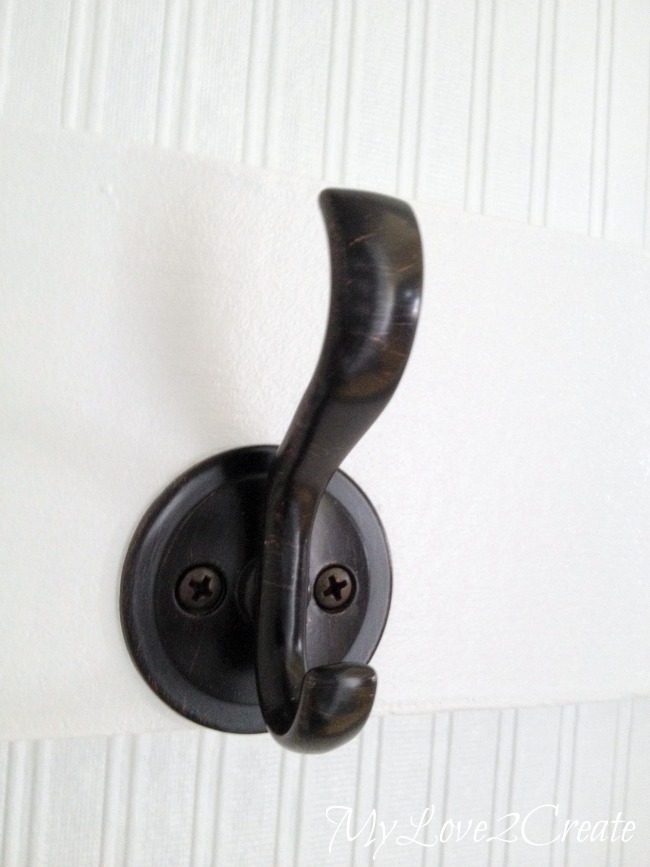
I used the following method to hang them in the same place on the top and bottom rows. I cut a strip of newspaper the length of the wall. Then I calculated where the hooks should go so they would be evenly spaced (see the tape measure in the top right photo), and I marked on the newspaper the center of each hook. I taped the newspaper to the wall and used the marks on the news paper to mark the wall boards where each hook should go. I centered the hook on the mark and used a pencil to mark where the screws should go. Next I pre drilled holes and screwed on the hooks.
Looking good!
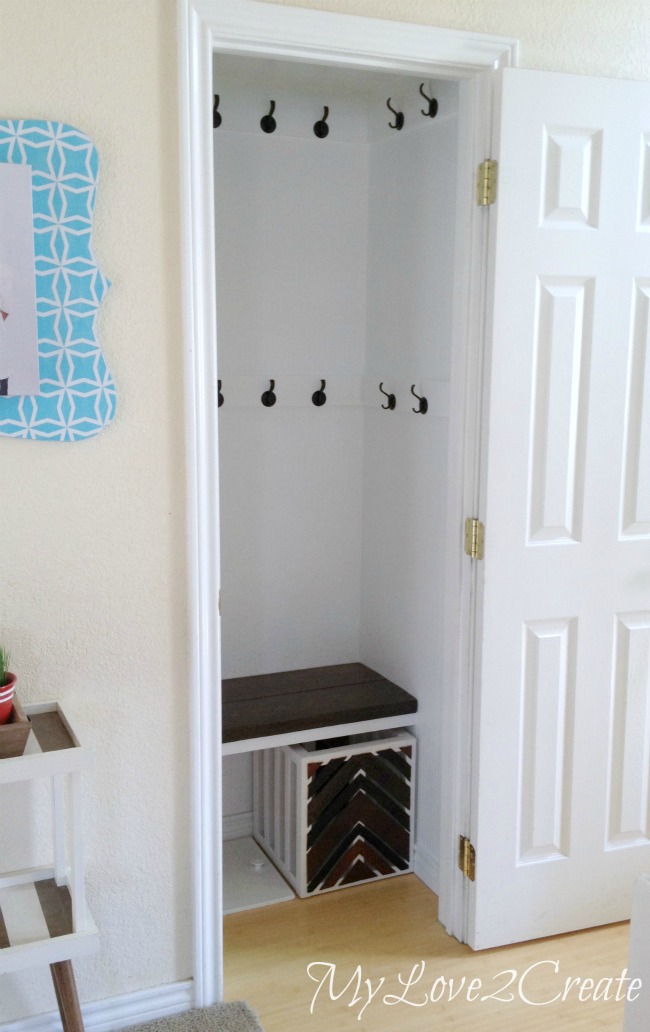
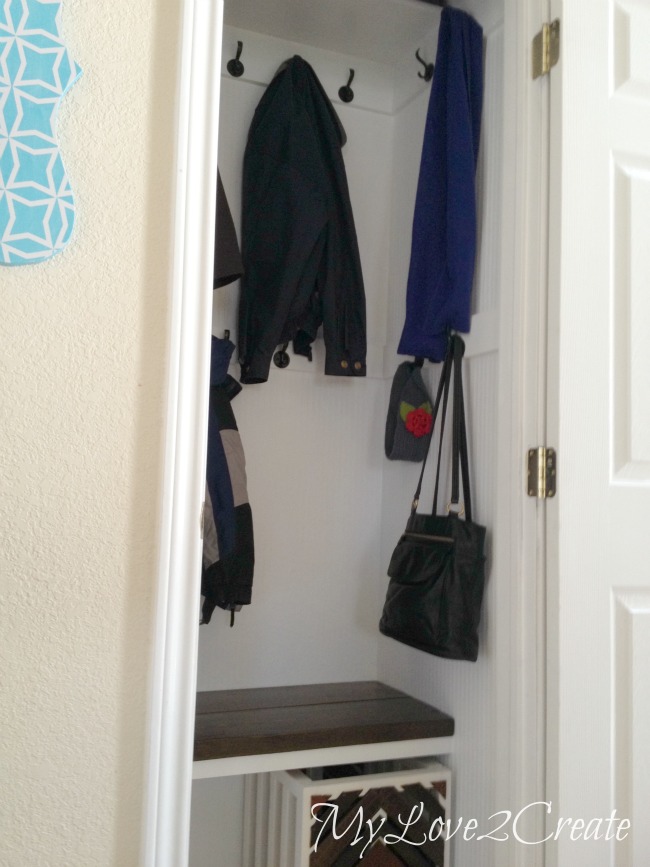
Plenty of hooks for all our coats, this picture makes me happy! Doesn’t it look pretty!
Speaking of tutorials, you have to hop on over to
My Repurposed Life and check out my contributor post on how I made my
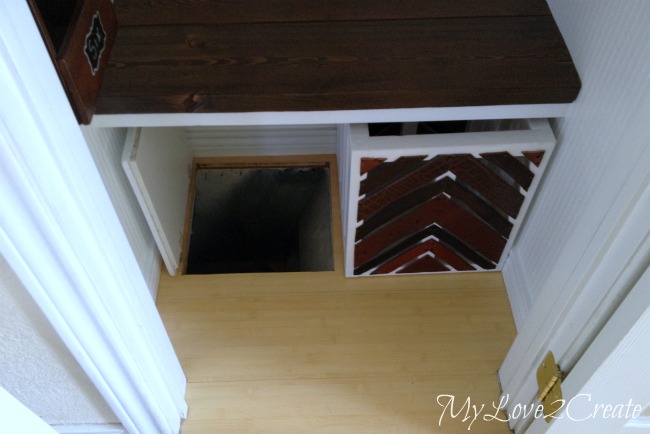
Leather Belt Crate for under the bench storage. Oh, and I thought you might want to see into the laundry shoot. Now I won’t have to worry about coats falling into it, woo hoo!
This lovely bench is not only to cover the laundry shoot, it makes a great place to sit too. Ha ha! It is also for stepping on to reach the crates on the top shelf, and I think it will make a perfect spot for someone to sit while playing hide and go seek! Who knew a bench in a closet could have so many uses!
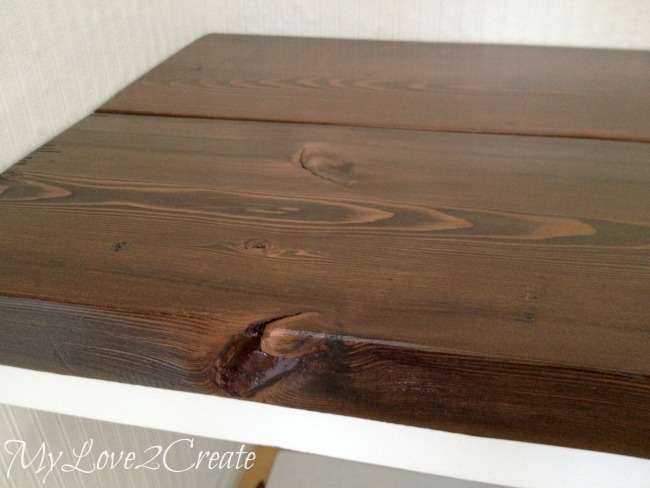
For those who are wondering I used pre wood conditioner, one coat of Rustoleum’s Kona stain, and three coats of poly (sanding with 400 grit between coats 1 and 2) to seal the bench. It is my favorite part (just like in my
Master Closet Makeover) and I like to keep the closet door open so I can see it when I walk by. I know, I am weird.
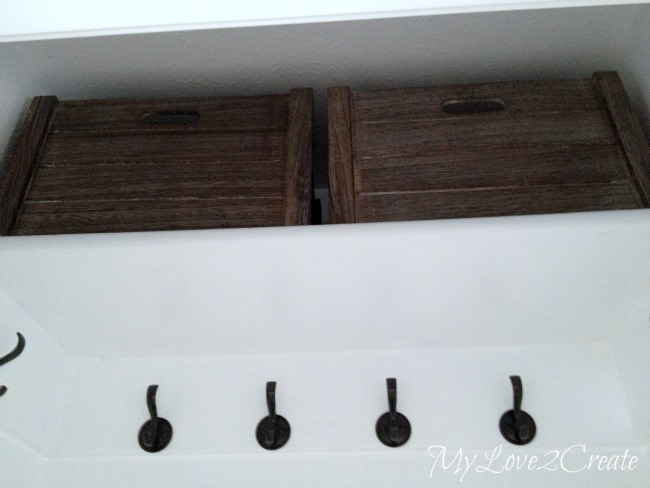
Here is a shot of my top shelf and the crates I put there. I actually got these at At Home (previously Garden Ridge) and I love them. They have great prices for home decor, but it killed me to spend money on crates when I love to build them. I guess sometimes time is money…right? And I was out of time for this project.
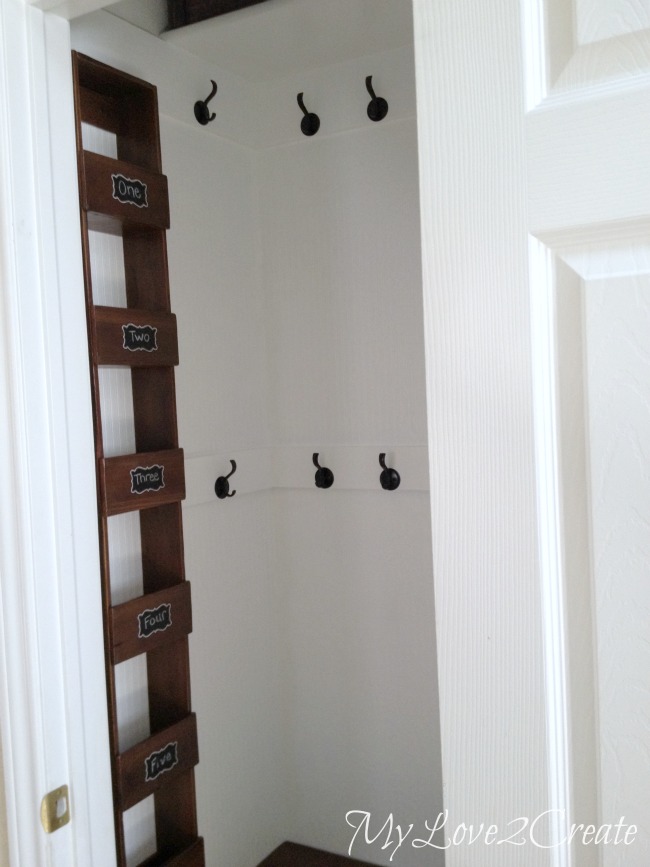
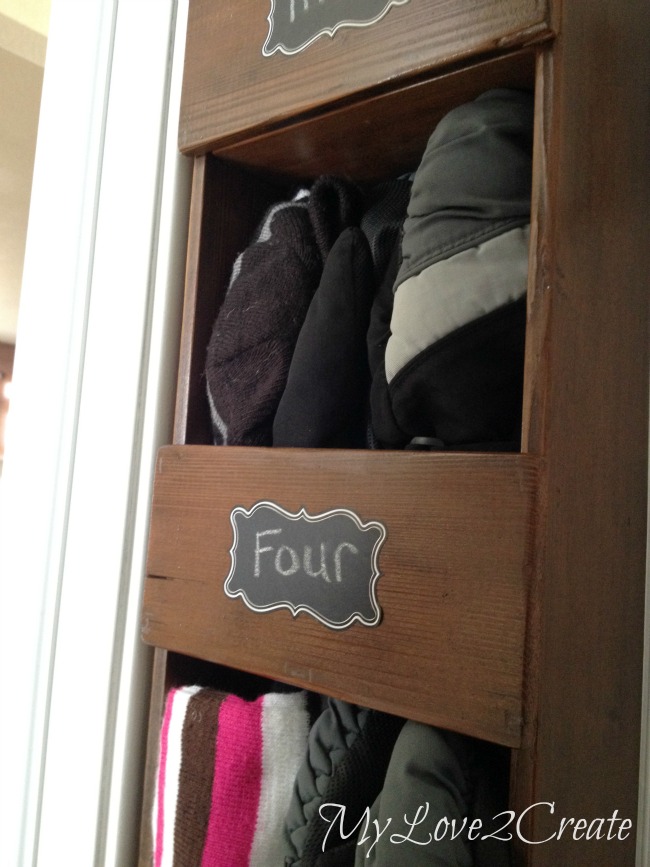
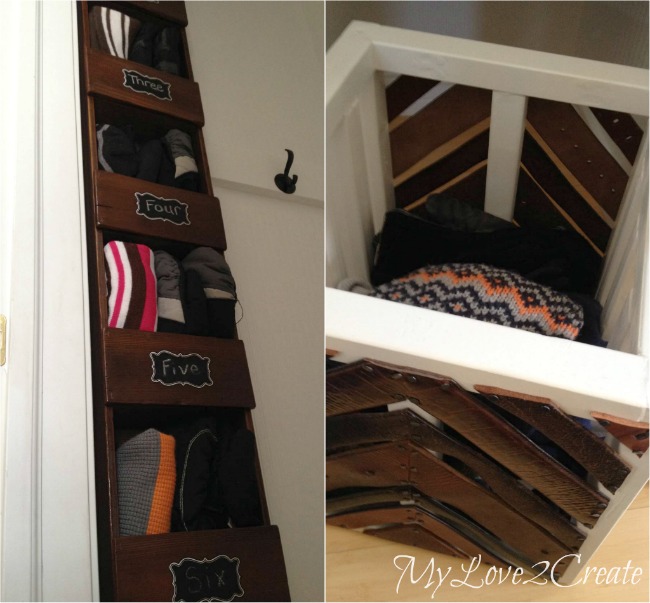
My cubby storage rack was a super fun build and it is doing a great service. Each kid has their own cubby and I made sure it would fit their gloves and hats perfectly. Eeek!
Now they have no excuse not to put them away, and not to make a mess getting them in the morning. At least in theory anyway!
My
leather belt crate is holding the excess hats and gloves. Hmmm why do we need so many extra? It can also hold shoes too, but I am not good at making my kids take them off at the door. I guess because I am a shoe person and always have mine on!
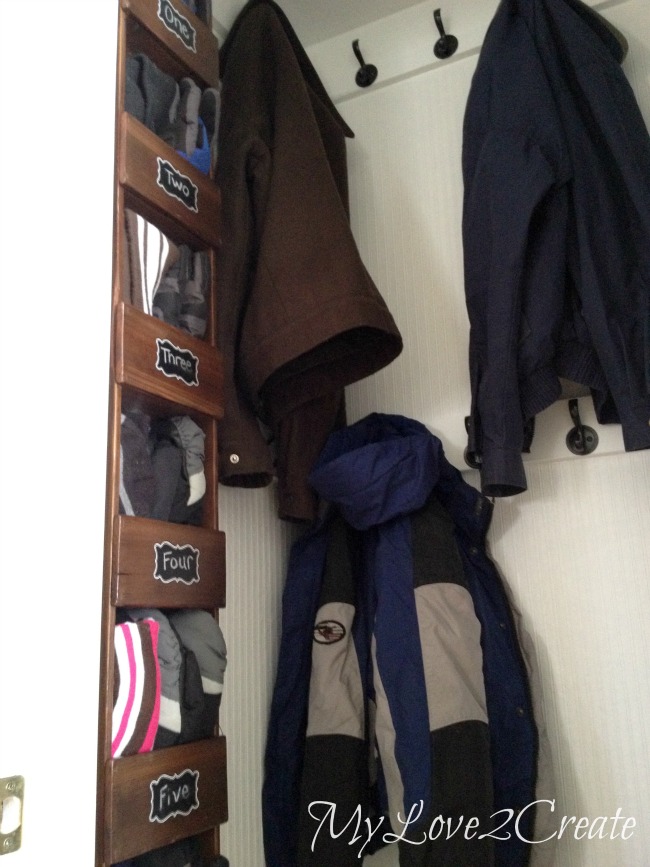
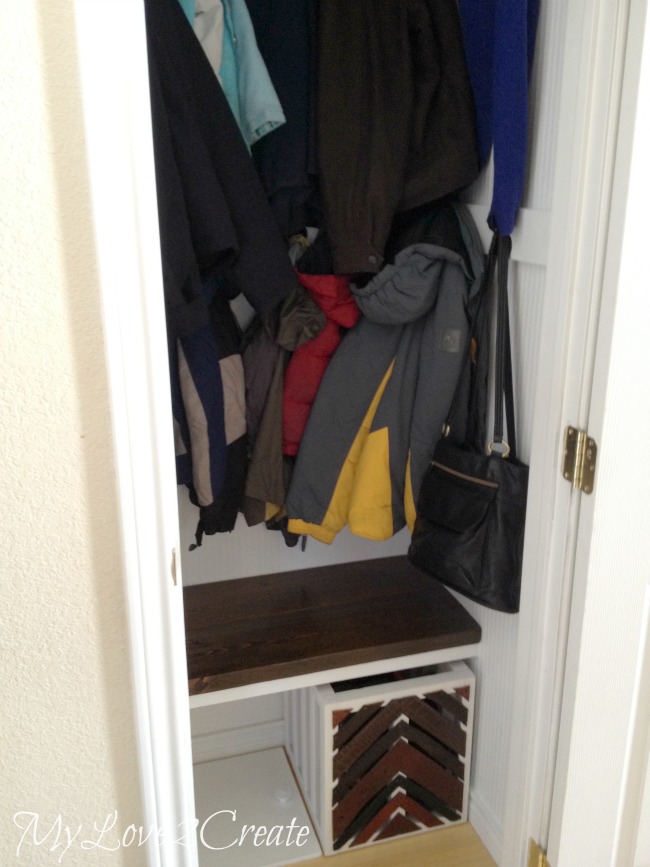
Here is a shot with some coats…
And the other side. Please excuse my photos, I am saving up to buy a new camera, so I like to take shots outside to get good ones….obviously the closet wasn’t going anywhere. 🙂
I had to do a real life shot. Because lets face it, 8 people equals a lot of coats. Even if the kids have License Plate Coat Racks in their rooms, they have more than one coat. That is how it goes in Colorado, you need a heavy coat, a warm jacket, and light jacket for winter. One day it will be bizzarding and the next it will be 70 degrees…true story.
And that is is! See why I feel better?
Nothing beats being organized, and this is such a doable project. It is easy and effective, perfect for anyone wanting to take the plunge and try some DIY!
So? What are you waiting for…get to work, it’s easy, just start ripping things out… 🙂
Hugs,
Mindi
I will be linking to these parties.


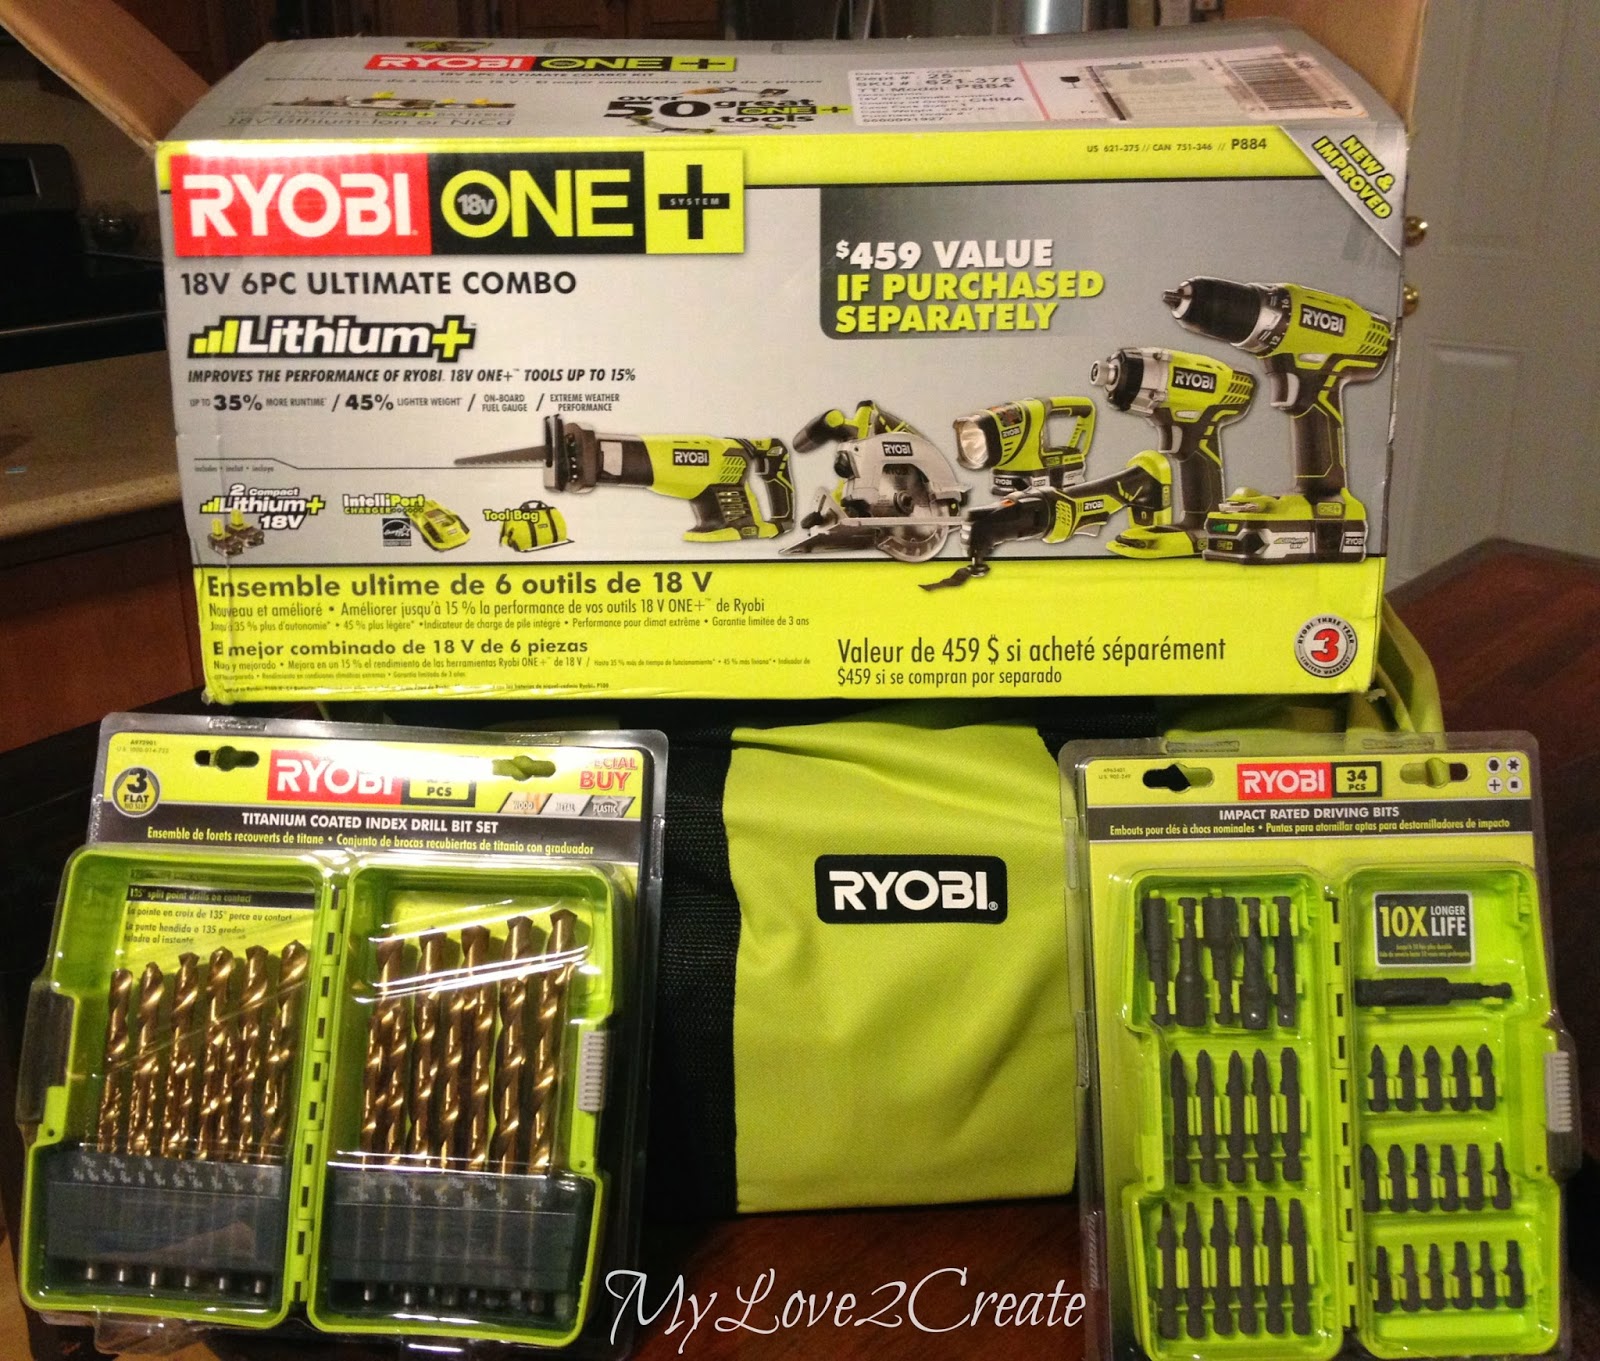
This looks awesome! Way to go! You are amazing with your new tools!
I'm now following along! I'd love if you stopped by for a visit!
Carolyn
http://www.ccmcafeeperspective.com/
That looks great!
lol just start ripping things out!!! yep–that's great advice I need to do that to several closets (and other spaces) around here! hahahah
great closet makeover Mindi!!! The hooks work a lot better than all those hangers. 🙂
gail
You did a great, job–I love it! Especially the little cubbies. I live in Colorado too so I totally get what you mean about the many different coats!
Looks amazing! We need to makeover our coat closet as well, thanks for the inspiration!
Thou dost amaze me!
Oh this is awesome! Nice work! I love the idea of putting hooks at different level for kiddos, such a great idea. Loving that bench, and that adorable belt crate!! All around lovely!
Oh this is awesome! Nice work! I love the idea of putting hooks at different level for kiddos, such a great idea. Loving that bench, and that adorable belt crate!! All around lovely!
Ohhh how I would love to have a laundry chute! Except I live in a one-level apartment. I just like the idea of having one, though!
Your closet turned out fabulous! I love how you paired the bright white with the dark wood-color (always a fantastic combination!). I reorganized our hall closet today, actually, and would love to rip out the terrible shelf and rod situation in it, I just can't (darn apartments!) – so thank you, for having this up today, as a sort of vicarious my-closet-*could*-look-like-that thing 🙂
This turned out AMAZING!! And I know all about the 'snapping' and needing to fix it now! Also- don't you just love kreg jigs?! Happy Friday!
Amanda @ The Hatched Home
I love it! AND it totally looks like something my husband could do. Hehe. 😉 But a laundry shoot?! LOL. That's cool!
GREAT job. I have been planning on doing something like this with my closet on the lower level. My house, like most has it's issues, one being, the only linen closet is on the lower level…..beds and stuff upstairs! So I am in the process of making a place for storing the linen up where it needs to be and wanted to do this with the linen closet down stairs since I have no coat closet. I would not need the containers on the side but that was an amazing idea. Thanks for sharing.
This uses the space so much better. It also looks very inviting, if that makes sense for a closet haha. Great idea
Holy crapoli! This is absolutely gorgeous!
🙂
I love the little bench on the bottom so much!
Thanks for linking in up Talented Tuesday Link Party! Hope to see you again next week!
Wow great job!!!! I'm currently trying to figure out what to do with similar issue in two of my closets. Apartment living forces your hand in closet space sometimes, but you inspired me :)!
Okay, I am stuck on the laundry shoot. lol The inner kid in me wants to put all kinds of toys and stuff animals down there. Heck, maybe even attach a Go-Pro camera to one while it slides down the shoot. – Yeah, I am that kid. :/ Anyway…I LOVE what you did here! Everything looks very crisp and organized. I like how you used a template for the bench and the beadboard wallpaper. Too funny about dumping everything in your husbands office. lol
I need to do this (amongst other things). Our coat closet is a dumping ground of stuff. 🙁
I so enjoy seeing before and after pictures on a project. I love what you did with the closet and love the tutorial. Thank you for sharing with the Clever Chicks Blog Hop! I hope you’ll join us again next week!
Cheers,
Kathy Shea Mormino
The Chicken Chick
http://www.The-Chicken-Chick.com
Love the make over Mindi! It's functional as well as gorgeous! Thanks for sharing it with SYC.
hugs,
Jann
The cubby storage rack is exactly what I need in my hall closet to keep hats, gloves and scarves organized! Looks amazing!
~Jen
http://www.appledapplepancakes.blogspot.com
OMG, so many ideas! It reminds me a little of the laundry closet that I still need to wallpaper. You did a really great job utilizing things you already had. Love the double row of hooks! Sharing on FB and pinning. Thanks for sharing on Merry Monday!
catching you! 🙂
Hi Mindi, This turned out great! We've been sorting and organizing closets too. I love this idea for an entry closet. Pinning! Thanks for sharing at this week's party! Hope to see you again this week. Hope your having a great week my blogging friend! Theresa @DearCreatives
This turned out fabulous! And you're tutorial is great!! Thanks for sharing at Fridays Unfolded!! Featuring you this week 🙂
Hi Mindi, Just want to pop by from What to do Weekends and let you know that we just Featured your wonderful closet makeover! Happy Friday! The Party and your Feature is Live now.
Theresa @ Shoestring Elegance
Wow! What an amazing transformation and well worth all your effort. Love the bead board wallpaper and the little cubbies. Sometimes that's the only way to get anything done…just rip it out to the point of no return!!
all i can say is WOW! This turned out amazing and is probably my favorite closet redo I have seen! I just love it! I pinned, stumbled and tweeted! Have a wonderful rest of your weekend and see you monday at 10pm eastern! I cant wait to see what you bring next week!
Jess @liveRandomlySimple
Love it! The bench, the bead-board paper, all those hooks, no excuses for not being organized!
Great project! Thanks for sharing it at The Pin Junkie! I'm stopping by to let you know that your closet makeover is being featured today in a roundup of home decorating ideas.
Mindi, I love it!!! Well done:-)
Katie
I will make sure to bookmark it and come back to learn extra of your helpful info. Thank you for the post. I will definitely comeback.
http://www.y8gold.com/
Wow great job!!!! I'm currently trying to figure out what to do with similar issue in two of my closets. Apartment living forces your hand in closet space sometimes, but you inspired me…Y8 Arcade
Yepi 2017
Friv 2017
Kizi Games
Y8 Games