Corner Cabinet Planter
About a year and a half ago I made some super fun Old drawers into porch planters, that I still use on my porch. Because I loved them so much, they were the inspiration for this project. I first shared this at My Repurposed Life about a year ago.
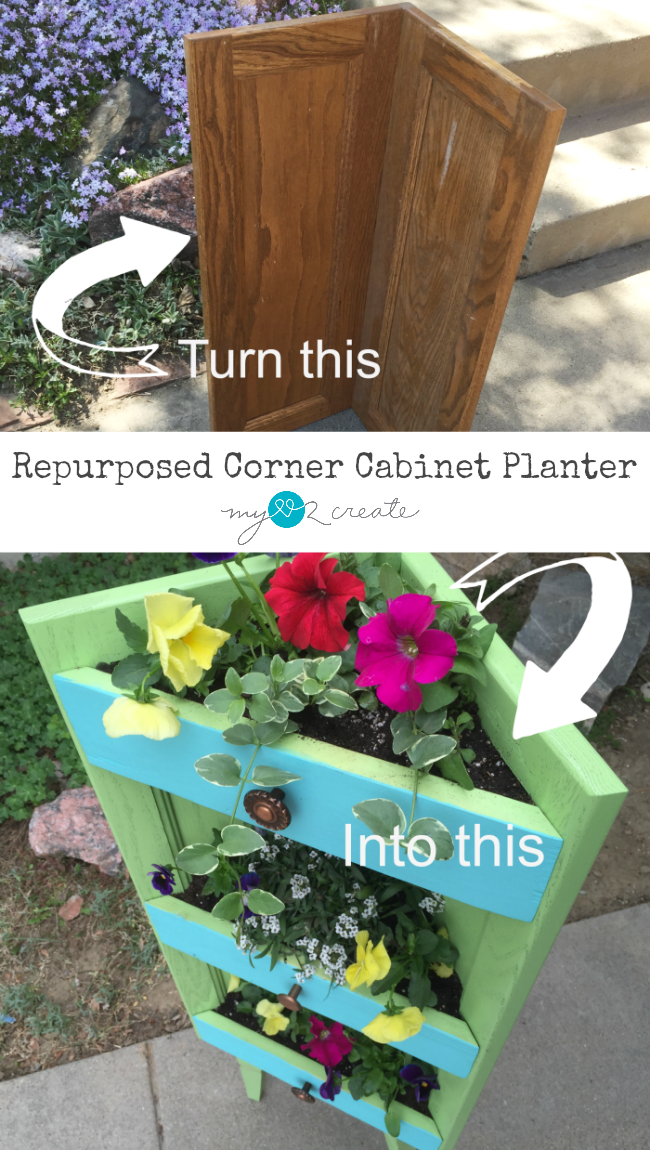
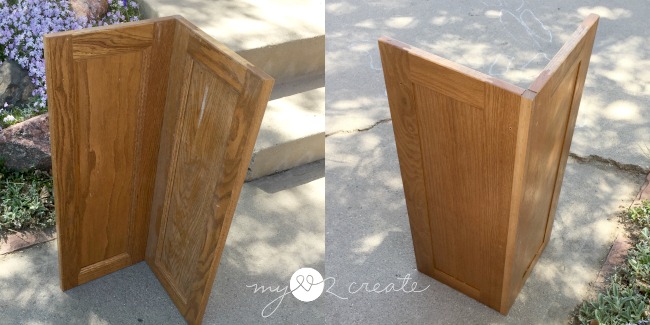
I was lucky to inherit a huge stash of kitchen cabinet doors from a friend’s old kitchen. I was seriously so excited when she offered them to me! 🙂 This corner cabinet sparked my interest so I started brain storming ideas.
I looked at adding another cabinet to the other side to make a table with shelves… but even though I liked that idea I ended up going with making it into a corner planter instead.
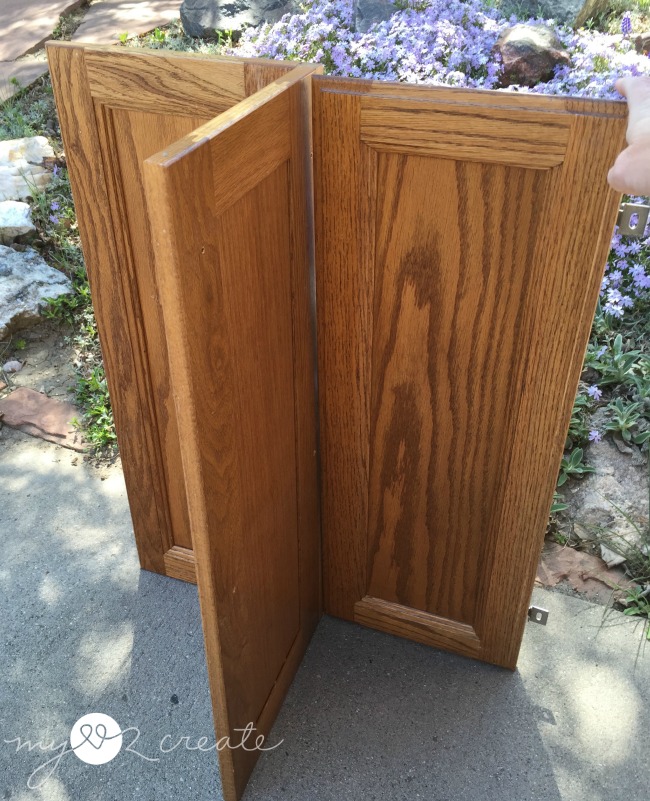
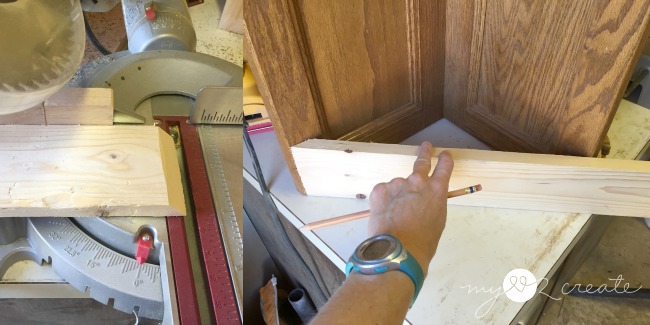
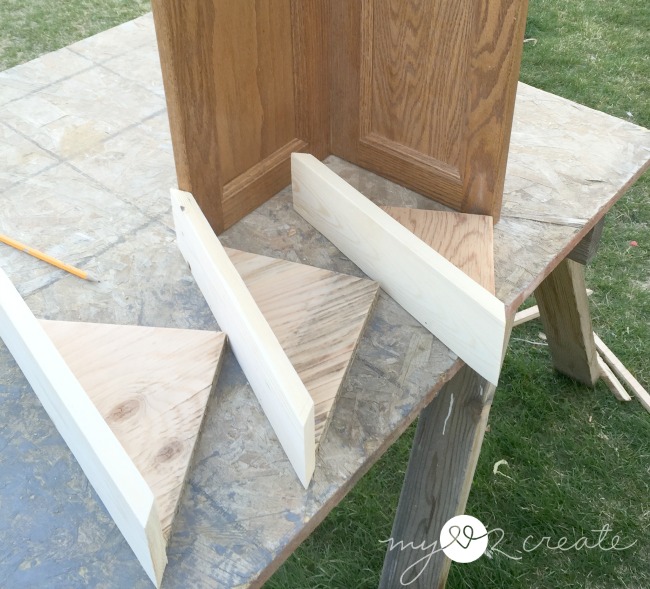
I had some scrap wood left over from my Drawers and drawer slides, Master closet makeover, and tried them out to see if they fit in the space between the corner cabinet doors. They did! On the right you can see I am trying out a piece of 1×4 to see if it would work for a front piece.
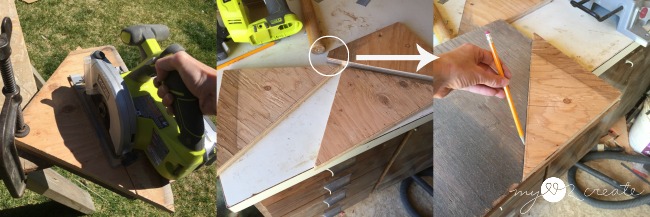
Using my Ryobi Circular Saw
I trimmed up the scrap pieces to fit. In the middle shot above I circled the one shelf that ended up being too small. I simply used a good shelf and traced and cut another one on scrap wood. Then I gave them all a nice sanding.
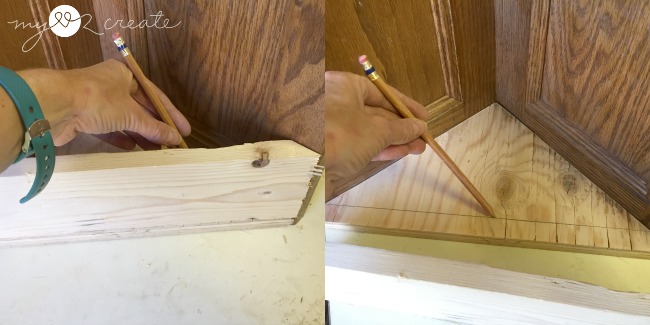
In order to make my faux drawer fronts I used my scrap 1×4 and started by cutting one end at a 45 degree angle. I put it in place and marked the other side and then cut it at a 45 degree angle as well. I suggest cutting a little bigger at first and then trim it down if necessary.
When I went to dry fit everything I realized that the plywood edges would be showing because the 1×4 was placed on top. In order to fit that I simply traced the 1×4 (or mark 3/4”) and cut the excess off of each shelf with my circular saw.
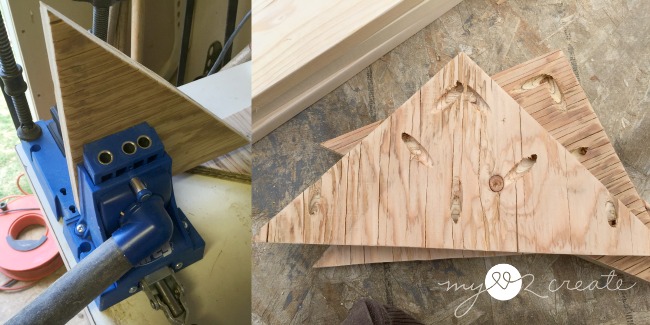
Using my Kreg K5 Pocket-Hole Jig
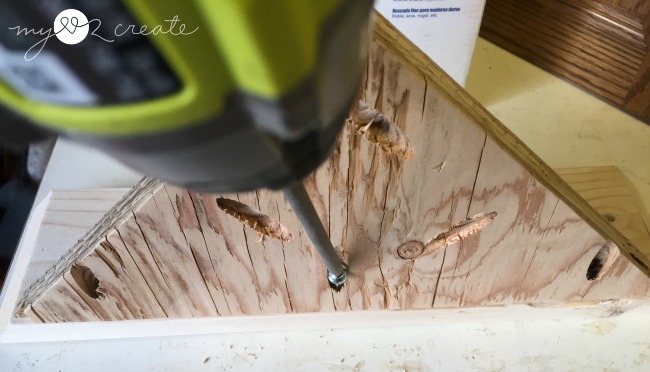
I drilled pocket holes into each corner shelf so I could attach them to my corner cabinet doors and drawer fronts.
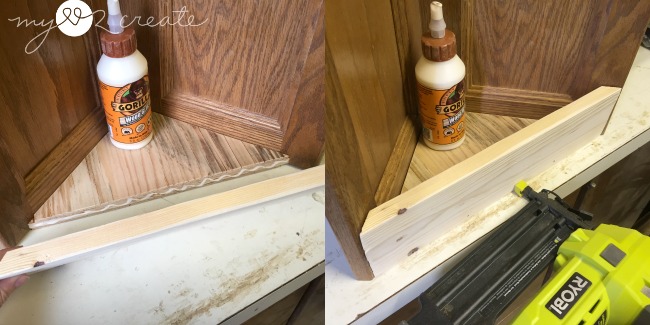
Now time to build! I started by adding glue to the front of the plywood and then attached the 1×4 to it with finish nails using my Ryobi Cordless BRAD NAILER . I did this with all three shelves, just to attach the 1×4 fronts.
This way I made sure my 1×4’s attached to my shelves in the right spot so that the sides would be flush to the corner cabinet doors. Now I could add my pocket holes for more stability.
Next up was spray painting! Since I was matching them to my Old drawers into porch planters I used the same green spray paint and gave the cabinet door and shelves a couple of coats. Sorry forgot to take a photo of that process. To make sure the shelf fronts didn’t get painted I just set them with the fronts down, while spraying.
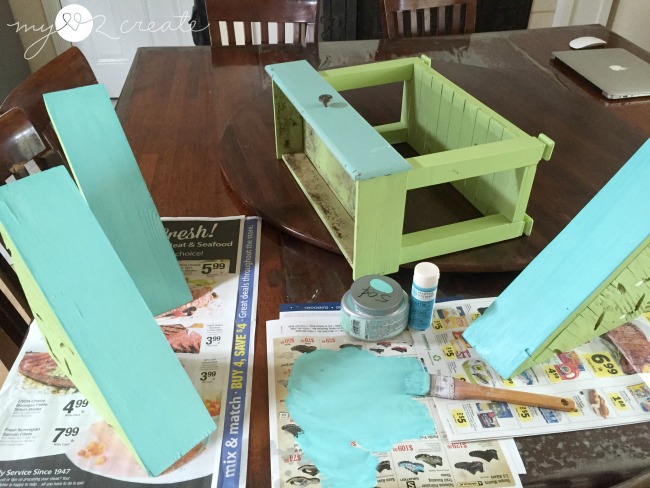
In order to try and match the fronts I got some teal and green teal colors and mixed them the best I could to get the colors the same. It wasn’t perfect, but good enough!
I debated adding chalkboard labels to the front, because I Love Chalkboards, but decided to do knobs instead. I found my stash of old knobs I had gotten from an estate sale and found some that I liked. Of course there were not three matching so I went with one different and two the same.
For adding the shelves I used gorilla wood glue and finish nails to secure the shelves where I wanted them. Then I went back and added pocket holes for extra strength. If you look closely, the top and middle shelves had a gap on the sides for the inset of the cabinet door and so didn’t put screws in the middle, but those slats were perfect for drainage.
For the bottom shelf I just drilled holes so the water could drain.
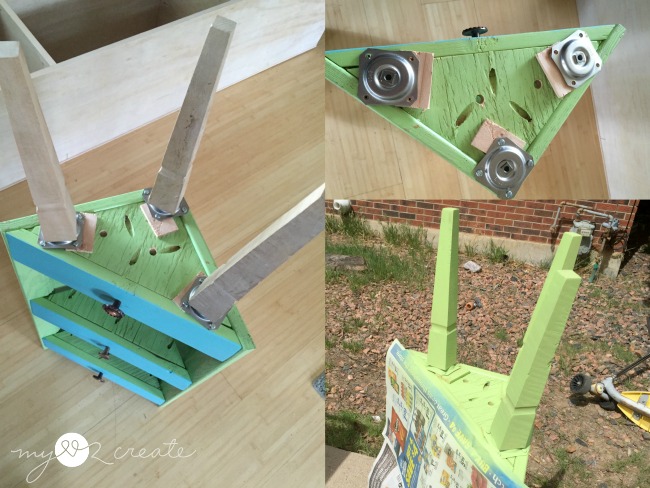
My corner planter was going to be behind my patio furniture so I decided to add some legs to raise it up. I had these three legs that I had gotten from craig’s list for free and since there was not a matching 4th leg they were perfect for this project. 🙂
I happened to have some mounting plates
for the legs that I got at the Restore for $1. Because I wanted the legs to angle out a little, and these were straight mounts I used some lath scraps under the inside edge of each mount to give them the tilt they needed. It worked perfectly!
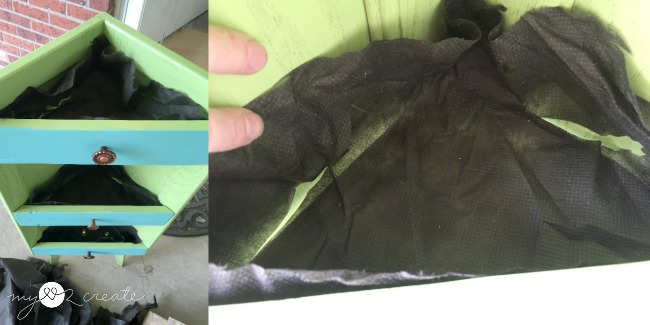
To help protect the wood I used some mesh material (I actually stole it from the bottom of an old box spring we were getting rid of) and lined the shelves with it. I made sure to cut slits where the water needed to drain.
Now I just needed to plant!
I did want to mention that I ended up adding some screws on the side of each faux drawer front to help support weight of the dirt and plants. After a few days they started to pull away, but once I added the screws they were just fine, I had no problems after that! These photos was taken after I cleaned out the plants last fall, that is why you don’t see the screws in the photos below, they were all taken before I added the screws. You could paint over them to hide them if you prefer.
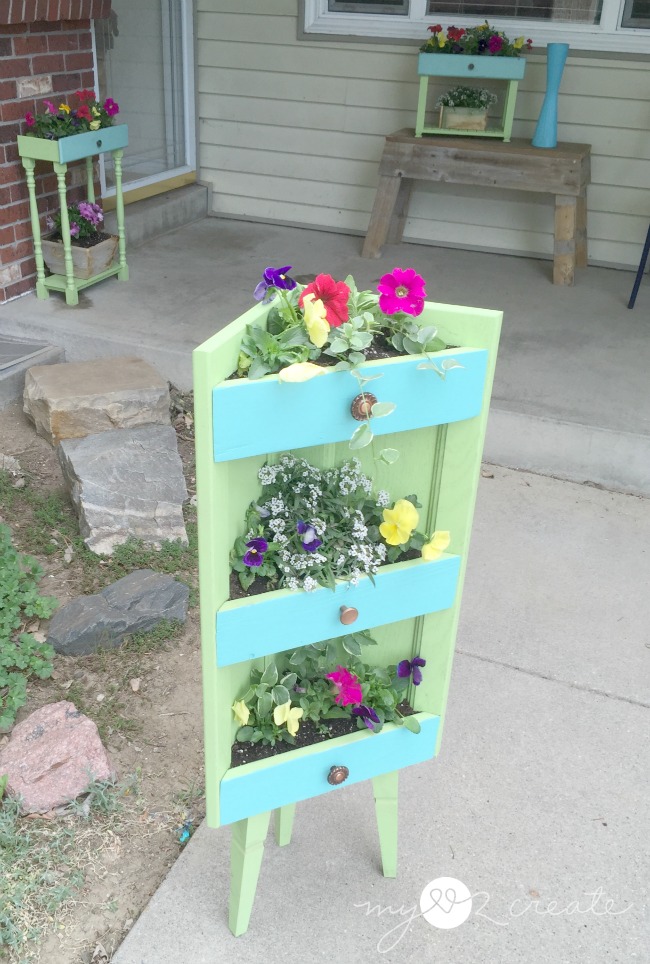
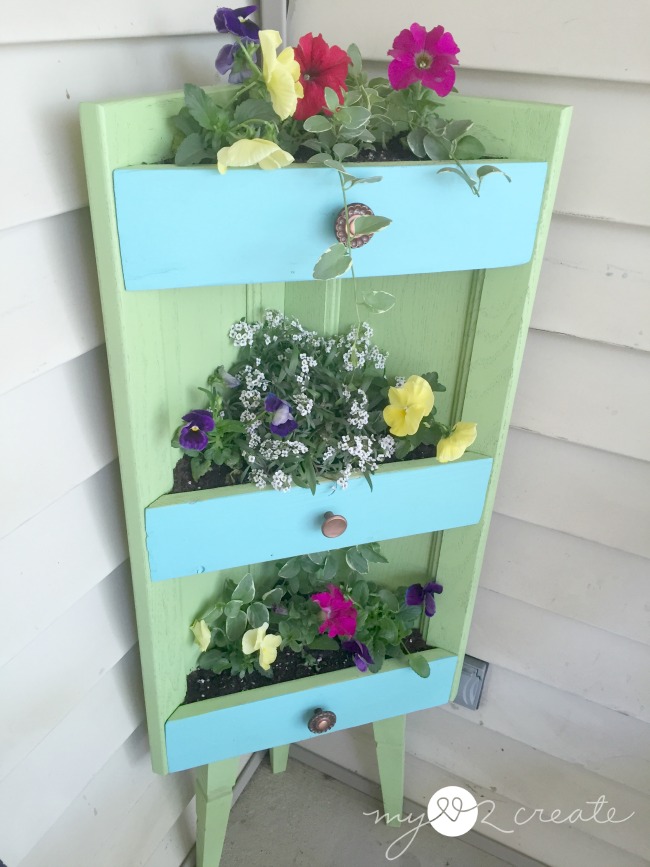
Now that is what I call happy!! Yay for spring flowers! I can’t wait to get these planted again this year!
It fits so nicely in the corner, and I am loving the faux drawer fronts.
I am happy with how the knobs turned out, I actually got that whole box for $1. Can you believe it!? Estate sales rock!
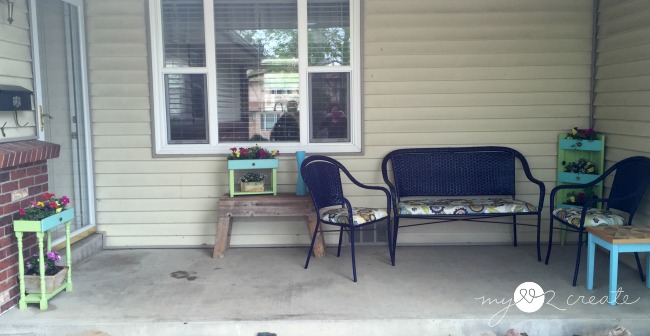
Here is my porch with my repurposed planters! I am so happy with them, and you can spot my Wicker Furniture Makeover, my Old Fence wood bench, and my Pallet top Table. I think the corner cabinet really ties the space together…now all I need it some type of hanging light or something…hmmmm. Maybe a rug? Always a work in progress right!
And that is it! Kind of a fun funky upcycle, I think it was a great way to repurpose that corner cabinet door!
Have you done any spring projects lately? Or are you still battling winter? I know we will have a few more snow storms coming, we always do, but one can always dream…
Hugs!
Mindi
I will be linking to these parties and Savvy Southern Style











You are AMAZING! So glad you have vision…ALMOST makes me wish I still had my cabinet doors. This is lovely and it looks fantastic with your other planters!
Love your repurpose especially with flowers!
Debby
Debbygoesshabby.blogspot.com
So creative and so cool that you put the drawer fronts on. Love the vintage vibe!!
So cute for a corner space and what great colors! Thanks for linking up to the Talk of the Town Link Party!
These are super…you have to show them again when the plants are spilling out everywhere. Good directions, also. Thanks, Sandi
OK I NEED this corner planter for my house!!! What a great addition…LOVE! Thanks so much for linking up to Talk of the Town. 🙂
Sarah (Sadie Seasongoods)
Your little corner cupboard is great – I love the colors you chose to paint it.
Thanks for sharing at SYC.
I am new to your blog, I found your project at Chic on a Shoe String.
This project is so cute, I love it and would also like to invite you to share on my Friday Features!!
Have a great weekend!
Karren
#OMHGFF
You are so creative! What a great way to reuse materials and get ready for spring 🙂 Thanks so much for sharing at The Creative Circle. Happy Blogging!
Wow this is such a gorgeous and pretty planter you made! I co-host a blog party on Monday's called Cooking and Crafting with J & J Link Up. I would love to have you come and share this with us. Thanks.
Julie xo
This is amazing and will be featured at Diana Rambles on Friday.
Love this!! It's the perfect solution for a small porch, and a great upcycling project! I am featuring it on the Talented Tuesday Link Party this week, thanks for sharing!
Mindi, you never cease to amaze me with your talent. LOVE everything about this idea including the colors! Pinning to share ☺
hi….i saw your drawer planter on pin and just had to make it, this was last spring. turned out perfect. did it in the same color as my front door. used all repurposed material.after sealing all the pieces, lining the drawer in contractor grade plastic and using exterior paint, the drawer started to swell and then fall apart approx 4 months after. completely broke my heart. as i totally loved it and so did everyone who walked by the house. however, im not giving up and going to make another one for this summer. so, any tips? btw, it was placed in my landscaping which is not covered. thxs michele in ontario ca
I love your planter! I will be sharing it on SYC this week! Thank you for sharing! Jo
Pinned & shared. thanks for joining the Inspiration Spotlight with your awesome projects Mindi!
Those planes are awesome. I'm looking at your patio thinking she what else you could do to tie it together – since you mentioned a light, and I thought – what about painting your patio? You could paint on an outdoor "rug". It would look amazing! I have been meaning to paint mine too 🙂 Thanks for the inspiration!
Those planes are awesome. I'm looking at your patio thinking she what else you could do to tie it together – since you mentioned a light, and I thought – what about painting your patio? You could paint on an outdoor "rug". It would look amazing! I have been meaning to paint mine too 🙂 Thanks for the inspiration!
Why is this exactly like this one: http://www.myrepurposedlife.com/diy-corner-planter/
myrepurposedlife was last year
Did you steal it?
Hi Jane, If you read under the first photo I tell you that I first shared this at My Repurposed Life about a year ago. I am a contributor for Gail and I eventually share the projects on my blog several months after I have shared them on her blog. So yes, it is actually my project I did not steal it. 🙂
Wow, these are amazing. I love them and your site.
You have so many cool projects it is hard to pick a favorite. But since I love gardening and flowers this has to be my pick as best project. I love it.
I love all 3 pieces.