Farmhouse Storage Bed
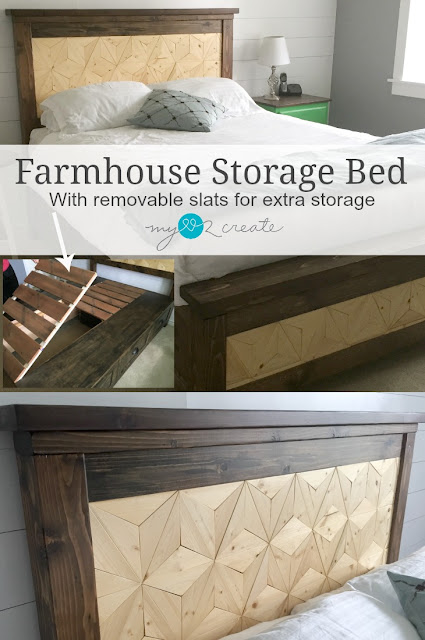
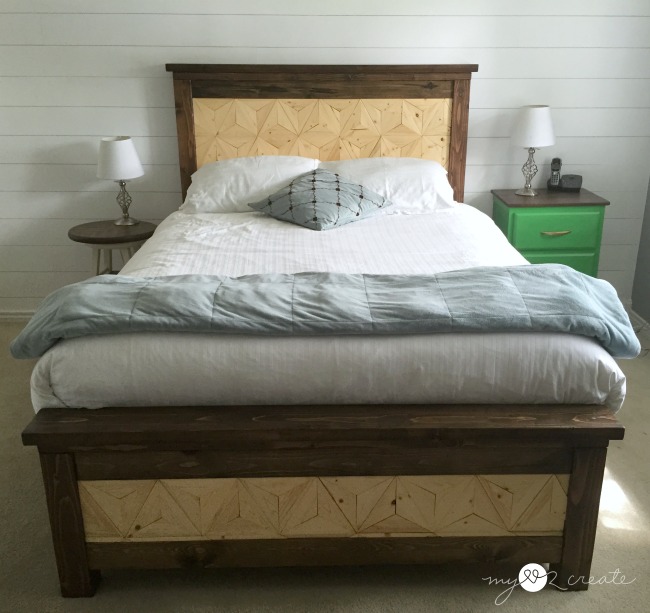
Oh boy, am I ever excited to share my Farmhouse Storage Bed today! It has been a long time coming folks, but it is finally done and I. LOVE IT.
I started this bed months ago, thinking I would have plenty of time to get it done in a weekend. Ha! Well actually to tell the truth most of it was done in a weekend…but, maybe I should start at the beginning… Beware this is a picture heavy post, I tried to do collage photos as much as possible to cut back…
Since my bedroom is pretty small, my husband and I decided that I should build Ana White’s Farmhouse Storage Bed with Storage Drawers. I have always loved her farmhouse bed, and this plan was perfect, because with the drawer storage we could eliminate needing a dresser. My Master closet makeover has a ton of of storage space for such a small closet, but we needed a bit more.
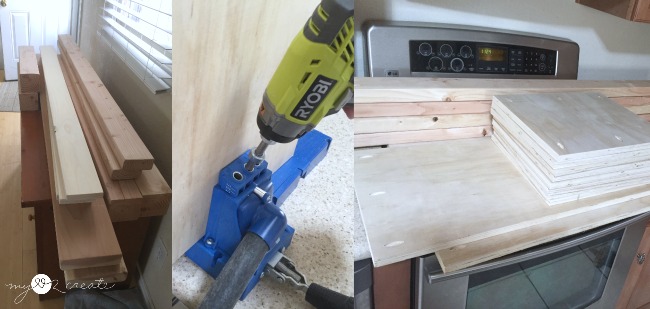
So I purchased the wood, cut it to size, and drilled all the pocket holes with my Kreg Jig K5. I will not give a full tutorial because you can refer to the plans, but I will provide some in progress shots. 🙂
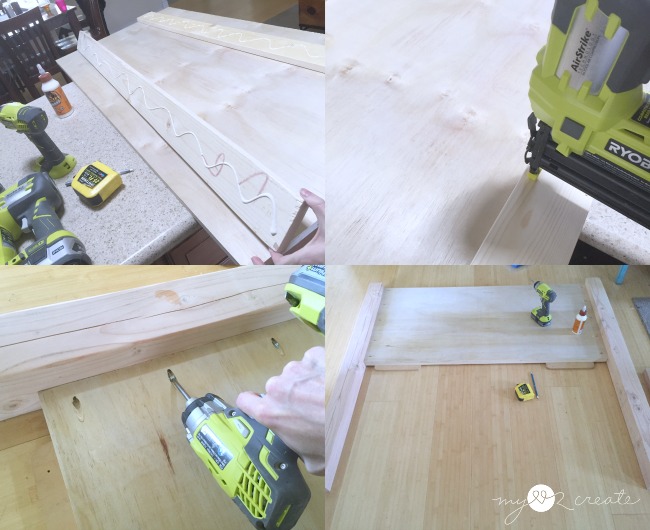
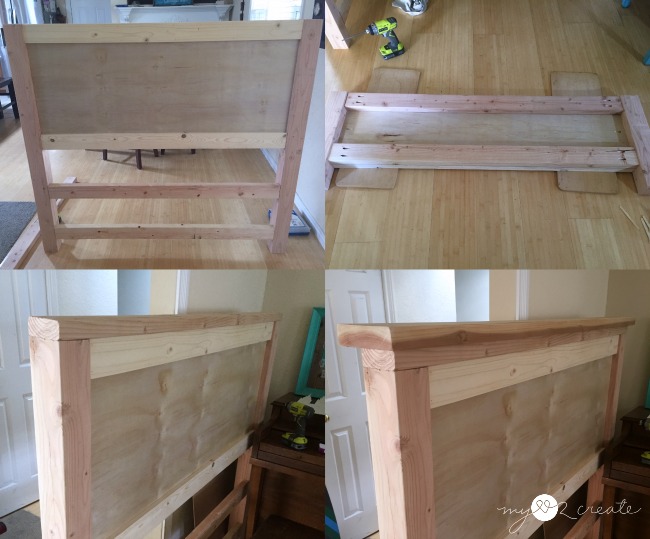
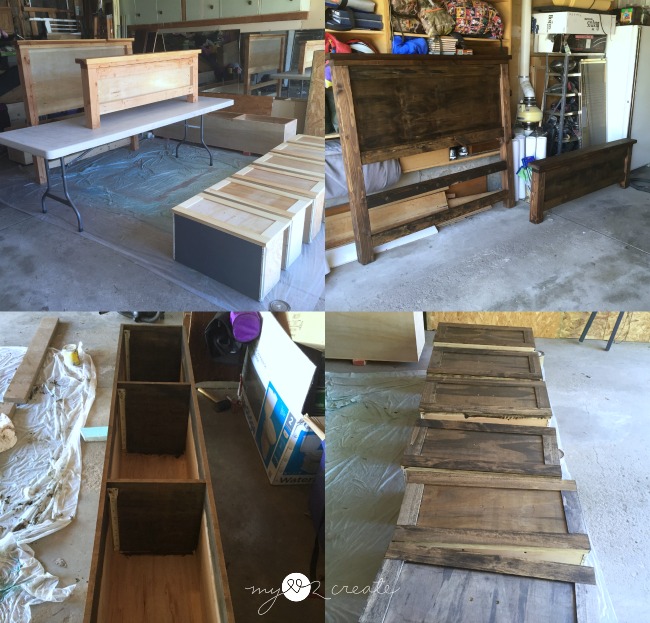
Putting together the headboard and foot board was pretty quick and easy. I added the 1×4 trim to the plywood panels with gorilla wood glue and my Ryobi Air Strike Nailer (which I love) and then secured them to the 4×4 posts with pocket holes. You can see on the bottom right I used some wood to hold up my plywood up to the correct spot for drilling.
Then I added the 2×4’s for the bed storage drawer supports on the head and footboard. Last, I added the top trim boards, and in less than a day’s work the head and foot board were done. I did these the same weekend I started my How to install a plank wall, and how to avoid the biggest mistake ever…
Then things came to a screeching halt for about a week. After that I would work on things when I had an hour or two during the last month of school. We had millions of kid activities and track meets, you know the drill, good stuff, just not good for getting projects done. 🙂
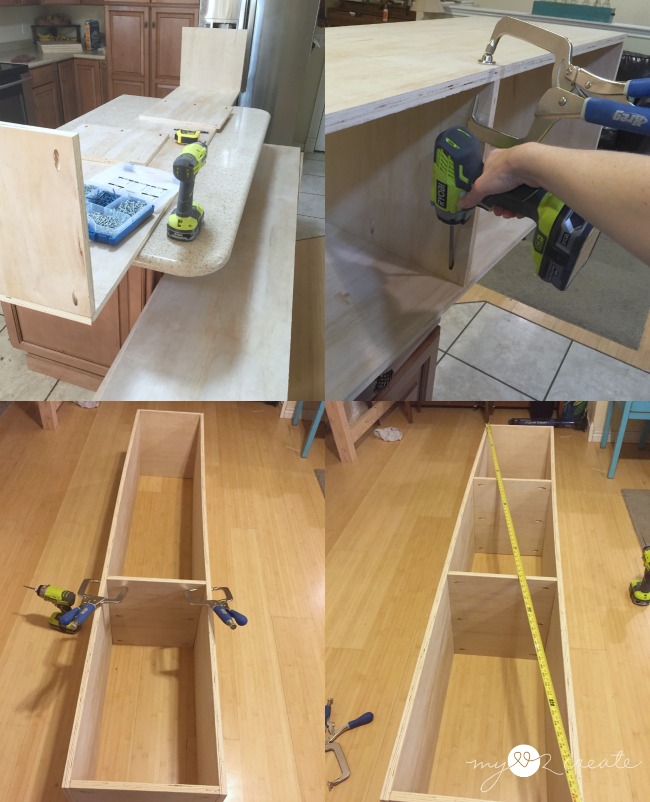
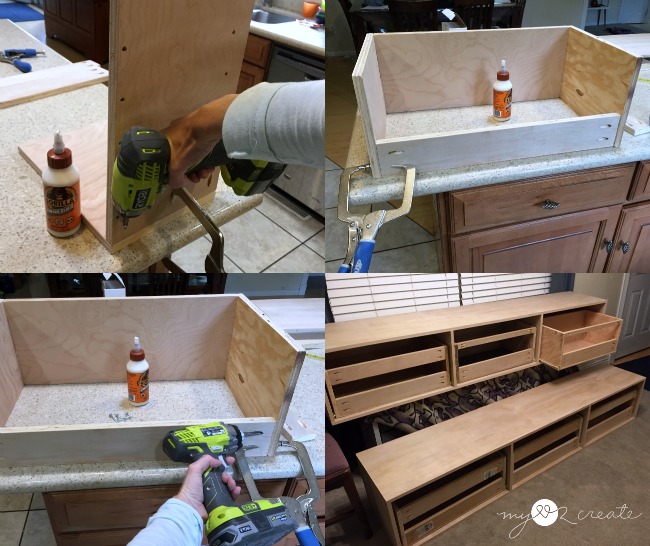
I found a night when I could work on my drawer storage boxes. Building these was easy since I had already cut the wood and drilled the pocket holes, all I had to do was put them together. My Kreg Right Angle Clamp seriously save the day for attaching pocket holes, I can’t imagine how I used to build without them!
In the bottom right photo I am checking for square with my tape measure. You just measure from corner to corner. Hopefully both corner measurements will come out the same…and they did.
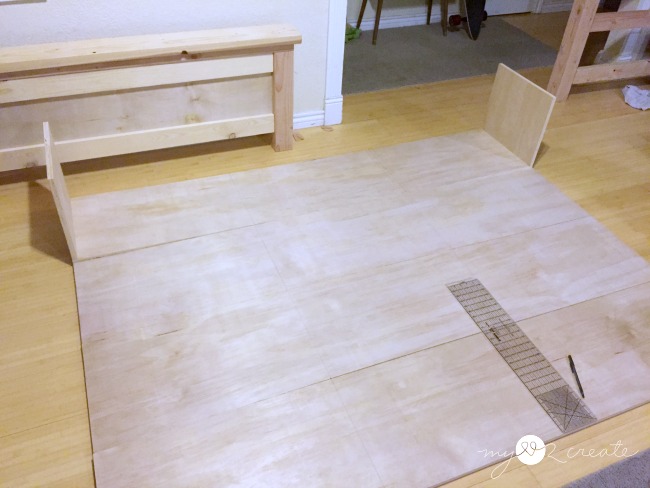
Tip: One thing I like to do, to make sure my boards are all placed in the same spot, is to draw lines where they need to go. I actually draw two lines, 3/4 inch apart, to represent where the board goes. I use my quilting ruler (which I love to use for wood working) and draw them on all the boards as they are lined up together. It saves time and guess work when I am building.
I used 1/4 plywood for the back of my storage drawer boxes, you can see I used clamps to pull the sides in, one of my plywood pieces was a little warped. Once I put the backing on they were just fine.
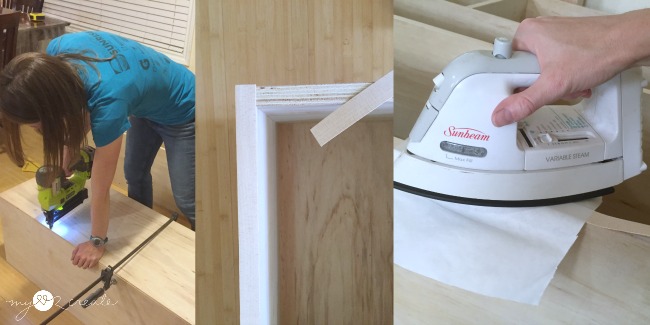
To cover up my exposed plywood edges on the boxes I used edge banding. It was pretty easy to iron on, I just followed the directions. I ended up sanding off the excess, since the banding was a bit wider than 3/4 inch.
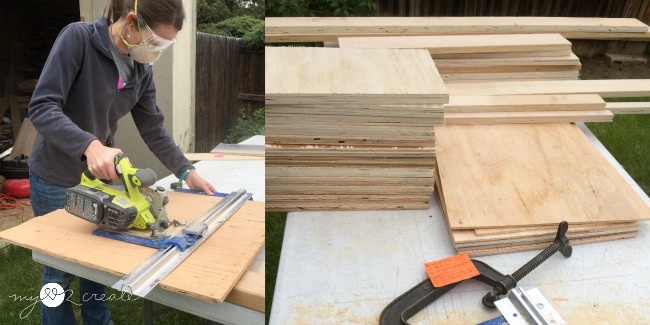
When it came time to build my drawers I got to use my new Kreg Rip-Cut! Ok, guys I am in LOVE!! This is coming from a girl who doesn’t have a table saw. My Roybi Circular saw and Kreg Rip-Cut
are like peas and carrots (said in my best Forrest Gump accent). This was life changing for me, I was getting perfect accurate cuts super fast and easily. Someone pinch me! I think I am in heaven!
You may think that was a little dramatic, but it is truly how I felt using this tool…just look at all those great cuts! I used the left over plywood that I had from the head and foot board and then for the rest of the drawers I went to my scrap pile just like I did for my Drawers and drawer slides, Master closet makeover, and that time I didn’t have my cool rip cut, which helps explain my excitement! 🙂
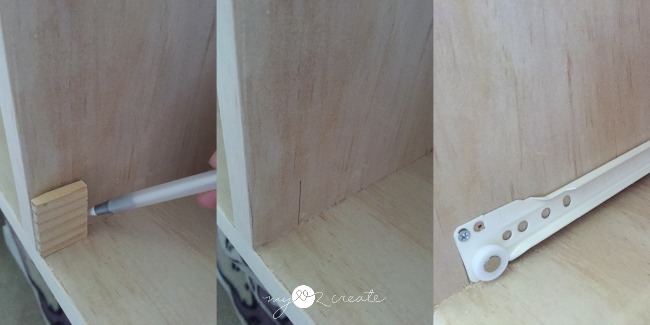
At some point I had taken some time to install my drawer glides. This can be pretty easy if you get a good system. I cut a scrap of wood at one inch (this is how far I needed to inset my glides for this project, it may be different for other projects) marked it on my plywood, and used that mark to attach the glides. Not too bad, but it still seems to take a while, because you have to pre-drill and make sure they are level.
Again I used gorilla wood glue, my fav, and the right angle clamps to build my drawers. Just ignore all the holes in the top left photo on the bottom of the plywood, that was some scrap ply from my father in law’s neighbor and obviously it was a mistake board.
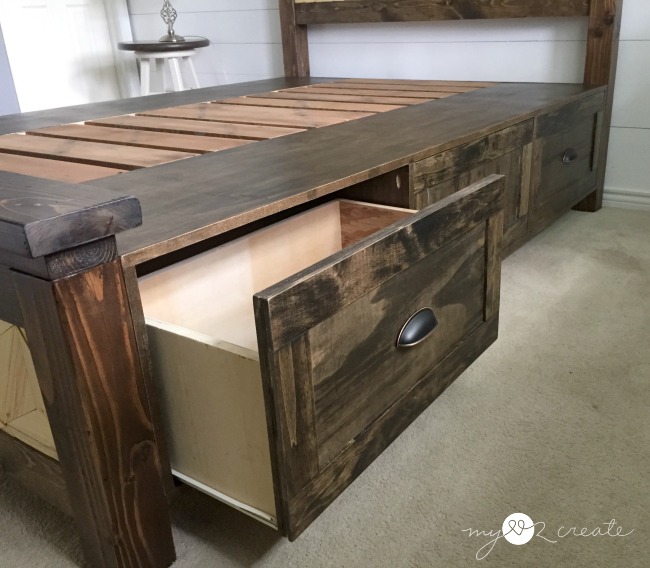
To save on plywood I decided to use left over scrap strips to put on the front of the drawers, since I will be adding faces later, and it makes it less thick for when I add the drawer pulls. Once they were all built and bottoms and glides attached, I put them in my drawer storage boxes. Yay!
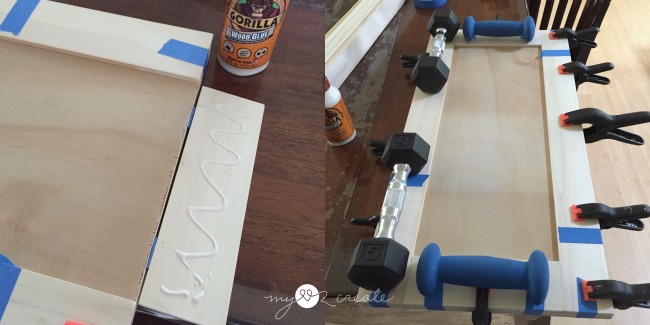
For building the drawer faces, I again used scrap plywood, and hobby stock wood for the trim. It was a little pricy, but I really wanted them trimmed out nicely. Plus when I asked my husband, because I debated for several days whether to splurge or not, he gave the green light…so I did. He is such a good guy. 🙂 Oh what would I do without my scotch blue painter’s tape? I use it all the time!!
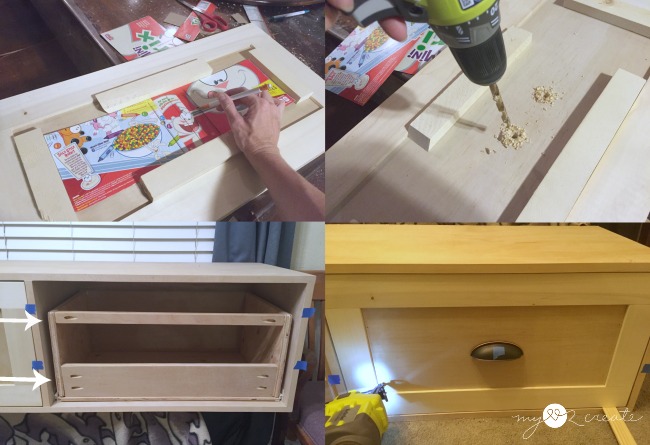
To mark holes for my hardware I used 1×2’s and a cereal box to make a template, then it was easy to mark and drill them all without measuring. In the bottom left you can see I used scotch blue painter’s tape to mark where I needed to nail when I was attaching my drawer fronts. I used shims to keep my drawer front in the right spot while I added 4 quick nails with my air strike nailer. Then I screwed them on from the inside.
Next up was staining. I used Minwax pre wood conditioner, and then Minwax Jacobean stain. At the time I did this it was super hot weather, which I don’t normally stain in, so I had to work in small sections.
I have to be honest part of the reason it took so long to finish my bed is because I had to make a decision. You know the feeling when you want something to be just awesome so you will love it forever? Well that is how I felt about this bed, so much so that I had a hard time deciding things. The hardest one was what design to put in the head board and foot board. I knew I wanted a cool pattern and that I wanted it to be made out of wood. After a few months I decided that Mandi’s Nugget DIY Geometric Wood Flooring was still one of my faves and I had to copy it!
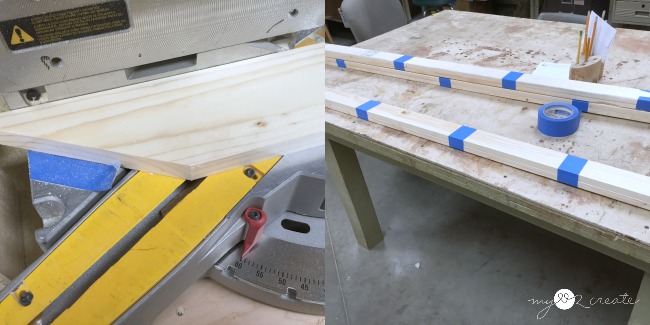
I started with 1×4’s and cut them all, it took me about an hour to cut 12 board into triangles, you can see I used painter’s tape to mark my spot on the saw. I had to go to our community wood shop and use their miter saw because mine did not go to 60 degrees. See Mandi’s tutorial for details.
When I got home I realized that the triangles were too big for my bed, if I used them the pattern would not be seen as much as I wanted!! I was sooo frustrated and my cuts were perfect too! I had wasted time and money and I was not happy. 🙁 You may see a project with them in the future, I surely won’t waste them. 🙂
So I had to plan another trip to the shop, and ended up only having less than an hour to get things done. This time I used 1×3’s and made the mistake of taping them together (see above) to do multiple cuts at a time, since I didn’t have very much time…and one of my 1×3’s was slightly bigger (not sure how) but I didn’t realize it until I got to the shop. At this point I was so frustrated and DONE that I just went ahead and cut the boards. Buy taping my boards the cuts were slightly off because of shifting but only by a hair…and with one board being a little bigger they were off a little from that board.
So when you see my design it is not perfect. I know why, and now you do too. I really had to come to terms with it and accept that it was not the end of the world, it was hard for me. I decided I could embrace the imperfections and love it the way it was, because isn’t that what life is all about? We love and except each other despite our obvious imperfections. We choose to see the over all beauty in each other? Well that is how I am choosing to see it! 🙂
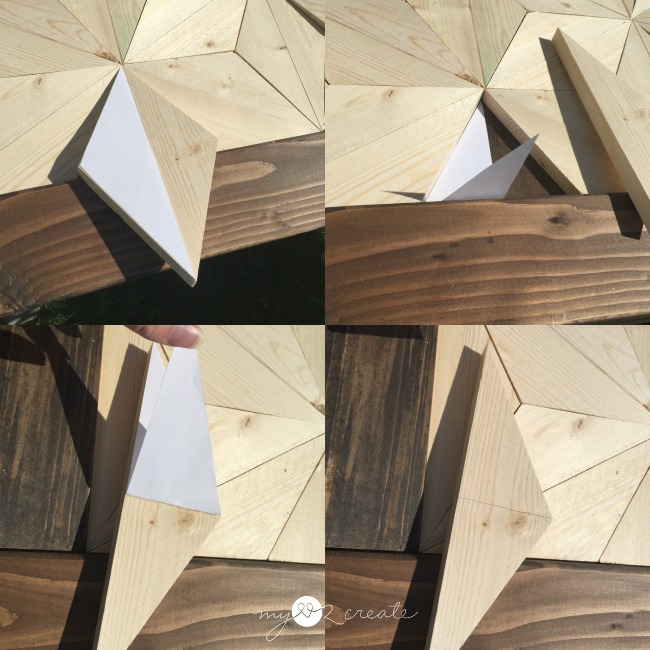
Above you can see I am cutting triangles to fit into the headboard. I used Mandi’s brilliant idea to make a paper template and fit it to the space then trace it onto the wood to cut. Man I love that girl!
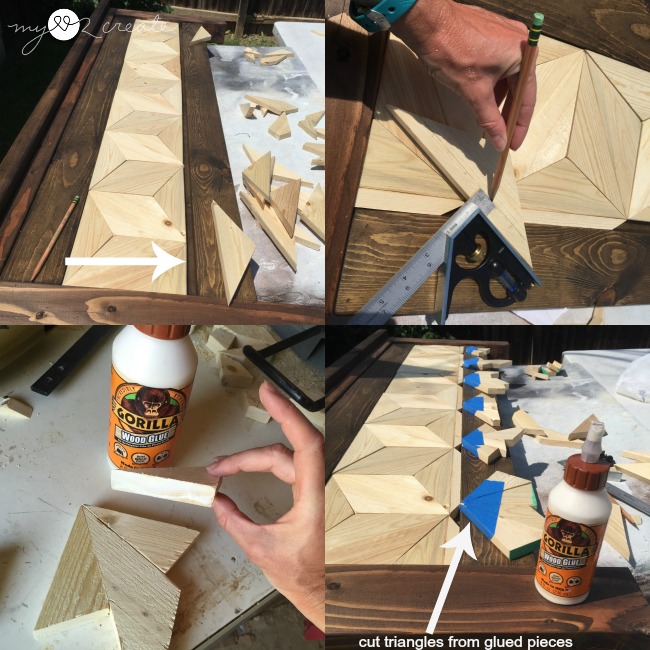
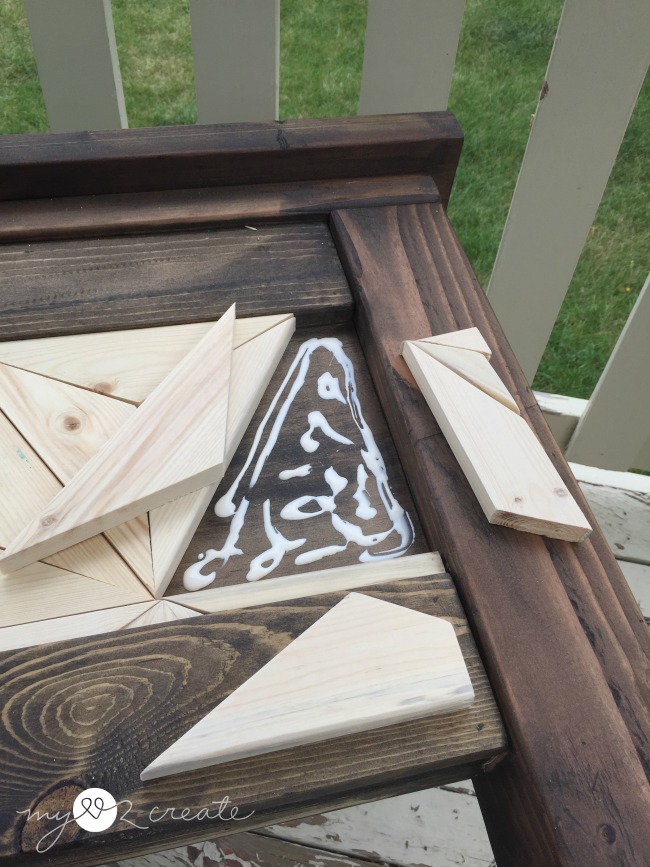
For the footboard I had some super small cuts to make. I did some measuring and marked my wood. For the sections on the bottom you can see I decided to glue scraps of four together to complete the pattern. Then I taped them to let the glue dry. Once they were dry, I marked and cut them so they would fit into the small spaces on my foot board. I keep the tape on while I cut and removed it afterwards.
Please use extra caution when cutting small pieces. I made sure to clamp ALL my boards onto my miter saw, and used other boards to help hold my piece in place so I could keep my fingers VERY FAR from the blade, it is not worth losing a finger over. If you don’t feel comfortable, don’t do it!
With my pieces all cut, I took out a few at a time and added glue, then placed them back in. I didn’t use weights or clamps, my gorilla wood glue worked great. In fact, one time I misplaced a piece and after a few minutes realized it and had to use some serious force to get it off! It has a great hold, that is why I love it so much, gorilla tough!
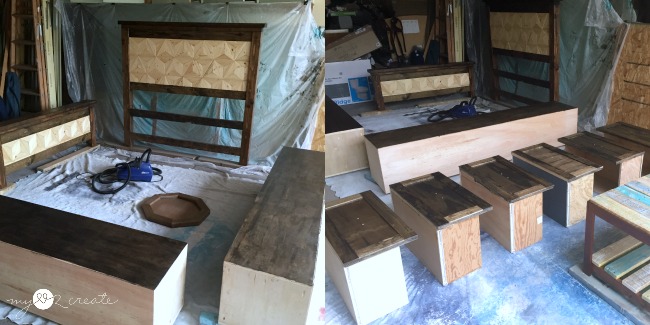
When it came time for the finish I think I would have DIED, literally, without my Home Right Finish Max Pro! Not only did it save me hours of brushing on by hand but it put the poly on flawlessly and was so quick and easy to use, I seriously love this thing!
I ended up putting natural stain on my geometric design first, and then did 3 coats of poly sanding with 400 grit between coats for a nice smooth finish. If you look closely you can see I put finish on two other projects at the same time my Updated glass top coffee table with pallet wood and my DIY Octagon Mirror, gotta love multi-tasking.
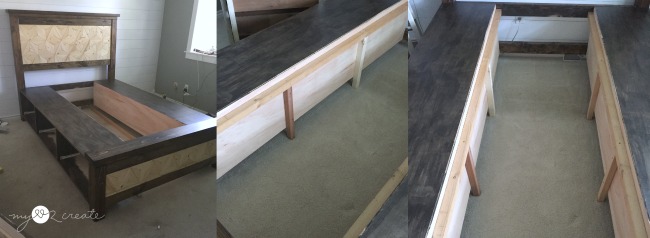
Even after all that work I still wasn’t done! I had to take it inside to build…which was actually very exciting! I used blocks of wood to hold up my storage boxes while I screwed them to the head and foot boards. Then I used some 2×2’s to set up my inner support system. I modified Ana’s plans here by putting the boards 3/4 inch lower than what she put in the plans. Why? So I could add my favorite feature!!
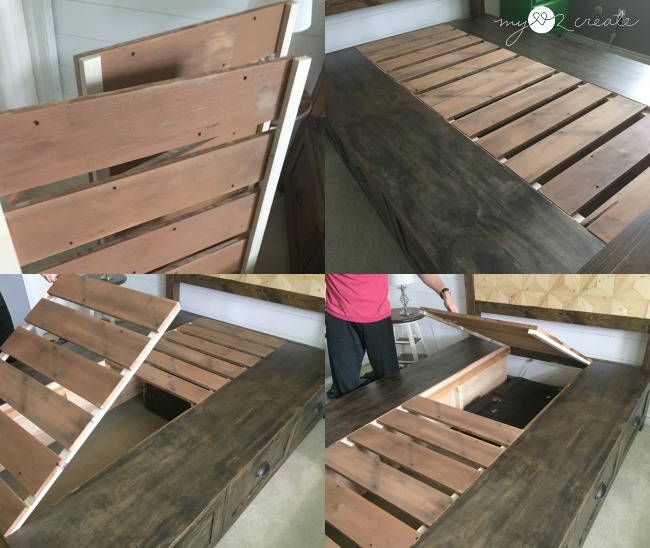
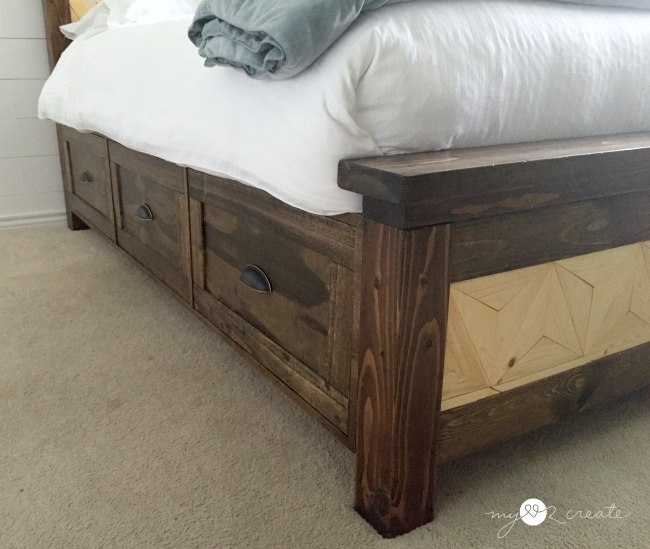
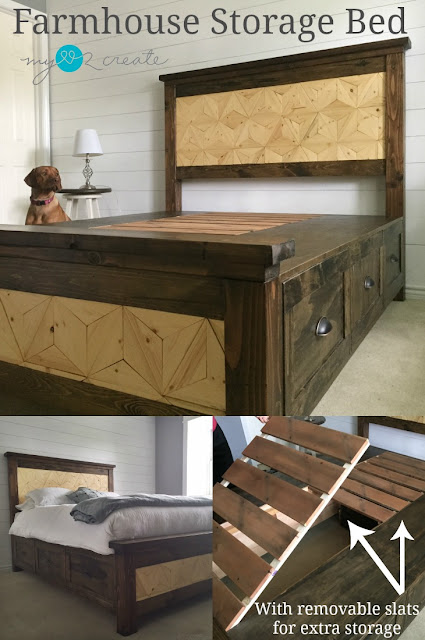
Removable slats!! Yippee! I used 1×2’s (that is where lowering the 2×2’s 3/4 inch comes in) to glue and nail my slats onto. I chose to do two sections of slats and now I have a TON of storage, you can see a couple of suitcases already in their new home.
For slats I used some old deck wood that my father-in-law got for me a few years back. They ended up being perfect, and I didn’t have to spend a dime on slats. I think we have a new home for hiding presents for a certain holiday in December!
I was finally done last week, and then it has POURED all week long and I had to hurry the only chance I got this week to snap some shots when the sun decided it would come out for a few minutes…I am talking less than 40 minutes people.
My husband and I love this bed so much and we have lots of great storage space, it is stinkin’ awesome!
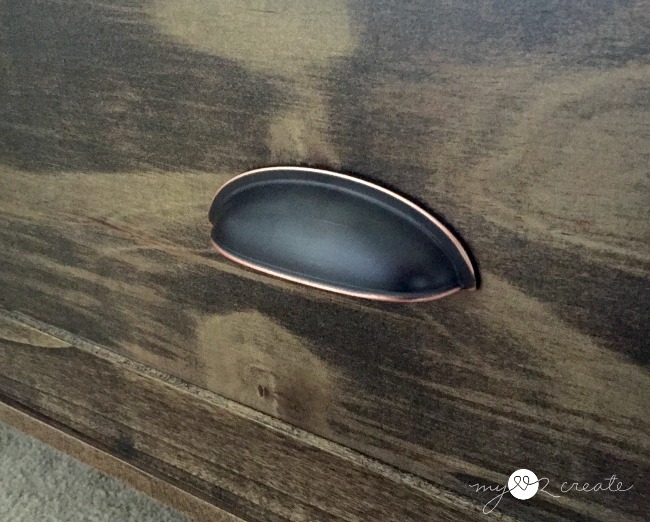
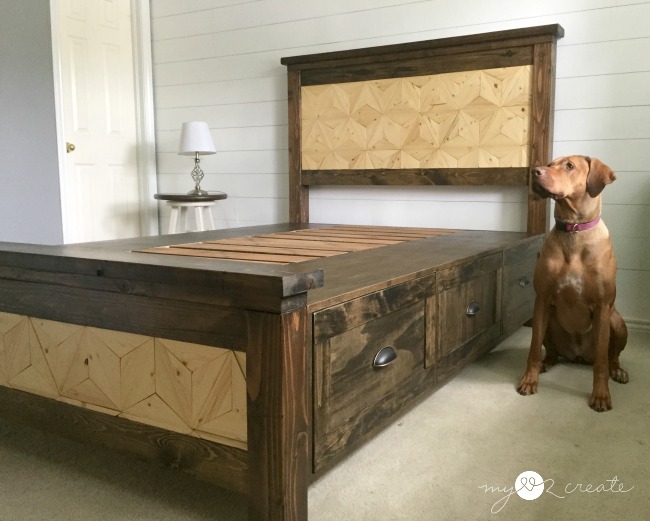
A huge thank you to D. Lawless Hardware for my gorgeous cup pulls! I got these for the antique dresser that was supposed to go in my room, but since we opted for the storage bed and not the dresser, it ended up working out perfectly! Phew! I got the 3″ Bronze cup pulls with Copper Highlights, and they are so pretty! I am very impressed with the quality, and they go perfectly with the bed color.
Sunny kept photo bombing so I decided that she deserved a cameo. 🙂
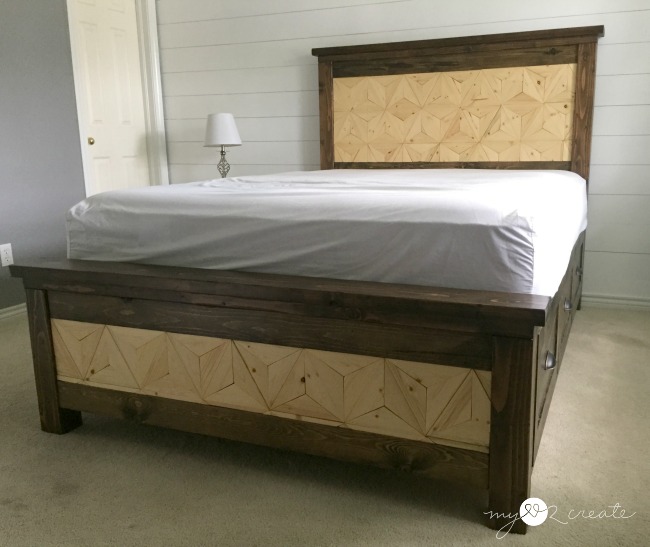
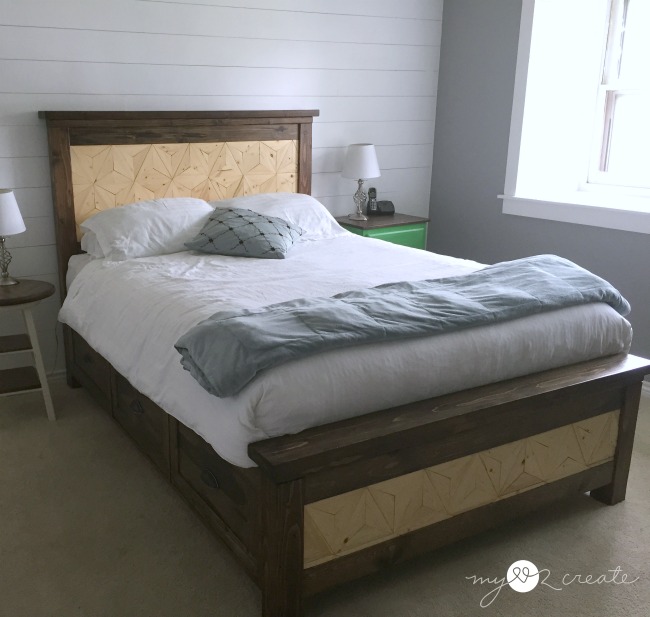
The mattress fits perfectly and is nice and high. My husband said something about it being regal…and a couple of other times how he felt like he was sleeping in a super nice timeshare bed. Lol! Both of which were meant as compliments.
Obvioulsy I still have some work to do in this room…but for now were are sporting our mis-matched night stands. My Night Stand Makeover, and Stool Turned Sidetable that will tie us over for just a little while longer. Eeeek, I am sooo excited, I am working on something fun right now!
This bed is just wonderful! It is solid as a rock and Ana’s plans were amazing! I really am in love! I have probably said that fifty times now!
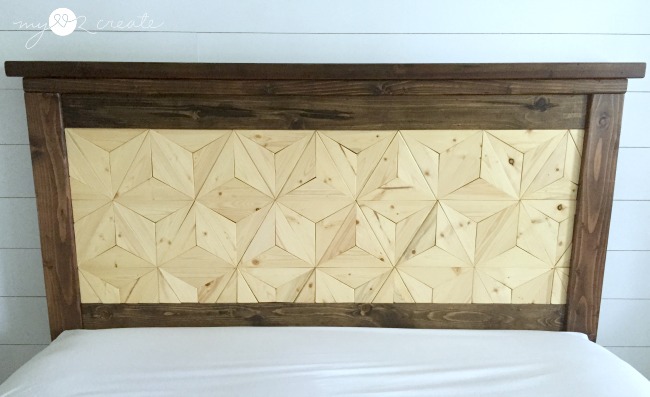
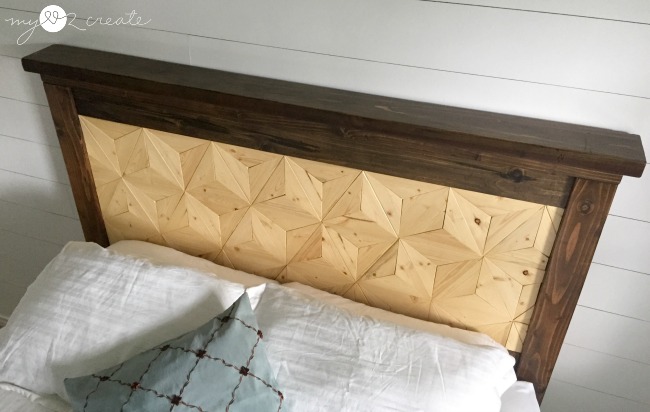
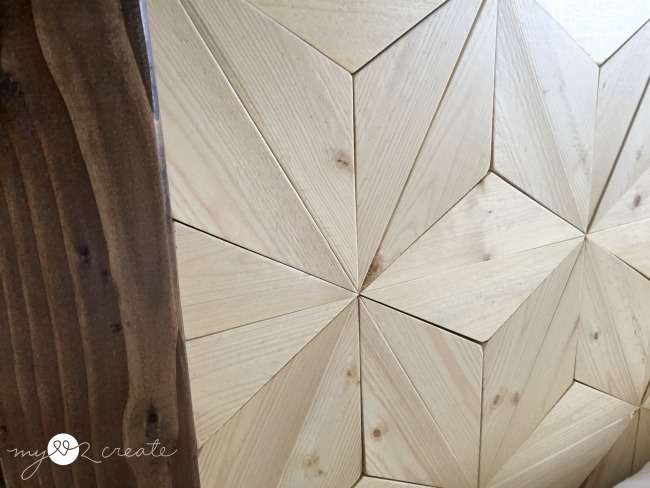
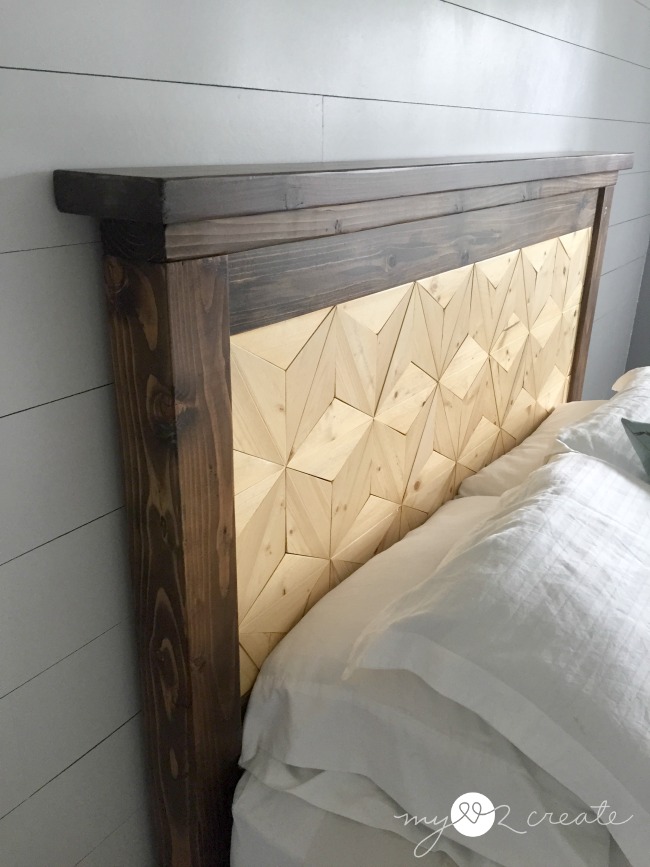
My inlay geometric pattern makes me happy and I love it when notice the different shapes standing out. There are three different patterns…can you see them?
I think the blocks stand out the most…
But if you look close you can see the stars…and if you follow me on Instagram you got a sneak peek of a star pattern, a while back.
…and the triangles. And sometimes I get a glimpse of a Charlie Brown chevron pattern! Seriously makes me smile!
So there you have it, if you are still reading you deserve a prize! That was a long post, but much shorter than it took to build this bed, ha ha!
If you had help and knew what you wanted…unlike me, then I would say this is a good week long project. But if you are me, what’s a few months of your life sleeping on a bed pushed to the center of the room while you drag your feet on building a new bed…right?
I am DYING to know what you think? Do you like it? Are you up for building your own bed? Please share!
Thank you so much for reading and pinning, I really appreciate it!
Hugs!
Mindi
I will be linking to these parties and Savvy Southern Style

WOW!!!!! That turned out incredible! I adore the farmhouse style beds and yours just looks amazing! !
Mindi, you have really outdone yourself this time! Oh-My-Goodness! Your farmhouse bed is amazing and the geometric inlay really defines the head and foot board, as well as giving the piece a unique and creative look. The storage under the slats is completely awesome and I love the drawers on the sides. Heck, I love everything about your new bed! 😀 I am sure you are enjoying sleeping on it.
Geesh, that is one heck of a weekend project! lol Way to stick with it after some setbacks. I hear ya about not wanting to proceed with a project until you know exactly what you want. Sure, it can definitely prolong a project, but I understand about wanting to be completely happy with the end result. 🙂
Okay, you have me really interested in the Kreg Rip Cut! I don't have a table saw either and this tool looks fantastic!
Superb work Mindi! High fives and hugs! 🙂
Wow! Mindi, this is fantastic, I love it! Thank you for sharing with us. I loved the "life lesson" you included. You will love it even more because of its imperfections. Besides, you know where they are, we don't. That was a great project. I am so proud of you, girl! Way to go!!!
Okay… I'm sorry, but I just can't get over all the lumber on the stove. That's killing me!! Also, I'm pretty obsessed with the nugget's floor pattern, too. You nailed it! Well, you glued it.. But you also knew what I meant 😉 LOVE this bed, Mindi!!!! Like…. LOVE! And your pup's pretty cute, too.
Mindi your bed turned out amazing!!! Love that nugget pattern and the beautiful 2 toned look. So beautiful.
I read every word! Your patience and talent never cease to amaze me Mindi. Your new bed is absolutely beautiful, and all that storage… what a bonus!
The pattern… even in the pictures is so beautiful…. looks 3 dimensional. 🙂 so darn pretty!
great job friend!
gail
Absolutely gorgeous! If there are any imperfections, as only you see, they must definitely serve to enhance its beauty. Fantastic job! That timeshare must be 5 star!
Hi Mindi
Like Gail, I read every word, probably because I am currently contemplating making this bed myself. I know you raved about the Kreg right angle clamp, I already have the Kreg jig set and am debating whether it's worth getting the clamp now, but don't know if I will use it for other projects, does it really make THAT much difference when putting this bed together?
Judi in the UK
Hey Judi! To be honest, you do not need the right angle clamps to build the bed. 🙂 However, if you are going to be building a lot with your Kreg and using pocket holes in the future, it would be worth the investment. If you don't plan to build a lot in the future then it may not be worth buying, they are pricey so you want to make sure you will use them. So it really depends on you. It took me a while to decide to purchase my clamps, but when I did, I noticed a huge difference in my projects, it was easier to build and my joints were always spot on. I personally love them and wish I had gotten them sooner, but like I said I build all the time! You can use other clamps to help hold your boards in place so that may work better for you, bar clamps would be a good option. I hope that helps! Good Luck with your bed!!
PS I forgot to say … Your bed looks absolutely FABULOUS! Can't wait to get stuck into making my own now although I won't be doing all the fancy wood pieces like you did on the head and footboards.
WOW. Just WOW. I can't even imagine being able to make something this nice, I really love the details that you gave to the head boards and food board!
The headboard looks gorgeous! Absolutely gorgeous! Thanks for sharing pics!
Wow! This bed turned out incredible! I love the design on the headboard. And the color is so perfect! You did such a great job!
Thank you for sharing with is at Merry Monday!!
Incredible job! This is truly a labor of love…and yes, sometime a weekend projects takes…a little (lot) longer 🙂
You have put together a wonderful tutorial on making a Farmhouse Storage Bed. The bed is just beautiful. Thank you for sharing with the Clever Chicks Blog Hop! I hope you’ll join us again next week!
Cheers,
Kathy Shea Mormino
The Chicken Chick
http://www.The-Chicken-Chick.com
What an incredible project! I am so impressed with the detail, time, and effort you put into this bed. And, it looks amazing! Job well done~
I came over on Think Tank today, and I'm glad to find your site.
I pinned your photos here: https://www.pinterest.com/melredd/blog-link-parties-and-blog-link-ups/
Hope you have a blessed day today~
Melanie
Hi Mindi! That is absolutely one of the prettiest headboard/bed. Rustic but feminine at the same time. Just stunning!
Kristine 🙂
I'm loving this! Pinned and tweeted! I always love your creations, thanks for sharing this with us! I hope to see you tonight at 7 pm. Lou Lou Girls
Really great storage Mindi! Super creative. Thanks for sharing with SYC.
hugs,
Jann
Hey Mindi, yes, I usually read your entire posts! There's always something (I should say a lot) for me to learn from them. You have done an AMAZING job with this bed, the geometric inlay is just the cherry on top. You're the only one who sees mistakes, it's gorgeous!. Gotta order the Kreg Rip cut. 😉
how much did this run you? total
Hey Seth! I totally forgot to do a cost break down, oops! When I originally purchased the wood it was about $200 for the bulk of it. I only had a few pieces of wood that I repurposed and that price didn't include the hardware or finishing materials. So if you included those things it would be closer to $250- $275. Not bad! I hope that helped!
Geesh, that is one heck of a weekend project! lol Way to stick with it after some setbacks. I hear ya about not wanting to proceed with a project until you know exactly what you want. Sure, it can definitely prolong a project, but I understand about wanting to be completely happy with the end result
is this a queen sized bed?
I love it so much!!
WOW WOW WOW WOW!!!!! Great Job!!!!
Is this a queen? Do you think it would be too hard to eventually take apart? I love this, but I think we will move at some point.
Thanks!!
Good evening, my husband and I are making our son and his fiancé a king size bed for a wedding gift. I have been researching several designs and really like your design. Do you offer your plans for sale? Thank you.
Bobbi jo