I am also hosting, with several other awesome DIY bloggers, a one board challenge for YOU! Yes you read that right!
This challenge is for you my awesome readers, if you choose to accept it! This message will self destruct in 5 seconds…ha ha just kidding 😉
We had such a great time doing this challenge we wanted to see what our readers would come up with, and Ryobi has offered to give our winner $1,000 in Ryobi power tools. Say what?!!
Who couldn’t use more tools right? I know I have several on my wish list.
One Board Challenge Rules:
Use one 1×8 8-foot board, you are allowed to use fasteners, glue, finishes, etc…
Share your finished photo on Facebook, Instagram, or twitter.
You MUST use the hashtag #oneboardchallenge (this is how we will find your project) 🙂
The contest will run from September 15, 2015 to October 15, 2015, so start planning now!
Don’t forget to have fun and tell your friends to join in!
Each hosting DIY blogger will pick their favorite project from all the one board challenge hashtags and then we will put them in a pool to choose a random winner. It totally could be you! Just think $1,000 in power tools….!!!!
*Make sure your account is public so we can see your hashtag, if you are concerned about having a public account you can email me your photo and I will share it on social media for you.
I can’t wait to see what you come up with, and please share the above image on your social media and shout it out to all your building friends and family! This is going to be so. much. fun!
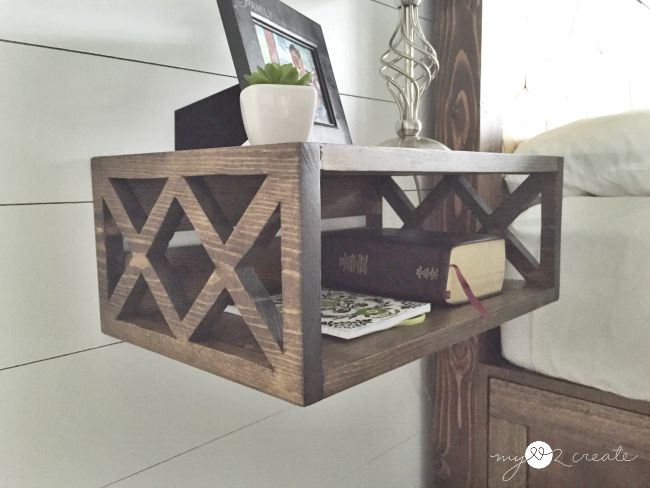
Ok, now go check out my building plans! for this Floating Night Stand!
Can I just say I am loving my night stand. It makes me super happy to be able to share these plans with you. Life has been full speed around here for several months so it is good to finally have time to post these.
For my step by step picture tutorial on how I built this night stand you can see my original post, which also contains links to all the original one board challenges so you can get inspiration!
Thanks so much for pinning!
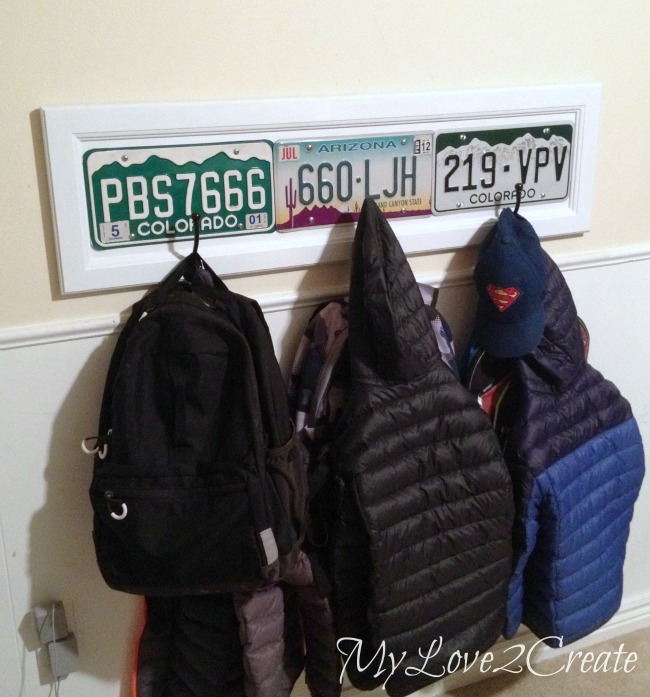
Oh, I almost forgot! Speaking of challenges…tomorrow I am hosting a Repurpose it Challenge with 7 other bloggers so please stop by again for my repurposed project and links to 7 more. Hopefully you will be inspired to repurpose something of your own!!
Mindi Carwin is a passionate and resilient creator who turns life's challenges into powerful opportunities for growth and inspiration. With an infectious joy and unwavering faith in the transformative power of creativity, she empowers others to discover their true potential and find beauty in every step of their journey.
Mindi! This is soooo funny. I was telling Jamie (tonight) that I was in the repurpose challenge, but I missed the one board challenge. This might be time for me to get busy, eh?
Wow! This is genius! What a great tutorial! Such a perfect solution for a tiny space. I love everything about it… including those scriptures. 😉 Thank you for sharing this at Friday's Furniture Fix! I hope you'll join us again really soon. Have a great weekend!.. Carrie, Thirty Eighth Street
I have a project that I am just now working on, and i am sure this will help me a lot..and I have been looking for such information since from few days….Thanks! http://www.mitersawexpert.net
Looks great. I like this wooden project very much. It is really great idea to make our home furnished with woods. I think you should paint it. The white color is more beautiful.
Sand all the surfaces in order that everything is extremely swish. Use a power tool to complete that task.In case you are doing not would like to create your own table, merely obtain a decent one that you just can assemble yourself.
Looks great. I like this wooden DIY project very much. Your coffee table look so cute. I’m doing some research on DIY projects. I want to do something like that for my family. But I have no idea now. Thanks for sharing your idea.
I'm a 76 year old woman living alone and just came across your page by chance. I've been thinking for weeks how I could make some sort of bedside shelf that would allow me to open the drawer in the bed base without having to pull out the night stand…! This is perfect, and doesn't look too difficult for me to do. So thanks for popping up just in time….! Nadia in Perth, Western Australia
This is absolutely stunning! How long did it take for you to finish it? I am planning to remake our bedside table and wanted to do something "different" – this might've been the look I was looking for!
Thank you Tom! I made two of these in one day, not sure how many hours, I am always stopping and starting again to help the kids! Of course, it took another day to stain and add my top coats. But it really is a simple build! I hope you make one and please share if you do! Thanks for stopping by!
My boyfriend and I made these for our bedroom. One thing we found hard was cutting out the “x” patterns. We found it easier to cut the “x’s” out from a larger piece of word, rather than having the 3/4 inch sides to clamp onto and rearranging the clamps every few seconds. They look great and were a fun project!


Awesome job, I love those nightstands. Still can't believe that they are from 1 board! Great job on the plans.
Mindi! This is soooo funny. I was telling Jamie (tonight) that I was in the repurpose challenge, but I missed the one board challenge. This might be time for me to get busy, eh?
I love your nightstands, totally amazing!!
gail
Wow, what a fabulous idea Mindi and very professional drawings and tutorial too! Love your floating night stand!
Looks good – great solution for small bedrooms. Thanks for sharing with us at the #HomeMattersParty link party
This is a great idea – space efficient and really pretty! Bravo!
Very creative! Thanks for sharing with SYC.
hugs,
Jann
I love the floating night stand, great tutorial. Thank you for sharing with the Clever Chicks Blog Hop! I hope you’ll join us again next week!
Cheers,
Kathy Shea Mormino
The Chicken Chick
http://www.The-Chicken-Chick.com
Wow! This is genius! What a great tutorial! Such a perfect solution for a tiny space. I love everything about it… including those scriptures. 😉 Thank you for sharing this at Friday's Furniture Fix! I hope you'll join us again really soon. Have a great weekend!.. Carrie, Thirty Eighth Street
Super cute! I love the quad on the nightstand too! 😉
Just found your blog from the Remodelaholics post, and I'm so glad I did! This project is fantastic!
I have a project that I am just now working on, and i am sure this will help me a lot..and I have been looking for such information since from few days….Thanks!
http://www.mitersawexpert.net
Looks great. I like this wooden project very much. It is really great idea to make our home furnished with woods. I think you should paint it. The white color is more beautiful.
Sand all the surfaces in order that everything is extremely swish. Use a power tool to complete that task.In case you are doing not would like to create your own table, merely obtain a decent one that you just can assemble yourself.
Great ideal thank you
Looks great. I like this wooden DIY project very much. Your coffee table look so cute. I’m doing some research on DIY projects. I want to do something like that for my family. But I have no idea now. Thanks for sharing your idea.
I'm a 76 year old woman living alone and just came across your page by chance. I've been thinking for weeks how I could make some sort of bedside shelf that would allow me to open the drawer in the bed base without having to pull out the night stand…! This is perfect, and doesn't look too difficult for me to do. So thanks for popping up just in time….! Nadia in Perth, Western Australia
Unbelievable. How do you do this job so perfectly? I adore you.
This is a great DIY idea.I will try to make one by my own. Thank for share
This is absolutely stunning! How long did it take for you to finish it? I am planning to remake our bedside table and wanted to do something "different" – this might've been the look I was looking for!
Thank you Tom! I made two of these in one day, not sure how many hours, I am always stopping and starting again to help the kids! Of course, it took another day to stain and add my top coats. But it really is a simple build! I hope you make one and please share if you do! Thanks for stopping by!
Great looking night stands. How did you get the stain so dark. Pre conditioner, 2nd or third coats? Thanks
So I am trying this project but I am stuck at making the sides. I can get the jigsaw from getting jagged lines. Can you give me some advice?
I cannot seem to figure out how to measure the x pattern. Could you possibly get angles or a video on how you made them
My boyfriend and I made these for our bedroom. One thing we found hard was cutting out the “x” patterns. We found it easier to cut the “x’s” out from a larger piece of word, rather than having the 3/4 inch sides to clamp onto and rearranging the clamps every few seconds. They look great and were a fun project!