Tall Patio Console Table
Today I am happy to share a fun “double” repurposed project with you…
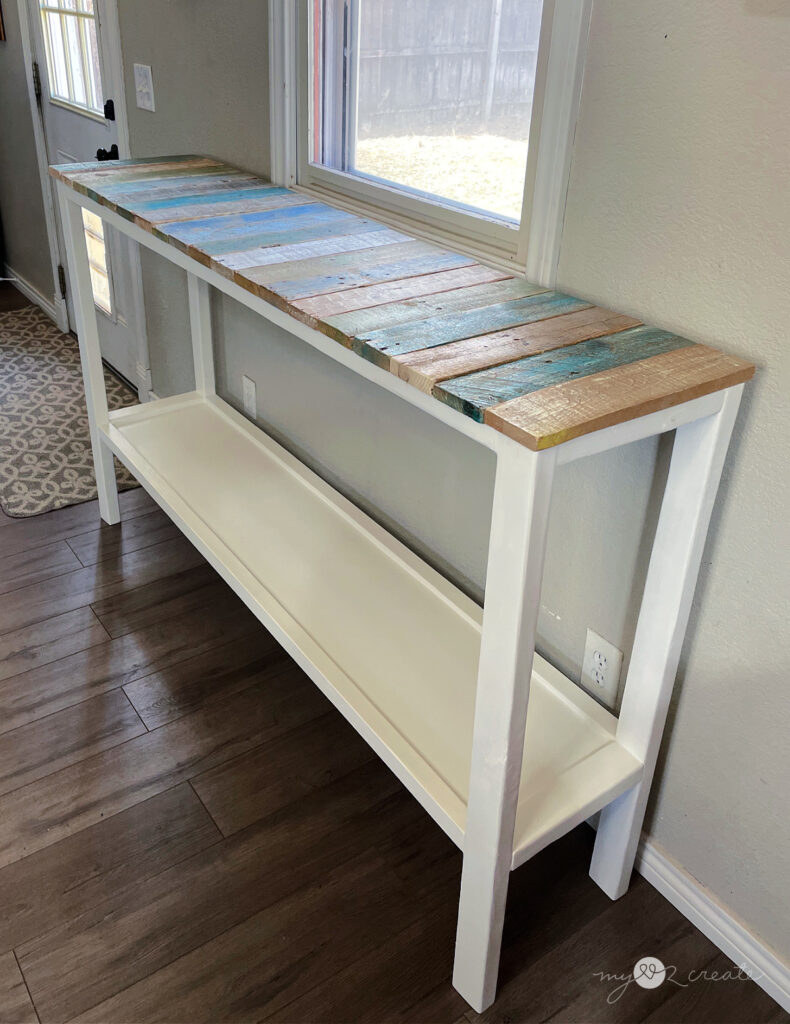
My newly built Tall Patio Console Table!
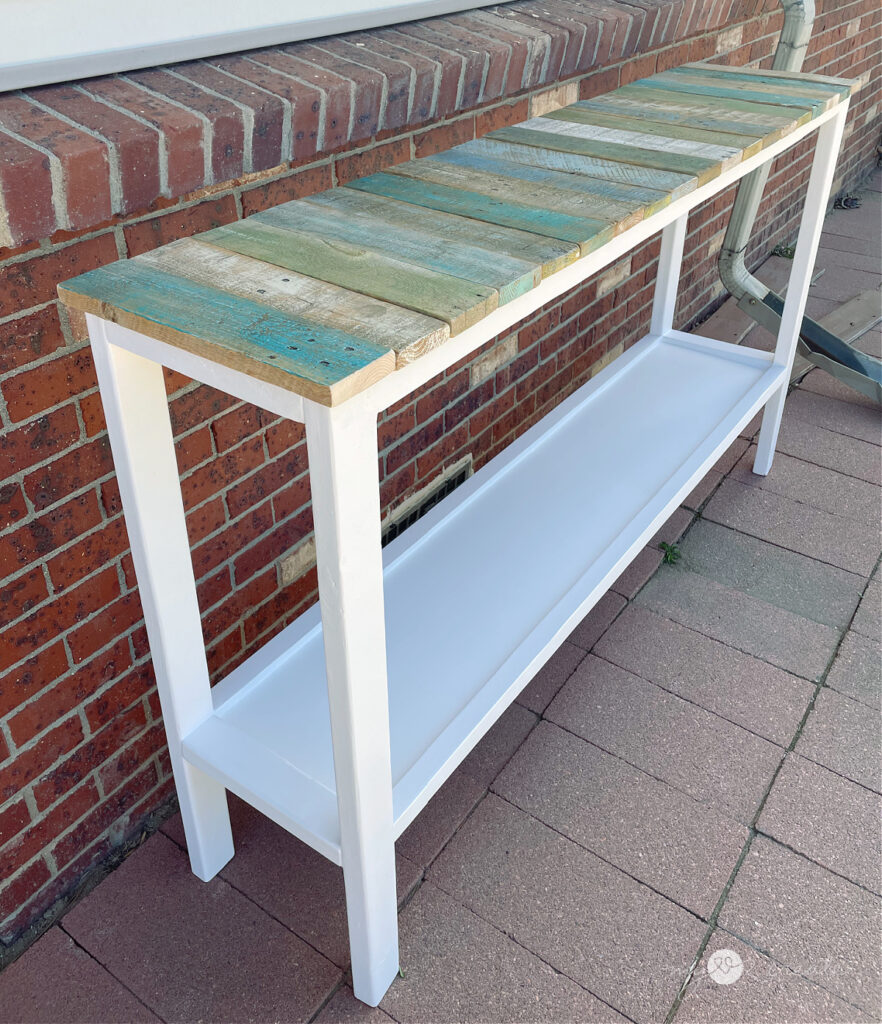
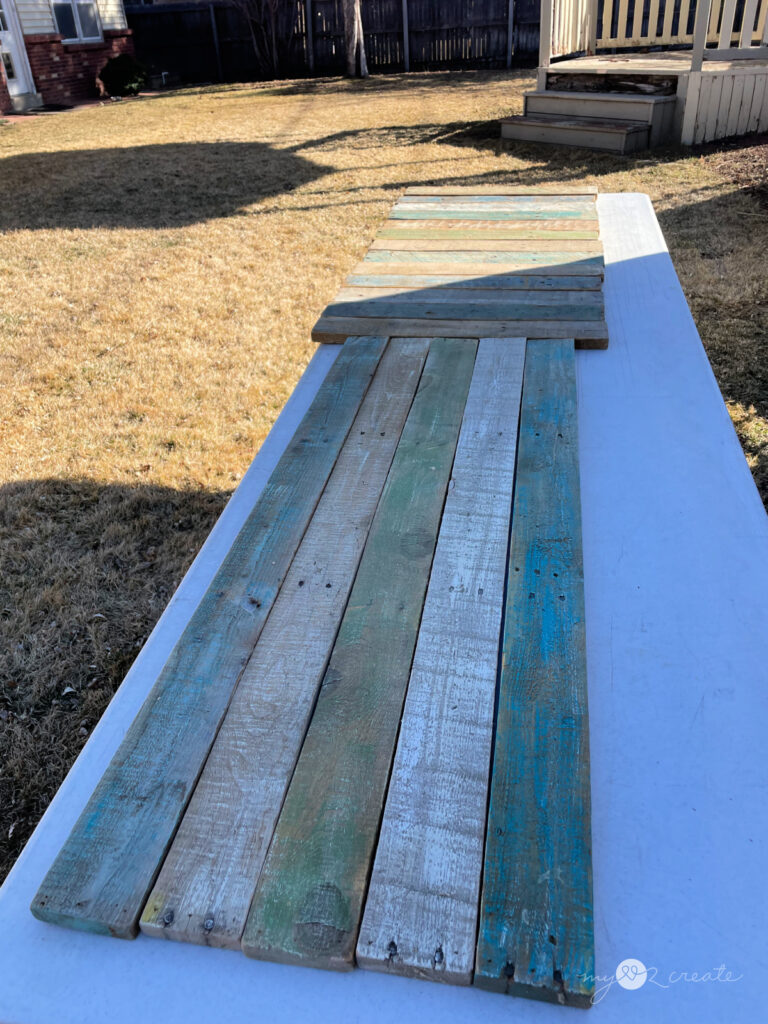
I love it! “Double” repurposed you ask? Well, yes. The pallet wood on the top of this table used to be on a coffee table that I repurposed many years ago…
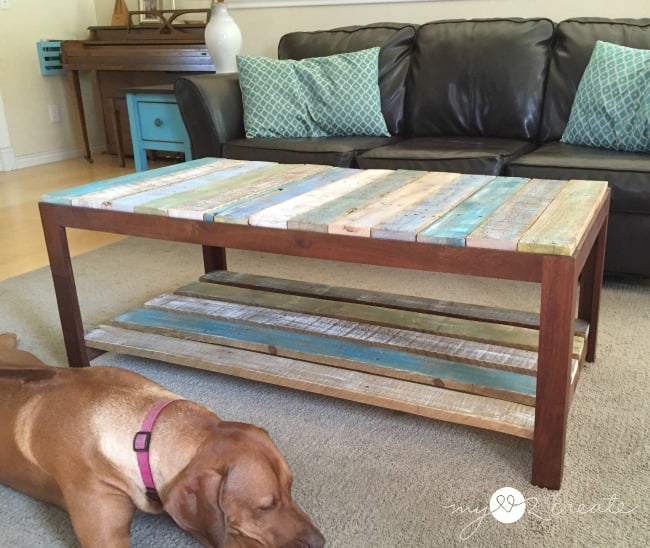
Super fun right!? I loved it, but when my son jumped on it and broke the frame, sadly I had to trash it. But…I saved the pallet wood to use on a different project in the future. That day has finally come, folks!
I have been SLOWLY working on my back patio, and I realized that this pallet wood would be perfect for the top to a console table. I installed a projector screen on the porch and we needed a spot to place the projector behind the patio furniture, so I set to work.
How to build a Tall Patio Console Table
*This post contains affiliate links (learn more)
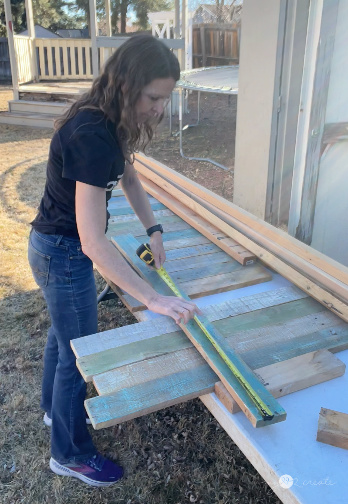
Step 1: Measure your Space and determine the length, height and width of your table.
I measured the spot behind the patio furniture and determined roughly how long I wanted the table. Then I measured the space behind the furniture and figured out roughly how wide or deep to build it. Lastly, I measured the top of the patio furniture and made it several inches higher so the projector would clear any heads sitting in front of it. 😉
I also determined that I would spend zero dollars on this project, which meant in addition to using the repurposed pallet wood, I would need to use some scrap lumber I had laying around to build the table base. So I did some measuring of the pallet wood and scrap lumber to help determine the final size of the table.
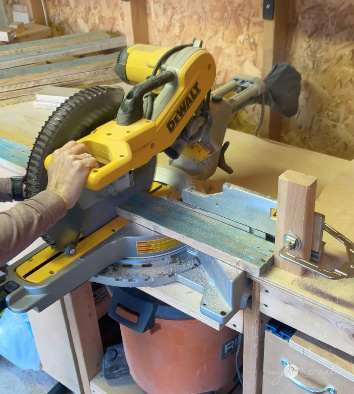
Step 2: Cut wood pieces to size
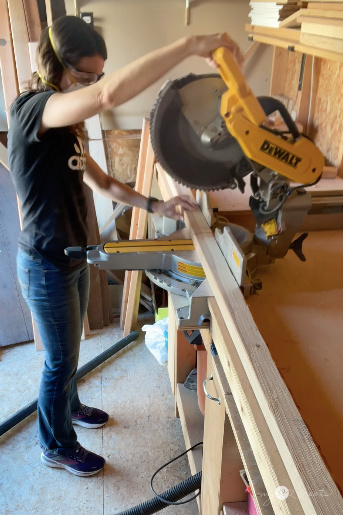
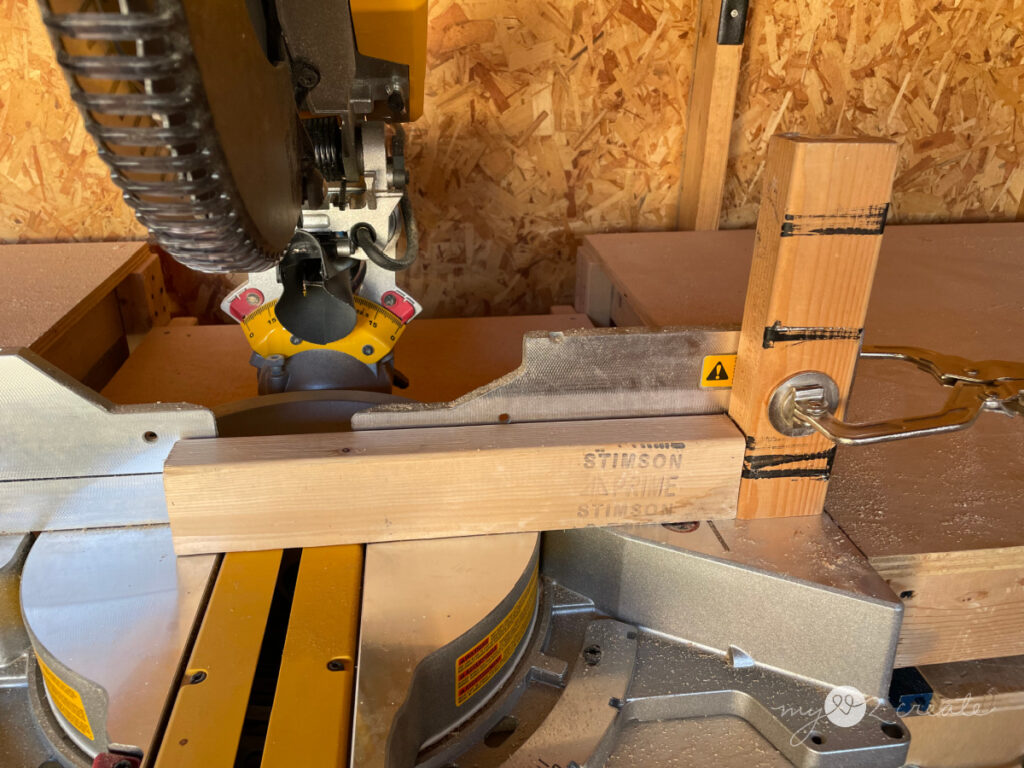
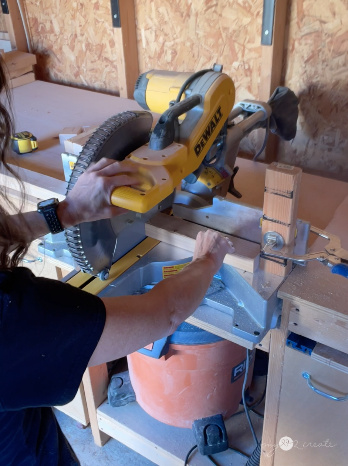
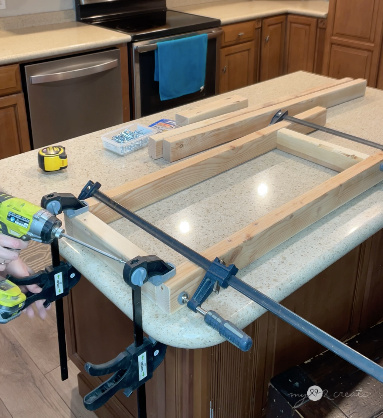
Once you determine your measurements for your table, it is time to cut all your pieces to size. For multiple pieces that are the same size I like to save time measuring and use a stop block of scrap wood (middle photo) that I clamp to my miter saw. I cut my 4 rail pieces that will be connected to the legs to this length as well as the support pieces that will go in the table frame. This is a fast way to get them cut and all the exact same size.
Step 3: Drill Pocket holes and sand
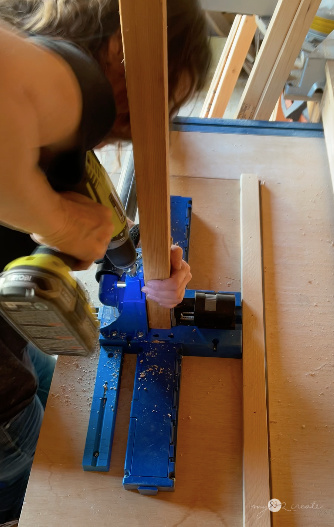
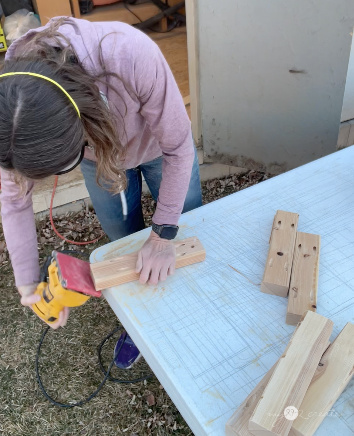
Once all my pieces for the table frame were cut, I drilled pocket holes into the rails and support pieces for building the frame. Then I sanded all the pieces before building. I also created a stop for the pallet boards and cut them to size for the top of the table.
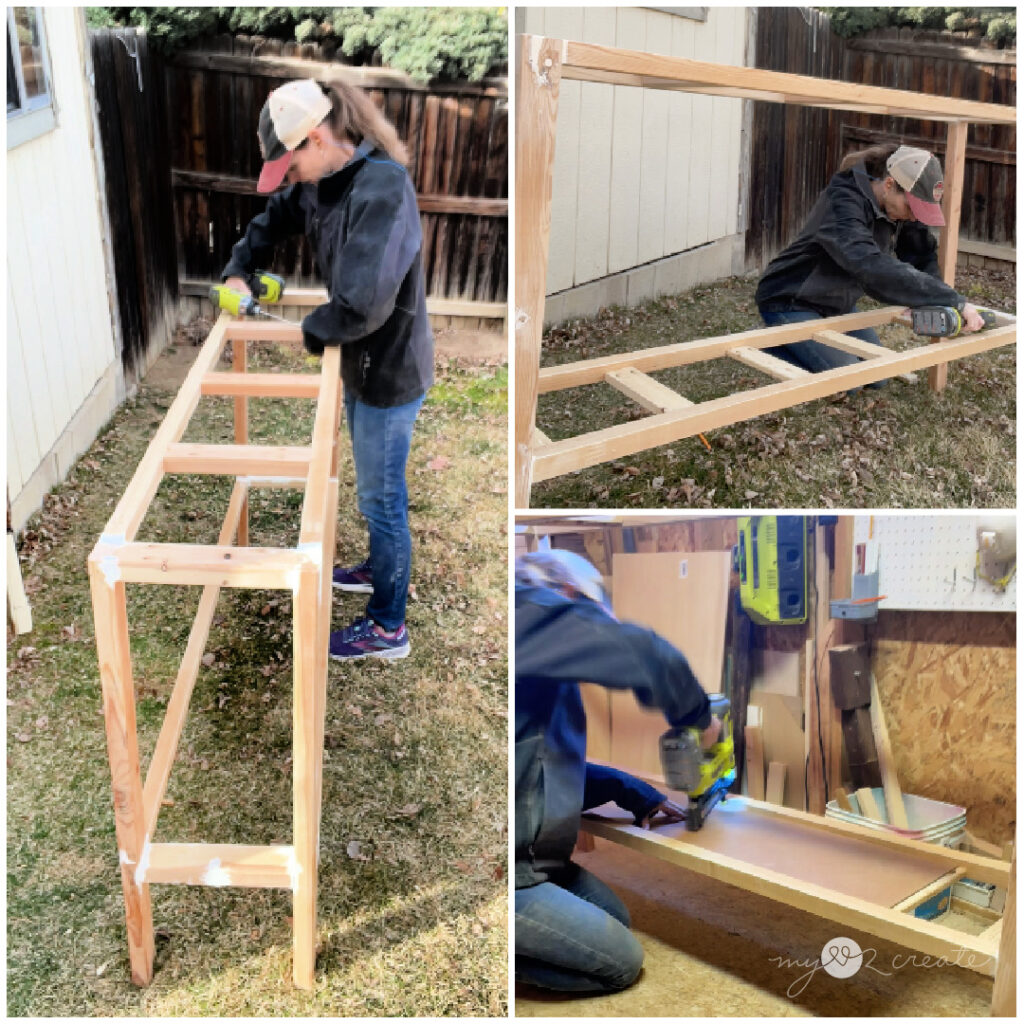
Step 4: Build table frame
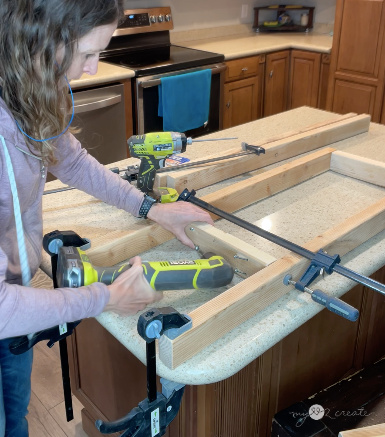
I started by building both sides of the table base by attaching the top rail and bottom rail between the leg pieces. I used 2 1/2” pocket hole screws, since I was using 2×3 lumber. I did the top rail flush to the top of the legs and then picked a random height for the lower rail support. I ended up using my right angle drill to add the pocket hole screws, this is not easy, in such a tight space. I would recommend pre drilling from the outside of the leg into the rails with 2 1/2” screws. However, I am stubborn, and since I had already drilled pocket holes I was determined to use them. Good grief!
I added the long rails to connect the side pieces on one side, then I flipped it over and added the other side.
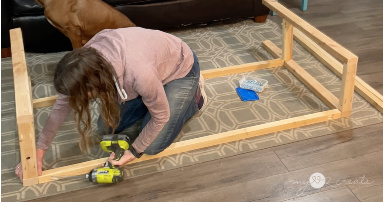
Ta da!! An instant table base…so fun! Now you have to remember that when you work with scrap wood, chances are you are not going to have straight boards. My leg pieces were pretty warped. I knew this would cause imperfections in the build, but I was ok with that because most people won’t notice, it is for my patio, and I built this for…FREE!! Totally worth it, in my book. 😉
Step 5: Add support pieces and bottom shelf
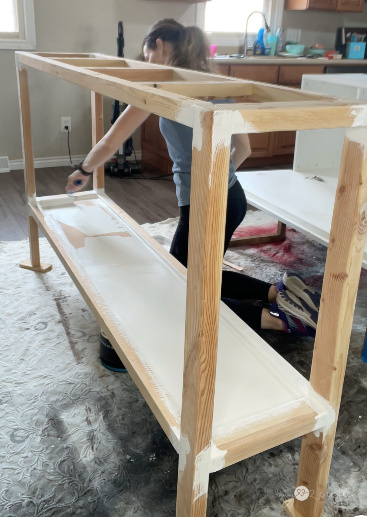
I added support pieces to the top of the table. For the bottom I was going to leave it and then at the last minute I thought it would be fun to add a shelf, so I added some 1×3 support boards and used some scrap chipboard to make an inset lower shelf. I simple cut the chip board to fit the opening and then nailed it to the support boards with 5/8″ nails.
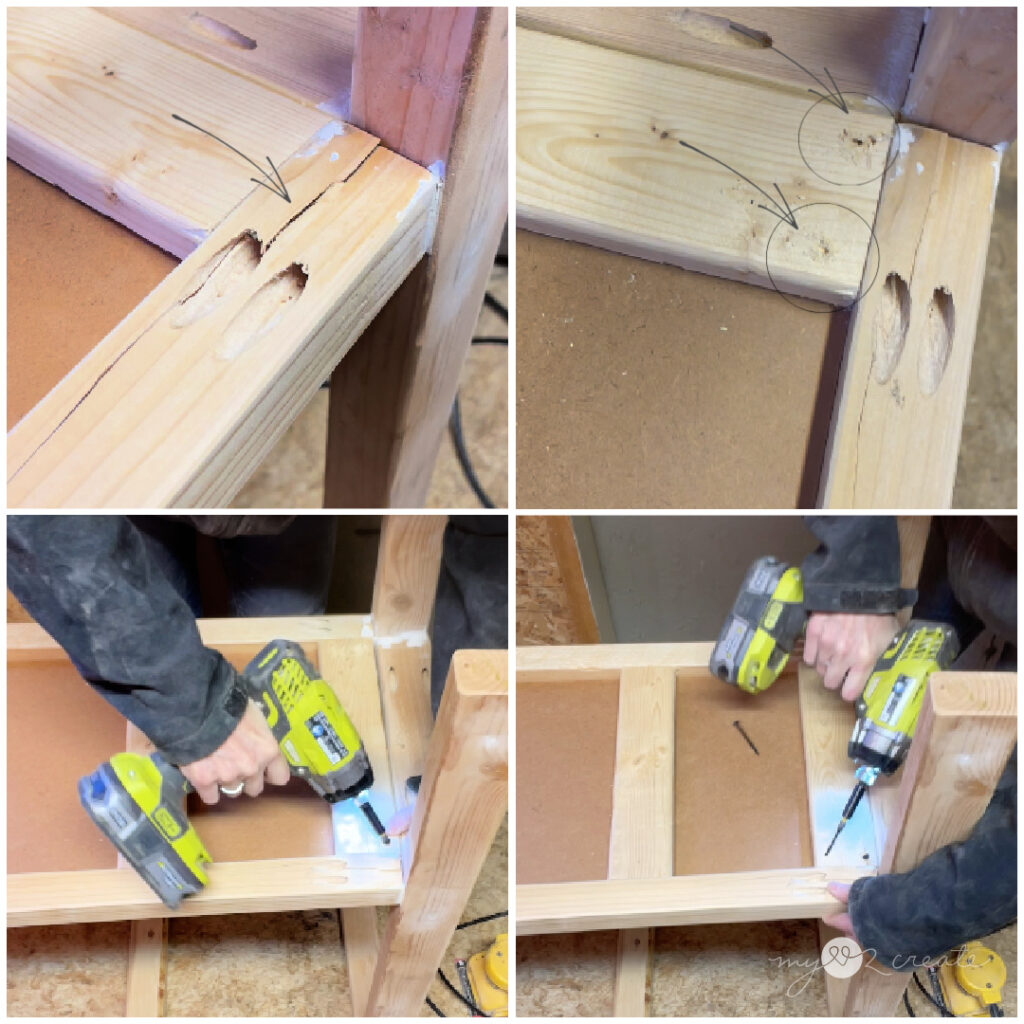
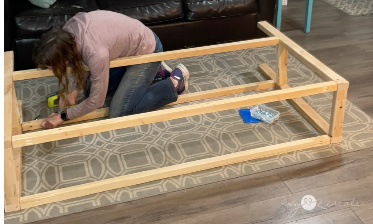
Remember when I said I was using warped scrap wood? Well these 2×3 furring strips ended up splitting on one side when I nailed the chip board shelf on. I flipped the table over to access the damage. I quickly realized that I could fix the problem by anchoring the support board into the 2×3 side boards and the legs on each side. I pre-drilled two holes in each side at a steep angle and then drilled in 2 inch self tapping screws. This baby is nice and sturdy now, problem solved! Phew!
Step 5: Prep for paint/stain for table base
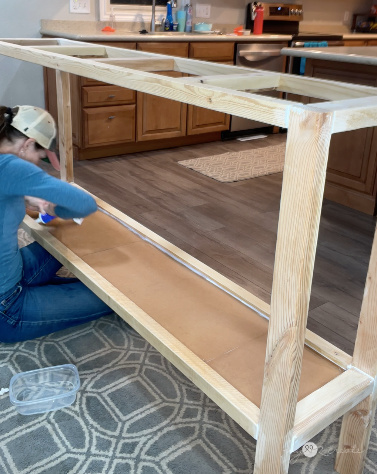
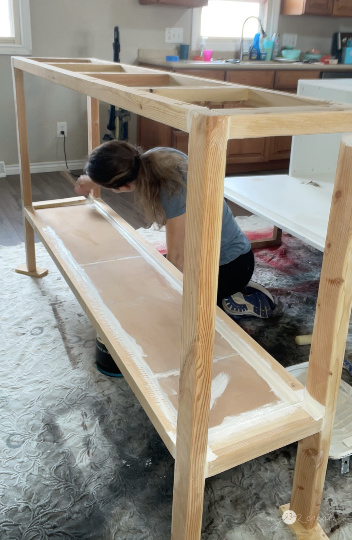
I filled the edges of the bottom shelf with caulk so it was ready for painting. Then I did all the edging for the paint and rolled the rest of the paint on with a foam roller.
Step 6: Add Pallet boards for table top
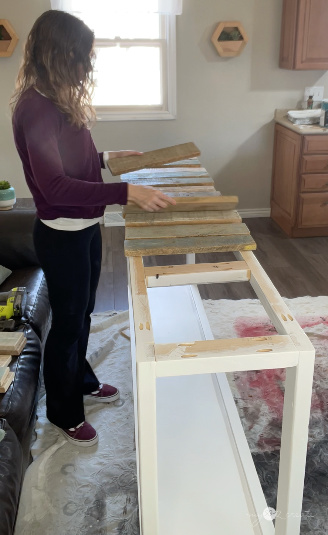
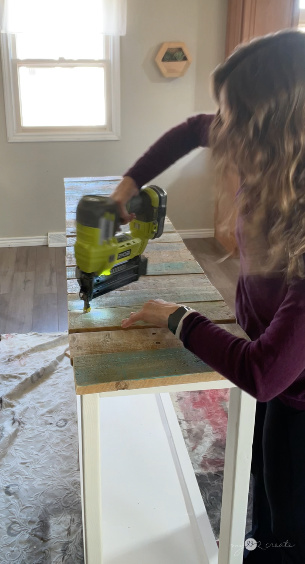
Because my pallet boards were repurposed and I wanted to keep the same finish, I just arranged them on the top how I wanted them and then nailed them to the top frame with 2” finish nails. Done!
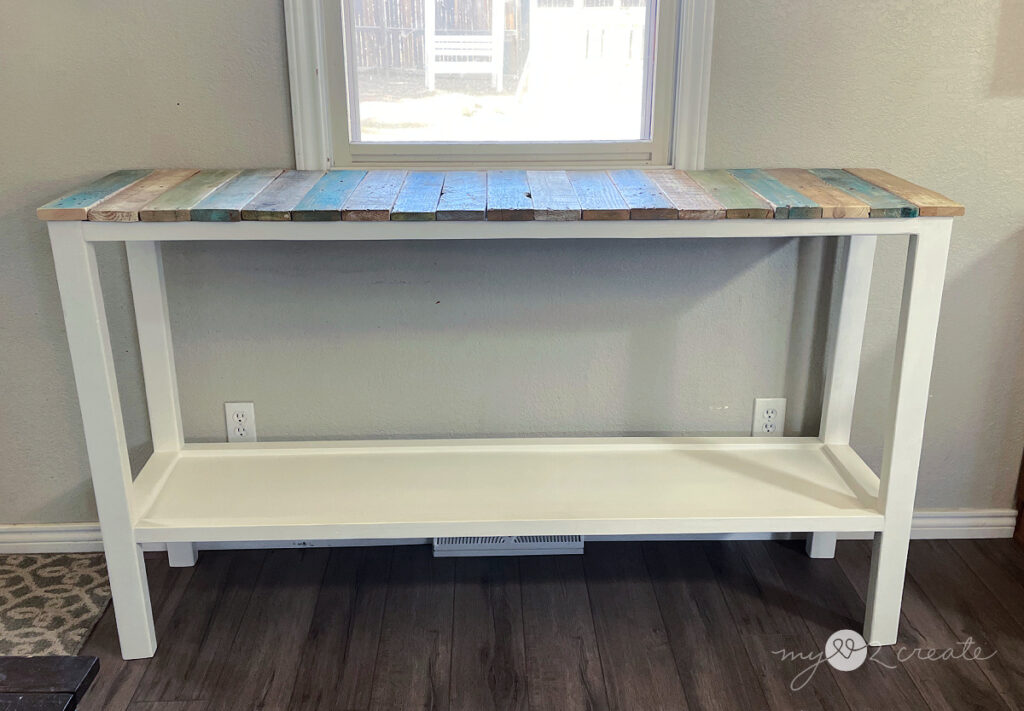
I think she is pretty dang cute if I say so myself!
And once I get my patio in a place where it is worth seeing…then I can show you how she will help us out!
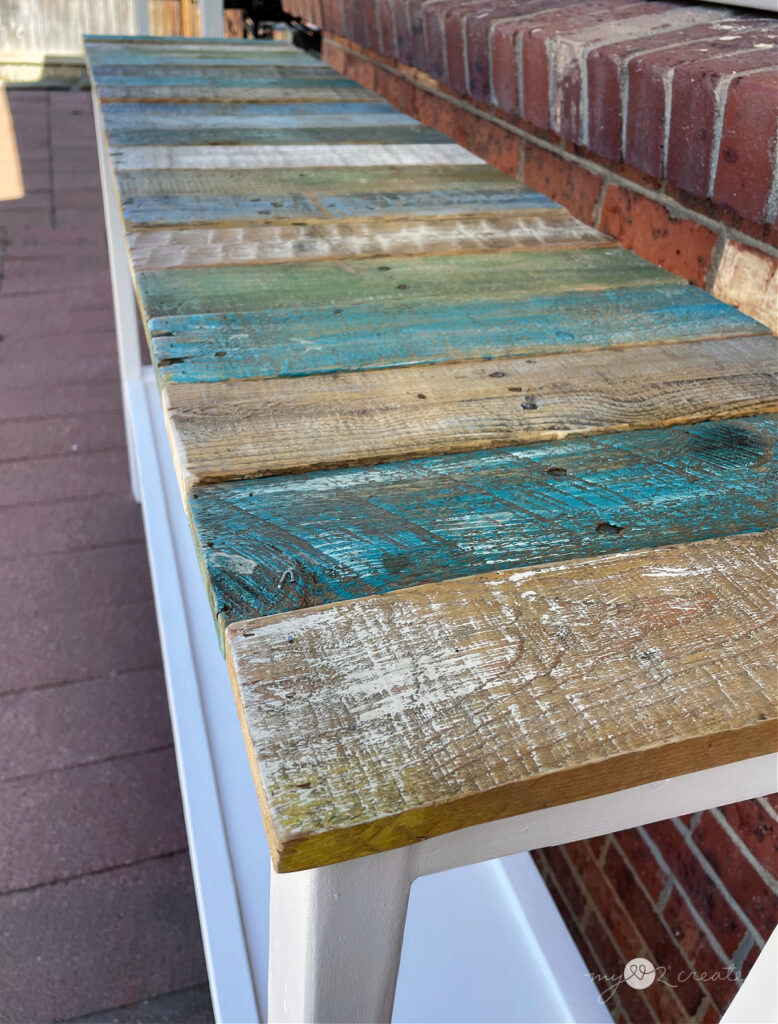
For now I am VERY happy to see these pallet boards put to good use! 🙂
I hope you enjoyed this project and if you are interested in me sharing building plans for this build, let me know!!

Thanks for sharing and pinning!