Triangle Hexagon Tray
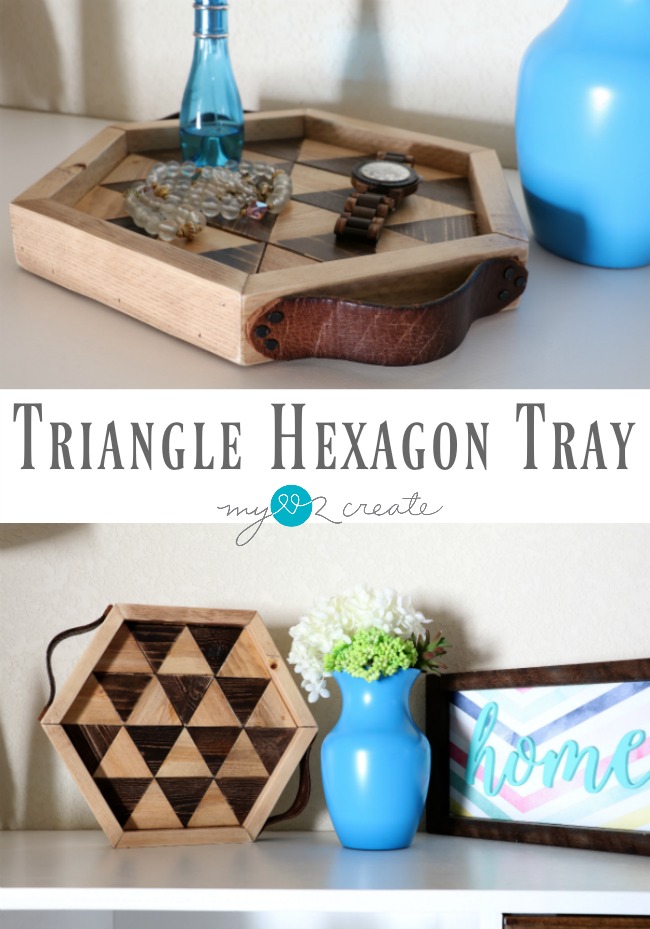
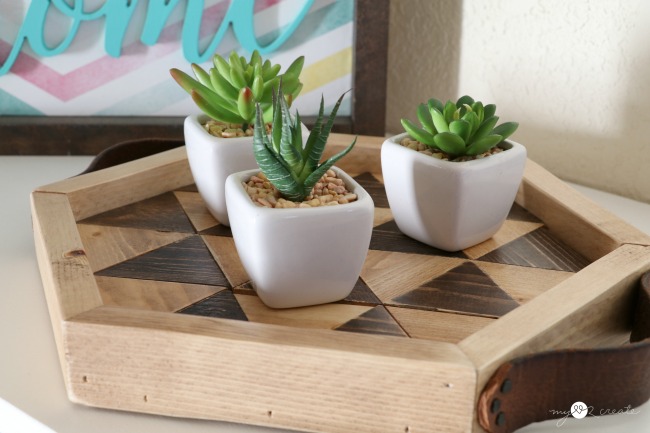
As part of the Power Tool Challenge Team, I am excited to share my project for this month, a Triangle Hexagon Tray.
Does that name sound confusing? Ha ha! Yes it is a hexagon shape, but I made it out of triangles, there is a method to my madness! 😉
The theme for this month was to do a project using your favorite tool. Picking a favorite tool is sort of like picking a favorite family member, you just can’t do it, because you love them all…right!?!
I went with the Miter saw, I love this tool. Partly because it was my first big power tool, and also because you can make so many cool cuts with it, and it is easy to use. 🙂 Which leads to this tray…
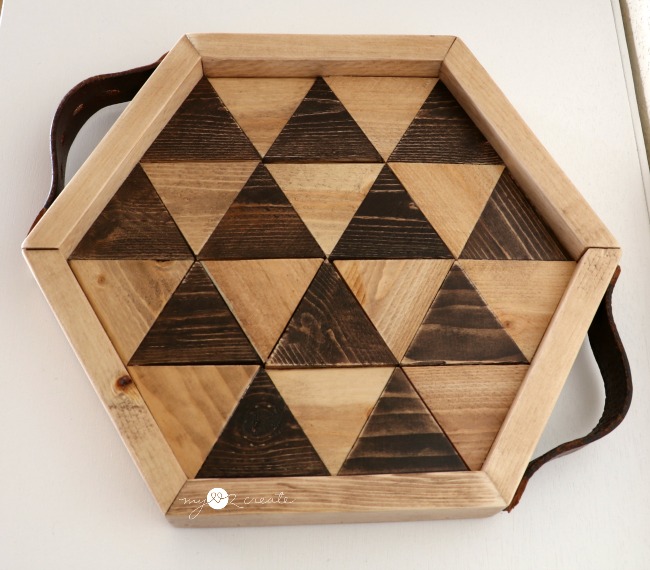
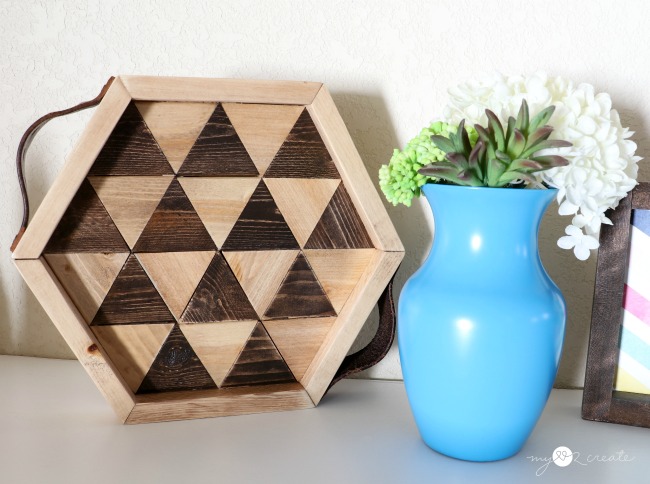
Isn’t it cool!?! Plus it is easier to make than you think, but you will never know unless you try! So don’t look at it and say, I could never do that BECAUSE YOU CAN!!!
Let me give you a little back ground on how this project came about. I did a similar project with triangles a few years ago, my Pallet Top Table, and I still love it.
At the time I made it, I just picked a random angle on my miter saw and started cutting triangles. I had no idea that the random angle I set my saw at, which was 30 degrees, also happens to be the magic angle for making hexagons. I just wanted a fun pattern.
Fast forward a year or so and I made my DIY Hexagon Planters, which you cut the wood at 30 degrees to create. I recently had the thought if my triangles and hexagons were both cut at 30 degrees then you could combine them and have all your angles match up. So I tried it, and it worked!
How To Make a Triangle Hexagon Tray:
This post contains affiliate links that help me at no cost to you! Thanks so much! Read more.
Supplies:
- Scrap 1×3 boards or 1- 1″x3″x8″ board
- Scrap 1×2 boards or 1- 1″x2″x8″ board
- Scrap 1/4″ hardboard or plywood size depends on how many triangles you use, for 25 triangles cut from a 1×3 board you will need it approx. 11″x11″
- Gorilla Wood Glue
- Stain (of your choice)
- Finish nails
- Nail gun with 1 1/4” finish nails
- Miter Saw
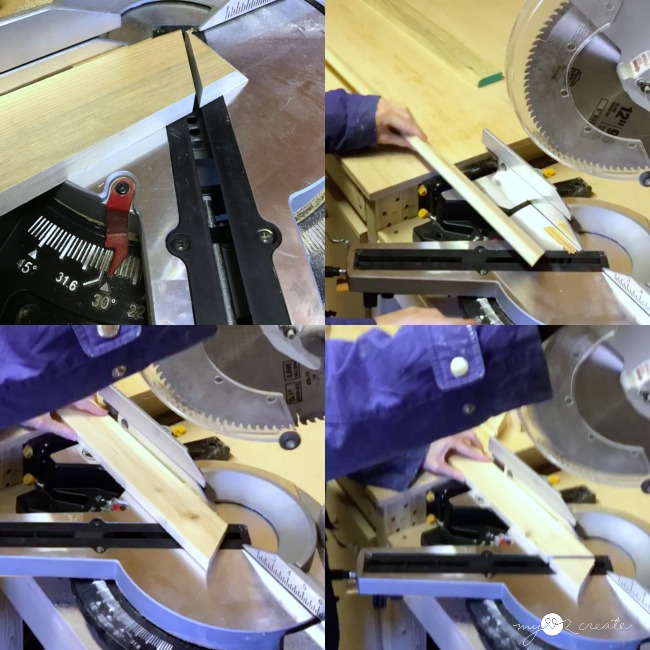
Step 1: Cut your 1×3 board into triangles.
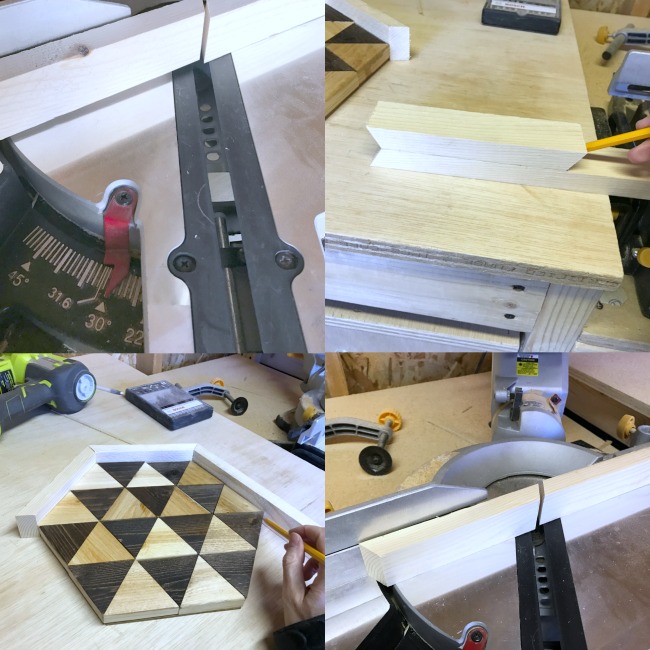
Set your miter saw at 30 degrees and cut off the square, or straight, end of your board (top left). Then flip the board over (top right). Push the board up to the fence and line it up with the blade to cut it at the tip of the board (bottom left). Then cut out your first triangle (bottom right).
Remove the triangle, flip the board and cut another triangle. Repeat this process until you have 25 triangles.
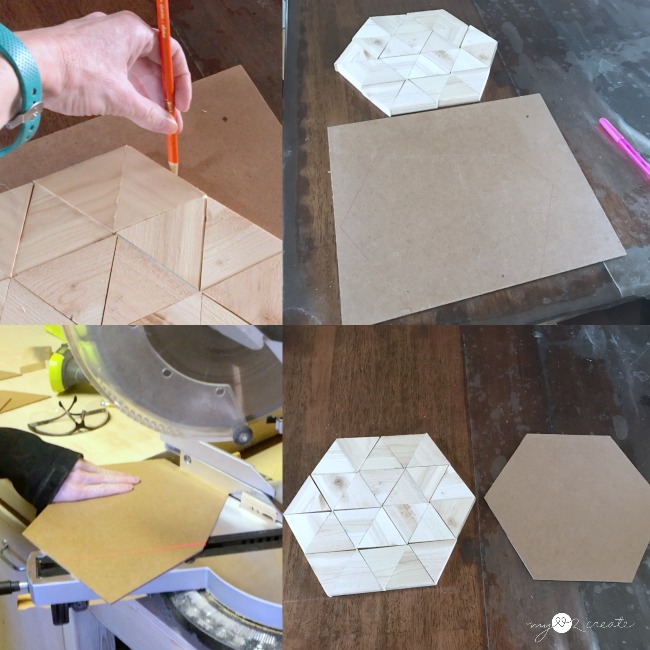
Step 2: Cut your 1/4” back piece into a hexagon shape.
I found a thin scrap of hard board, you can use 1/4” plywood too. I set up my triangles on top of my back board into a hexagon shape, then I traced around the pieces (top left). This gave me my shape to cut (top right). Since my saw was already set on 30 degrees I just lined up the edges of my board to the fence and cut on all the lines to get my hexagon back piece (bottom left/right).
Step 3: Stain triangle pieces.
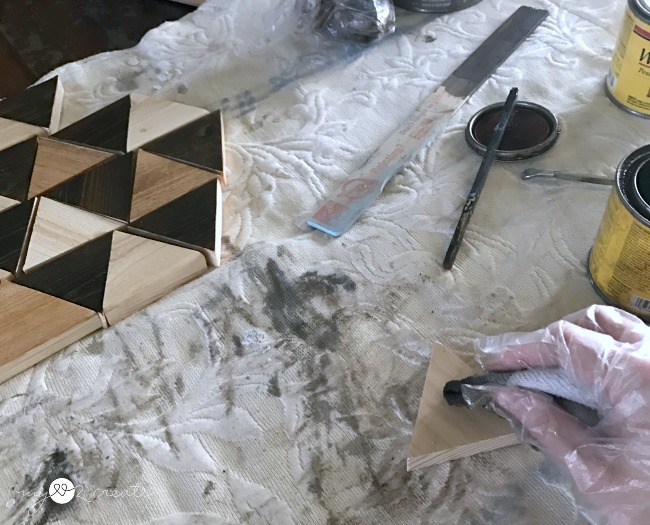
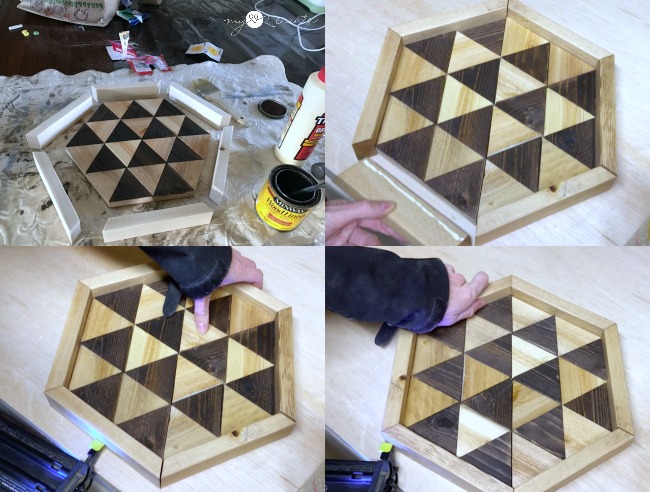
If you want a contrasting pattern in your triangle pieces, which will make a cool geometric pattern, then you need to stain them first before attaching them to the bottom piece. I choose to do a dark stain and a light stain, alternating every triangle.
Step 4: Glue triangle pieces to back piece.
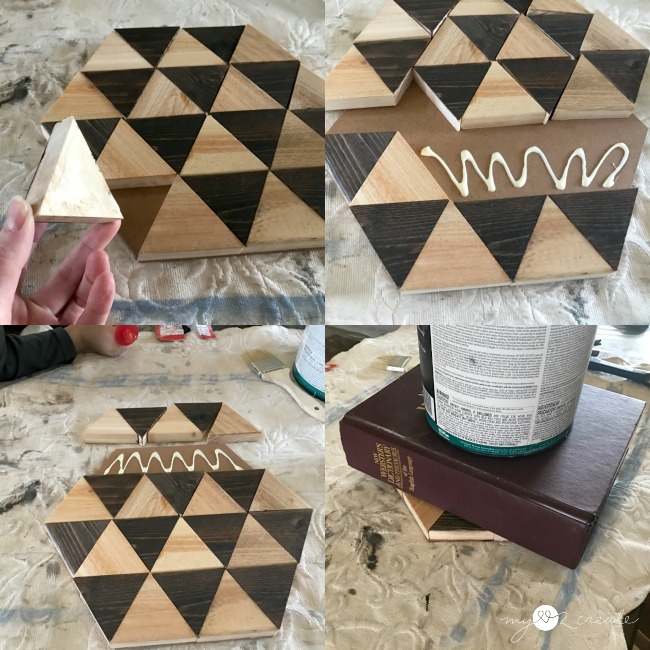
Place your triangle pieces on top of your back piece. Remove one piece at a time and glue it to the back with wood glue. I eventually got lazy and started adding glue to the back piece instead, and then attached the triangles, this method was much faster. Once done, I made sure they were in the right position on the back piece and then set a large book and a paint can on top while the glue dried.
Step 5: Cut the 1×2 frame pieces.
Set your saw set at 30 degrees. Place your 1×2 on the thin side for cutting your frame pieces.
*An easy way to mark for accurate miter cuts is to place the boards short ends together (top right photo) and then mark for the second cut .
*TIP: For greater accuracy when cutting angle pieces, cut one piece at a time and measure it to your project as you go (bottom left photo above). When in doubt it is ALWAYS better to cut a little too long, you can keep making smaller cuts until you have a perfect fit…but you can’t add wood back on!
*The short sides of your frame pieces need to be the same length as your hexagon sides on your project.
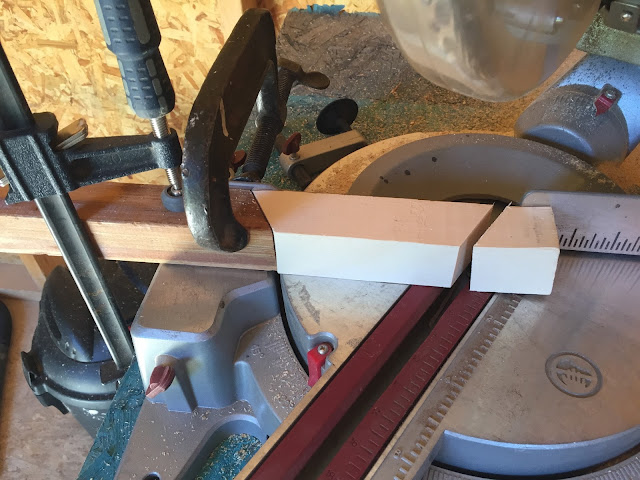
*Tip: If I am making a LOT of cuts the exact same, it is worth it to make a stop on the miter saw. This is done by cutting a scrap piece at the same angle you are making your cuts at, and then clamping it on the fence of your miter saw. Make sure that you are clamping it so that the wood piece you are cutting will be the size you need, adjust if necessary. Using this method will ensure all your cuts are exactly the same. The shot above is of the stop I used when I made my Hexagon Planters. It saved me a ton of time, because I didn’t have to measure! If I am only making a few cuts then I prefer to use the previously mentioned methods.
You can also cut bigger boards at 30 degrees, it is done by using a bevel cut, where you actually tilt the saw blade to one side, instead of just turing it off square (like I am doing on this project). To see how, check out my Hexagon and Triangle Shelves post.
Step 6: Glue and Nail on Frame pieces.
After I sanded and stained the 1×2 frame pieces, and let them dry, I glued and nailed them onto my triangle hexagon shape with my Ryobi Nail Gun .
.
Place all frame pieces around the hexagon, then one at a time add glue and nail them on. I like to keep the pieces in place so that I know I am adding them to the project in the exact right spot. Once you have nailed all the frame piece into the triangle hexagon shape. Go back and attach nails into the corners of the frame to secure them as well (bottom right).
Step 7: Add a clear finish and handles.
I sealed the tray with 3 coats of ploy, lightly sanding with 400 grit between coats 1 and 2. The sanding gives it a really smooth finish.
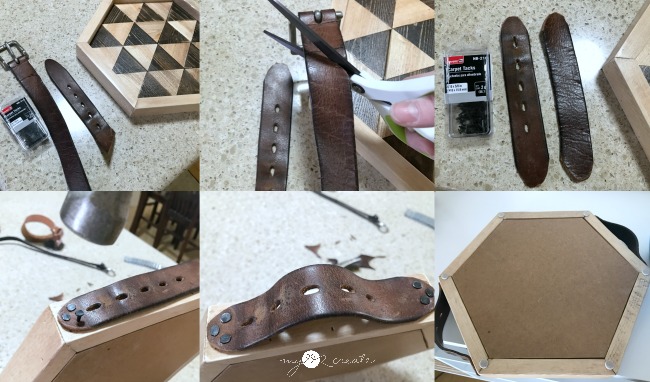
For handles I grabbed some letter belts left over from my Leather Belt Crate and cut them longer than the sides of the tray. I used Carpet Tacks to nail them on. Then I added small felt circles to the bottom to avoid scratching.
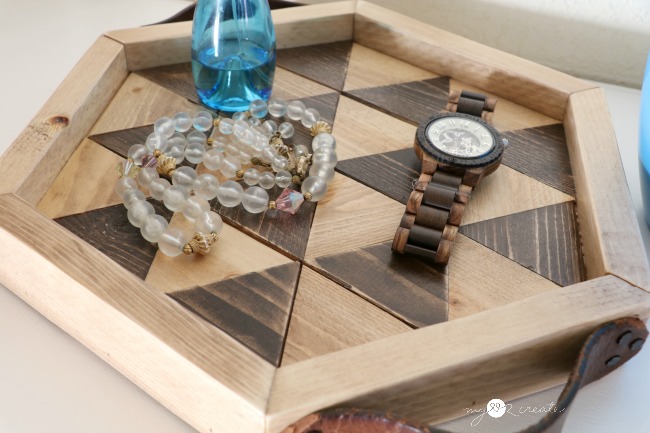
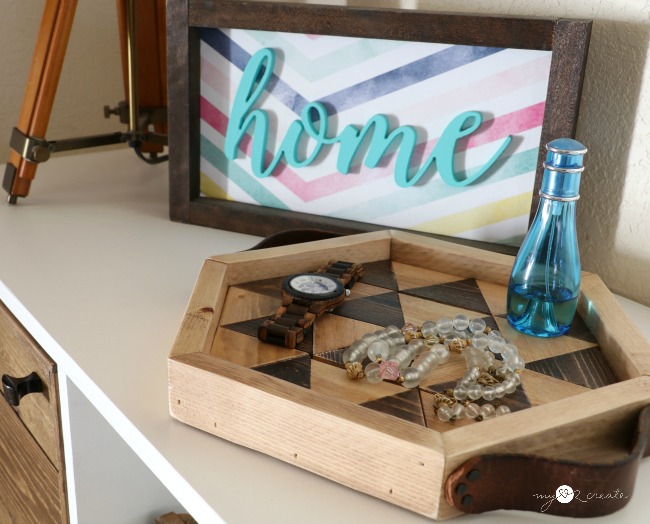
It is the perfect size to hold trinkets, or soaps and lotions, or really for whatever you need!
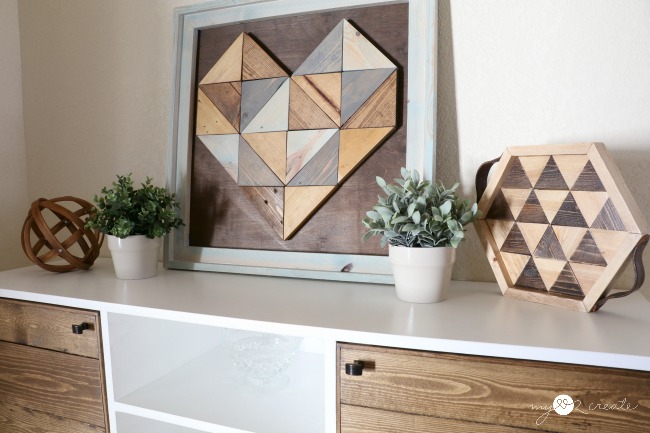
And quite honestly I think it makes a statement as art too! Of course if you wanted it for this purpose you wouldn’t need to add the handles. 😉
The possibilities are endless when you think about it! If you want it bigger, simply cut bigger boards like 1×4’s or 1×6’s. Smaller? Cut 1×2’s. Or just add more triangles to make it bigger, or less to make it smaller. As long as you have enough to make the hexagon shape with them, then you can make it as big or small as you want!
It fits right in with my Wooden Triangle Heart, which was also cut on my miter saw. Except I cut those triangles at 45 degrees. See how much fun this is!?!
I hope you have been inspired to try out the miter saw. I promise that your angles won’t be perfect at first, and that is ok!! Trust me my angles are NOT always perfect. It takes practice, but honestly it doesn’t matter especially on these types of projects! So be brave and give it try, you won’t be sorry!!
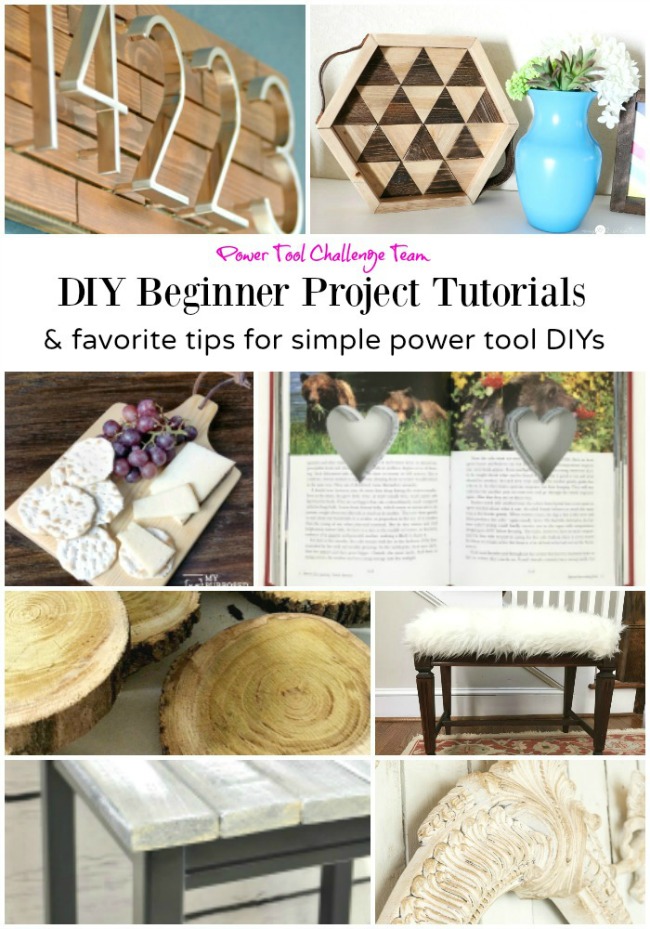
Now let’s get a look at all the other Power Tool Challenge Team member’s projects and see what tools they picked as their favorite! Be sure to show them some love and click to see their posts on the links below!
H2OBungalow DIY Horizontal Wood Slat Address Plaque
My Love 2 Create – Triangle Hexagon Tray
My Repurposed Life – DIY Cutting Board
The Kim Six Fix – Scroll Saw Book Letters
Create and Babble – Cut Wood Slices
The DIY Bungalow – DIY Faux Fur Foot Stool
The Interior Frugalista – Small Portable Rolling Multi Purpose Table
Designer Decor – Ornate Oval Wood Frame Update
Thanks for stopping by!
Hugs!
Mindi
I will be linking to these parties, Savvy Southern Style.



Mindi! You are an inspiration! I've marveled at your angle cuts for the longest time and love the tips you shared. Especially the one to make several cuts the same! Brilliant! I can't wait to make one of these and have the perfect place for it too! XO – Wendi@ H2OBungalow
Ohh Mindi! How awesome your triangle hexagon tray is. Just saying it makes me nervous. Angles – have done them, sometimes even successfully…. but you really take your triangles to the next level! As soon as I saw this project in the collage, I knew it was yours! Lots of great tips for a novice, and even me!
pinning!
gail
What an awesome project! I love this and need one for my home.
That is gorgeous! I love the heart even more – I think that might be a build project in my future! Pinned and shared!!
I really love your tray, Mindi and knew as soon as I saw the hexagon shape in the photo collage that it was yours! You were so right when you said it is simpler to make than it looks, thanks to your awesome tutorial and tips. This would make fabulous gifts. Pinning to share and bookmark.
How different that you didn't just go square, very unique!
All I can say is "wow!" It's like a big puzzle that you put together beautifully. Looks great with the heart also. Great job!
Oh Mindi!!! You and your AWESOME 'angle-icious' art!! Lol!!! You never cease to amaze me girl!!!
Very cool project. I really love all the geometric decor I'm seeing everywhere, and this is such an inexpensive project that looks amazing! Thanks for sharing with us at the Home Matters Link Party:) #HomeMattersParty
Very cool. Thanks for the share. Adding to my Pinterest queue.
I absolutly LOVE this one! So creative. You make it look so easy!
This is great and I love the tutorial – I'm thinking of all the things I can make with triangles now! Thanks for sharing at To Grandmas House We Go link party xx
PS – I'm featuring your fabulous tray this Wednesday at House of Hollingsworth Blog! xx
Not only is it functional, but beautiful as well! Thanks for sharing with SYC.
hugs,
Jann
This really interesting post. Thanks for sharing!
I enjoyed on reading your blog post. Your blog has a lot of useful information for me, I got good ideas from this great blog.
usps tracking
Nice work, the finished project is really nice. I love power tools too and really enjoyed your blog. I am going to follow your blogs. Thanks for the inspiration!!
Good article and knowledge for me! I found a lot of information here! This article is really good for all newbie here. Thank you for sharing with us!