Ah Drawers…
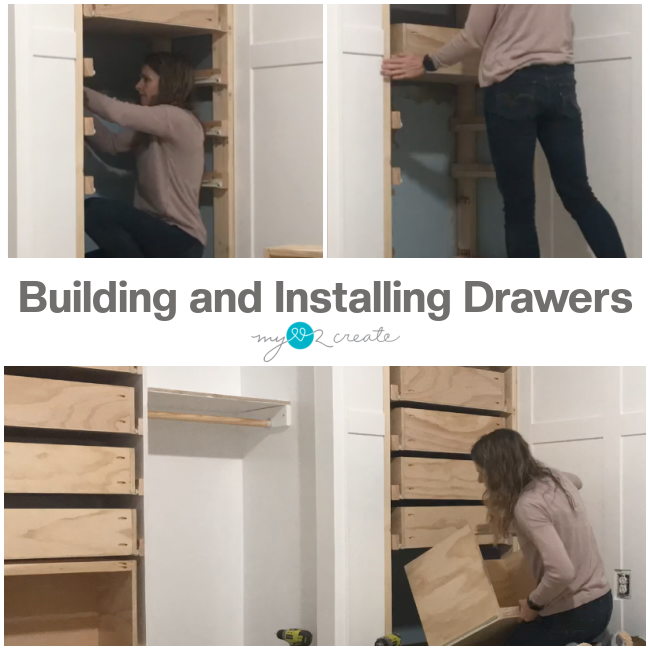
I LOVE having drawers, they can hold hide so much behind their pretty faces and keep things organized. In a built-in they are a definite must. So this week I am sharing how I built and installed the drawers for my closet and niche, with some helpful tricks that make the process much easier!
Let’s get started shall we?!
Building and Installing Drawers
Step 1: Cutting and prepping the wood for building
For step one, I send you back to the drawing board, your plan. When it comes to drawers, you need to think through all the things. How wide the drawers will be, how deep, how tall, what thickness of wood you will use, the type and size of your drawer glides. Also, what type of face or front will you be putting on your drawers, will you have a face frame around them? Etc…
See, so many things to think about! You will need to calculate all those things based on your tower, niche, or frame where your drawers will be installed. This is where you math skills are put to good use. Woot!
I built my drawers using the easiest method, ANYONE can do this! I cut plywood according to the sizes I needed for my plan. In this case I have two sets of drawers to build. One for the tower in the closet and one for the niche. The drawers in the tower are smaller than the niche drawers since the niche is wider, you will see how I adjusted for those differences throughout this post.
I am not going to share measurements since this is a custom project, measurements for my project will be different for yours. 🙂 But the basic process is the same. After I cut all my wood for the drawers; sides, front, and back cut from 3/4” plywood, and the bottom cut from 1/4” plywood. I was ready to drill pocket holes with my Kreg jig. This makes building drawers a cinch! I love using pocket holes. I am ready to upgrade to this
Kreg Jig, it is next on my wish list.
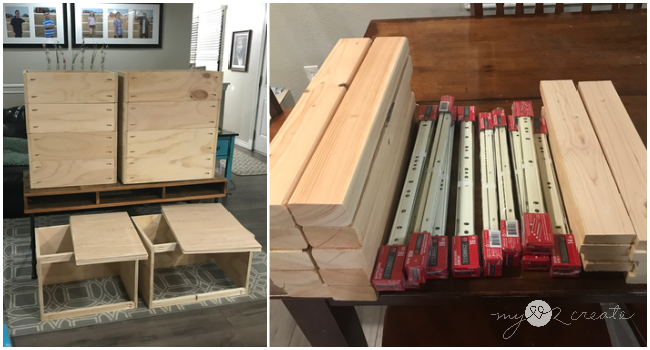
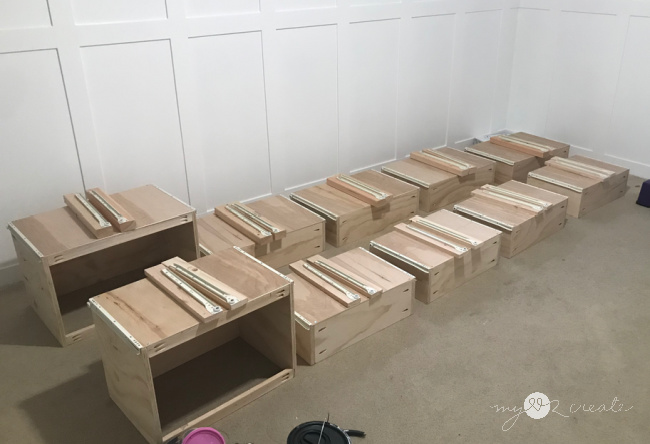
There is a lot of work that happens to get to this photo. Which is why I love it so much. The planning, measuring, calculating, thinking, re-thinking, visualizing, then calculating again, buying, measuring, cutting, drilling, sanding…SO many hours. For real.
I am sort of obsessed with stacking my nicely cut, sanded, and pocket hole drilled wood when it is ready to be built into the awesomeness it is destined to become. I know I am weird, but it makes me happy to see all that hard work lined up ready to be transformed into something useful!
Step 2: Building the Drawers
Here we go, this is fun!
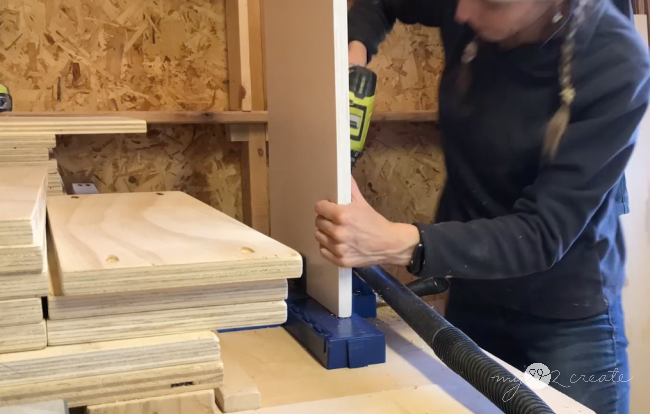
I like to use my Kreg Right Angle Clamp, when building, it is seriously the best! I started by attaching my front and back pieces to one side piece, then I added the other side piece to make an open box.
ALWAYS make sure you check for square when building drawers, TRUST me you need your drawer boxes square, otherwise you will have problems when you install them.
As you can see the bottom right drawer in the photo above looks a little different. I like to build hamper drawers into my closet built-ins so we have a place to put our dirty clothes. You can see them in my
Master closet and my
Teen Boy’s bedroom reveal. I used 1×2’s for the front of these drawers, you will see why next week!
Yay, more stacking!! Happiness!
With my drawer boxes all built I am ready for the next step, to add the bottoms and my
bottom mount drawer slides. My built-in’s will have a face frame around the outside of the drawers, I had to cut scraps of wood to install the drawer slides onto so they can be clear of the face frame that I will add later. This is why planning is so important.
For the tower in the closet, my face frame will be a 1×2, so I have the 1×3 boards to install my slides on. For the niche, my face frame will be a 1×3 so I needed a wider board to install the drawer slides on, I used 2×3’s.
I know that seems confusing but look at the photos for this post and next week’s post and it will make sense. A picture is always a worth a thousand words.
Step 3: Attaching drawer bottoms and drawer slides.
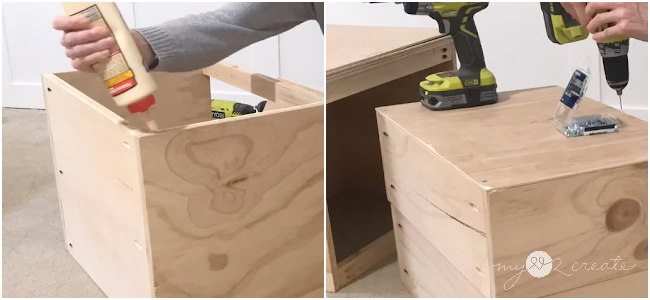
There are tons of different ways to build drawers. Like I said before, this is the easy method. Build a box then add a bottom. Simple. I used 1/4” plywood, wood glue, and 1/2” screws to attach my bottom pieces to each drawer. Make sure you pre-drill your holes before you screw them together so the wood does not split.
For adding the drawer slides, I have developed my own little system for adding drawer slides that have to be mounted on wood for a face frame, my Drawers and Drawer slides post for my master closet makeover also has some great tips, more in depth you will want to check out.
I used bottom mount drawer slides for this closet, and all the other ones. They are cheaper and easy to install. They are cost effective for the amount of drawers I am installing, however they are not as quiet and don’t self close, so if you have the money you can upgrade your drawer slides. On a budget, these work great.
I attached each drawer bottom slide to the drawer bottom, and then I attached the other slide to the scrap of wood that I will install in the tower or frame. I like to make sure that the slides are
level when installed on the wood, and then I check them for level again when I installed them in the tower or frame.
See, almost perfect!
Here is a close up, you can see on the left of the photo, that is the front. The slides are set right to the edge of the bottom of the drawer and right to the edge of the scrap wood that will be mounted in the frame.
Next, I put the drawers with their slides in rows in order of install. Ha ha, do you see a pattern? It may seem silly, but I love celebrating each step of the process, plus it looks organized and I don’t have to guess which drawer goes where, they are lined up according to placement and then I can work my way down the rows as I install them.
Step 4: Installing drawer slides and drawers into tower or frame.
This is where the magic does or does not happen people! Ok the magic will happen, but this is where you have to be patient and adjust if needed so it can happen. In your plan you should have calculated all the good stuff of where to mount your slides in your frame.
My hamper drawer is bigger, but the top drawers are going to be spaced the same distance apart, so I cut two spacer scraps of wood so I could use them to install the wood with my slide mounted on it. That way I can just set the wood on the spacers, made sure they are flush and square to the front of the frame, and then I screw them into the frame or tower. (pictured above is the frame in the niche).
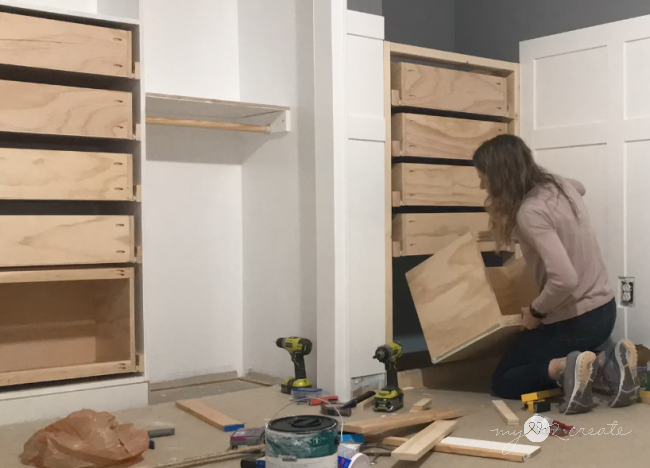
Once both sides were installed I set a board across onto the slides to check for level, just like I did before when I add them to the wood. Then I slid in each drawer to it’s new home to make sure it fit, was level, and would slide nicely. Sometimes I had to adjust a little, and add shims here and there to make sure the drawers all worked great.
This takes a little time and patience, drawers can be tricky. Some will work perfectly and some will need some more TLC. I am not perfect at drawers, but that is ok, I am not perfect, and projects are NEVER perfect. So all in all, that makes us a “perfect” match! That is some seriously sound logic. 😉
And with that, we have drawers!!! Happy dance!!
I am coming back next week to show you how to make them look beautiful!! All the trimmings!
Thanks for following along in my week 5 of the one room challenge, you can check out my other posts for this room challenge below:

