How to make your own signs
Welcome! I would love for you to follow me on Pinterest and Instagram!
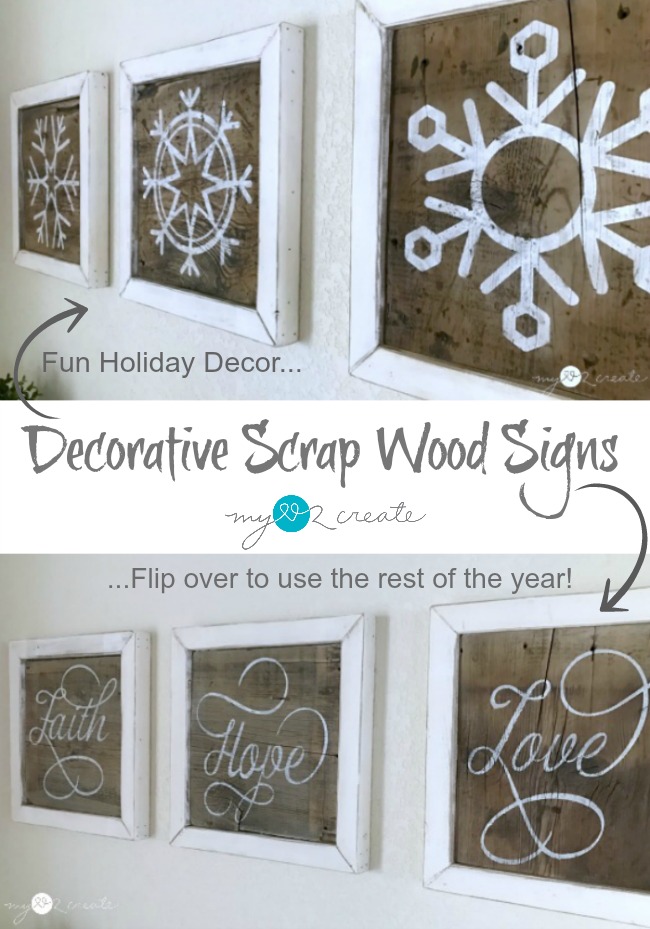
I love making signs, they are so fun because you can customize them any way you want and put them on anything! Plus they are cute… 🙂

This post contains affiliate links read more.
Today I am going to show you how to make a scrap wood sign, or you could even use pallet wood too!
Supplies:
- Wood- you can use scrap wood, reclaimed wood, pallet wood, or even new wood.
- free paint sticks (for attaching wood together on the back)
- Gorilla Wood Glue
- Ryobi Cordless BRAD NAILER, or clamps
- stencil, or printed image and pencil
- paint
- foam brush
- stain or paint
- twine and staples or other hanging supplies
This tutorial will cover the basic easy way I make my signs, as well as some other options.
You don’t have to have a fancy cutting machine to make a sign. I make enough signs that I saved up and purchased a Cricut Explore Air Wireless Cutting Machine, which I use for most of my signs. I will also tell you how to do it without a cutting machine, so if you don’t have one, don’t worry!

First you start off with some wood and cut it to the length you want. I found some scrap wood for this sign but I love using pallet wood just like I used in my Pallet and Scrap wood DIY Picture frames, they would have been perfect for a sign.

Then put wood glue on the back of your paint sticks and place them on the back of the boards.

At this point you can nail the paint stick to each individual piece of wood like I did on this project or use weights or clamps to secure it until it dries. I used small nails to attach my paint sticks on this sign, but either way will work, the nails just hold it in place while the glue dries.
You can also see how I added some twine to hang my sign, simply tie knots in each end of the twine and staple it to the back of the wood.
At this point you can leave the wood as is, or you can stain or paint it. I choose to stain mine for this sign, I used Minwax Special Walnut.

Since I have a Cricut Explore Air™ I cut my design on contact paper because it is WAY cheaper than vinyl. I do make vinyl signs, but when I am painting them I prefer to use contact paper. I use the outside of the cut for stenciling (the part on the board) I do have to add the middle of the O’s and e’s and such by hand, but it is really easy, just don’t forget that part! 🙂

Once I have my stencil placed on my wood where I want it I push it into the wood the best I can. I always have some parts that don’t stick to the wood as well, but it is ok.
Stenciling is best done when you load your brush and then unload it. You want HARDLY ANY PAINT on your brush. A little goes a long way. If you use too much paint it WILL bleed through the stencil. Lightly brush toward the center of each letter until you are finished. Then while the paint is still wet pull off the stencil, and don’t forget to remove the middle parts of the letters too.

That is it!! DONE! So easy right!?!
Now if you don’t have a cutting machine you have a few options on how to make your sign…
First you can do the…

Good old fashioned Pencil Transfer Method which is super easy and all you need is a printer, paper, paint, a pencil and some tape. Plus you can make them bigger or do shapes, really anything you want! My step by step tutorial is very easy to follow.

Another method is using ink transfer. I show you how to do it in my Spooky Halloween Sign post and it also works on cloth too, you can see it on my Burlap Christ Sign. With this method you could also paint over the ink if you wanted color, or use colored ink!

One last method is using a projector. A lot of people have a mini projector, which I would love to have, but I just use my husbands old overhead projector, you know the kind your teacher used a million years ago! 🙂 I put the image I wanted on a transparency, or even a die cut would work, and projected onto the wood, then traced around it. For my Flapper Girl and Selfie Sign (the photo above) I cut out the project, but you could easily just trace the words or image and then paint them!!
Oh, and of course you can use regular stencils which you can buy in any craft store! I show you how to do that on my French Inspired Piano Bench Makeover!
So there you have it, many different ways to make awesome signs! To see more of my signs you can click Here or check out my Project Gallery for lots of fun ideas.

Thank you so much for reading and happy sign making!!
Hugs!
Mindi
I will be linking to these parties, Savvy Southern Style, and Bloom Designs

HELP! I too have a cutting machine. I CANNOT get it to cut like you are showing. WHAT am I doing wrong. I am so exasperated. It crumples, turns, rolls, makes weird noises. I have read to NOT use the mat so Haven't… any pointers? help help
I also heard that I may be a no reply blogger— my account is so old i haven;t a clue. I never use it. so my email is
bluestar.warriormom@gmail.com
If you try the mat you will most likely have better luck! I do!
I am so sorry you have been struggling, that is very frustrating! Not sure if you got my response by email, so I thought I would reply here as well. I agree with the comment above, you should use the mat, for sure. Hopefully that will give you the success you desire! Good Luck!
Use painters tape to hold it down
Great post on the different transfer methods. I had to laugh when I saw you using paint stirrers for the backing. I use them the same way! Which reminded me I have 2 sets of signs to finish! Sharing:) Also – welcome to the Power Tool Challenge team! XO – Wendi@H2OBungalow
I love your signs! I also love the picture of the Salt Lake Temple, thank you for sharing at SYC! Jo
I just love the look of these wooden signs! With the stencil method it might even be something I can do, lol!
Thanks for sharing this great tutorial with SYC. I love making signs as well.
hugs,
Jann
This is a fun sign! I love signs and this would look great anywhere in- or outside!
Love your sign……..I sing that to my lil grandaughter all the time, and she loves it.
Looks easy enough to make, just gotta put in some time….
Thanks for sharing your tutorial…..I might just give it a try.
Blessings, Nellie
This is a wonderful idea! So simple and so pretty <3
Super tute Mindi! I love this saying… have it hanging in the guest room. 🙂
pinning!
gail
I don't have a cutting machine, but I make all my own signs.
Thanks for sharing with SYC.
Thank you for sharing this great tutorial, Mindi! I was looking at the blank plank's at Michaels and they are expensive. Nice to have a quick and easy way to make my own!
Thank you for sharing this week at Brag About It link party on VMG206 (Mondays at Midnight). I plan to feature you next week!
~ Megin of VMG206
I'm on the fence about getting a cutting machines, but I really don't mind painting my letters and designs, as I'm fortunate to have the talent for this. But I do love how you held the wood together with paint sticks. Pinning this.
I was looking for some Pinterest ideas for a pallet sign and found you! What a happy surprise. Great tutorial but more special since it was from a great friend. Keep sharing!!! Debbie shumway. 😊
What size of wood are you using? It looks thinner that the 1×4's.
Hi! I used some scrap 1×3's for the sign, you are right they are thinner than 1×4's!
What kind of paint did you use?
I just used regular craft paint, but you could use any kind you want! 🙂
Can you do a video or just show how to use the cutting machine and how to make stencils? Some of us don't have the slightest idea what this machine looks like.
Hi Richard, that is a great idea! I will have to see if I can do that. Until I can get to it, here is a introduction video to the machine I use. https://www.youtube.com/watch?v=qT-TV1P2Z-A&spfreload=10
In the video it shows a "make it now" project which you can purchase through the software that comes with the machine, but you can also create and design your own, which is what I like to do. When I make stencils I use contact paper and usually set the dial between paper and vinyl, but it is always a good idea to do a test cut before you do it on your actual project. I hope that helps!