How to turn a Cabinet Door into a Shelf

Super cute, very useful, and sooooo easy!!

I made this for a friend’s baby shower several months ago and I am barely getting around to sharing it! That’s what summer does to me, it is crazy town around here!
How to turn a Cabinet Door into a Shelf:
*This post contains affiliate links that help me at no cost to you, thank you! Read more.
Supplies:
- Cabinet door (any size)
- 1×4 board (or scrap pieces) use for the sides and bottom pieces
- Lath boards or 1/4” thick trim use for the front pieces
- Wood Glue
- Nail Gun
- 1 1/2” finish nails
- sandpaper
- Large No Nail Sawtooth Picture Hangers
- paint (finishing supplies)
- hammer
- stencil (optional)
Because this project needs to be specific to the cabinet door size you are using I will give a tutorial on how to make it, but I will not provide specific measurements.
Cause yeah, they probably wouldn’t fit your cupboard door…just sayin’.

I started with an old cabinet door and removed the hardware. Sometimes you have to do a little prying on the hinges.
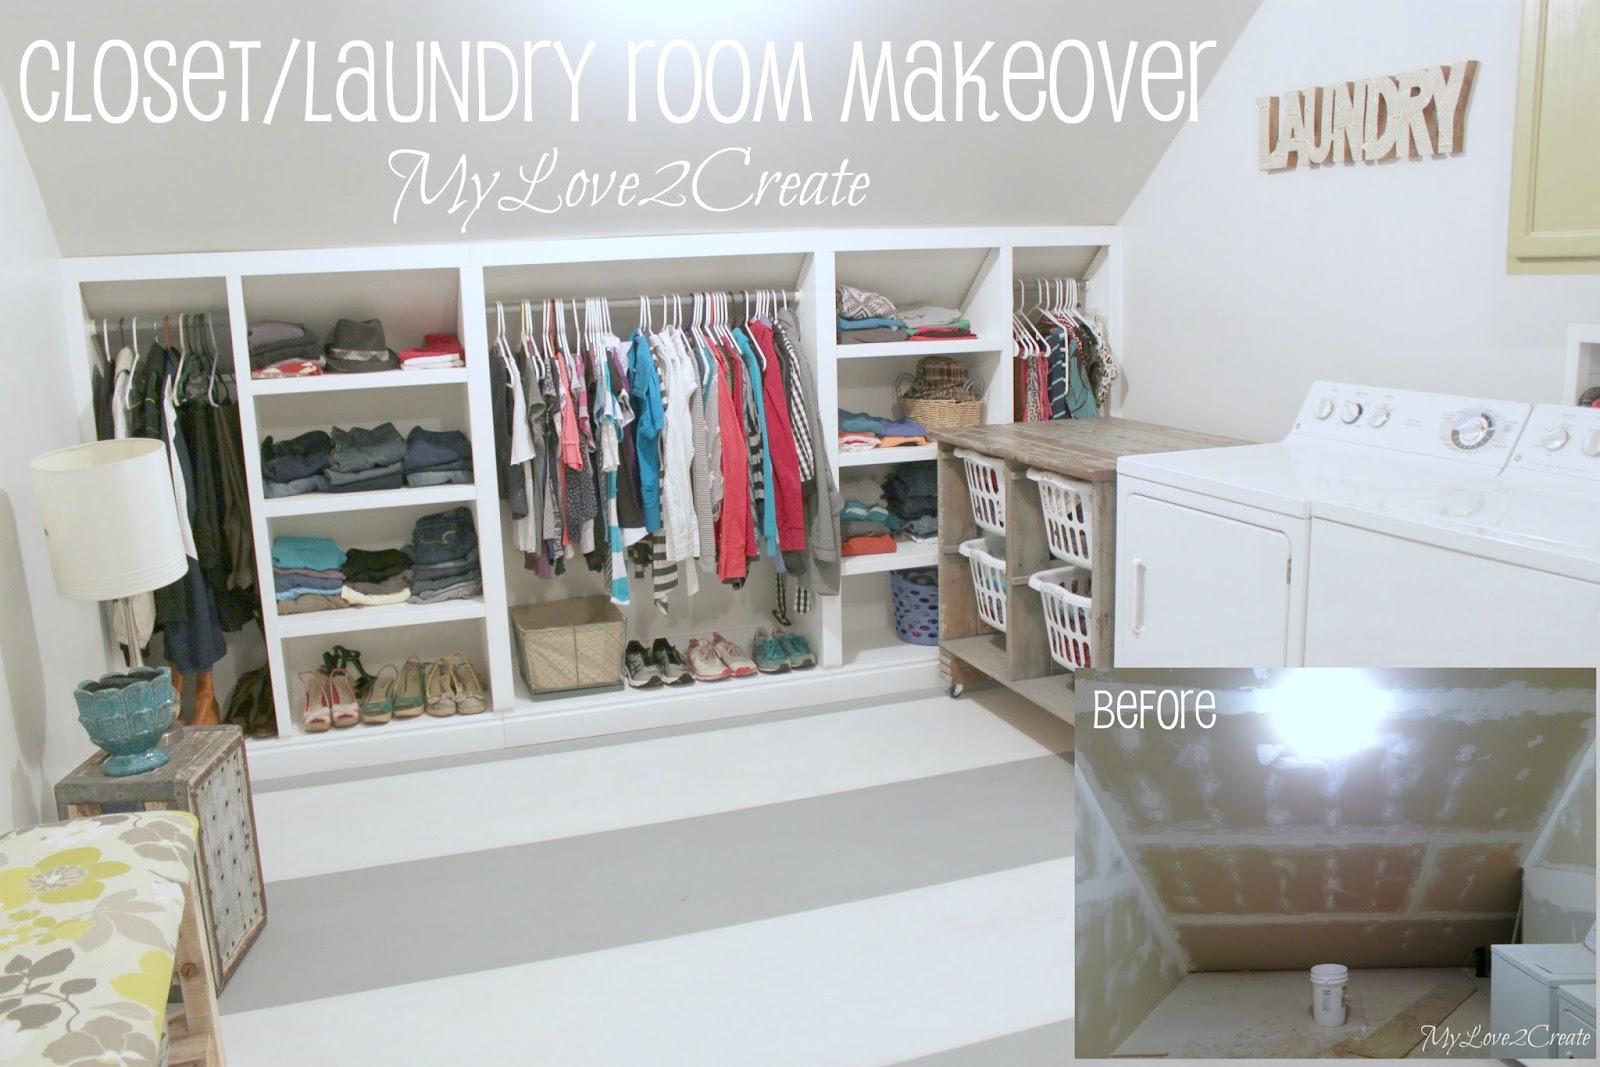
If you have been following me for a while you know I love repurposing cabinet doors. You may recall my Bookshelf from Cupboard Doors, my Cabinet Doors into Children’s Desk, or my Cubby Shelf made from Cupboard Doors…just to name a few. If you are new, be sure to check them out!

For my shelf portion, I used 1×4 boards to build the sides and bottom pieces. I wanted my sides to be square, so I used the width of my 1×4 board (which is 3 1/2”) to quickly draw my cut mark (left). Then I cut the sides with my RYOBI Miter Saw and made sure they were the same height.

In order to measure my bottom piece, I used some scrap 1×2’s or you can use the side pieces too, and placed them on the inset edges of my cabinet door. Then I placed my 1×4 board inside of the pieces and marked where to cut (left).
My son said my photo on the right looks like a face, hee hee hee. I didn’t plan that. 🙂

Before I jumped into building I did a dry fit, and measured for my front pieces (top). I used 1/4” lath boards, which are pretty cheap if your Home Depot carries them. If not, you could used 1/4” trim or plywood strips.
Now it is time to build! My favorite part!

Using Wood Glue on the edges of the bottom piece, I attached both side pieces to the bottom piece with my Finish Nail Gun
.

Next, I glued and nailed on my lath boards to finish off the front of the shelf.

Now all I had to do was attach the shelf to the cabinet door. I added wood glue to the back of the shelf (top left) and set it in place (top right).
After carefully flipping the whole thing over, I made sure the shelf hadn’t shifted, then I nailed from the back of the cabinet door into the sides and bottom pieces of the shelf. Done!

I used some no Large No Nail Sawtooth Picture Hangers for the back of the cabinet door. They are great because you just have to hammer them in. Trust me, they are soooo much easier than the picture hangers with the little nails!

After sanding the whole project down and wiping off the dust with a clean rag I was ready to paint! If your cabinet door is really dirty I recommend using TSP to remove any oil or dirt so the paint will adhere correctly.
Because my friend was having a girl, my daughter helped me pick out some paint and stencils to make it super cute.
I used two coats of chalk paint sanding between coats with fine grit sandpaper. After stenciling I finished it off with a coat of wax.
*Tip* When stenciling, make sure to load and unload your paint from your brush onto a piece of paper. You want HARDLY ANY PAINT on your brush when you stencil, trust me.

Now all I had to do was hang it up and fill it up! Babies always require lots of bath supplies, so I filled it up with the essentials as part of my gift.

Wouldn’t this be perfect hanging on the bathroom wall?! Easy quick access to the tub.

It isn’t too deep which is nice, but still holds quite a bit!

Of course it could hold anything, like hairspray, gel, or even nail polish. Kind of like my Rustic DIY Shelf.

It would also be perfect for books!

Hang a few of these on your kids wall and they have their own little library!

There are so many possibilities!
What would you use this for?

Be sure to pin this for later! Thanks for sharing and stopping by!
Be sure to check out my youtube video and subscribe!!
Happy Creating!
Mindi
Sooo cute!! I just pinned it! Glad I found your site through the talk of the town linky party:)
Yay, so happy you are here!! Thanks for pinning too!
Mindi, this is a great idea. It turned out really nice and who can't use an extra shelf and make it as pretty as you want. Thanks for sharing and have a great day. Sylvia D
Thank you so much Sylvia!
What a great idea Mindi! Cabinet doors are so versatile. I have one made into a tray. Thanks for sharing with SYC.
hugs,
Jann
Thank you Jann! You are so right you can do so much with them!
Just wondering how you hung it on the wall?
I attached D-rings to the back and hung them on nails. Hope that helps!